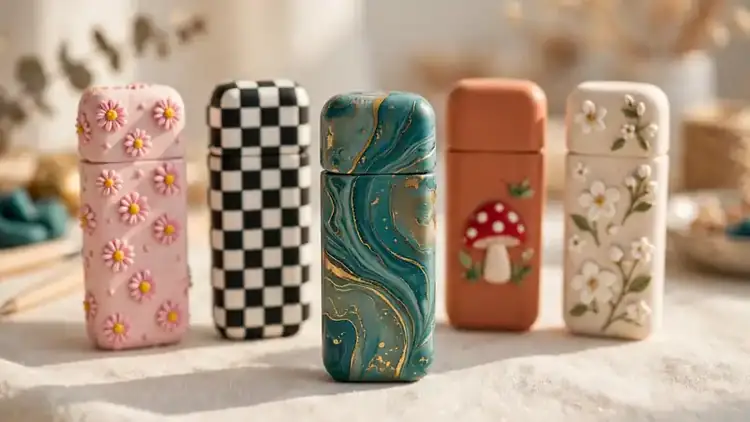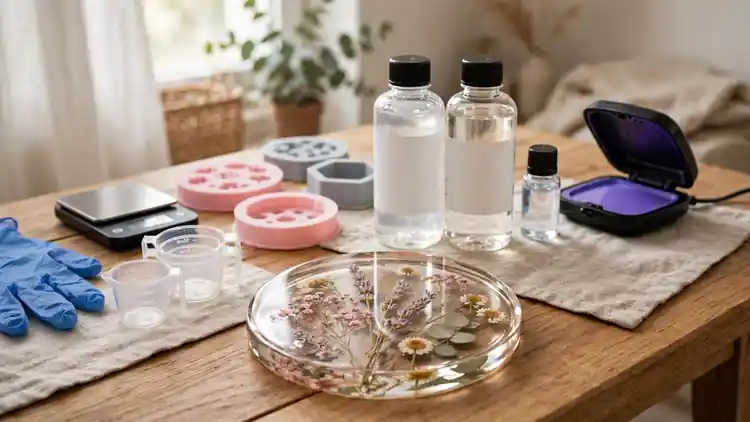
Resin Tips for Beginners to Avoid Every Sticky Mistake
Nearly every resin crafter owns one coaster that never stopped being sticky. It sits in a drawer as a quiet reminder that resin punishes guesswork. These honest resin tips for beginners exist so your first pours skip that drawer completely, covering ratios, warmth, layers, and the patience that turns sticky mistakes into glass clear finishes.
I have noticed beginners rarely fail from lack of talent. They fail on small controllable things: a cold bottle, a rushed stir, a piece uncovered while dust settled. Fix those moments in order and the craft becomes calm, repeatable, and genuinely fun to learn at home.
Why Every Beginner’s First Pour Goes Wrong
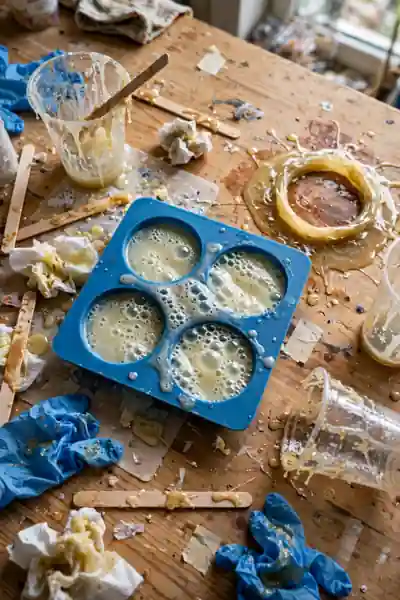
Thirty second videos make resin look like pouring honey. Nobody films the coaster that stayed sticky for a week, or the bubbles that rose after the camera stopped. Most resin tips for beginners exist because nearly every first pour fails in one of the same five quiet ways.
Here is the honest comfort: resin rarely fails because of talent. It fails because of temperature, timing, ratios, and dust, and every one of those can be controlled before the bottle opens. Learn the rules in this order and your first pour gets to skip the disaster stage entirely.
Choose Epoxy or UV Resin Before Anything Else
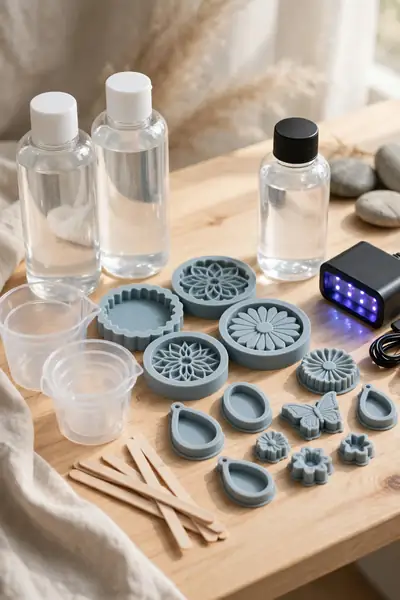
Epoxy and UV resin are different crafts wearing the same name. Epoxy mixes in two parts and cures over hours, forgiving and strong for coasters and trays. UV resin comes ready in one bottle and hardens in minutes under a lamp, perfect for small jewelry and quick repairs.
- Match the resin to the project size: epoxy for anything wide or deep, UV for small, thin pieces.
- Count your patience honestly. UV finishes today; epoxy asks for a day or more of curing.
- Check what you must buy. UV needs a lamp; epoxy needs accurate cups or a scale and mixing time.
- Compare cost per finished piece, not per bottle. UV resin costs more for the same volume.
- Start where mistakes are cheap: most beginners learn fastest on small epoxy pours with simple molds.
Also View: DIY Resin Jewelry That Even Total Beginners Can Master
Set Up a Workspace That Forgives Mistakes

Quick Tip: Check that your table is truly level before the first pour, with a level tool or a marble that should stay put. Resin levels itself as it cures, so a tilted table means one thick edge, one thin edge, and a piece that rocks forever.
Cover more table than feels necessary, because resin travels further than any beginner believes. Silicone mats forgive every drip, since cured resin peels off them cleanly, while paper and cloth become part of the spill. Keep paper towels, spare gloves, and a bin within arm’s reach, because sticky hands should never go hunting.
Wear the Safety Gear Every Single Time

Common Mistake: Pouring bare handed in a closed room because the project is small. Uncured resin does not care about project size. Repeated skin contact can build a sensitivity over time, and resin fumes in still air leave many beginners with a headache they blame on concentration.
The Fix: Treat every pour like a big one: nitrile gloves on before the bottles open, a window open or a fan moving air out, and sleeves that cannot trail through wet resin. Add a proper respirator when sanding cured pieces, because sanding dust is the exposure most people forget.
Nitrile matters, because thin latex and vinyl gloves can let resin chemicals through surprisingly fast. Buy gloves by the box, not the pair, so changing a torn or sticky glove mid pour is never a decision. Safety gear is the cheapest line in this craft, and it protects the crafter instead of the project.
Assemble a Starter Kit That Covers the Basics
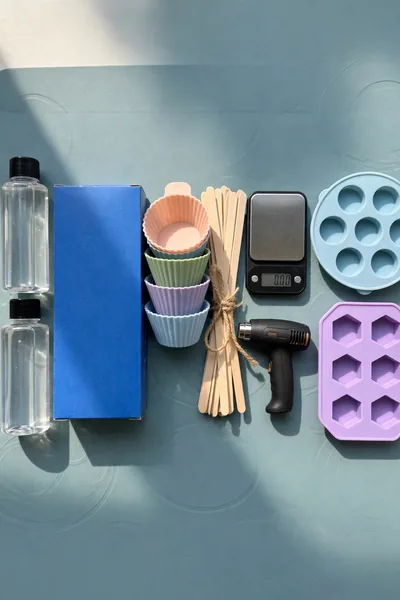
What You Need:
- One two part epoxy resin kit in a middle size
- A full box of nitrile gloves, not a single pair
- Silicone mixing cups and stir sticks you can reuse
- A digital kitchen scale or clearly marked measuring cups
- A small heat gun or kitchen torch for bubbles
- A silicone mat, two simple molds, and a box to cover curing pieces
Buy the middle sized resin kit, not the smallest bargain and not the gallon. You need enough resin to survive the learning pours without rationing, and fresh stock while you learn. Skip the mountain of pigments and glitters for now: two molds, one color family, and practice pieces teach more than a drawer of supplies.
Pick Molds and Inclusions That Behave
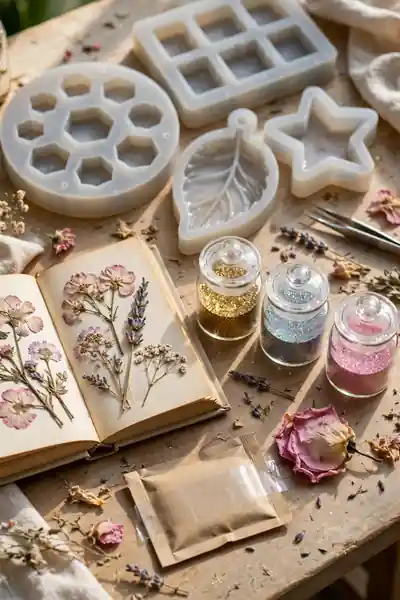
Before: Fresh petals go into the mold looking alive and come out brown and translucent, glitter sinks into one heavy layer at the bottom, and an unsealed photograph drinks the resin and darkens at the edges. The pour itself went perfectly. The materials betrayed it.
After: Pressed, fully dried flowers keep their color, fine glitter stays suspended far better, and paper or photos sealed with a thin coat first come out bright and sharp. Every inclusion is dry, sealed, or both, and the resin simply does its job around them.
Moisture is the hidden enemy in almost every failed inclusion. Even flowers that feel dry can hold enough water to cloud resin or feed bubbles for hours. When in doubt, give inclusions another day of drying or a silica gel rest. Patience before the pour is cheaper than grief after it.
Also Explore: DIY Resin Coasters With Dried Flowers for Beginners
Measure by the Ratio, Never by Eye
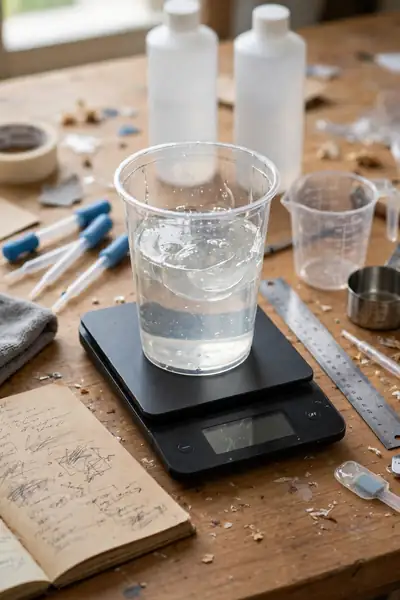
Do This:
- Read the ratio printed on your own bottles before every pour
- Measure with a scale, or with marked cups filled to exact lines
- Mix the full amount you measured, with nothing added from memory
- Write the ratio and the pour date in a notebook beside your kit
Avoid This:
- Eyeballing two pours that merely look equal in the cup
- Adding extra hardener to speed things up, which causes soft cures
- Borrowing the ratio from a video that used a different brand
- Topping up a short measure with a hopeful splash
Read your own bottles every single time, because ratios differ between brands and even between product lines. A one to one resin measured like a two to one does not cure a little wrong. It does not cure at all. The label is the recipe, and the recipe is not a suggestion.
Warm the Resin Bottles Before You Mix

Quick Facts: The Bath: Warm tap water, never hot | The Time: Ten to fifteen minutes | Room Comfort: Most kits cure best near 70 to 75 degrees | The Result: Thinner resin that releases bubbles early
Warm the bottles, never the mixed resin, and keep the water at bath warm rather than hot. Ten to fifteen minutes is enough for most kits. A warm room matters as much as warm bottles, since cold air thickens resin again while you work. Never use a microwave or open flame for this job.
Stir Slowly and Scrape the Sides and Bottom

Fast stirring feels productive and ruins the pour. A whisking motion folds thousands of tiny air bubbles into the resin, and every one must rise and be popped later. Slow circles with a flat stick, at a pace you could keep for four minutes, mix without whipping.
Scraping is the other half. Unmixed resin clings to the cup’s sides and bottom, and it pours out last, landing as soft sticky streaks in the finished piece. Scrape as you stir, then pour everything into a second clean cup and stir briefly once more. That double cup habit ends most sticky surprises.
Pour in Thin Layers Instead of One Deep Flood

Deep single pours are where standard epoxy punishes beginners hardest. A thick layer generates heat as it cures, and that heat can crack the piece, yellow it, or leave the center soft while the surface feels done. Thin layers cure calmly, and they give you control over everything suspended inside.
- Read the deepest layer your specific resin allows on its label. Standard craft epoxy often means an eighth to a quarter inch at a time.
- Pour the first layer, pop its bubbles, and place any heavy inclusions.
- Wait until the layer reaches the gel stage the label describes, firm but still tacky, before pouring the next.
- Add each new layer the same way, letting lighter inclusions float at their own level in each one.
- Use a resin sold as deep pour for genuinely thick pieces, instead of forcing craft epoxy past its limit.
Pop Bubbles With Heat at the Right Moment

Quick Tip: Let the pour rest for five to ten minutes before touching it with heat. Most bubbles rise to the surface on their own during that wait, so the heat only handles the stubborn remainder instead of doing all the work at once.
Pass the heat over the surface in quick, moving sweeps from a few inches away, the way you would pass a hand over a candle flame. Standing heat in one spot cooks the resin, which can dimple the surface, yellow it, and ripple the mold. A heat gun is gentler than a torch for beginners.
Cover the Piece While It Cures
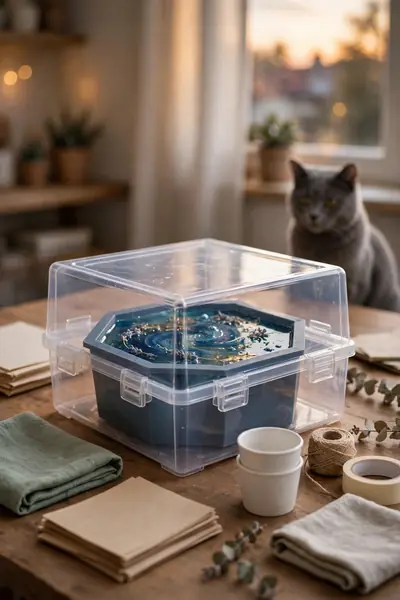
Common Mistake: Leaving the fresh piece open to the room for its whole cure. Rooms are full of floating dust, loose hair, and tiny insects, and wet resin collects all of them permanently. The damage is usually discovered the next morning, sealed under a hard glossy surface.
The Fix: Cover the piece within minutes of the final bubble pass, using a clean storage box, bin, or large bowl set gently over it. The cover goes on once and stays on, so no fresh dust gets stirred up by repeated checking.
Wipe the inside of the cover before its first use, because stored boxes carry their own dust. Keep the curing corner away from opening doors and busy paths, where air moves and knocks happen. What the cover really buys is a boring cure, and boring cures are the successful kind.
Respect Working Time and Cure Time as Two Clocks

What You Need:
- The label’s working time and cure time, copied into your notebook
- A simple kitchen timer for the working window
- A room thermometer where the pieces cure
- A calendar habit: pour date and demold date written down
- Enough patience to let the second clock finish
Write both times down when you pour, because memory edits them by morning. Working time is the minutes the mixed resin stays pourable, and cure time is the days the piece needs before real use. A coaster can feel hard at demold and still dent under a mug a day later.
Demold on the Schedule, Not on Curiosity
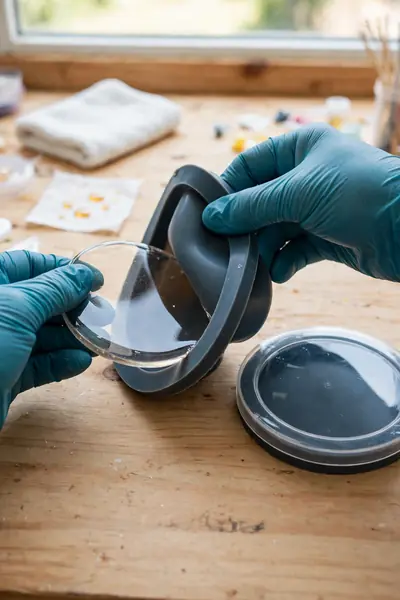
Before: Curiosity wins at hour ten. The piece bends slightly as it leaves the mold, fingerprints press into a surface that felt hard, and the flat coaster dries with a permanent gentle warp and a thumbprint blooming in the gloss.
After: The mold’s hidden edge is tested first with one gentle flex. The resin feels firm and springs back, the mold peels away cleanly, and the piece rests flat on the mat for the rest of its cure, untouched and unmarked.
Cold rooms stretch every schedule on the label, so add time rather than hope when the house is chilly. If the edge test feels at all soft or rubbery, cover the piece and walk away for half a day. Resin rewards the patient with the exact same piece, only finished.
Fix a Sticky or Tacky Surface the Right Way
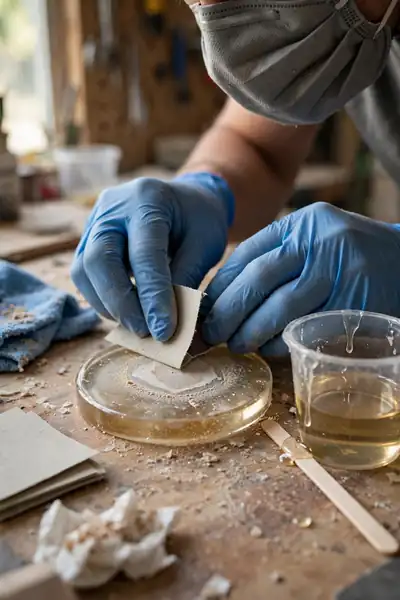
Do This:
- Give a slightly tacky piece two extra warm days before judging it
- Sand a tacky film off with fine paper, wearing gloves and a mask
- Pour a thin fresh layer over the sanded, cleaned surface
- Check for unmixed streaks near the cup’s side of the pour
Avoid This:
- Brushing extra hardener over a sticky surface to force it
- Sealing an unsanded sticky layer under new resin
- Handling or stacking pieces that still feel at all soft
- Declaring the piece ruined before the diagnosis is done
Diagnose before you repair, because sticky has three different causes. A thin tacky film usually means unmixed resin reached the surface, and sanding plus a recoat cures it. Softness through the whole piece means the ratio failed, and honesty is faster: that pour becomes practice, not a project.
Prevent the Cloudy and Milky Finish

Quick Facts: The Causes: Moisture, cold resin, held heat | Prevention: Dry inclusions, warm bottles, brief heat | The Blush Fix: Warm soapy water on the cured piece | The Test: Pour small before the real piece
One cloudy pattern has a kinder name and an easy cure. Amine blush, a waxy film some epoxies form in cool damp air, washes off a fully cured piece with warm soapy water and a soft cloth. Dry the piece well afterward, and what looked like failure turns back into glass.
Stop Resin From Sticking to Everything It Touches

Resin sticks to almost everything in a craft room except the small family of things it cannot grip: silicone, certain plastics, and waxy surfaces. Build your whole table from that family and cleanup stops being a battle. Drips peel off a silicone mat in one satisfying sheet the next day.
For plastic or other non silicone molds, a light mist of mold release is the difference between a clean pop and a cracked piece. On skin, soap and water with a little patience does the work. Never reach for solvents against your skin, however sticky the moment feels.
Avoid Yellowing Before It Starts
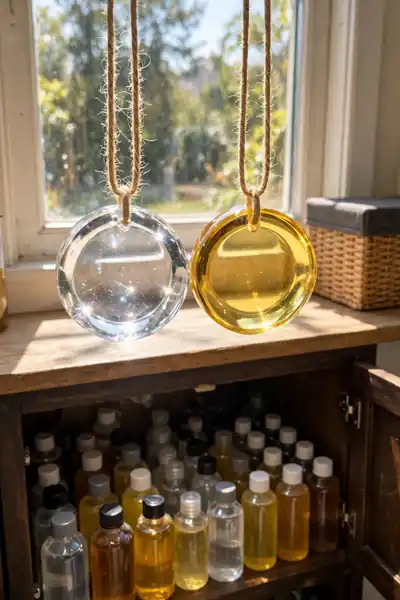
Yellowing feels like betrayal because it arrives slowly, months after a perfect pour. Sunlight is the author, helped by heat during curing and by resins never made to resist it. Prevention lives in three places: the bottle you choose, the cure you give, and the shelf the piece lives on.
- Choose a resin whose label promises UV resistance when pieces will live in bright rooms.
- Cure pieces away from direct sun, however tempting the windowsill looks for warmth.
- Keep heat passes brief, since cooked resin yellows early and unevenly.
- Store finished pieces out of constant sunlight, and display the pale ones in gentler light.
- Keep your resin bottles in a cool dark cupboard, so the liquid itself stays clear longer.
Sand and Polish to a Clean Glass Finish

Quick Tip: Wet sand whenever the piece allows it. Water keeps the dust down, stops the paper clogging, and shows you the true surface as you work. Dry sanding a dull patch can look finished until the piece dries and the scratches all come back.
Move through the grits in order, roughly 400 for shaping, then 800, 1000, and 2000 for the shine, rinsing between each one. Skipping a grade leaves scratches the next grade cannot remove in reasonable time. Finish with polishing paste on a soft cloth, worked in small circles until the surface answers the light.
Start With One Small Test Pour

Common Mistake: Making the first ever pour the big important piece, a gift with dried wedding flowers riding on an untested resin, an unknown room temperature, and a brand new technique. Every beginner variable stacks onto the one piece that cannot fail.
The Fix: Pour one small plain test first, a single coaster or charm, using the exact resin, room, and timing of the real plan. The test teaches your brand’s behavior for pennies, and the gift pour then runs on knowledge instead of hope.
Write the test down while it cures: ratio, temperature, stir time, and what you would change. A week later that notebook page is worth more than an hour of videos, because it describes your resin in your room. Every experienced crafter I know keeps some version of that notebook.
Quick Diagnosis: Match the Problem to the Fix

Keep this diagnosis habit beside your kit and read the piece before you mourn it. Most failures announce their cause clearly once you know the short list of usual suspects. The piece in your hands is nearly always a lesson with a name, and named problems are the fixable kind.
Frequently Asked Questions
1. Why did my resin stay sticky after two days?
Almost always one of three causes: the ratio was off, part of the mix never got stirred in from the cup’s sides, or the room cured it cold. A tacky film can be sanded and recoated. A piece that is soft all through was mixed wrong and becomes a practice piece.
2. How long does resin really take to cure?
Two different times matter. Many craft epoxies demold in about a day, but full hardness for daily use often takes several days, and the label of your brand is the only honest clock. Cold rooms stretch both times, sometimes by a lot.
3. Can I use a hair dryer instead of a heat gun?
It is a poor trade. A hair dryer blows a wide stream of room air, dust included, across wet resin, and its heat is harder to control in quick passes. A small heat gun or a carefully moved torch does the bubble job faster and far more cleanly.
4. Is cured resin safe to eat and drink from?
Only if the specific resin is certified food safe on its label, and most craft resins are not. A mug resting on a coaster is fine for ordinary craft resin. Plates, cups, and anything holding food directly should wait for a certified product.
5. Can I pour resin outside on a nice day?
You can, but the outdoors charges rent: wind carries dust and pollen, insects investigate, sun warms one side unevenly, and evening damp arrives early. A calm indoor corner with a cover gives beginners far fewer surprises per pour.
6. What should I do with leftover mixed resin?
Never pour it down a drain and never return it to a bottle. Leave leftovers in their cup to cure fully, then throw the solid piece away with household waste. Unmixed resin and hardener bottles go to local hazardous waste collection if they need disposing of.
Conclusion
Resin stops being intimidating the moment its rules become habits: measure honestly, warm the bottles, stir slowly, pour thin, cover the cure, and let both clocks finish. Keep these resin tips for beginners beside your kit for the first few pours, save this guide on Pinterest before your next project, try one small test piece this week, and share it with a friend who is still fighting a sticky coaster. I’ve seen how small habits like these can completely shift a beginner’s whole confidence at the craft table, one clean demold at a time.