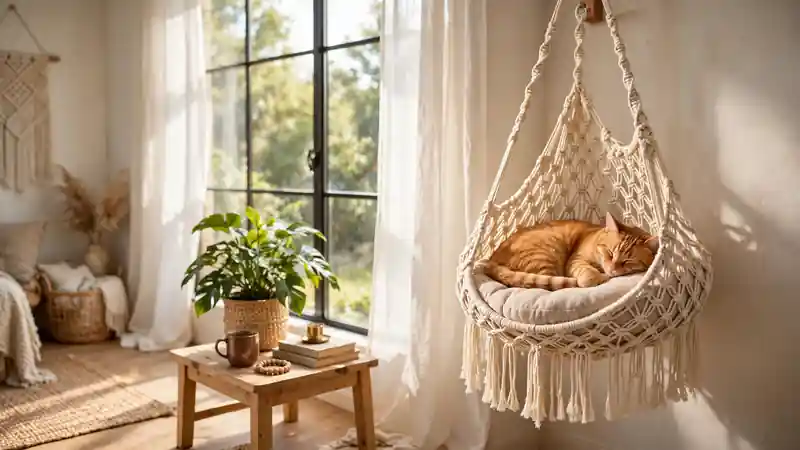
DIY Macrame Cat Hammock Your Cat Will Actually Use
You bought the soft bed. You placed it in the sunny corner. Your cat looked at it once and slept in the laundry basket instead. A macrame cat hammock works on different rules: height, a gentle sway, and a smell that feels like home.
I’ve noticed the cats who ignore every store bed are the same ones who claim a hanging basket within days, because it gives them height and a view instead of a cushion on the floor. This guide builds that basket from plain cotton cord, with the only two knots the whole project needs.
You will finish with exact supply sizes, six shapes to choose from, a safe way to hang it, and a three-day plan that gets your cat actually using it. No craft experience needed.
Why Cats Skip Store-Bought Beds but Claim a Hammock
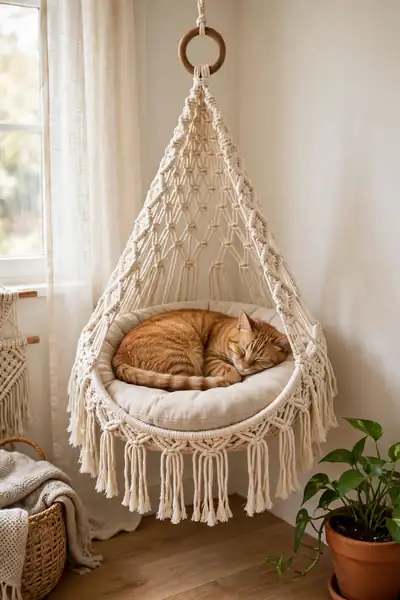
Most cats do not hate new beds. They hate new beds that smell like a store, sit on the floor where the dog walks past, and offer no view of the room. A bed on the ground asks your cat to rest in the most exposed spot in the house.
Height changes the deal. Cats rest where they can watch without being watched, and a hanging bed lifts them above foot traffic, drafts, and toddlers. The gentle sway copies the give of a branch or the top of a bookshelf, so the bed feels like a perch, not furniture.
Weight and Safety Rules to Settle Before the First Knot

A hammock holds a sleeping cat in the air, so the mounting point carries every nap, jump, and midnight stretch. In my experience, the hammock itself almost never fails. The hook, the cord, or the wall gives way first, which is why these checks come before any knotting.
- Weigh your cat on a home scale, then plan for more than that number. A jumping cat lands with two to three times its resting weight, so a 10 pound cat can hit the hook like 30 pounds.
- Choose hardware rated well above that figure. A ceiling hook or wall bracket rated for at least 50 pounds handles one average cat with room to spare.
- Screw the hook into a ceiling joist or a wall stud, never into drywall alone. Use a stud finder, mark the spot, and drill a pilot hole first.
- Use cord at least 5mm thick for anything that carries weight. Thinner cord looks delicate, but its breaking strength drops fast, and this bed hangs over a hard floor.
- Test the finished mount with your own weight before the cat gets anywhere near it. Lean in and press down hard; any shift, creak, or stretch means reinforce it now.
Also View:DIY Macrame Keychain Tutorial for Thoughtful Gifts
Every Supply With the Exact Size and Quantity

Quick Tip: Buy everything in one trip before you cut a single cord. The full list costs about 35 to 45 dollars in total, less than most ready-made cat hammocks, and a complete table of supplies keeps the build moving in one sitting.
For the build you need a 14 inch metal ring and about 360 feet of 5mm cotton cord, bought as one large roll so the thickness matches across the whole net. Add a rated ceiling hook, a round cushion 15 to 16 inches wide, a 20 inch wooden dowel, sharp scissors, and a measuring tape.
The Only Two Knots This Whole Project Needs

Common Mistake: Most beginners try to learn five or six decorative knots before they start, get tangled by the second one, and abandon the roll of cord in a drawer. Decorative knots are for wall hangings. A cat bed stands or falls on two working knots done neatly.
The Fix: Learn the lark’s head first: fold a cord in half, push the loop over the ring, pull the two ends through, and snug it tight. Then the square knot: cross the left cord over the middle pair, right cord over and through the loop, pull even, then mirror it once. That pair of moves, repeated, builds the whole net.
Practice both knots on a spare cord tied to a chair back before you touch the real ring. Ten slow repetitions teach your hands the pattern better than an hour of video. Once your square knots sit flat and even without you thinking about each cross, you are ready to start.
Cutting Your Cords to Length Without Running Short

What You Need:
- A measuring tape, because eyeballing 15 feet of cord is how uneven baskets begin.
- Sharp fabric scissors that slice 5mm cord in one cut instead of chewing it.
- Painter’s tape to flag each finished bundle with its length, so cords never get mixed mid-build.
- The cut list, written down before you start: 24 cords at 15 feet each for the standard ring build.
- Two spare cords at the same length, because one bad cut should never pause the project.
Each cord folds in half at the ring, so a 15 foot cord gives you two working strands of 7 feet 6 inches each. Knotting eats cord three times faster than the net grows, so the basket ends near 2 feet deep. For a deeper net, add 3 feet to every cord before you cut.
Building the Base Net Every Shape Starts From
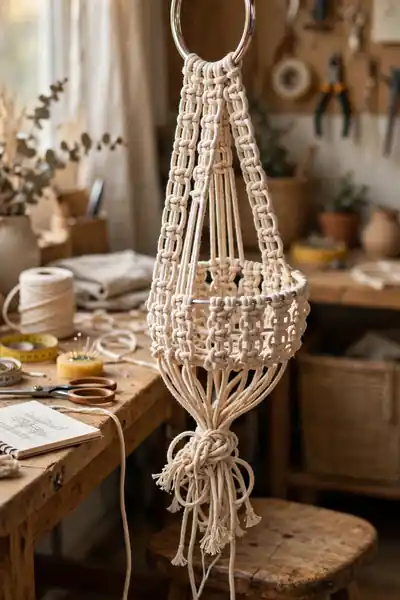
Before: A pile of loose cords draped over a ring looks like a tangle waiting to happen. The sides are uneven, the gaps wander wider and narrower, and there is no clear moment where a flat ring of strings turns into a bed.
After: The same cords hang in even groups, the square knots stack in straight columns, and a shallow net curves down from the ring on every side. You can already see the basket shape, and the cushion will drop straight into it.
Start by folding all 24 cords over the ring with lark’s head knots, spaced evenly. Work square knots in rounds, four cords at a time, checking the gap after each round with two fingers. When the net is deep enough, gather every cord at the bottom and lock it with one tight gathering knot.
The Classic Round Basket for Cats Who Curl Up

Do This:
- Hang the ring at elbow height while you work, so gravity pulls every round into the same gentle curve.
- Keep the same two-finger gap between knot columns for every round, all the way down.
- Rotate the ring a quarter turn after each round, so one side never gets more attention than the rest.
- Press the net into a bowl shape with your hands every few rounds to check the curve.
Avoid This:
- Do not pull each knot as tight as you can; a strangled net twists into a spiral.
- Do not add extra cords halfway down to widen it; the rim count sets the shape from the start.
- Do not trim the bottom fringe before the gathering knot is locked and tested.
Worked this way, the round basket almost shapes itself. The ring holds the top open, the even rounds pull inward at the same rate on every side, and the bottom gathers into a soft bowl. Cats who sleep curled in a tight ball settle into this shape fastest, because the sides hug back.
The Oval Lounger for Cats Who Stretch Out

Time Needed: 2 to 3 hours | Difficulty: Beginner | Cost: Same roll of cord
Base: 20 inch wooden dowel instead of the ring | Shape: long and shallow
Best For: cats who stretch out full length | Cushion: a rectangular pillow fits better than a round one
The dowel changes everything about the silhouette. Cords hang from a straight line instead of a circle, so the net stretches into an oval with long, shallow sides. Space the rows wider than the round basket, and stop earlier. Sprawlers who sleep with their legs out will pick this shape over a bowl every time.
The Snug Cocoon for Shy and Anxious Cats

Some cats do not want a view. They want a cave. Shy and rescue cats often sleep pressed against something on every side, because contact on their back and flanks tells them nothing can sneak up while they rest.
Build the cocoon from the same ring base, but close the walls up. Work your knot rows at half the usual spacing, and keep going for several rounds past the classic depth before you gather the bottom. The tighter net and the extra rows raise a wall around the cat, and the whole bed feels like a covered nest.
The Flat Open Perch for Watchers and Sunbathers
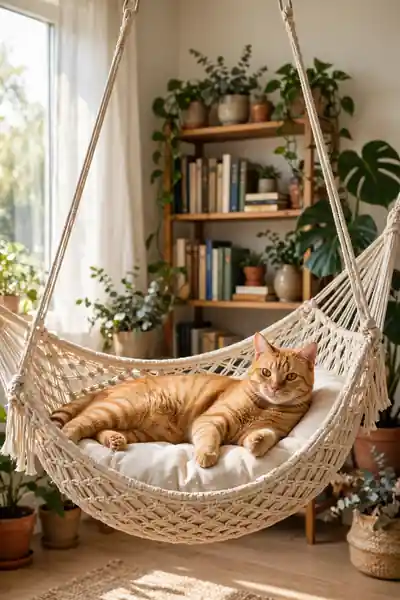
Not every cat wants walls around it. The perch is the opposite of the cocoon: a wide, nearly flat platform with a low rim, built for cats who sleep in the open and keep one eye on the room. It is also the fastest shape in this guide.
- Go one size up on the base: use a 16 inch ring, or the 20 inch dowel, so the platform spreads wide from the start.
- Space your knot rows wider than any other shape here, roughly double the gap you used on the round basket.
- Stop early. Four to six rounds of knots are enough; the net should read as a shallow saucer, not a bowl.
- Add the cushion and press the center down with your hand. The rim only needs to sit high enough to keep the cushion from sliding off.
The Two-Tier Hammock for Multi-Cat Homes

Quick Tip: Build and test each tier on its own hook first. Two untested baskets stacked on one mount hide which level is weak, and you want that answer before a cat is sitting in either one.
Build two smaller versions of the round basket or the perch, then join them with a longer run of cord between the lower basket’s rim and the shared mounting point above. Leave 12 to 18 inches of clear air between the tiers, and step the hardware up to a 100 pound rating.
The Woven-Back Hammock for a Boutique Finish
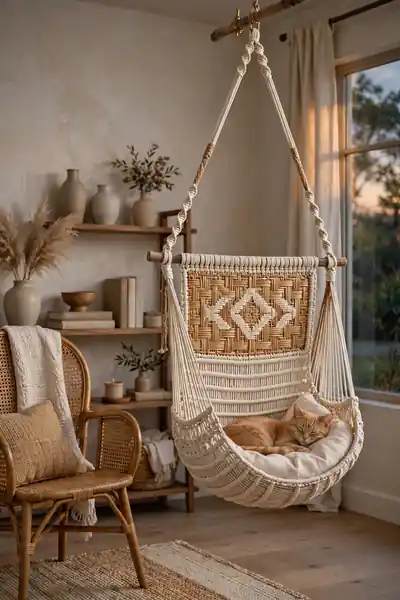
Common Mistake: Many makers thin out the basket to leave more cords for the woven panel, treating the back as if it carries part of the load. It does not. The panel is decoration only, and a weakened basket under a woven back still sags like any other weak basket.
The Fix: Finish the basket completely first, full cord count and full depth, and test it with weight. Only then weave the panel across the back cords with alternating half hitch knots, worked in horizontal rows and kept snug, not load tight.
Worked in that order, the panel turns a plain basket into the piece guests ask about. The weave sits flat against the back, the fringe below stays loose, and the front stays open for the cat. Save this shape for your second build, once the plain net feels easy in your hands.
Three Ways to Hang It, Including a No-Drill Option
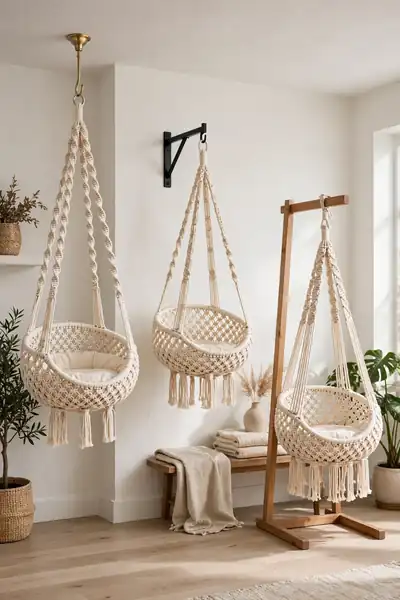
What You Need:
- A stud finder and a drill, for the ceiling hook that carries the classic setup into a joist.
- A heavy-duty wall bracket rated for 50 pounds or more, screwed into a stud for the wall-mounted version.
- A free-standing plant stand or garment rack with a wide, heavy base, for the no-drill version renters can use.
- A short length of chain or extra cord, to adjust the hanging height after the mount is set.
- A level or a careful eye, so the ring hangs straight and the basket does not list to one side.
Pick the method your room allows, not the one in the prettiest photo. Ceiling mounting gives the cleanest swing and the strongest hold. A wall bracket suits corners and keeps the bed out of walkways. The stand version moves from room to room, which suits renters and anyone still deciding on the perfect spot.
The Cushion Choice That Decides Whether Your Cat Stays

Before: A stiff new cushion with a strong store smell sits in the basket, and the cat sniffs it once and walks away. The bed is finished, but it smells and feels like a shop, not like home.
After: The same basket holds a washed, medium-soft cushion that has spent two nights on the sofa where the cat already sleeps. It carries the smells of the house and the cat itself, and the first visit lasts minutes instead of seconds.
Choose a cushion with a little give, not a firm pad: a cat tests a bed by pressing it, and a surface that sinks slightly reads as safe. A washable cover matters more than looks, in a medium thickness that fills the basket without puffing over the rim.
The Three-Day Plan That Gets Your Cat Actually Using It
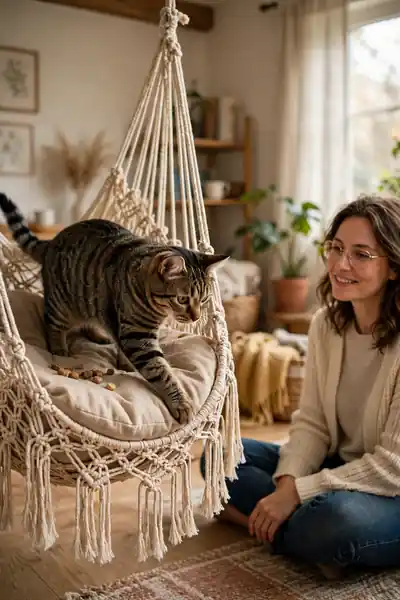
Do This:
- Day one, set the finished hammock on the floor in your cat’s favorite room and let it simply exist there.
- Rub the cushion with a worn t-shirt or the cat’s own blanket, so the bed smells like home from the first sniff.
- Day two, place treats or a pinch of catnip in the basket and walk away; let curiosity do the work.
- Day three, hang it low, just a few inches up, and raise it a little every few days as the naps get longer.
Avoid This:
- Do not lift your cat and place it inside; a bed it was forced into is a bed it will avoid.
- Do not hang it at full height on the first day, however sturdy the mount feels.
- Do not move the hammock to a new room mid-introduction; cats map their territory slowly.
Patience is the whole trick. Most cats investigate a new bed for days before the first real nap, and that is normal, not failure. Keep the spot, the scent, and the routine steady, and your macrame cat hammock turns into the place your cat chooses on its own.
Mistakes That Make a Hammock Sag, Swing, or Get Ignored

Almost every fault shows up in the first week, which is the good news: all of them are fixable without starting over. Retie the uneven side, move the mount, swap the cushion, and test again with weights before the cat goes back in. Ten minutes of adjusting beats a rebuild.
Washing and Looking After Cotton Macrame

Cotton cord collects dust and cat hair faster than most people expect, and a grubby bed is a bed cats start avoiding. Every few weeks, take the hammock down, shake it out outside, and vacuum the net gently with a brush attachment. That alone handles most of the upkeep.
For a full wash, soak the whole net in lukewarm water with mild soap for about 20 minutes, then rinse and press the water out with towels. Never wring it; twisting stretches wet cotton and distorts the knots. Dry it hanging in its normal shape, out of direct sun.
Colors, Cushions, and Small Variations to Try Next

Once the first hammock earns its place, the second build is where you get to play. Small changes to color, cushion, and trim give the same shapes a completely different mood, and none of them changes the structure you already know. Start with whichever idea suits the room.
Also Explore:20 Dreamy DIY Boho Curtains You Can Sew This Weekend
- Dye the cord before you cut it: a soft sage, terracotta, or dusty blue suits most rooms better than stark white, and solid dyed cord keeps its color wash after wash.
- Swap the cushion cover with the seasons: linen in summer, a warm plaid or fleece in winter, and the bed feels new twice a year.
- Add a short fringe or a few wooden beads at the rim for a boho finish, keeping beads large and sewn tight so nothing can come loose.
- Build a second shape instead of a second color: pair a perch by the window with a cocoon in the quiet corner, and most cats will rotate between the two.
Frequently Asked Questions
1. How much weight can a handmade cat hammock hold?
With 5mm cotton cord and hardware rated at 50 pounds or more, mounted into a ceiling joist or wall stud, this build comfortably suits cats up to about 15 pounds. Test it first with weights well above your cat’s weight, and re-check the mount and knots every few months.
2. How long does the classic basket take to make?
Plan on 2 to 3 hours for your first one, including cutting the cords. The open perch is the fastest shape at roughly 1.5 to 2 hours, while the cocoon and the two-tier build run closer to 3 to 4 hours.
3. Can I hang one without drilling into the ceiling?
Yes. The no-drill option in this guide uses a free-standing stand or garment rack with a wide, heavy base, and it works well for renters. Just keep the base clear of walkways so it cannot be knocked, and test its balance with weights before the first nap.
4. What if my cat ignores the new hammock?
Give it the full three-day plan from this guide: floor time first, a familiar scent on the cushion, treats in the basket, then a low hang in the cat’s favorite room. Most cats need days of casual inspection before the first nap, so judge the result after two weeks, not two hours.
5. Is it safe for kittens?
Yes, with a few adjustments. Hang it low, just a few inches off the floor, keep the fringe trimmed short so there are no long loops, and supervise the first sessions. Kittens grow fast, so re-check the fit and the mount as the weight climbs.
6. How do I size it for a large cat like a Maine Coon?
Move up to a 16 inch ring, switch to 6mm cord, and add cords in groups of four so the knot pattern stays even. Step the hardware rating up as well, and keep the cushion at the wider end of the range so a long cat can stretch.
Conclusion
A macrame cat hammock your cat actually sleeps in is not about fancy knots. It is about a strong mount, even tension, the right shape for how your cat sleeps, and a patient first week. I’ve seen how making this one change can completely shift the result. You now have the exact supplies, the only two knots you need, six shapes from one base net, and a plan that turns curiosity into a daily nap. Pick your shape, clear an afternoon, and start with the ring. Save this guide on Pinterest for build day, try it this weekend, and share it with a fellow cat owner.






One Comment