21 Dainty DIY Polymer Clay Bracelets to Make and Gift
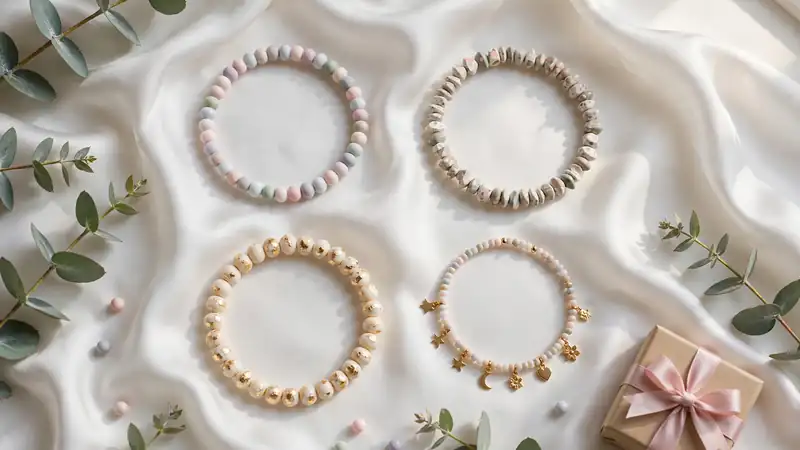
Store-bought bracelets all look the same, and the handmade ones cost more than you want to spend. If you have ever wished for jewelry that feels truly yours, this guide to diy polymer clay bracelets is your answer: 21 dainty designs you can make in a weekend and gift with pride.
In my experience, bracelet-making is the most forgiving way into polymer clay. A bead that wobbles a little still looks charming on a wrist, and each design teaches a skill you will reuse. You need only clay, a tile, and an afternoon to start.
Classic Round Clay Bead Bracelet
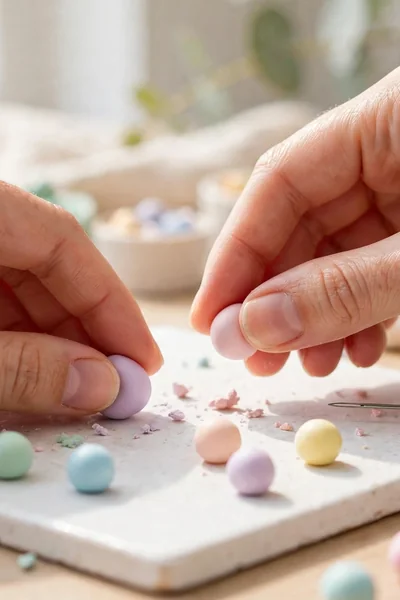
Every journey into diy polymer clay bracelets starts with the classic round bead. This is the simplest design you can make, and it teaches the three core skills: conditioning, rolling even beads, and baking. All you need is clay, a needle tool, elastic cord, and one free afternoon.
Roll beads between your palms until they feel smooth and match in size. In my experience, laying them side by side before baking catches size differences early. Pierce each hole straight through, bake on a tile per package directions, then string on elastic with a surgeon’s knot.
Terrazzo Chip Bead Bracelet

Terrazzo looks expensive, but the technique is wonderfully simple. Tiny chips of contrasting clay pressed into a base bead create that speckled stone effect. It hides fingerprints and uneven rolling, which makes it forgiving for beginners. Choose three colors that share one undertone for a pulled-together look.
- Condition your base color and roll it into smooth round beads. Keep them slightly firm so the chips press in cleanly.
- Chop tiny contrasting clay bits with a blade and scatter them on your work surface. Roll each bead over the bits to pick them up.
- Gently re-roll the beads to embed the chips flush with the surface. Avoid over-rolling or the speckles will smear.
- Pierce, bake per package directions, and let cool fully before stringing. A light sanding makes the chips pop.
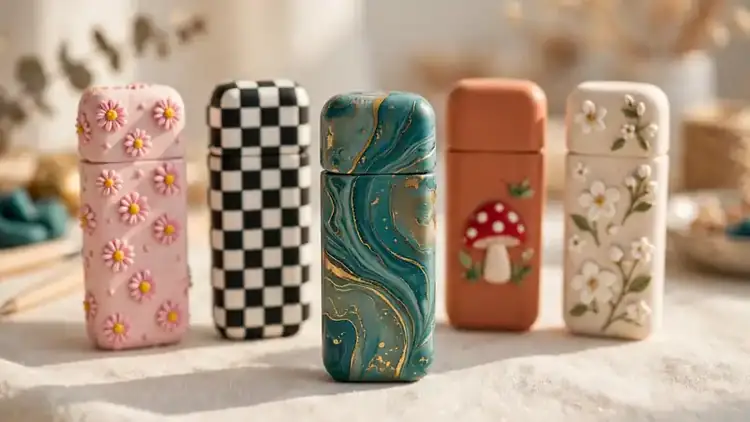
Also View:DIY Polymer Clay Lighter Case Even Beginners Can Make
Marbled Swirl Bead Bracelet
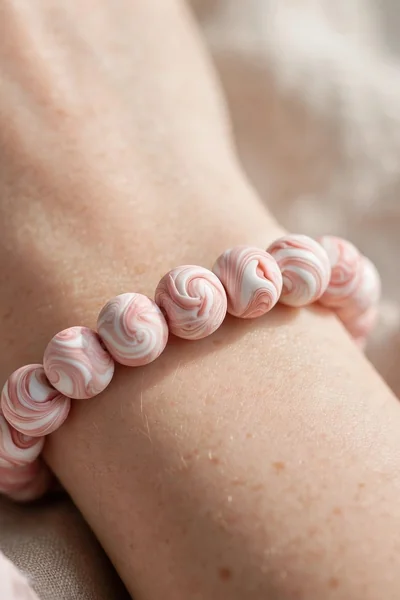
Quick Tip: Stop marbling earlier than feels natural. The colors keep blending as you roll the beads, so what looks perfectly swirled now can turn muddy later. Two gentle folds usually give the prettiest result.
Marbled beads look like tiny works of art, yet they take minutes. Twist two conditioned colors together, fold once, and roll into beads without overworking. Pair bold marble beads with solid ones so the bracelet feels balanced. Bake as usual and string with the pattern facing outward.
Dainty Thin Bangle Bracelet
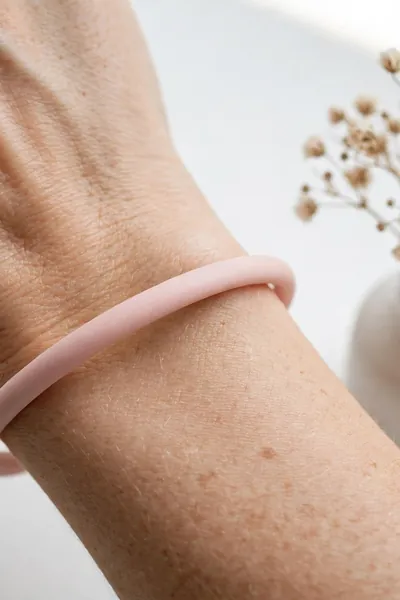
Common Mistake: Most beginners roll the bangle too thin, and it snaps the first time it flexes over a hand. Others skip conditioning, so tiny cracks appear along the curve after baking.
The Fix: Roll the clay rope to at least 6mm thick so it survives daily wear. Condition the clay until it is warm and pliable, then shape it around a jar or bangle mandrel for a perfect circle.
A thin bangle looks delicate but needs real strength. Overlap the rope ends and blend the seam smooth with your fingertip. Bake the bangle standing on its edge so it keeps its round shape. Let it cool fully before sliding it on. Sand the seam lightly for an invisible finish.
Also Explore:How to Glaze Polymer Clay for a Perfect Glassy Shine
Gold Foil Accent Bracelet

What You Need:
- Polymer clay in a deep base color: navy, black, or forest green makes gold pop.
- Gold foil sheets or gold leaf: a small booklet covers many bracelets.
- Soft brush: presses foil onto clay without tearing it.
- Clear polymer-safe glaze: seals the foil so it does not flake off.
- Baked beads or bangle base: apply foil before baking for best grip.
Gold foil turns plain beads into jewelry that looks store-bought. Tear the foil into small pieces and press them onto conditioned beads with a soft brush. Bake as usual, then seal with glaze. The foil catches light beautifully against dark clay. Handle finished pieces gently until the glaze cures fully.
Dried Flower Inlay Bracelet
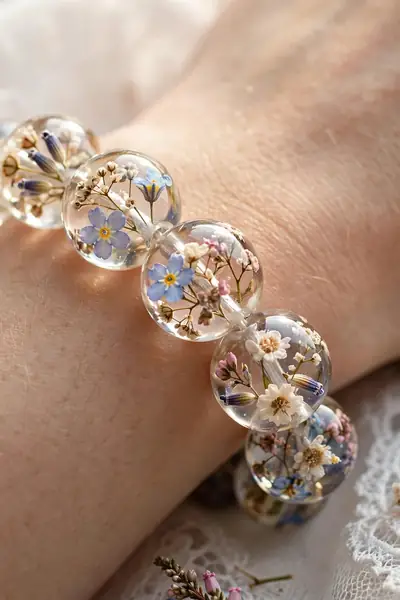
Before: Plain beads can feel a little flat once you have made a few bracelets. You want something more personal, but painting tiny details freehand feels intimidating.
After: Pressed flowers sealed under a thin clay layer look like tiny preserved gardens on your wrist. Each bracelet becomes one of a kind, and guests always ask where you bought it.
Choose small, fully dried flowers so no moisture gets trapped inside. Press them gently onto a flattened bead, then cover with a paper-thin clay layer and smooth the edges. Bake on a low, careful cycle per package guidance. Seal with glaze to protect the petals.
Ombre Gradient Bead Bracelet
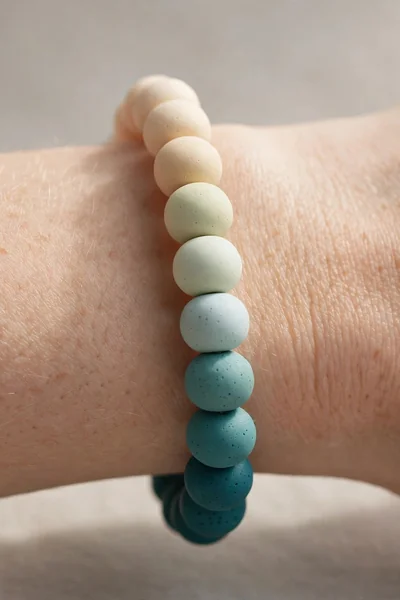
Do This:
- Blend five small clay balls from light to dark before rolling the final beads.
- Lay the beads in gradient order on the tile so the sequence stays correct.
- String the beads in the same order, checking the flow before knotting.
Avoid This:
- Do not jump between random shades; the gradient needs smooth steps.
- Avoid re-rolling finished beads, or the careful blending will disappear.
- Do not mix brands with different baking needs in one gradient set.
An ombre bracelet looks complex but follows a simple system. Mix each step by adding a little more of the dark color to the light one. Keep notes on your ratios so you can repeat a favorite gradient. The result is a bracelet that fades beautifully around the wrist.
Speckled Granite-Look Bracelet
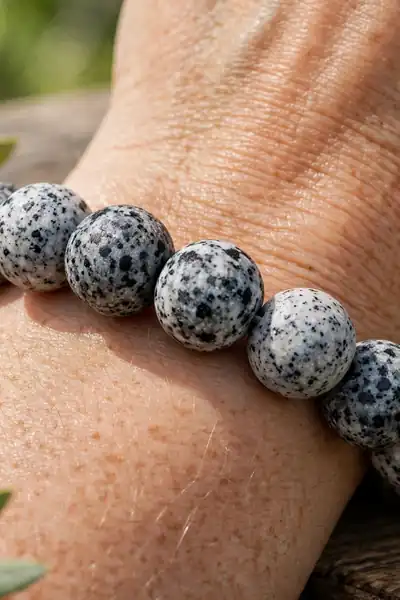
Time Needed: 1.5 hours | Difficulty: Easy | Cost: Low
Best For: Everyday wear | Tools Required: Blade, needle tool, tile
Pro Tip: Gray and white speckles on charcoal look just like real granite
Granite-effect beads bring a natural stone look without the weight or cost. Chop fine speckles in white, gray, and black, then roll them into a charcoal base. The key is tiny, even speckles rather than big chunks. Sand lightly after baking for a smooth stone finish.
Mini Charm Clay Bracelet
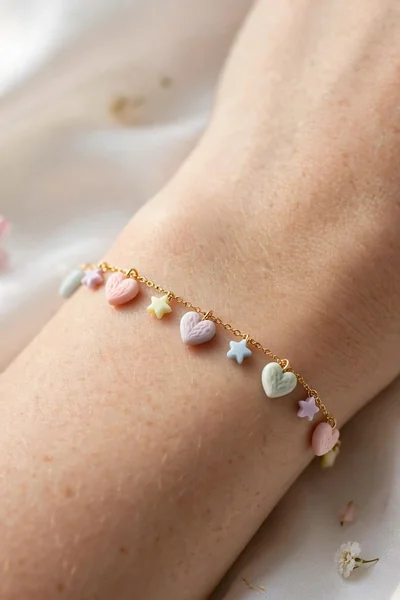
Tiny clay charms turn a simple cord into a story. Roll miniature hearts, stars, or flowers, pierce a hole through each, and bake them hard. Thread them onto waxed cord or a fine chain with small spacer beads between charms. Keep each charm under 8mm so the bracelet stays dainty.
Space the charms unevenly for a playful look, or center one charm for quiet minimalism. In my experience, a drop of glaze on each charm keeps the details crisp and bright through daily wear. Finish with adjustable sliding knots so one bracelet fits most wrists comfortably.
Pastel Heart Bead Bracelet

Heart beads look adorable, but their points can break if shaped carelessly. Rolling a ball, then pinching one end into a soft point, gives a sturdy heart that survives stringing. Small hearts suit dainty bracelets better than large ones. Keep the point rounded, never sharp.
- Roll small clay balls, then pinch one end gently to form a soft point. Smooth the crease with your fingertip.
- Pierce each heart horizontally through the widest part. A centered hole keeps the heart facing forward.
- Bake per package directions and cool fully. String with tiny spacer beads between hearts for a delicate rhythm.
- Tie off with a surgeon’s knot and tuck it inside a bead. Trim the tails close for a clean finish.
Tortoiseshell-Effect Bracelet
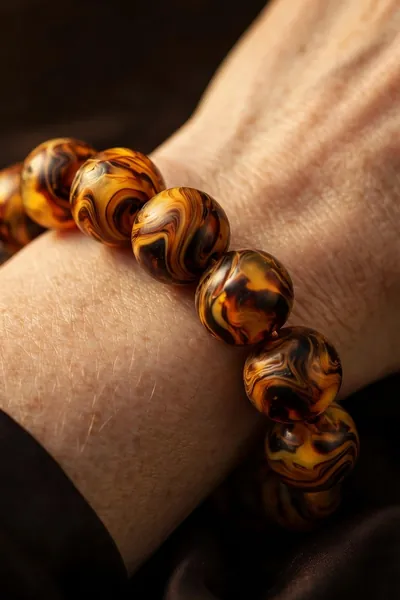
Quick Tip: Tortoiseshell needs translucency to look real. Mix a little translucent clay into your amber so light passes through the finished beads. Without it, the effect reads as plain brown swirls.
This vintage-inspired pattern looks far harder than it is. Layer thin sheets of amber, brown, and translucent clay, then twist and slice to reveal the mottled pattern. Roll slices into beads without overworking the swirls. The result could pass for vintage tortoiseshell. Sand and buff after baking for a glossy, authentic shine.
White and Gold Minimalist Bangle
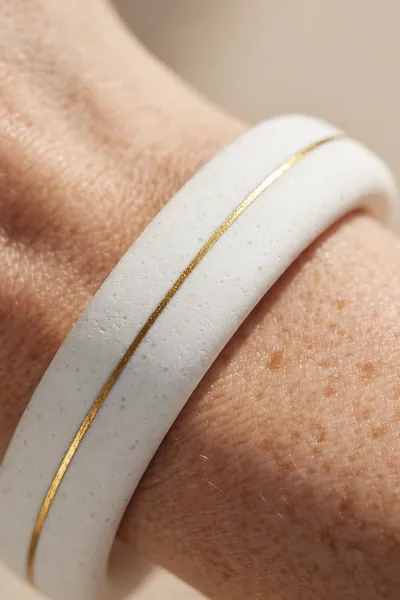
Common Mistake: Beginners paint the gold line after baking, and it chips off within days. Others make the bangle too thick, losing the minimalist look entirely.
The Fix: Inlay a thin gold clay stripe into the white clay before baking so it fuses permanently. Keep the bangle slim, around 5mm, and sand it glass-smooth after cooling.
Minimalist jewelry lets one detail shine. Roll a white clay rope, press a thin gold clay stripe along its length, and smooth the join. Shape into a bangle and bake standing on edge. The clean contrast looks elegant with everything. Buff with a soft cloth for a soft satin glow.
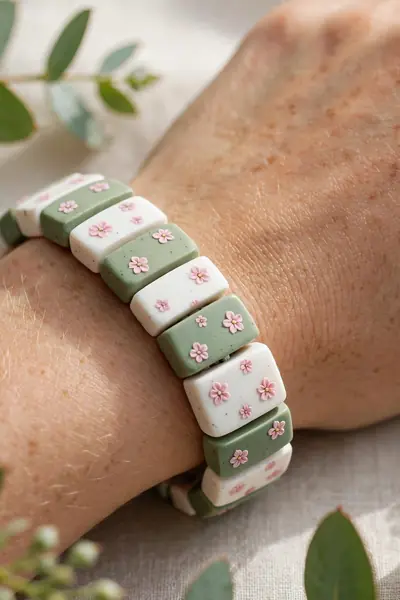
Floral Slab-Cut Bracelet
What You Need:
- Polymer clay in 3-4 colors: one base plus petal and leaf tones.
- Acrylic roller: rolls even slabs without sticking.
- Small flower cutters or a blade: for shaping petals cleanly.
- Needle tool: for piercing and fine details.
- Ceramic tile: keeps the slab flat while you work.
Slab building opens a new world beyond round beads. Roll a thin slab, arrange tiny clay flowers on it, and press gently so they bond. Cut the slab into bead-sized rectangles and pierce each one. The flat beads catch light beautifully when strung. Sand the cut edges lightly for a soft, professional finish.
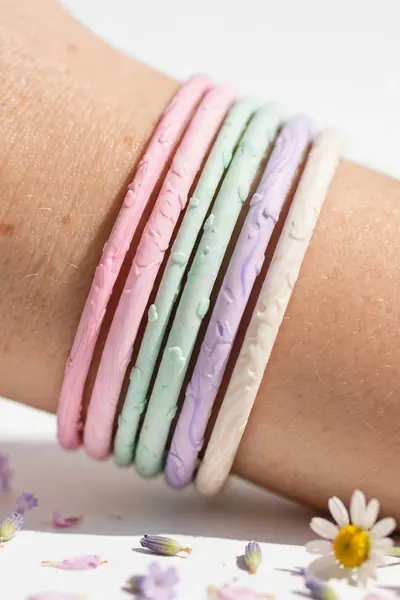
Rainbow Pastel Stack Bracelets
Before: One bracelet can feel lonely on the wrist, especially with simple outfits. Buying a stack of bracelets costs more than most craft budgets allow.
After: A handmade stack of pastel bracelets looks cheerful and costs almost nothing. You can mix and match the stack daily, and each thin bracelet takes under an hour.
Stacks are the easiest way to look styled with minimal effort. Make five to seven thin bracelets in coordinating pastels, keeping each one simple. Vary the bead shapes slightly so the stack has texture. Wear them together or gift the set as one present. Tie the set with ribbon for an instant gift-ready package.
Textured Lace-Imprint Bracelet

Do This:
- Press real lace firmly into conditioned clay for a crisp imprint.
- Roll beads gently after imprinting so the texture stays visible.
- Use light-colored clay so the lace pattern shows clearly.
Avoid This:
- Do not use stretchy lace; it shifts and blurs the pattern.
- Avoid pressing too hard, which thins the bead walls.
- Do not skip a test imprint on scrap clay first.
Lace imprints give beads a vintage, romantic texture with zero carving skill. Drape lace over a clay slab, roll once with even pressure, then cut or shape your beads. The pattern survives baking beautifully. A light glaze makes the texture glow. This technique works beautifully on bangles too.
Celestial Moon and Star Bracelet
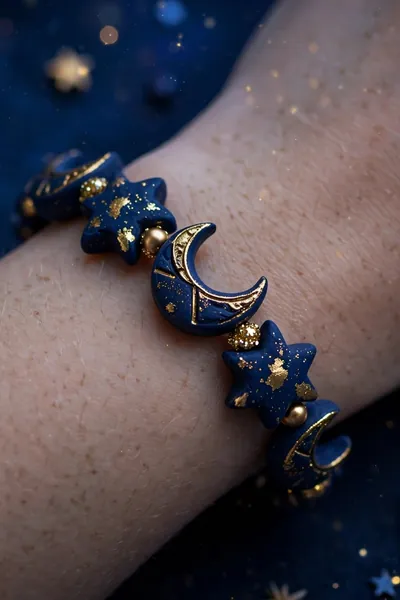
Time Needed: 2 hours | Difficulty: Medium | Cost: Low
Best For: Evening wear and gifting | Tools Required: Small shape cutters, needle tool
Pro Tip: A tiny dot of gold clay makes each star glow
Celestial jewelry feels magical without being childish. Cut tiny moons and stars from navy clay, add gold accents, and alternate them with small round beads. Keep the shapes small so the bracelet stays dainty. This design makes a thoughtful gift for dreamers. Bake carefully so the thin points do not darken.
Fruity Miniature Bracelet
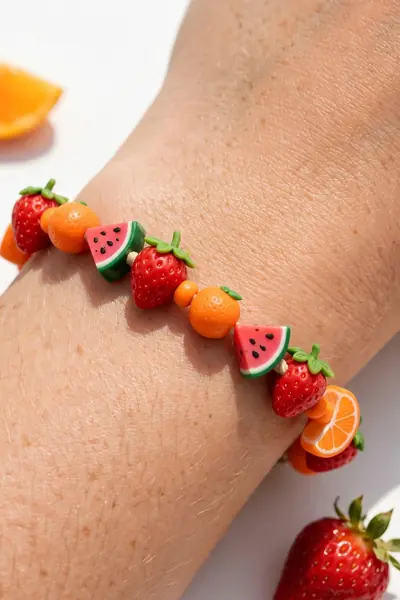
Miniature fruit beads are pure joy on a wrist. Roll tiny strawberries, oranges, or watermelon slices no bigger than a pea, adding seeds and leaves with a needle tool before baking. These playful beads always get compliments. Keep details simple since tiny beads read best at a glance.
String fruit beads with solid green or cream spacers so the colors pop. In my experience, a thin coat of gloss glaze makes fruit look juicy and real. Mix two or three fruit types for a cheerful summer bracelet. These make adorable gifts for friends who love playful jewelry.
Abstract Face Bead Bracelet
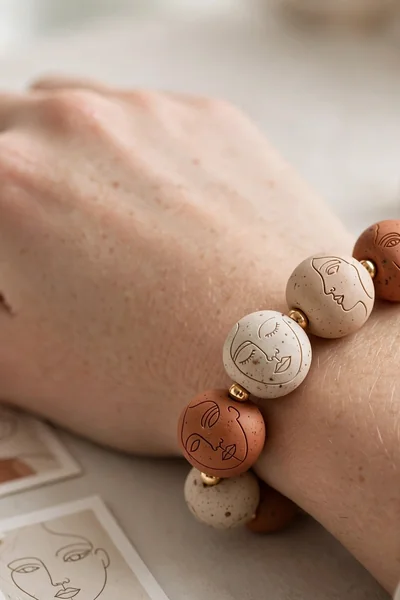
Abstract faces are a gallery trend you can wear. One continuous curved line suggests eyes and lips on a flat bead, and imperfections only add character. This design looks impressive but needs no drawing skill. Practice the line on paper first, then transfer it with confidence.
- Roll flat oval beads and smooth the surface completely. A flat face gives the line room to flow.
- Draw one continuous line for the profile using a fine needle tool. Keep the pressure light and steady.
- Bake per package directions and cool fully. Seal with matte glaze to protect the delicate lines.
- String with plain spacer beads so the faces stay the focus. Alternate face directions for an artistic rhythm.
Braided Clay Strand Bracelet
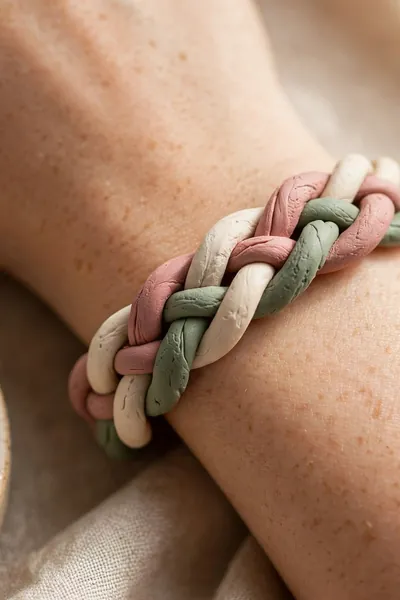
Quick Tip: Braid the strands while the clay is freshly conditioned and pliable. Stiff clay cracks at the bends, and over-handled clay loses its smooth finish. Three even ropes braid more neatly than two or four.
A braided bracelet looks woven like fabric but is pure clay. Roll three long ropes in complementary colors and braid them loosely. Press the ends together and blend smooth, then shape into a bangle or string as beads. Bake carefully so the braid keeps its twist.
Pearl and Clay Combo Bracelet
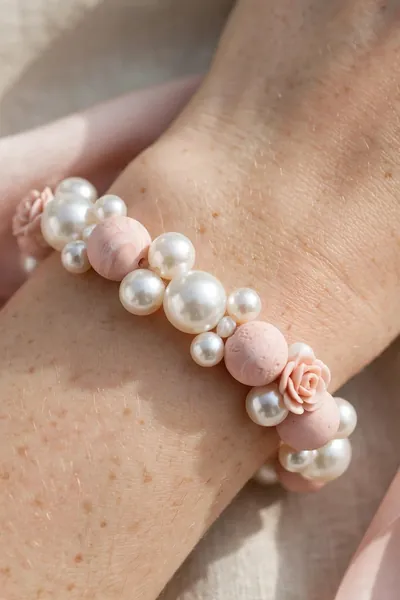
Common Mistake: People mix real pearls with clay beads, and the weight difference makes the bracelet hang lopsided. Others use glue on pearls, which yellows and weakens over time.
The Fix: Use lightweight faux pearls that match your clay beads in size and weight. String everything on elastic or wire without glue, letting the pearls move freely.
Pearls add instant elegance to playful clay beads. Alternate faux pearls with solid clay beads in a matching tone for a balanced look. Keep the pearl count low so the clay stays the star. This combo suits weddings and special occasions beautifully. A single pearl as a focal bead also works wonderfully.
Personalized Name Bead Bracelet
What You Need:
- Polymer clay in the recipient’s favorite color: personal from the start.
- Alphabet stamps or a needle tool: for clean, readable letters.
- Small flat beads or discs: the easiest shape to stamp.
- Elastic cord: comfortable for daily wear.
- Tiny gift box and ribbon: presentation matters for gifts.
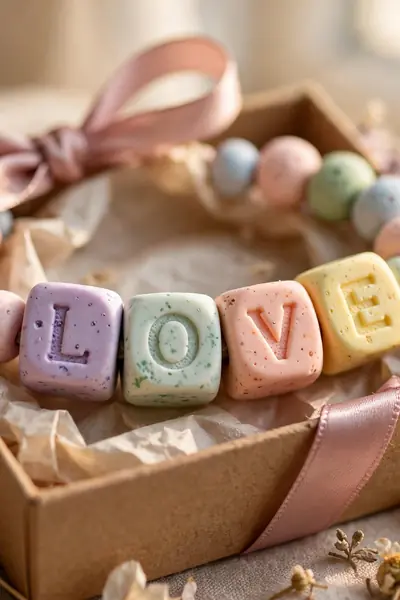
A name bracelet is the most personal gift you can make. Stamp one letter per bead, spelling a name or a short word like love. Keep the letters centered and shallow so they read clearly. String with plain spacers and wrap beautifully. Double-check the spelling before baking, since mistakes are permanent.
Conclusion
You now have 21 ways to turn simple clay into jewelry worth gifting. Start with one design, enjoy the rolling and baking, and watch a lump of clay become something personal. This diy polymer clay bracelet collection proves beautiful jewelry needs only your hands and a free afternoon.
Save this article on Pinterest so your favorite designs wait for your next craft day. Try one bracelet this weekend and share it with a friend who loves handmade gifts. I’ve seen how making this one change can completely shift the result, and your gift box deserves that magic.


One Comment