How Long to Bake Polymer Clay for Truly Perfect Results
Nothing is more frustrating than pulling your clay from the oven and wondering if you got it right. Once you know how long to bake polymer clay for your project, that anxiety disappears. If you want to bake polymer clay with confidence, the secret is simpler than most tutorials make it sound: match the time to your thickness and the temperature to your brand.
In my experience, beginners do not fail because they lack skill. They fail because every package says something different and the oven dial cannot be trusted. This guide cuts through that confusion with exact times, a brand chart, and the small habits that prevent burnt or brittle pieces.
How Long to Bake Polymer Clay
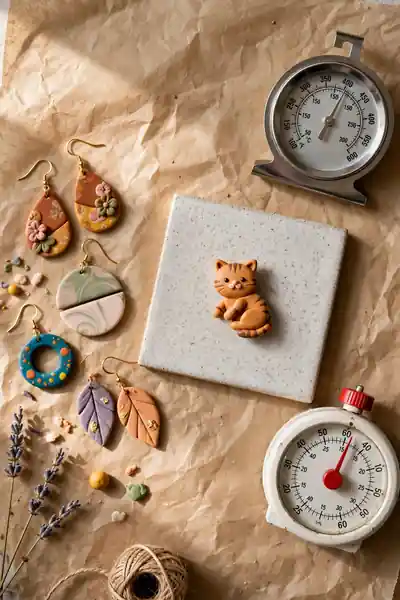
Here is the short answer most beginners need: bake polymer clay for 15 to 30 minutes per 1/4 inch of thickness, measured at the thickest point of your piece. Always use the correct temperature printed on your clay’s package. Time matters, but temperature matters more.
A thin pair of earrings needs far less time than a figurine, which is why one fixed time never works for every project. When you are unsure, a longer bake at the right temperature beats a short one. Underbaked clay feels fine at first, then turns brittle weeks later.
Also View:How to Glaze Polymer Clay for a Perfect Glassy Shine
Baking Time and Temperature by Brand
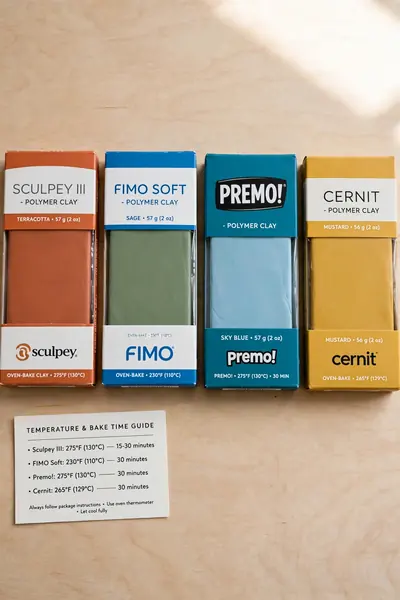
Different brands cure at different temperatures, so the package is always your first authority. Baking Fimo at Sculpey temperatures will scorch it, while Sculpey baked at Fimo temperatures stays weak. Here is the quick reference most clayers keep taped inside a cabinet door.
- Sculpey III, Premo, and Souffle: bake at 275°F (130°C) for 15 minutes per 1/4 inch. Many artists extend this to 30 minutes for extra strength.
- Fimo Soft, Professional, and Effect: bake at 230°F (110°C) for 30 minutes. Do not raise the heat to speed things up; Fimo darkens fast above its range.
- Cernit: bake at 215 to 275°F (110 to 130°C) for 30 minutes, following the specific line on your package. Translucent shades scorch easily, so tent them with foil.
- Kato Polyclay: bake at 300°F (150°C) for 10 to 30 minutes depending on thickness. It is the firmest clay of the four and rewards a full, hot cure.
Real-Life Baking Time Examples

Quick Tip: Measure thickness at the thickest point of your piece, not the average. A pendant that is mostly thin but has one thick bead needs the timing for that bead. When in doubt, round up the time rather than down.
A pair of 1/4 inch earrings cures in about 15 to 30 minutes. A 1/2 inch pendant needs 45 minutes to an hour. A solid one-inch figurine can bake for up to two hours at the correct temperature. Longer bakes build strength; only excess heat causes damage.
Why Underbaking Hurts More Than Overbaking
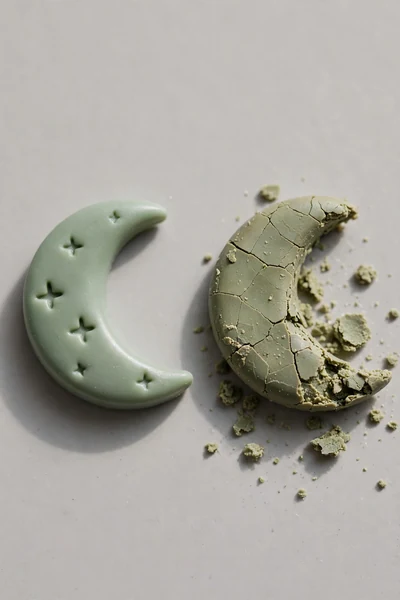
Common Mistake: Most beginners pull their pieces out early because they are afraid of burning them. A shorter bake feels safer in the moment. But an undercured center never finishes hardening, no matter how long the piece sits afterward.
The Fix: Give every piece its full time at the correct temperature without fear. Extra minutes at the right heat only make clay stronger. Real damage comes from too much heat, not too much time.
Underbaked clay tricks you because it feels hard when it leaves the oven. Weeks later it turns brittle, and thin edges start to snap or crumble. A full bake drives heat to the center and locks in real strength. When a piece fails later, short baking time is almost always the cause.
Getting Your Oven Temperature Right

What You Need:
- Oven thermometer: shows the real temperature inside your oven, which often differs from the dial.
- Kitchen timer: keeps your bake honest so you do not guess or cut time short.
- Aluminum foil: tents loosely over pieces to shield them from direct heat.
- Ceramic tile or baking sheet: gives clay a stable, even-heating surface to rest on.
- Heat-resistant gloves: protect your hands when placing or removing the hot tile.
Preheat your oven fully for at least 15 minutes before the clay goes in. Place the thermometer right next to your pieces, not on another rack. For toaster ovens, watch closely since small spaces spike fast. For convection ovens, lower the set temperature by 25 degrees to offset the fan.
The Best Surfaces for Baking Polymer Clay

Before: Baking straight on a thin metal tray gives pieces shiny, brownish bottoms while the tops look fine. Metal heats fast and blasts the underside with intense heat. The uneven cure stays hidden until the piece cracks or breaks later.
After: Resting clay on a ceramic tile lined with parchment changes everything. Heat rises slowly and evenly, so bottoms cure at the same rate as tops. Pieces come out with clean, matte undersides and consistent strength throughout.
The surface you bake the clay on shapes your final result more than most beginners expect. Ceramic tile is the gold standard because it heats slowly and evenly, preventing hot spots. Line it with parchment to stop sticking and shiny patches. Avoid thin metal trays, which heat fast and scorch the bottoms.
How to Prevent Browning and Burn Marks
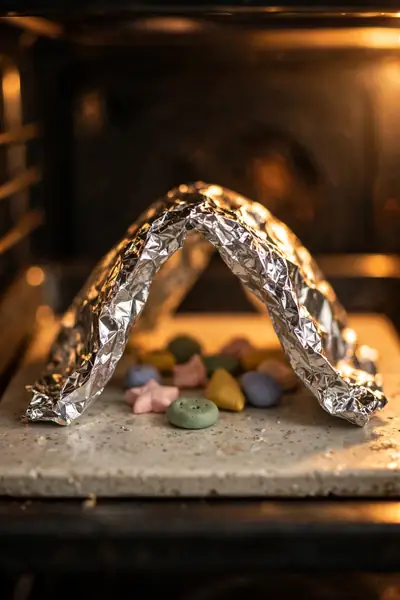
Do This:
- Tent pieces loosely with aluminum foil, keeping the foil from touching the clay.
- Place the oven rack in the center or lower third, away from top heating elements.
- Keep pale and translucent colors away from direct heat; they scorch first.
- Bake when you will not need to open the oven door repeatedly.
Avoid This:
- Don’t let foil touch the clay surface; contact points leave permanent marks.
- Don’t place pieces directly under a visible broiler element.
- Don’t raise the temperature to “catch up” on time; excess heat causes browning, not time.
- Don’t skip the tent just because the dial temperature looks correct.
Browning happens when radiant heat hits the clay directly, even at the right temperature. A loose foil tent reflects that heat while letting warm air circulate. In my experience, this single habit prevents more discoloration than any other trick. Tent every light-colored piece, every time.
How to Tell When Your Clay Is Fully Baked
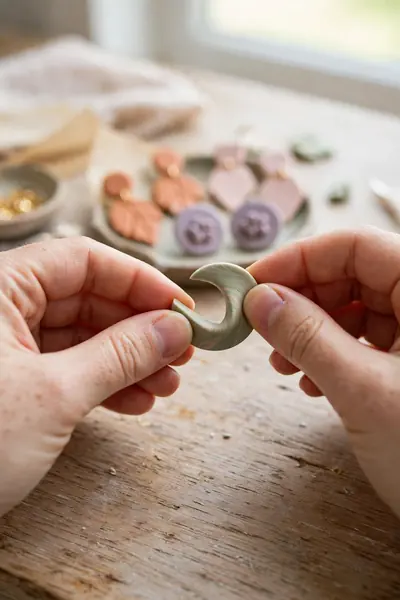
Cool-Down Rule: wait until pieces reach room temperature before testing; clay firms up as it cools.
Bend Test: thin sections should flex slightly without snapping; thick sections should feel rock solid.
Fingernail Test: a fingernail should dent the surface slightly but not sink in or flake it.
Best For: checking every piece before assembly, glazing, or gifting.
Fresh from the oven, even perfectly cured clay can feel soft or bendy, and that panics beginners. Let pieces cool completely on the tile before you judge them. If a cooled piece cracks or crumbles, it needs more time in the oven, not less. Patience here saves more projects than any tool.
Also Explore:How to Make an Air Dry Clay Paint Palette So Easily
Rebaking Polymer Clay the Safe Way

Here is the good news: polymer clay can go back in the oven as many times as you need. As long as the temperature stays in the correct range, rebaking never damages cured clay. Artists bake in stages on purpose, curing a base shape before adding details on top.
Rebaking also rescues pieces that feel weak after cooling. If a charm flexes too much, return it for another full cycle at the same temperature. Each round drives heat deeper and the piece comes out tougher. Never raise the heat instead; steady temperature builds strength.
Baking Safety: Fumes, Ventilation, and Kitchen Rules
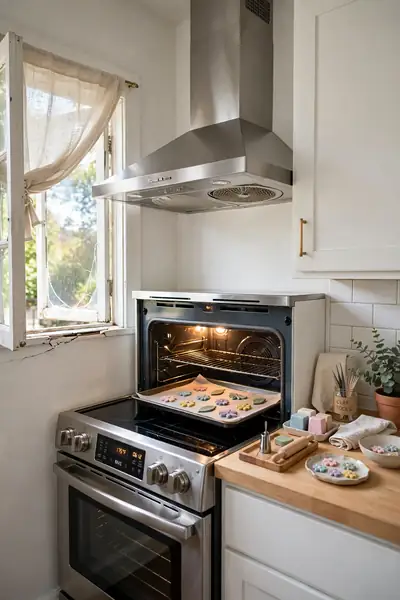
Polymer clay is safe to bake when you follow basic precautions, but burnt clay releases fumes you do not want to breathe. Good ventilation and strict temperature control keep your kitchen safe. These steps take two minutes and protect every bake.
- Ventilate the room: crack a window or run the range hood fan while baking. Moving air carries away the mild odor that normal curing produces.
- Never exceed your brand’s maximum temperature: fumes turn acrid and harmful only when clay burns, which happens above the recommended range.
- Keep clay tools out of food use: dedicate your tile, blades, and rollers to crafting, and never bake food on a tile used for clay.
- Stay nearby and set a timer: an unattended oven can drift hotter, and a timer catches problems before a full bake goes wrong.
Troubleshooting: Bubbling, Cracking, and Discoloration

Quick Tip: Match the symptom to the cause before you change anything. Bubbling means trapped air or moisture, cracking means uneven thickness or too-fast cooling, and yellowing means too much direct heat. Fix the cause and the next bake comes out clean.
Bubbles usually come from air trapped during conditioning; knead thoroughly and prick surface bubbles before baking. Cracks form when thick and thin areas cure at different rates, so keep thickness even. Discoloration is almost always radiant heat, solved with a foil tent and lower rack position.
Beginner Mistakes to Avoid
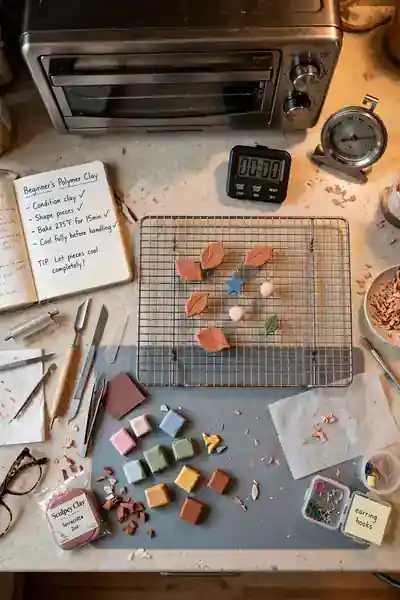
Common Mistake: Beginners treat baking like a race, rushing pieces into a half-heated oven and pulling them out at the first timer beep. They trust the oven dial, skip the thermometer, and poke at hot clay to check firmness. Every shortcut adds a weak spot.
The Fix: Slow down and follow the full routine: preheat completely, verify with a thermometer, bake the full time, and cool untouched. Each step exists because skipping it breaks pieces. Patient bakers get strong results on the first try.
The most common failures I see all trace back to impatience: cold ovens, short bakes, and hot testing. Your clay cannot tell you it is undercured until weeks later, when edges snap. Build the slow habits now and every future project benefits from the start.
Conclusion:
You now know exactly how long to bake polymer clay for strong, lasting pieces: match time to thickness, temperature to brand, and always verify with a thermometer. I’ve seen how making this one change can completely shift the result, turning fragile charms into pieces that survive daily wear. Save this guide on Pinterest so the brand chart is handy at your next bake. Then preheat your oven and try it this weekend. And if a crafty friend keeps pulling out brittle pieces, send this her way. Your best bake is the next one.