21 Artistic Air Dry Clay Bowls to Shape This Weekend
Every home has an awkward corner: the dresser where earrings scatter, the entryway where keys land somewhere new each night. One handmade bowl solves both, and it costs less than this morning’s coffee.
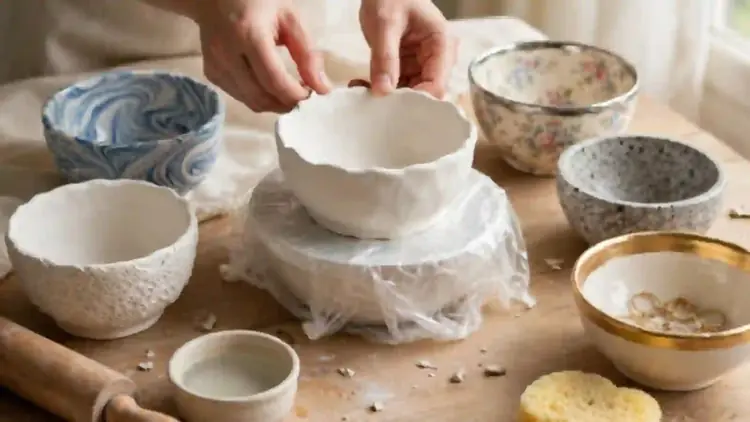
Inside, you will find 21 air dry clay bowl designs, each shaped with a kitchen bowl as the mold and finished with paint, pattern, or texture. In my experience, the first bowl feels like the hard one; after it, thickness, drying, and smoothing start making sense in your hands. Choose the design that fits your shelf, set aside one slow afternoon, and let this weekend be the one you finally make it.
Essential Supplies and Tools
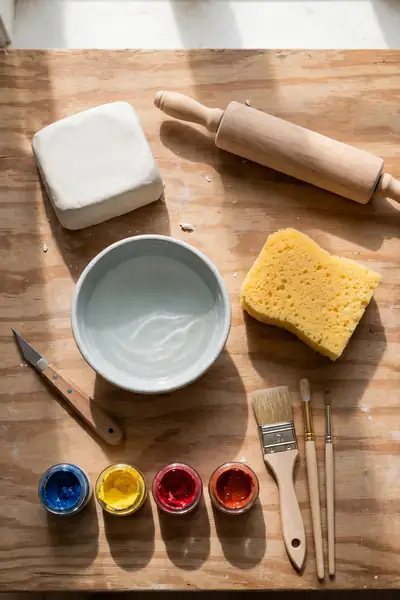
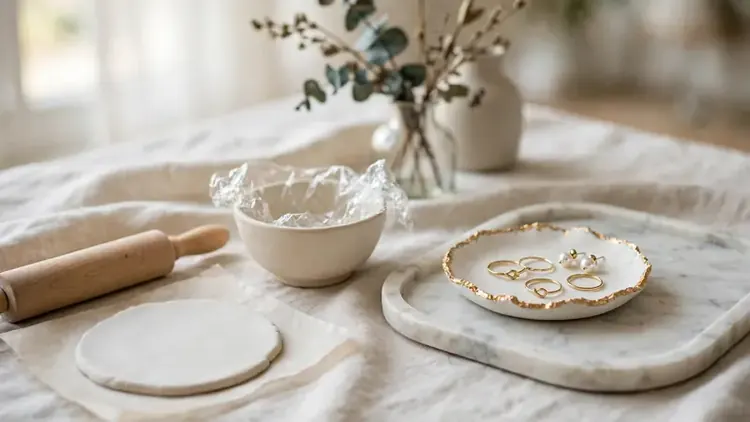
Nothing on this list needs a craft store run. One block of white air dry clay, a rolling pin, and a cereal bowl from your cupboard will shape your first air dry clay bowl this weekend. Add a ramekin of water, a butter knife, and a small sponge.
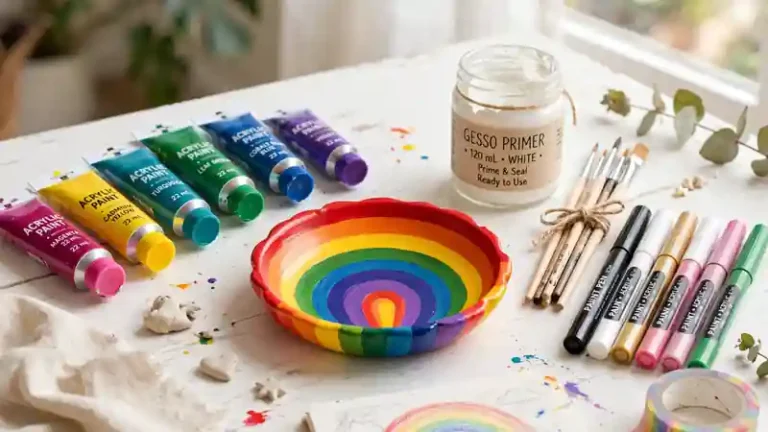
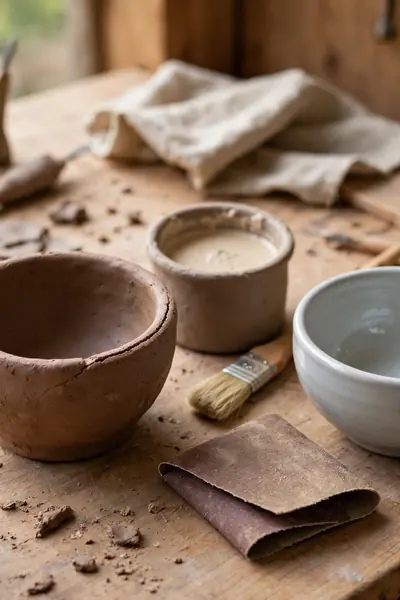
Keep the finishing basics nearby too: fine sandpaper for smooth rims, acrylic paints and a soft brush for color, and a clear sealer for the final coat. A sheet of plastic wrap slows drying and helps prevent cracks, while an old apron keeps clay dust off your clothes during sanding.
Shaping and Smoothing Basics
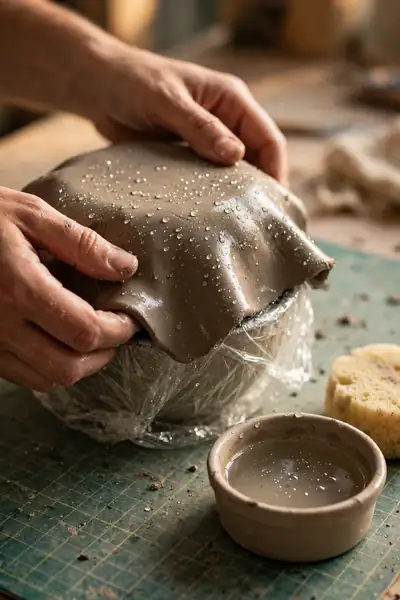
- Every design ahead starts one of three ways. For a slab bowl, roll the clay between two guide sticks so the sheet stays even, then drape it over a plastic wrapped kitchen bowl and trim the edge.
- Pinch bowls need no mold at all. Press your thumb into a clay ball, then pinch and turn in small steps until the walls rise evenly on every side.
- Coil bowls grow from clay ropes stacked in rings. Blend each ring into the one below with a fingertip of slip, which is just clay mixed with water to a paste.
- Smoothing happens while the clay is still soft. Wet fingertips or a damp sponge, worked in tiny circles, erase fingerprints and small bumps before they dry in place.
- Drying rewards patience: a bowl with walls near a quarter inch thick needs 24 to 48 hours, turned over halfway, away from heaters and direct sun.
Beginners usually succeed fastest with the slab method, because the kitchen bowl holds the shape while hands stay free for smoothing. In my experience, even walls matter more than perfect edges at this stage. A rim can be sanded smooth later, but a thin spot that dries too fast often becomes tomorrow’s crack.
Classic Pinch Pot Bowl
Quick Tip:
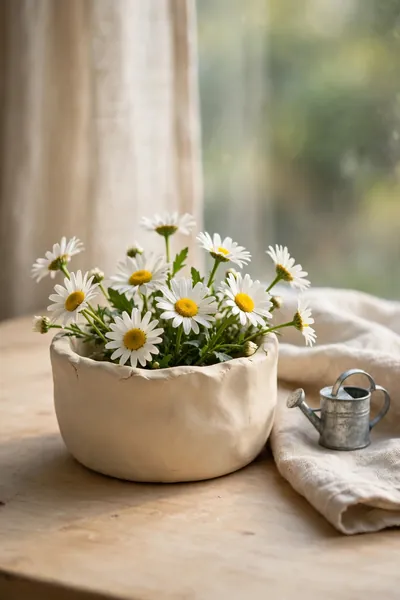
Keep a small dish of water beside you and dip your fingertips whenever the clay drags or feels dry. Short pinch, turn, short pinch, turn keeps the walls even. Working in one spot for too long stretches that side thin, and thin spots are where rims split while drying.
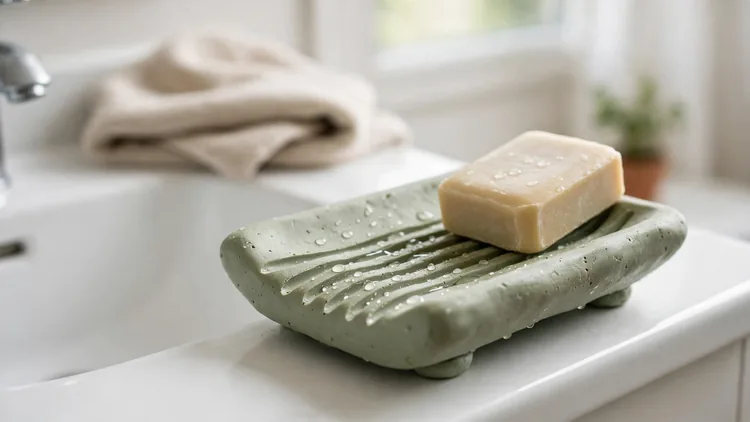
A palm sized pinch bowl takes about fifteen quiet minutes, which makes it the friendliest first project on this list. Let it dry for a full day, sand the rim lightly, and leave the outside plain or paint a single band of color. Mine holds rings beside the kitchen sink, safe from drains.
Coil Wrapped Bowl
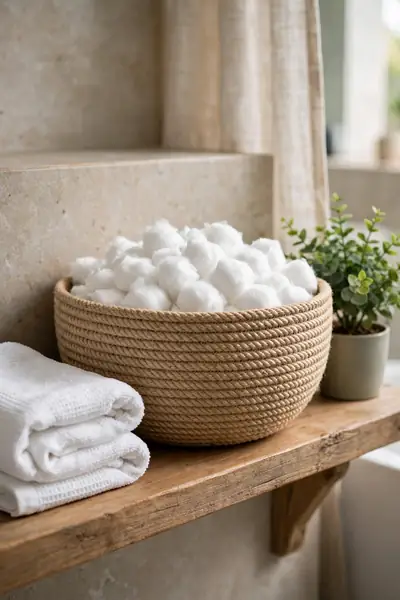
Before: A fresh stack of clay ropes looks rough and a little lopsided. The rings sit apart, the wall leans, and the whole piece reads more like a school project than decor.
After: Each ring is blended at the seams, the wall stands even, and the spiral texture catches light like woven rope. What looked unfinished now reads as deliberate, rustic texture.
Building the walls takes about twenty five minutes, and the thicker rope walls need a slower dry, close to two days under loose plastic. I have noticed coil bowls forgive wobbly hands better than any other style here. Uneven rings blend into the texture, so the finished piece reads rustic and handmade, never sloppy.
Napkin Transfer Floral Bowl
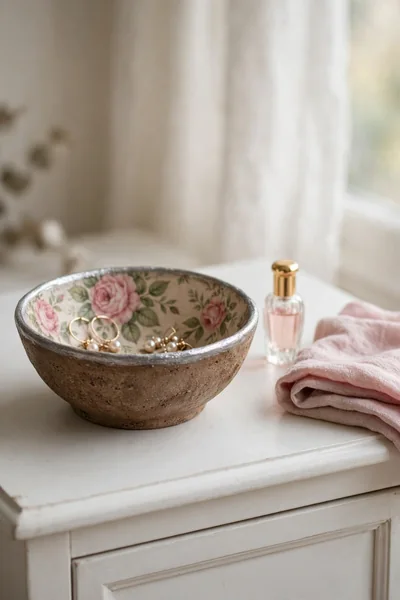
- Roll the clay into an even sheet between two guide sticks, then cut a rough circle a little wider than your mold.
- Peel the napkin down to its top printed layer only, and tear the design out instead of cutting, so the edges stay feathery.
- Brush a thin coat of craft glue over the clay, lay the napkin on top, and smooth it flat through a sheet of plastic wrap.
- Drape the sheet over a plastic wrapped bowl, press it gently into shape, and trim the edge once the clay firms up.
- Let the bowl dry for a full day, paint the rim silver, and finish with two light coats of sealer.
Torn edges matter more than perfect cutting here, because a torn napkin edge melts into the clay and hides the seam. Bold patterns forgive small wrinkles, while tiny prints show every bubble. Pick a napkin with one large flower you can center, and the bowl looks planned instead of patched.
Lace Doily Imprint Bowl
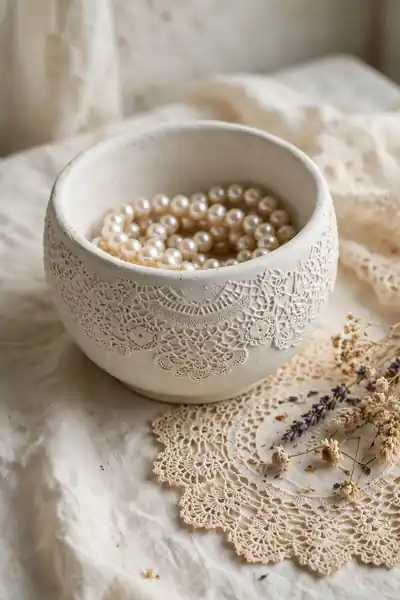
| Detail | Doily Pressed Inside | Doily Pressed Outside |
|---|---|---|
| Where the pattern shows | Inner surface, seen from above | Outer wall, seen from the side |
| Best use | Jewelry and dresser bowls | Shelf and mantel display bowls |
| How it is done | Doily laid in the mold before the clay | Doily rolled onto the shaped bowl |
| Rim finish | Plain rim keeps the inside pattern clean | Pattern can run right up to the edge |
A paint wash settles the design: brush sage or dusty blue over the dry bowl, then wipe the raised lace lines clean with a damp cloth so only the grooves keep the color. Seal it, style it with jewelry or wrapped sweets, and your air dry clay bowl looks older and finer than it is.
Gold Rimmed Vanity Bowl
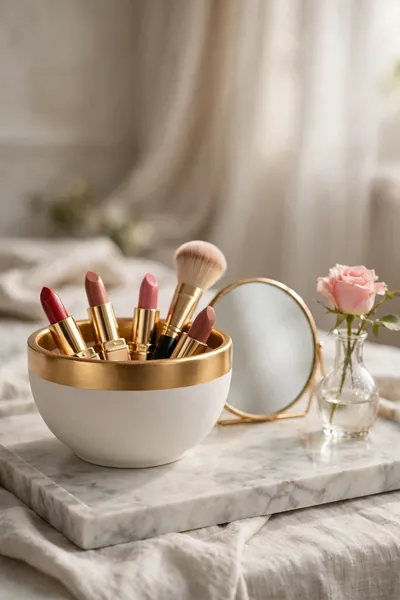
Do:
- Paint the rim last, after sanding, so the gold edge stays sharp and clean.
- Rest the bowl upside down on a soft cloth while painting, keeping fingers off the fresh paint.
- Seal over the gold with a clear coat so the metallic finish does not dull or flake.
- Pair the bowl with plain pieces so the gold rim stays the single shiny note on the tray.
Don’t:
- Real gold leaf can wait; metallic paint gives the same glow for far less cost and effort.
- Never paint a damp bowl, because trapped moisture blisters paint from underneath.
- Skip thick coats; two thin coats of gold look richer than one heavy coat.
- Avoid washing the finished bowl; a dry cloth keeps the rim bright for years.
Ten minutes of painting is all this upgrade takes, yet the bowl reads like a boutique find beside plain clay pieces. Set it on a dresser with earrings pooled inside and the gold edge catches morning light while you get ready. Small effort, daily payoff, and a tray that finally looks finished.
Speckled Stone Look Bowl
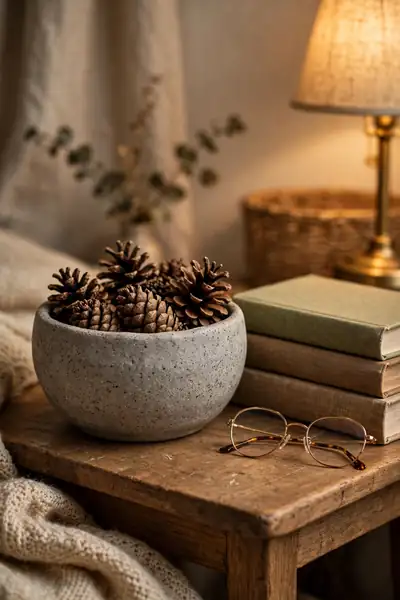
Cost: Under a dollar of paint per bowl
Time: 15 minutes of painting, plus drying
Skill Level: Beginner
Best For: Kitchen counters and farmhouse shelves
An old toothbrush does all the work: dip it in thinned black paint, then flick the bristles over a warm gray base coat for the first layer of flecks. Add white flecks once the black dries, keep them uneven and sparse, and finish with a matte sealer so the surface reads as stone, not plastic.
Leaf Imprint Bowl
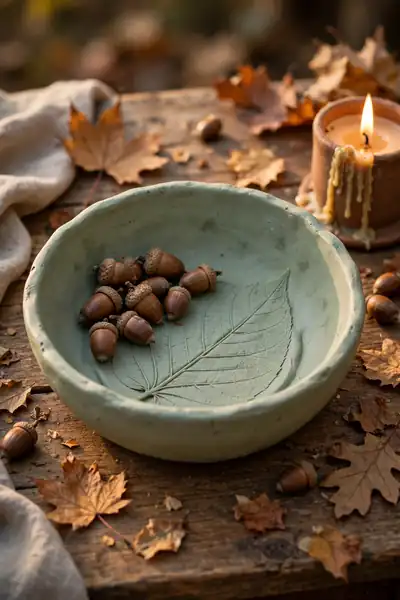
The prettiest pattern on this list costs nothing and grows outside your door. Pick a leaf with bold veins, like hosta or fern, lay it vein side down on a rolled clay sheet, and press once with the rolling pin. Peel the leaf away and a botanical print stays behind.
Shape the sheet over a mold with the print facing up, then let it dry a day before painting. Wash soft sage into the veins, wipe raised parts clean, and seal with a matte coat. Set it by the sink for rings, or on a hall table for daily use.
Stamped Mandala Bowl

- One firm press does the decorating here, so stamp the flat sheet before any shaping begins, while the clay is fresh and even.
- Wooden block stamps and large rubber stamps both work; pick a design with deep, wide lines that stay readable after paint.
- Press straight down with even pressure, then rock the stamp once, very slightly, so the edges of the pattern register too.
- Mark the center of your circle first with a light toothpick dot, because a mandala sitting off center shows at once.
- Shape the stamped sheet over a mold with slow, gentle pressure, since hard pressing at this stage flattens the pattern.
Deep grooves love a paint wash: brush dark brown over the dry bowl, then wipe the surface so color stays only inside the pattern lines. The stamping itself takes ten minutes, and the bold center hides small smoothing flaws kindly. Few beginner techniques deliver this much detail for this little skill.
Marbled Swirl Bowl
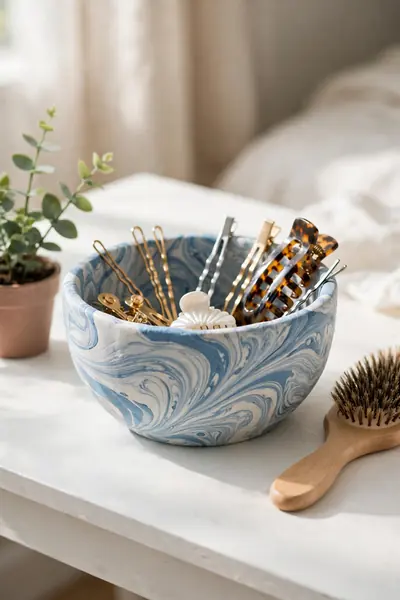
Quick Tip:
Twist two clay ropes together, fold them once, and roll the sheet out right away. Every extra fold blurs the veins, and overworked marble turns a dull gray. Stop while the swirls still look bold and separate, even if the pattern feels almost too strong.
White clay plus one color is the safest pairing; dusty blue, sage, and soft terracotta all swirl cleanly without going muddy. Shape the sheet gently so the veins stretch instead of tearing, then seal with a gloss coat once dry. Gloss deepens the color veins, and the bowl suddenly reads like polished stone.
Scalloped Edge Bowl
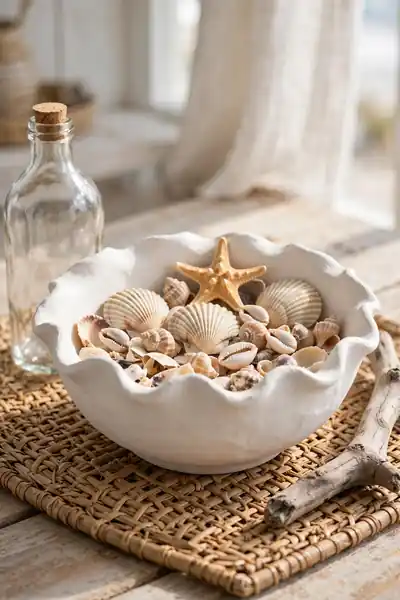
Before: A plain straight rim leaves the bowl looking flat and a little factory made. Nothing about the edge invites a second look, and the whole piece feels plainer than the work you put into it.
After: Even petal cuts turn that same rim into a soft flower shape. Light catches each curve, the edge becomes the design, and the bowl looks hand finished from across the room.
Cut the scallops while the bowl rests on its mold, using a small round cutter or the rim of a spice jar as your guide. Eight to ten arcs keep the flower balanced, and a wet fingertip smooths each petal in seconds. Dry it on the mold longer, so the petals hold their lift.
Tiny Trinket Bowls
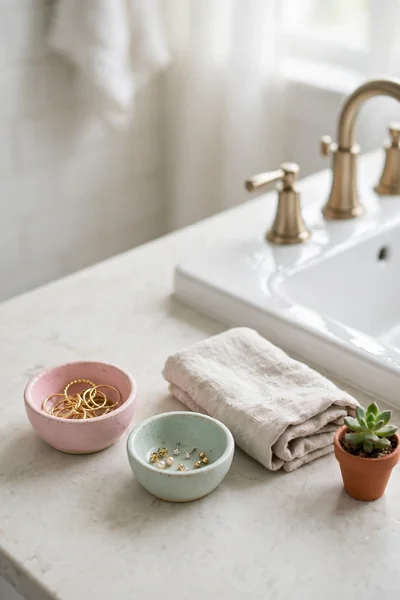
- Divide the clay into two plum sized balls, one for each bowl, so the pair matches in thickness and weight.
- Pinch each ball into a tiny bowl, turning slowly and keeping the rim as even as your fingers allow.
- Rest each bowl upside down on the table and press once, very gently, to level the rim without flattening the shape.
- Dry the pair for a full day; small bowls dry faster than large ones, but the bases still need the whole day.
- Sand the rims, paint the insides gold or blush, and seal both bowls once the paint is completely dry.
A matched pair solves the nightly scatter: rings land in one bowl, studs and earrings in the other, and nothing rolls toward the sink or the floor. Together they take less clay than one cereal bowl, so this is also the kindest project here for using up leftover clay scraps.
Entryway Catchall Bowl
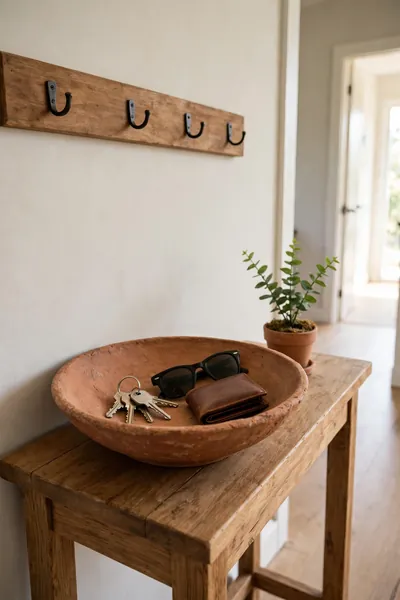
| What matters | Shallow and Wide | Deep and Narrow |
|---|---|---|
| Keys at a glance | Seen in one look, no digging | Hidden at the bottom, easy to forget |
| Space it takes | Needs a wider console or shelf | Fits the narrowest hall table |
| Tipping risk | Low, weight spreads across the base | Higher when keys pile on one side |
| Best for | Busy family doors with daily clutter | Single key and mail spot in small flats |
Size is the honest secret here: a catchall works only when it is wider than the handful of things you drop at the door. Measure your console first, then shape the bowl two inches wider than your keys laid flat. A slightly thicker base keeps it steady under daily tossing.
Nesting Bowl Set
Do:
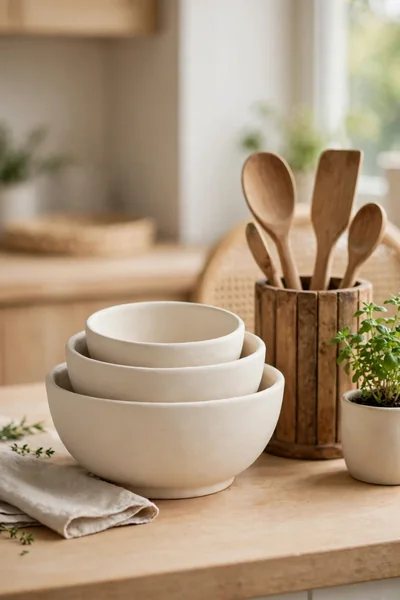
- Roll one single sheet for all three bowls, so every wall shares the same thickness and drying speed.
- Cut three circles in clear graduated sizes, using three kitchen bowls as both guides and molds.
- Paint the set in one shared palette, deepest color in the largest bowl, lightest in the smallest.
- Stack the bowls only after sealing, with a small felt pad between them to protect the rims.
Don’t:
- Drying the set stacked together traps moisture and warps the rims out of round.
- Skipping size gaps that are too small leaves bowls that jam instead of nesting smoothly.
- Forcing a tight bowl into its partner cracks rims; sand the edge instead until it slides in.
- Leaving the insides unsealed lets dust settle into the clay where a cloth cannot reach.
One afternoon builds the whole set, because the three bowls share one sheet, one paint session, and one drying shelf. Tied in a stack with ribbon, they make the most giftable project in this list. On open shelves they also earn their space, holding fruit, cotton balls, or nothing at all beautifully.
Rustic Wavy Rim Bowl
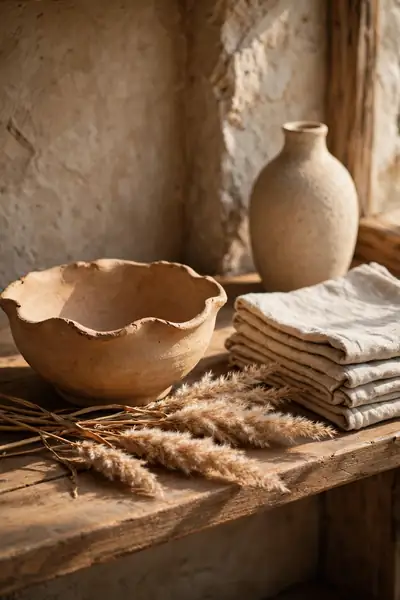
Cost: Nothing extra, the same clay does it
Time: 20 minutes of shaping
Skill Level: Beginner, no mold needed
Best For: Shelves, mantels, and rustic tables
Waves form at the rim while the bowl is still soft: pinch the edge upward at uneven intervals as you turn, letting some spots rise and others stay low. Keep each wave gentle and rounded. Sharp, deep dips concentrate stress as the clay dries, and those are the points where charm turns into rim cracks.
Painted Ombre Bowl
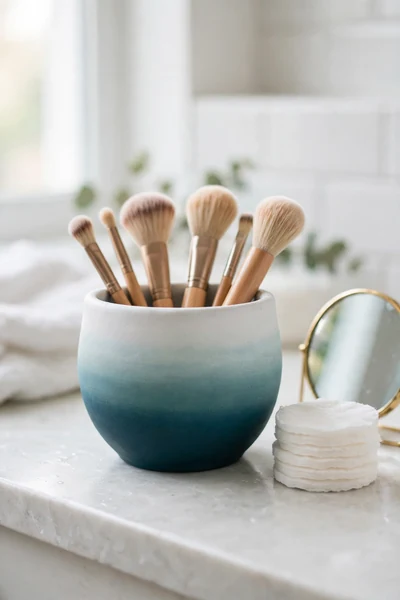
Color that melts from dark to light makes a plain bowl look painted by an artist. Mix three shades: your full color, that color halved with white, and mostly white with a hint of color. Paint the darkest band around the base, work upward while the edges are wet.
Blend each border with a dry brush dragged across it, so no hard line survives. Dark outside with a pale inside suits bathrooms and dressers best, because the light interior shows contents clearly. Let each coat dry before the next, seal with a satin coat, and the gradient stays smooth.
Footed Pedestal Bowl
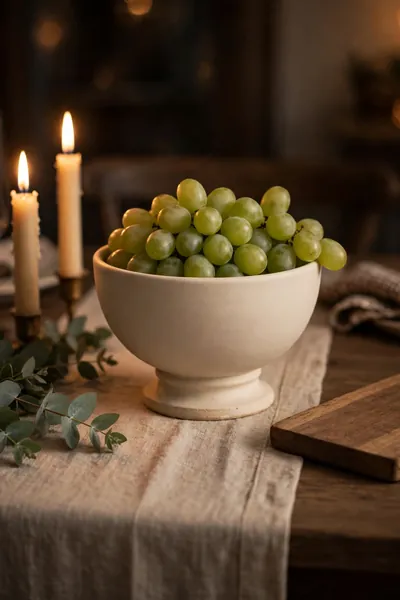
- Roll a thick clay rope, cut it to length, and join the ends into a neat ring the width of your bowl base.
- Scratch cross lines on both joining surfaces, add a little slip, then press the bowl onto the ring while both are still damp.
- Blend the seam smooth inside and out with a wet fingertip, so the join reads as one solid piece.
- Stand the bowl on the table and check for wobble before drying; a tiny shaved sliver off the ring fixes a lean.
- Dry the piece upside down for the first day, so the ring and bowl share the weight evenly.
Height changes everything on a table: the raised bowl becomes the piece eyes land on first, even when it holds grapes or candy. I have seen this work well in many cases where a flat bowl looked lost among taller candles and vases. The pedestal gives a ten dollar project a serving piece presence.
Heart Shaped Bowl
Quick Tip:
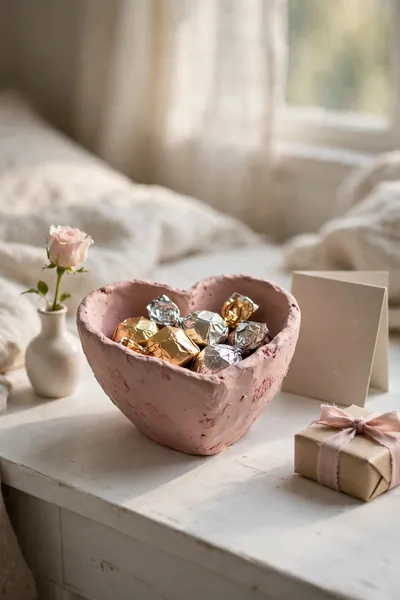
Form the heart while the shaped bowl still rests on its mold: press the rim inward at one point to make the cleft, then ease the opposite side out into a soft point. Rush this and the cleft tears, because the clay there is already stretched thin.
The pointed end dries faster than the round end, so drape loose plastic over the point for the first day while the rest stays open. Paint it dusty pink, classic red, or white with a gold rim, and it works far beyond February. Rings, wrapped sweets, and love notes all look better in a heart.
Bubble Textured Bowl
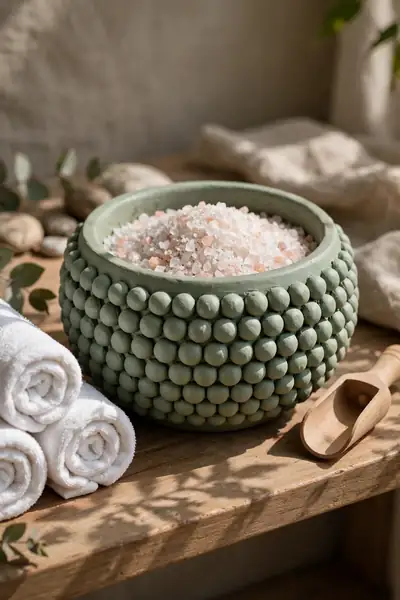
Before: A smooth plain wall gives the eye nothing to hold onto. The bowl does its job, but it could have come from any factory shelf, and guests walk right past it.
After: Rows of small clay bubbles cover the wall, and every bump catches a tiny shadow. The surface begs to be touched, and the bowl turns into the piece people pick up and ask about.
Press pea sized clay balls onto the wall in rings, starting at the base and working upward, blending each one at its edges. Keep the inside wall smooth, so the bowl still wipes clean and holds small items neatly. One coat of matte paint is enough here; the texture does the decorating, not the color.
Two Tone Dipped Bowl
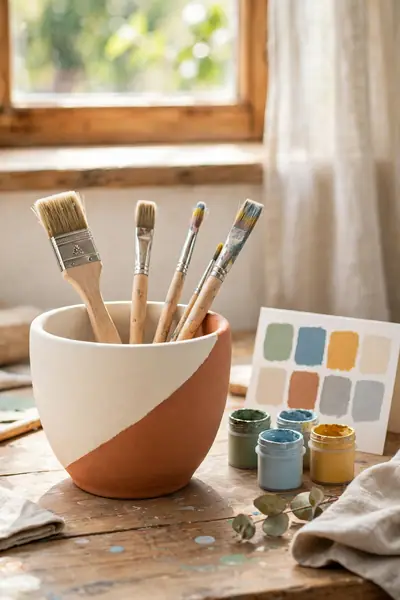
- Paint the whole dry bowl in your lighter color first, two thin coats, and let it dry completely.
- Stretch a wide rubber band or a ring of painter tape around the bowl where the color change should sit.
- Tilt the bowl slightly as you paint the second color below the line, if you want the modern slanted dip.
- Peel the tape away while the second coat is still slightly wet, so the edge stays sharp instead of tearing.
- Seal the whole bowl once dry, inside and out, so both colors wear at the same rate.
Safe pairings carry this design: white over terracotta, cream over sage, charcoal under soft white. High contrast pairs look modern, while close tones look calm and coastal. I have noticed the slanted dip flatters plain bowls most, because the diagonal line adds movement to a shape that otherwise sits very still and quiet.
Watermelon Painted Bowl
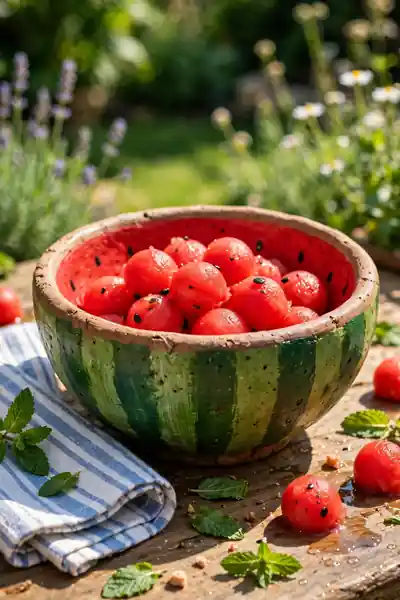
| Detail | Classic Watermelon | Soft Pink Version |
|---|---|---|
| Colors used | Deep red, dark green, black | Blush pink, pale green, brown |
| Painting time | About 30 minutes with seed dots | About 20 minutes, no seeds needed |
| Best setting | Summer parties and kids tables | Nurseries, showers, and soft kitchens |
| Skill level | Beginner with a steady hand | Beginner, most forgiving option |
Paint the inside first and the seeds last: a brush handle dipped in black paint stamps seed dots in seconds. Two greens make the rind believable, a dark stripe laid over a lighter base. Seal the bowl, then save it for dry party snacks, wrapped candy, or fruit that still sits in its skin.
Berry Bowl With Holes
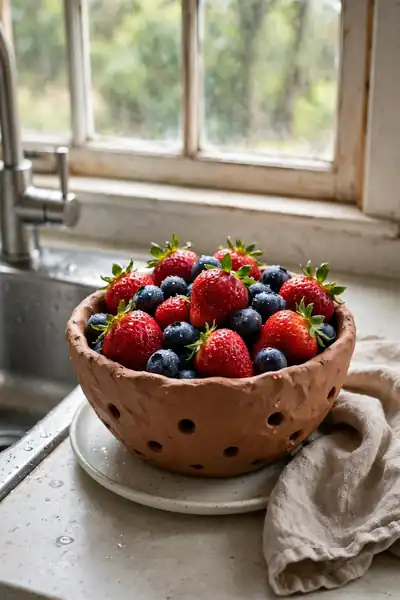
Do:
- Poke the holes after the bowl firms up on its mold, twisting a wooden skewer from the inside out.
- Keep holes near pea width and a finger apart, so berries stay in while water runs free.
- Sand every hole edge after drying, because tiny clay burrs catch on soft fruit skins.
- Rinse berries quickly, then dry the bowl at once and store it open, never wrapped in plastic.
Don’t:
- Poking holes in wet, soft clay drags the wall and warps the whole bowl out of shape.
- Oversized holes let blueberries escape and weaken the base where the bowl needs strength.
- Soaking the bowl in the sink ruins even a sealed finish; water belongs in quick passes only.
- Skipping a plate underneath leaves drip rings on wooden counters and shelves.
Strawberry season is when this bowl earns its keep on the counter, pretty enough to leave out between uses. Keep it palm to plate sized; a giant berry bowl grows heavy and awkward to lift with wet hands. Mine lives by the sink all summer, then holds garlic bulbs through the winter.
Mistakes That Ruin Bowls
Biggest Culprit: Uneven wall thickness
First Warning Sign: A hairline crack at the rim
Best Fix Window: While the clay is leather hard
Cheapest Prevention: Slow drying under loose plastic
Most bowl failures trace back to one of three causes: a thin spot, a fast dry, or a rim handled while soft. Small cracks are not the end of a piece. Press slip into the line, smooth it level, and dry the bowl slowly again. A crack repaired this way often vanishes under paint.
Frequently Asked Questions
1. Can I serve food in a handmade clay bowl?
Only dry foods, and even then with care. Air dry clay is not food safe, and sealer does not change that, so keep bowls for dry snacks in wrappers, fruit in its skin, or pure decor. Never use one for soup, salad, or anything hot or wet.
2. How long does a clay bowl take to dry?
A thin walled bowl needs about 24 hours, while thicker or larger bowls need 48 to 72 hours. Turn the bowl over halfway through so the base dries too. It is ready to sand and paint when the color looks even and the surface feels room temperature, not cool.
3. Can I wash my finished bowl?
Not in the sink. Wipe it with a damp cloth and dry it right away. A well sealed berry bowl can handle one quick rinse, but soaking softens the clay under any finish and shortens the life of the piece.
4. Which sealer makes a bowl last the longest?
A clear brush on sealer in two or three thin coats outlasts a single heavy coat every time. Let each coat dry fully before the next, and cover the rim and base fully, because those edges take the most daily wear.
5. My bowl cracked while drying. Can I still save it?
Usually, yes. Rub slip into the crack, press in a little fresh clay, smooth it level, and dry the bowl slowly under loose plastic this time. Only wide cracks across the base are worth restarting, and even those teach you the thickness lesson for free.
CONCLUSION
A handmade bowl will not fix a whole room, but I have seen how one small finished piece changes the way a corner feels and gets used. Start with whichever design you kept coming back to, even if it is the plain little pinch bowl. Shape it slowly, let it dry without rushing, and paint it in colors your home already loves. When your air dry clay bowl is sitting by the door or the sink doing its quiet job, save this post on Pinterest for your next free weekend, try a second design, and share it with a friend who crafts.