How to Make an Air Dry Clay Soap Dish That Drains Well
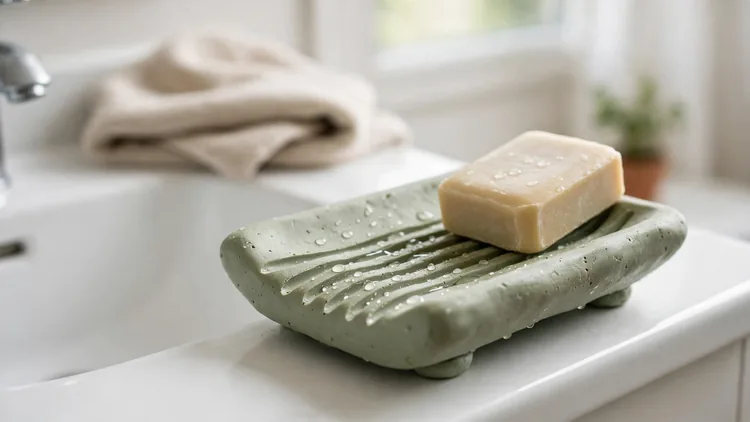
That sad, soft bar melting into its own puddle is not your soap’s fault. It is the dish underneath it. A handmade air dry clay soap dish solves the problem properly when its floor slopes, its ridges lift the bar, and air can move underneath. Build those three things in, and the same bar suddenly lasts weeks longer.
This guide walks you through the whole build in plain order: sizing the dish to your bar, shaping the slope and drainage, testing with real water before the clay hardens, and sealing it so daily use does not ruin it. I’ve noticed most failed dishes skip the water test, and it takes five minutes.
Why Most Soap Dishes Turn Your Soap to Mush

A bar of soap left sitting in water turns soft within days, its edges dissolving into a gummy layer that smears across the sink. The puddle underneath is the problem. It shortens the life of every bar and leaves a slippery ring that needs wiping.
Air dry clay suffers in that same puddle, because even a sealed surface weakens when water pools against it for hours. A well drained air dry clay soap dish protects both at once. Raised ridges and a gentle slope keep the bar dry between uses, so the soap lasts longer and the dish stays firm.
What You Need: Supplies and Smart Swaps
What You Need:
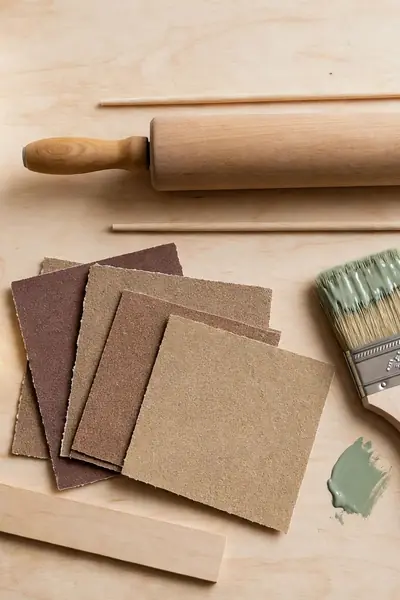
- One 500 gram block of air dry clay
- Rolling pin or a smooth glass bottle
- Craft knife or an old butter knife
- Small bowl of water and a sponge
- Ruler and a pencil
- Waterproof sealer and a soft brush
Most of this list is probably in your kitchen or craft drawer already. A standard 500 gram block of clay makes three full dishes with some left over, so each finished dish carries well under two dollars of clay, and leftover sealer from any earlier project works fine here.
Also View: 22 Beautiful Air Dry Clay Coasters to Craft at Home
Pick a Size and Shape That Fit Your Bar

Quick Tip: Trace your biggest bar of soap on paper and add half an inch on every side. Cut the paper out and shape your slab right on top of it. The bar later fits perfectly, with room to lift it out using two fingers.
Most standard soap bars measure about four inches long and two and a half wide, so an inner floor near four and a half by three and a quarter inches suits nearly all of them. Roll the slab a quarter inch thick. Oval shapes forgive wobbly cutting, while rectangles look sharper beside modern taps.
Roll the Base and Build the Rim
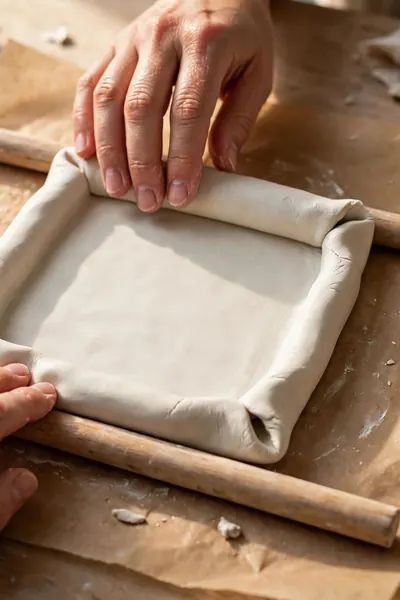
Common Mistake: Rolling the slab freehand, then gluing on a separate thin strip for the rim. The slab ends up uneven, and that added strip almost always cracks along the join as it dries.
The Fix: Roll between two guide sticks so the thickness stays even, then fold the slab’s own edges upward. One single piece has no join to split.
Aim for a rim about half an inch high, tall enough to stop a wet bar sliding off but low enough for fingers to lift it out. Pinch each corner gently, then run a wet fingertip along every fold until the line disappears and the wall feels firm.
Slope the Floor So Water Runs Off

Water always runs downhill, and a smart dish uses that fact. A floor that looks perfectly flat can still hold a puddle under the bar for hours. Tilt the piece by an amount while it sets, and every drop travels to one low edge instead of sitting under your soap.
- Shape the dish on a small flat board you can move without touching the clay.
- Slide a pencil under one short end of the board, lifting that end by about a quarter inch.
- Press the floor of the dish once, gently, so it follows the tilt of the board.
- Leave the pencil in place for the first full day of drying, so the slope hardens into the clay.
- Check the tilt with a marble or a spoon of water. It should roll or run slowly to the low end.
Cut Ridges or Holes That Lift the Bar Dry

Before: The bar rests flat on a smooth floor. A thin film of water seals itself underneath, and by the next morning the bottom of the bar has turned to soft jelly that washes away twice as fast.
After: Carved ridges or open holes lift the bar on narrow rails. Water slips into the grooves and drains toward the low end, while air reaches the underside, so the bar dries between uses instead of soaking.
For a first dish, ridges are the kinder choice. They are carved while the clay is soft, about half an inch apart and an eighth of an inch deep, and they keep the floor strong. Holes look neat but must be cut before drying too, since drilling dry clay invites cracks around every edge.
Add Little Feet for Airflow Underneath

Do This:
- Roll four small clay balls and flatten each one into an even disc
- Score the underside corners and the feet, then join them with a dab of slip
- Attach the feet while the dish is still soft, never after drying
- Set the dish down once to check that all four feet touch evenly
Avoid This:
- One single pedestal in the middle, which makes the dish rock
- Feet of uneven height that leave the bar sliding to one corner
- Tall feet that turn a neat dish into a wobbly stand
Feet about a quarter inch tall are enough. The dish still looks low and neat on the counter, but air now moves under it all day, the counter beneath stays dry instead of ringed with soap scum, and the base of the dish dries as fully as the top.
Test the Drainage Before You Commit

Quick Facts: When: Leather hard stage | Time: 5 minutes | You Need: The real bar and a cup of water | Pass Mark: No pool left after one minute
Wet the bar, set it in the dish, and pour half a cup of water over the top, the way a shower splashes it. Watch. Water should travel along the grooves and leave at the low end within seconds. Wherever a pool stays, carve that groove deeper or steepen the slope before the clay hardens.
Dry It Slowly So It Stays Flat

Clay dries unevenly, and uneven drying is what bends a dish into a rocking one. The edges give up their moisture first while the middle stays damp, so the piece pulls out of shape as it hardens. Covered drying keeps every part at the same pace.
Rest the dish on a rack so air reaches underneath, cover it loosely with plastic for the first day, and turn it over daily. A quarter inch slab usually needs two to three days. Then press it against your cheek. Clay at room temperature is dry. A cool feel means moisture still hides inside.
Sand and Smooth Every Edge
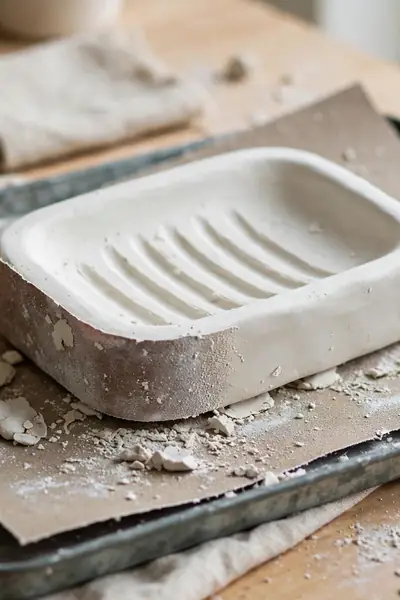
Dry clay keeps every fingerprint, knife line, and rough edge you left behind, and your fingertips will find all of them at once. Ten patient minutes of sanding is what turns a homemade piece into one that feels bought. Work over a tray, and wear a dust mask.
- Start with 120 grit sandpaper and level any high spots, bumps, and sharp corners.
- Move to 220 grit and work over the whole surface, including inside the grooves.
- Blow the dust off, then wipe every part with a barely damp sponge.
- Run a fingertip across the rim and floor. Any scratchy patch gets another pass.
- Leave the dish for an hour so the sponge moisture dries before painting.
Paint and Decorate Your Dish

Quick Tip: Test every color on the underside of the dish first. Acrylic dries a shade darker than it looks in the pot, and the hidden test patch tells you the true color before the top gets coated.
Acrylic paint suits this clay best, brushed on in two thin coats rather than one thick one, with an hour of drying between them. Bare clay drinks the first coat unevenly, so expect the second to do the real work. Speckles flicked from a toothbrush, stamped leaves, and a contrasting rim all survive sealing well.
Seal It Like You Mean It
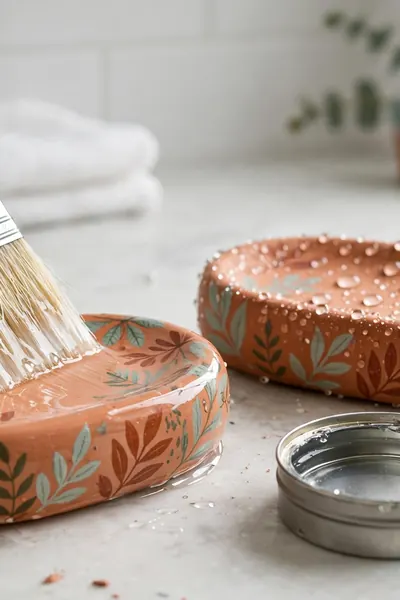
Common Mistake: One quick coat of basic craft varnish, then straight into daily use. Ordinary varnish and glue based sealers are only water resistant. Under daily soap and water they turn cloudy, feel tacky, and peel away in soft flakes within weeks.
The Fix: Choose a sealer made for real water contact. Water based polyurethane in three thin coats works well, and a thin layer of UV resin gives the hardest shell of all.
Let the last coat cure for the time on the tin, commonly two to three days, before daily use. Honesty helps here. Even a well sealed dish lives beside the shower spray, not under it, and a quick wipe keeps it fresh. When water stops beading on the surface, one fresh coat restores it.
Also Explore: How to Seal Air Dry Clay for a Waterproof Pro Finish
Mistakes That Soak, Crack, or Warp a Dish
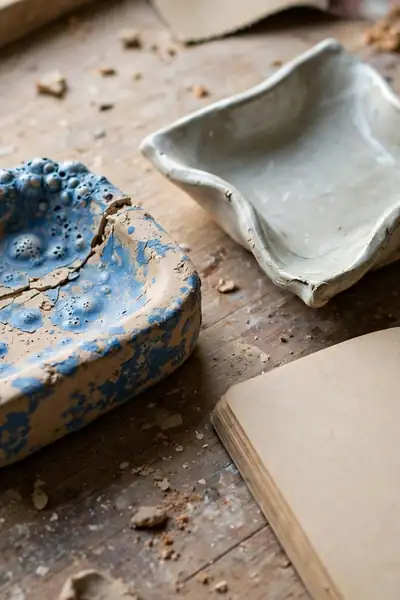
Most ruined dishes fail for the same reasons. The clay was painted while its center still held moisture, so the trapped damp pushed the paint up in bubbles. Or the floor was left flat with a low rim, and the bar sat in soup from the first week of use.
Heat causes quieter damage. A dish dried beside a sunny window or a warm vent hardens outside while the inside stays wet, and that uneven pull opens hairline cracks days later. Gentle air, full drying time, and real drainage prevent nearly every failure before it starts.
Fixes for Wobble, Puddles, and Peeling Sealer

A disappointing dish is rarely a lost cause. Wobble, pooling water, and flaking sealer all have calm repairs that take minutes, not a full remake. Work through the fixes below in order, testing after each one, and stop as soon as the dish behaves the way it should.
- For wobble, set the dish on sandpaper and slide it gently until the longest foot levels with the rest.
- For pooling, scrub the grooves with an old toothbrush, then deepen any shallow spot before resealing the lines.
- For peeling sealer, sand the flaky area smooth, wipe away every trace of dust, and recoat the whole top.
- For a tacky surface, give the dish three more days in an airy room. Most stickiness is simply an unfinished cure.
Care and Cleaning That Keep It Fresh

Do This:
- Rinse the dish once a week and brush the grooves with an old toothbrush
- Lift it and dry the underside whenever you clean the sink
- Rest the dish for a full day now and then if it works daily
- Recoat it the moment water stops beading on the surface
Avoid This:
- Scrubbing with steel wool or gritty powders that strip the sealer
- Leaving the dish soaking in a sink of water
- Spraying harsh bleach cleaners directly onto the surface
- Parking it inside the direct shower stream all day
Treated kindly, a handmade dish stays in service for a long time and makes a thoughtful small gift for a guest bathroom. Mildew feeds on old soap scum, never on the clay itself, so the weekly rinse is what protects it. Rest the dish for a day now and then if it works hard daily.
Frequently Asked Questions
1. How long should the dish dry before I paint it?
A quarter inch slab needs two to three full days in open air. Press it against your cheek before painting. If it feels cool, moisture is still inside, and paint laid over damp clay will bubble later.
2. Can I keep the dish inside the shower?
Keep it on a shelf beside the spray rather than under the stream. Even a strong sealer wears faster under constant hot water, and the bar lasts longer when it dries fully between showers.
3. Which sealer lasts the longest on a soap dish?
A thin layer of UV resin gives the hardest, most water resistant shell. Water based polyurethane in three thin coats is a close second and is easier to brush on evenly.
4. Why does my soap still turn soft in the dish?
The grooves are usually too shallow or the slope too gentle, so water still pools under the bar. Deepen the grooves slightly, steepen the tilt a little, and test again with a wet bar before resealing.
5. Can I make a dish without drainage holes?
Yes. Ridges with a sloped floor drain perfectly well and keep the base stronger than holes do. The only design that fails is a completely flat floor, because the water has nowhere to go.
6. How do I stop the finished dish from rocking?
Set it on a sheet of sandpaper and slide it gently back and forth. The longest foot wears down first, and within a minute all four feet usually touch the counter evenly.
Conclusion
A dry bar is a longer lasting bar, and now you know how to give it one. Slope the floor, carve honest ridges, lift the dish on little feet, seal it with something made for water, and your air dry clay soap dish will do its job daily. Make the first for your own sink this week, then a second as a gift. Save this post on Pinterest so the sizes, drying times, and sealer notes stay beside you, and share it with a friend whose soap keeps melting. I’ve seen how making this one change can completely shift the result, and drainage is exactly that change.