20 Adorable Salt Dough Ornaments for a Cozy Christmas
Store-bought ornaments are pretty, but they never feel quite like yours. If you want a tree that tells your family’s story this Christmas, salt dough ornaments are the answer. They cost almost nothing and turn an ordinary afternoon into a memory.
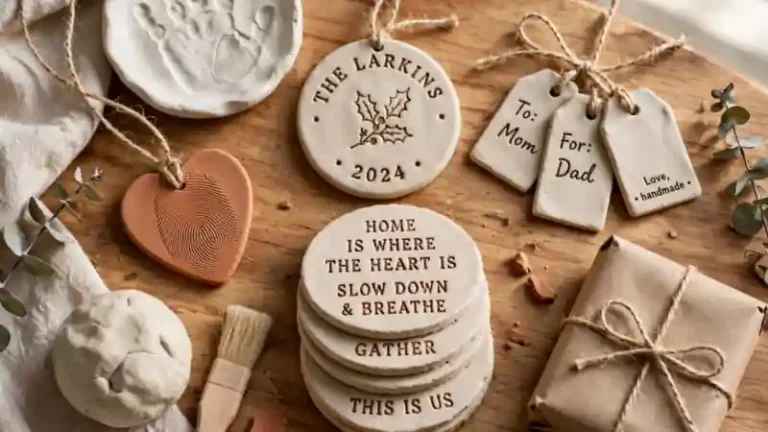
In my experience, the magic is in how personal they become. A toddler’s handprint, a pet’s paw, a name stamped carefully by little fingers. These are the decorations everyone reaches for first, year after year.
The 3-Ingredient Dough Every Ornament Starts With

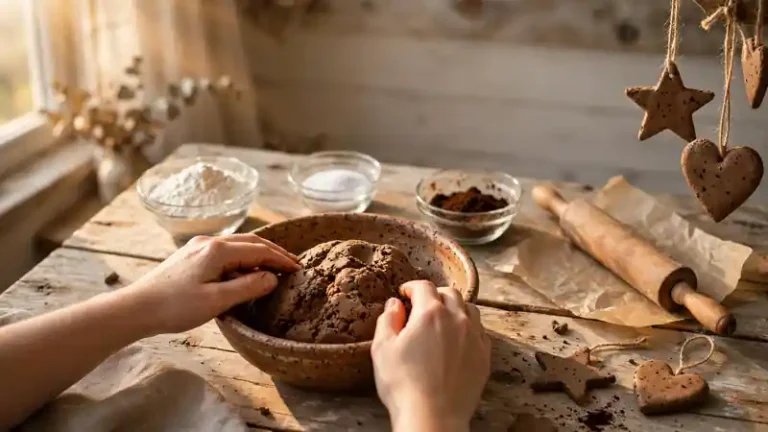
Every ornament in this guide starts from the same humble mix of two cups all-purpose flour, one cup fine salt, and about three-quarters cup water. Stir the dry ingredients, add water a little at a time, then knead five minutes until smooth. This base makes them wonderfully affordable.
Roll the dough a quarter inch thick on a floured surface; thinner pieces crack, thicker ones take forever to dry. Bake at 200 degrees Fahrenheit for two to three hours, or air-dry for one to two days, flipping once. In my experience, fully cooled pieces paint best.
Classic Cinnamon-Dusted Star Ornaments

Stars are the easiest shape to start with, which makes them perfect when little hands want to help. A light dusting of cinnamon mixed into the dough gives each star a warm, rustic color and a gentle holiday scent that fills the tree.
- Mix one teaspoon of ground cinnamon into your dough before rolling for even color.
- Roll the dough a quarter inch thick and cut stars with a cookie cutter, poking a hanging hole near one point with a straw.
- Bake at 200 degrees Fahrenheit for two hours, then thread twine through the hole once cool.
- Rub a pinch of extra cinnamon into the surface for a deeper rustic finish.
Also View:22 Personal Air Dry Clay Gift Ideas From the Heart
Rustic Twine-Hung Heart Ornaments

Quick Tip: Press the heart edges gently with your fingertip after cutting to round them; sharp edges chip more easily in the oven. If a crack appears while drying, rub a dab of fresh dough into it and smooth it over before baking.
Hearts suit a farmhouse tree better than almost any other shape. Cut them slightly thick, bake until firm, then loop natural twine through the hole and tie a small bow. Hang them among pinecones and wooden beads for a collected, cozy look that feels straight from a country cottage.
Mini Christmas Tree Ornaments

Common Mistake: Most people paint the tree green before the dough is fully dry, and the trapped moisture makes the paint bubble and peel within days. Others skip the hanging hole, then try to glue string on afterward, which never holds.
The Fix: Bake the trees until they feel rock hard and sound hollow when tapped, then let them cool overnight. Poke the hanging hole with a straw before baking, while the dough is still soft.
Tiny trees look best in clusters of three or five on the branch. Paint them deep green, dot on garlands with a toothpick, and add a star of gold paint at the top. They fill bare spots on the tree beautifully and take almost no time.
Delicate Snowflake Ornaments

What You Need:
- White acrylic paint: gives the crisp snowy base that makes details pop.
- Fine detail brush: lets you paint thin, clean lines for the flake arms.
- Snowflake cookie cutter or paper template: keeps the six-arm shape symmetrical.
- Clear glitter glue: adds a frosty shimmer along the edges.
- Ribbon loop: white satin ribbon suits the icy look better than twine.
Snowflakes earn their place near the top of the tree where light catches them. Keep the design simple: a white base, silver-blue arms, and glitter only on the tips. Too much detail turns muddy from a few feet away, so restraint pays off. Less truly is more here.
Handprint Keepsake Ornaments

Before: Store-bought ornaments all look the same year after year, and none of them capture how small those hands once were. Grandparents receive another generic gift, and the moment passes unrecorded.
After: A tiny handprint pressed into dough, painted white and dated on the back, becomes the ornament everyone reaches for first. It turns a simple craft afternoon into a keepsake that grandparents treasure for decades.
Press the hand firmly but gently into a quarter-inch slab, then trim around it with a circle cutter. Write the name and year on the back with a paint pen before baking. These make heartfelt Christmas gifts that cost almost nothing. Make one each year and watch the prints grow.
Also Explore:25 Playful Air Dry Clay Projects Kids Will Truly Love
Paw Print Pet Ornaments

Do This:
- Press the paw gently into the dough right after rolling, while it is still soft and pliable.
- Support the leg from below so the print lands flat instead of smudging sideways.
- Write the pet’s name and year on the back with a paint pen after baking.
Avoid This:
- Never force a nervous pet’s paw down; take a treat break and try again later.
- Do not roll the dough too thin, or the print will press straight through.
- Avoid washing the paw with soap right before printing; plain water keeps the dough safe.
Pet ornaments become instant favorites on any tree. Paint the finished piece in your pet’s fur colors and add a tiny red collar dot for charm. Hang it at eye level where guests notice it, and expect the stories to start. It is a small tribute with big heart.
Fingerprint Reindeer Ornaments

Time Needed: 20 minutes plus drying | Difficulty: Easy | Cost: Pennies per ornament
Best For: Toddlers and preschoolers | Pro Tip: Use brown paint for the face, red for the nose
Reindeer made from tiny fingerprints steal the show on a family tree. Each print becomes a face with painted antlers, dot eyes, and a bright red nose. Kids love spotting their own reindeer among the branches years later. It is the simplest idea here, and often the most loved.
Lace-Pressed Vintage Ornaments
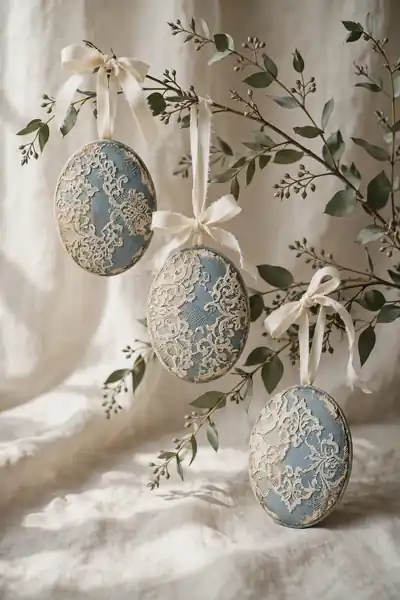
Lace-pressed ornaments look like something from an antique shop, yet they take minutes. Lay a piece of lace over your rolled dough and press it gently with the rolling pin so the pattern sinks in. Peel the lace away to reveal the delicate texture.
Paint the raised pattern cream and the background soft sage or dusty blue for contrast. A thin coat of clear sealer protects the texture for years. These suit a vintage-themed tree better than any store ornament could. I’ve noticed the bolder the lace pattern, the better it survives the oven.
Stamped Name Ornaments
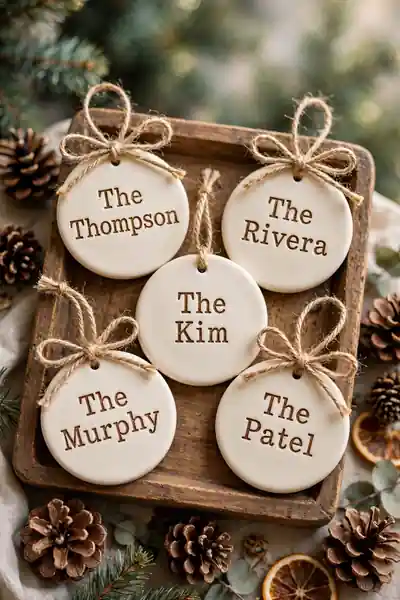
Personalized ornaments turn a tree into a family story, and letter stamps make it easy. Press each letter firmly and evenly so names stay readable after baking. These double as gift tags that guests take home. No artistic skill needed, just patience.
- Roll the dough a quarter inch thick and cut circles or ovals with a large cutter.
- Dip alphabet stamps lightly in flour, then press each letter straight down without rocking.
- Poke a hanging hole at the top, bake at 200 degrees Fahrenheit for two hours, and cool fully.
- Rub brown paint into the stamped letters and wipe the surface clean so only the letters hold color.
Gingerbread Man Ornaments

Quick Tip: Bake gingerbread men a little longer than flat shapes so their arms and legs harden fully. If a limb feels soft after cooling, return the tray to the oven for thirty more minutes.
These little figures bring instant nostalgia to the tree. Paint them warm brown, add white icing-style dots and squiggles with a fine brush, and tie a gingham ribbon at the top. Kids will claim their own gingerbread person within seconds. Make extras; they never survive the season unclaimed.
Glitter-Dipped Bauble Ornaments

Common Mistake: People sprinkle glitter onto wet glue in thick piles, which sheds all over the tree for weeks. Others glitter the whole ornament, losing the pretty contrast between sparkle and matte.
The Fix: Brush a thin, even layer of craft glue on just the lower half, then dip into fine glitter and tap off the excess. Seal the glittered half with clear spray sealer once dry so nothing sheds.
Half-dipped baubles catch light beautifully without overwhelming the tree. Choose gold or champagne glitter over a cream base for an elegant look, or bright red over white for playful. Hang them where fairy lights hit for maximum shimmer. They photograph beautifully for holiday cards too.
Gold-Dipped Elegant Ornaments

What You Need:
- Metallic gold acrylic paint: gives a smooth, rich shine without real gold leaf cost.
- Small flat brush: lays the paint on evenly along the dipped edge.
- Painter’s tape: masks a crisp straight line between gold and base color.
- Clear gloss sealer: deepens the metallic shine and protects it from chips.
Gold-dipped ornaments bring quiet luxury to the tree. Dip just the bottom third so most of the ornament stays matte cream or soft white. They pair beautifully with plain greenery and candlelight, and they look far more expensive than they are. A whole tree of these needs nothing else.
Whitewashed Farmhouse Ornaments

Before: Bright painted ornaments can look harsh against soft farmhouse decor, all glossy color with no texture. They clash with linen stockings and wooden bead garlands instead of blending in.
After: A dry-brushed white wash softens every color into a chalky, aged finish. The ornament suddenly belongs beside antique finds and looks like it has decorated trees for decades.
Whitewashing forgives almost any paint mistake underneath. Brush white paint on thinly, then wipe most of it away with a rag before it dries. The color beneath peeks through softly, giving that beloved worn farmhouse character. It is the easiest way to make bold colors tree-ready.
Buffalo Plaid Ornaments
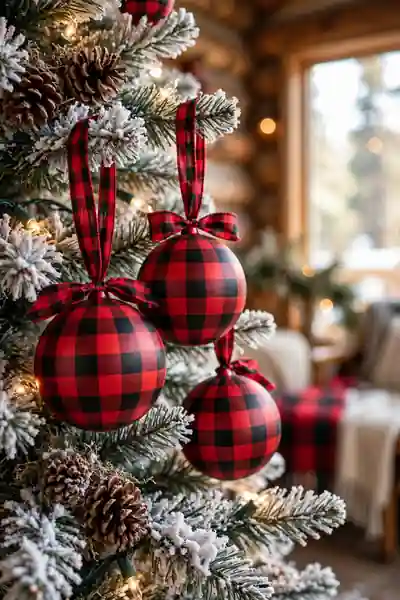
Do This:
- Paint the base deep red and let it dry fully before adding any lines.
- Use a flat brush for the wide stripes and a thin one for the fine lines.
- Keep the plaid squares even by marking light pencil guides first.
Avoid This:
- Do not rush the black over-stripes; wet red underneath will smear into pink.
- Avoid perfectly symmetrical plaid; slight unevenness looks more handwoven.
- Never skip the sealer, or the dark lines scuff the moment ornaments touch.
Buffalo plaid brings instant cabin coziness to the branches. The bold red and black pattern reads clearly even from across the room, which makes these great for large trees. Pair them with plain cream ornaments so the plaid stays the star. They are a Pinterest favorite every December.
Mini Wreath Ornaments

Time Needed: 30 minutes plus drying | Difficulty: Easy | Cost: Low
Best For: Front-door mini trees and garlands | Pro Tip: Twist two greens together for fullness
Tiny wreaths add a storybook touch wherever they hang. Shape the dough into a ring, press in painted leaf shapes, and tie a miniature bow at the top. They look adorable clustered on a kitchen garland or given as neighbor gifts. One batch makes plenty to share.
Angel Ornaments

Angels carry a special meaning on a Christmas tree, and dough gives them a soft, folk-art feel. Shape a simple triangle body, add two flattened wings on the sides, and press a small round head on top. A painted halo and gentle face complete the figure.
Paint robes in ivory or soft gold and keep faces minimal with just two dot eyes. These make touching gifts for someone celebrating a first Christmas in a new home. Hang them near the top where they seem to watch over everything. They never go out of style.
Jingle Bell Ornaments

Ornaments that actually jingle bring the tree to life for kids. A real tiny bell tied to a bell-shaped dough piece looks charming and sounds delightful. This is one of those ideas children ask to hang themselves. It takes minutes to make.
- Cut a bell shape with a cookie cutter and poke the hanging hole before baking.
- Bake at 200 degrees Fahrenheit for two hours until completely hard, then cool.
- Paint the bell cranberry red or classic gold and add a thin white trim line.
- Thread twine through the hole, tie a real jingle bell at the bottom, and hang.
Cozy Village House Ornaments
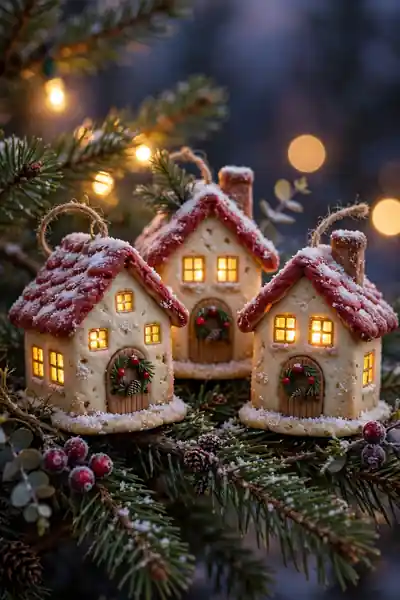
Quick Tip: Keep the house shape simple with a square body and triangle roof; tiny details get lost after baking. Score the door and windows lightly with a toothpick before the dough dries.
Little houses glow with charm on the tree, especially with snow-dusted roofs. Paint the walls warm cream, the roof cranberry, and add golden windows that look lit from within. Cluster three together and they become a tiny glowing village. Kids love deciding who lives in each one.
Clove-Studded Orange Spice Ornaments

Common Mistake: People press cloves in after baking, and they fall out within days. Others use ground spices in the dough, which weakens it and causes crumbling.
The Fix: Press whole cloves firmly into the soft dough before baking so they set in place as it hardens. Push each one in at least halfway for a hold that lasts for years.
These smell as good as they look, filling the room with warm spice every December. Arrange them in a bowl with dried orange slices and cinnamon sticks for a decoration that needs no tree. Guests always ask about the wonderful scent. It is the coziest idea in this whole guide.
Pinecone-Stamped Woodland Ornaments

What You Need:
- Real pinecones: small, fully opened ones give the clearest scale pattern.
- Rolling pin: presses the pinecone evenly without tearing the dough.
- Brown and cream acrylic paint: brings out the stamped texture beautifully.
- Jute twine: suits the woodland look better than shiny ribbon.
Woodland ornaments bring the forest indoors in the prettiest way. Roll a pinecone gently over the dough to stamp its scales, then bake and dry-brush with cream over brown. They pair perfectly with natural greenery and burlap ribbon. A whole woodland tree theme starts right here.
Mistakes That Ruin Salt Dough Ornaments
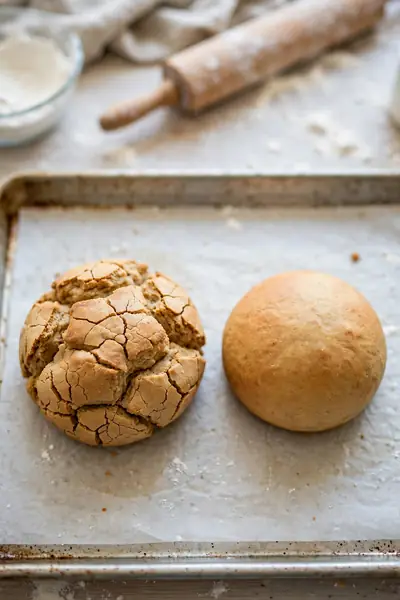
Before: Many beginners pull their ornaments from the oven too early, and the centers stay soft for weeks. Others roll the dough paper thin for delicate shapes, then watch every piece crack as it dries.
After: Patient drying and proper thickness give ornaments that survive years of hanging, packing, and rehanging. Each December they come out looking just as good as the year they were made.
The biggest mistakes all come from rushing. Give the dough its full drying time, keep pieces a quarter inch thick, and seal finished work against humidity. Slow and steady truly wins with this craft. Your future self, unpacking perfect ornaments next Christmas, will thank you.
Frequently Asked Questions
1. How long do these ornaments last?
Kept dry and sealed, they last for many years. I have ornaments from five Christmases ago that still look fresh. Store them in airtight containers with silica gel packets between seasons.
2. Why did my ornaments puff up in the oven?
Puffing usually means the oven was too hot. Bake at 200 degrees Fahrenheit and no higher. If a piece puffs, press it flat gently while still warm and let it finish drying.
3. Are these safe for kids to make?
Yes, the dough uses only flour, salt, and water, so it is safe for little hands. Supervise oven time and small parts like jingle bells. Toddlers love the kneading and stamping steps most.
4. How do I stop them from getting moldy?
Mold comes from trapped moisture, so dry pieces completely before painting. A coat of clear sealer on all sides blocks humidity. Never store them in damp basements or attics.
5. Can I leave them unpainted?
Absolutely. Natural baked dough has a lovely rustic color, especially with cinnamon mixed in. Add a clear matte sealer to protect the surface, and they look beautiful plain.
Conclusion
You now have 20 designs and every skill needed to make salt dough ornaments that look beautiful and last for years. The dough is simple, the steps are forgiving, and the results feel deeply personal.
Save this guide on Pinterest so it is ready when baking day comes. Try one design this weekend, then share this article with a friend who loves handmade Christmas magic. I’ve seen how making this one change can completely shift the result. Start rolling, and make this your coziest Christmas yet. Your tree will thank you.