23 Savvy Ways to Make Your Home Look Expensive Fast
Your home does not need a bigger budget. It needs better decisions, and most of them are free. Learning to make home look expensive is really about learning what expensive homes quietly do: they edit hard, repeat their colors, light rooms in warm layers, and give every object a reason to be there.
This guide gives you 23 of those decisions in working order, starting with the free fixes and moving room by room through light, curtains, art, rugs, mirrors, bedding, and even scent. Most take under an hour each. I’ve noticed guests never guess what a room cost. They only feel how calm it is, and calm is something you can build this weekend.
Why Expensive Homes Feel Different the Moment You Enter

Walk into a home that feels expensive and your shoulders drop within seconds, long before you can name one object in it. Nothing is shouting. The colors agree with each other, the surfaces hold a few things instead of many, and every object looks chosen rather than stored there by accident.
That feeling is design, not income. The tricks that make home look expensive have almost nothing to do with buying pricey furniture. They are about editing, repeating, and lighting what you already own. This guide walks through 23 of them in the order a stylist would work.
Start With the Free Fixes Before Spending Anything
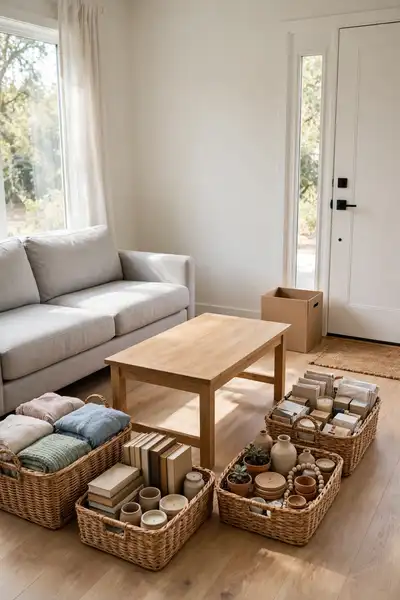
Every stylist I have watched starts a room the same way: by taking things away, not adding them. Editing costs nothing and changes more than most purchases, because a crowded room hides its own good furniture. Give yourself one hour and a few baskets before any money leaves your pocket.
- Clear every flat surface in one room to completely bare: tables, shelves, counters, and the mantel.
- Clean the empty surfaces properly. Dust free and polished already reads more expensive than decorated and dusty.
- Return only the pieces you genuinely love or use daily, one surface at a time.
- Group what comes back by job or by material, never as a random line of objects.
- Carry everything that did not return straight to a donation bag or another room, not back onto the surface.
Also View: 21 Effortless Ways to Style Your Couch With Pillows
Repeat One Calm Color Story in Every Room

Quick Tip: Build your palette from something you already own and love, like a rug or a painting. Pull its main color, its medium tone, and its darkest accent. Those three become the law for every cushion, throw, and vase you place from now on.
A rough guide designers lean on is sixty percent main color, thirty percent supporting tone, and ten percent accent. You do not need to measure it. Just repeat each of your three tones at least three times in a room, and the space starts agreeing with itself in a way guests feel immediately.
Layer Three Levels of Warm Light

Common Mistake: Lighting the whole room from one ceiling fixture fitted with cool white bulbs. That single flat light washes out every texture, turns warm colors gray, and makes even good furniture look like a showroom clearance corner.
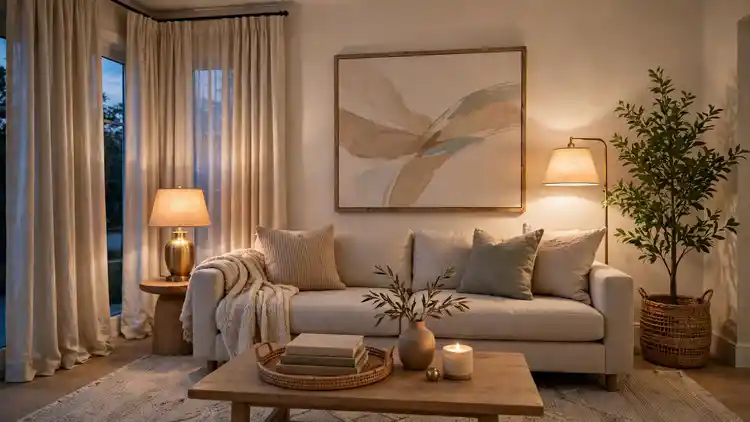
The Fix: Build three layers instead. Something soft overhead or on walls, a lamp where people actually sit and read, and one small glow at low level, like a candle or a picture light, all in warm bulbs.
Warm bulbs around 2700K are the ones that flatter wood, skin, and fabric. Put lamps at different heights so the light pools instead of glaring, and keep every bulb in a room the same warmth. Mixed bulb colors are a tiny detail the eye notices more than people expect.
Hang Curtains High and Let Them Kiss the Floor

What You Need:
- Curtain panels at least twice the window width in total, for full folds
- A rod that extends six to ten inches past the frame on both sides
- A tape measure and a pencil for marking the high line
- A level, so the rod reads straight from across the room
- A steamer or an iron, because creased panels undo everything
Mount the rod about two inches below the ceiling, or at least four to six inches above the window frame, and let it run six to ten inches wider than the frame on each side. Panels hung there stack mostly on the wall, so the window keeps its light and the wall gains height.
Choose One Oversized Piece of Wall Art
Before: Nine small frames wander across the wall at slightly different heights, none of them big enough to matter. The eye hops from frame to frame and reads the whole wall as busy and unsure of itself.
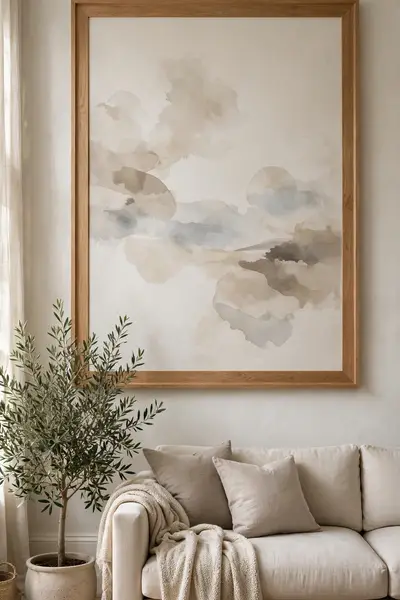
After: One large piece hangs centered above the sofa, its middle at about eye level, fifty seven inches from the floor. The wall suddenly looks planned, the sofa looks grounded, and the room has a focal point worth entering for.
Size is the whole trick. Aim for art roughly two thirds as wide as the furniture below it. Budgets survive this easily: a large thrifted frame with a printed poster, a stretched piece of fabric, or a simple painted canvas all carry the same visual weight as costly art.
Anchor the Room With a Rug That Is Big Enough

Do This:
- Size up until at least the front legs of every seat rest on the rug
- Leave a border of bare floor, roughly eight to eighteen inches, around the rug
- Tape the rug outline on the floor and live with it for a day first
- Choose a low flat weave where dining chairs or doors must move over it
Avoid This:
- A small rug floating under only the coffee table
- Pushing the rug against one wall to make it feel bigger
- A busy pattern doing the work that size should be doing
- Matching the rug exactly to the sofa color, which flattens both
Test the size on the floor with painter tape before spending anything. Living rooms usually need an eight by ten foot rug at minimum, and the tape outline tells the truth instantly. If the taped border makes the furniture grouping look calm and connected, that is your size, whatever the smaller price tag says.
Mix Textures Instead of Patterns

Quick Facts: The Mix: Smooth, rough, soft, and woven | Per Room: Four textures minimum | Cost: Mostly things you own | Pattern Allowance: One quiet pattern per room
Walk around one room and count what your hand would feel: something smooth, something rough, something soft, something woven. Four honest textures minimum is a workable target. Where a room feels flat, the missing thing is rarely another color. It is usually a texture the eye can almost touch.
Style Surfaces in Groups of Three
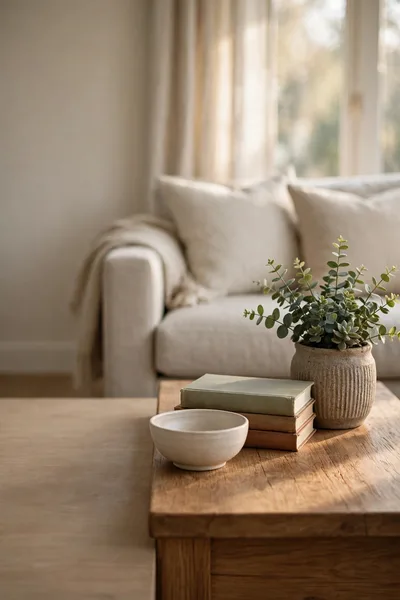
Groups of three work because the eye enjoys a triangle it does not have to think about. One tall piece, one medium, one low, placed close enough to read as a family. The same objects spread in a straight line across a shelf look like stock waiting to be sold.
Empty space is half of this trick. A styled group needs bare surface around it on every side, at least a hand’s width, or the grouping disappears into general clutter. Style one group per surface, then stop, even when the other end of the table looks tempting and bare.
Also Explore: 24 Sophisticated Coffee Table Decor Ideas to Copy Now
Corral Small Things on Trays
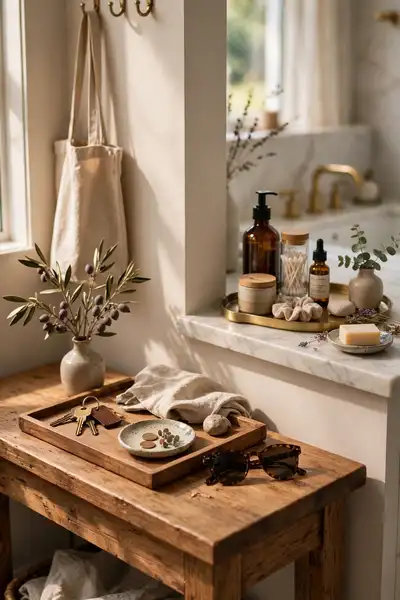
Loose small things are where tidy rooms go to look cheap. Keys, chargers, bottles, and remotes spread across a surface read as mess, but the exact same objects standing on one tray read as a styled arrangement. The tray draws a border the eye understands instantly.
- Pick the worst surface first: the entry console, the coffee table, or the bathroom counter.
- Choose a tray with a raised edge and a finish that already exists in the room, wood, metal, or stone.
- Gather only the daily items for that spot onto the tray, nothing that is merely passing through.
- Stand tall items at the back of the tray and small ones at the front, like a tiny shop display.
- Give every later arrival a rule: it lands on the tray or it does not live on that surface.
Swap Cabinet and Door Hardware for Real Metal
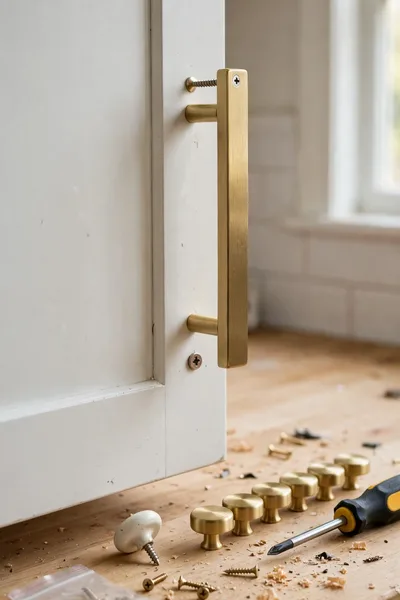
Quick Tip: Measure the distance between the screw holes on your current handles before buying anything, and take one old knob to the store with you. Pulls come in several standard spacings, and the wrong one turns a twenty minute job into a patching job.
One finish, carried through every room the eye can see in a single glance, is what makes hardware look planned. Matte black, brushed brass, and honest nickel all work. Count every knob and pull before ordering, add two spares, and expect the whole kitchen swap to take under an hour.
Double Your Light and Space With Mirrors

Common Mistake: Hanging a small mirror high on a wall where it reflects nothing but ceiling and the top of a door frame. A mirror shows whatever faces it, and a dull reflection makes the mirror itself look like clutter.
The Fix: Go large, and place the mirror opposite a window, a lamp, or the best looking corner of the room. Stand where guests stand, check the reflection first, and only then fix it to the wall.
An oversized mirror leaning on the floor against a wall works just as well and needs no holes at all, which renters appreciate. Keep the frame finish in the same family as your hardware and lamp metals. One generous mirror outperforms three small ones every single time.
Give Furniture Breathing Room and a Clear Job

What You Need:
- A roll of painter tape for marking new positions on the floor
- Furniture sliders or felt pads for heavy pieces
- A tape measure for checking the walking paths
- A second pair of hands for the sofa and bookcases
- Your phone, to photograph the room before and after each move
Start with the sofa. Pulling it even three or four inches off the wall breaks the lined up against the wall look that flattens most rooms. Keep main walking paths close to three feet wide where the room allows it, and let each remaining piece justify the floor it stands on.
Create Symmetry Where the Eye Lands First

Before: Two different lamps burn at two different heights, one cushion leans alone on the left, and a lone plant crowds the right corner. Nothing is wrong with any single piece, but together they make the room feel restless and unfinished.
After: The lamps match and stand at the same height on both sides, the cushions mirror each other, and the artwork hangs dead center. The same furniture suddenly looks deliberate, like a hotel suite arranged by someone paid to care.
Use symmetry at the one or two places the eye lands first: the bed, the sofa wall, the mantel, or the entry console. Everywhere else can stay relaxed. Symmetry everywhere turns a home into a showroom, but one anchored, mirrored moment per room reads as pure order.
Bring in One Large Plant With Real Presence
Do This:
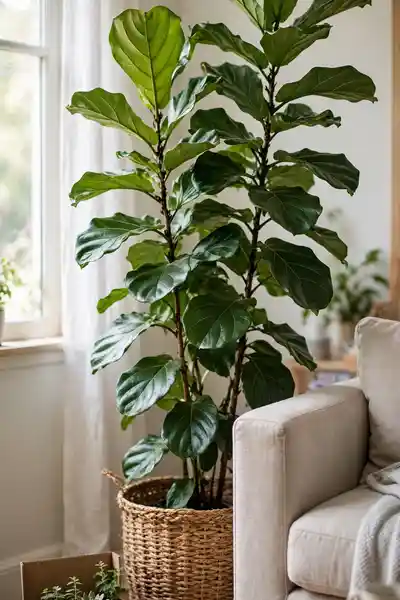
- Choose one tall plant, five to six feet, for the main empty corner
- Give it a pot that looks generous, like a woven basket or a ceramic planter
- Place it where the room’s real light can actually keep it alive
- Wipe the leaves when you dust, so the green stays glossy
Avoid This:
- A parade of tiny pots along every windowsill and shelf
- A plastic looking faux plant with dust settled on its leaves
- A sun loving plant exiled to the darkest corner of the house
- A pot so small the plant looks like it is wearing children’s shoes
Choose the plant by the light you actually have, not the light you wish for, and measure the corner so the pot size honors the plant. A five or six foot plant in a generous pot changes the whole room’s posture. One excellent faux plant, dusted weekly, beats a real one dying in public.
Layer the Bed Like a Hotel
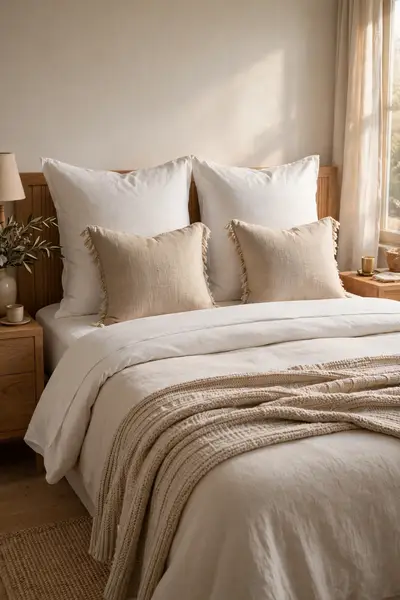
Quick Facts: Layers: Four that show | Base Color: White or warm neutral | Time: 20 minutes | Cost: Mostly bedding you already own
Build the layers in order: a smooth base sheet, the duvet folded back by a third so the bed shows its bands, sleeping pillows standing tall at the back, two smaller pillows in front of them, and one throw across the foot. Steamed or ironed pillowcases are the detail guests actually notice up close.
Make the Entryway Promise What Is Inside

Guests decide how your home feels before they reach the second room. The entryway delivers that verdict in about five seconds, and in most houses it consists of a shoe pile, a coat mountain, and a bare bulb. It deserves better, because it is the cheapest room to fix.
Give the entry four things: one surface for arrivals, one mirror or artwork at eye level, one tray that catches keys and mail, and one warm light that is not the ceiling bulb. Even a narrow hall can hold all four on a single wall with hooks and a slim shelf.
Clear Kitchen Counters Down to Three Things

Counters are the largest surface in the kitchen, so they carry the room’s verdict the way a table carries a dining room. When they are covered in appliances and paper, the whole kitchen reads tired. When they are nearly bare, the same kitchen reads calm, generous, and twice its price.
- Take everything off the counters, including the appliances, and clean the whole run properly.
- Return only the true daily workhorses: most homes land on three, like the coffee maker, the knife block, and the kettle.
- Move weekly appliances into the cabinets you emptied during your first edit.
- Decant whatever must stay out, like flour or coffee, into matching containers with no labels showing.
- Style one small corner on purpose: a board, a bottle of olive oil, and one green herb in a pot.
Roll Bathroom Towels and Decant the Bottles

Quick Tip: Start with the towels, not the bottles. A set of plain white towels, rolled instead of folded, is the single fastest bathroom change there is. White always matches, always looks clean, and can be bleached back to bright when life happens to it.
The branded plastic rainbow in the shower is the other half of the problem. Shampoo, soap, and lotion poured into matching amber or glass bottles with plain pumps suddenly look like products a hotel chose on purpose. Keep the original bottles under the sink for refills, out of sight.
Paint Walls One Consistent Shade Throughout

Common Mistake: Painting every room a different leftover color, then touching up scuffs with a near match that never quite matches. Add a shiny finish that shows every bump in the plaster, and the walls themselves start arguing with the furniture.
The Fix: Carry one warm neutral shade through every connected room in a flat or eggshell finish that forgives the walls. Test it as a big swatch and live with it through one full day of changing light first.
Finish carries as much weight as color. Matte and eggshell belong on living room and bedroom walls, satin earns its place in kitchens and bathrooms where steam and splashes live. Paint the trim in the same color family a touch glossier, and old woodwork suddenly looks like a decision.
Hide Cords, Chargers, and Everyday Clutter

What You Need:
- Paintable cord covers for the television and lamp runs
- One lidded basket or box for the household charging spot
- A pack of adhesive cable clips for behind furniture
- Closed baskets for the daily clutter that has no drawer
- Small labels for the chargers, so borrowed ones come home
Work corner by corner rather than room by room: the television wall first, then the charging spot, then the desk or nightstand. A basket with a lid near the sofa quietly swallows the daily tangle of chargers and remotes. When the floor line and the wall base read clean, everything above them looks calmer.
Shop Your Own Home Before Buying Anything

Before: A beautiful lamp glows unseen in a spare bedroom while the living room sits under a harsh ceiling light, and money is about to be spent on a second lamp. Half the homes I visit already own what they are shopping for, just in the wrong rooms.
After: The lamp moves to the living room side table, the spare room gets the simpler lamp, and the painting from the hallway lands above the sofa where its colors finally meet the cushions. Nothing was bought. Everything looks newly chosen.
Work one piece at a time and try it in three places before judging. Photograph each option, because the camera shows what habit hides. A piece that looked ordinary for years can look valuable in the right light, at the right height, beside the right color.
Add Secondhand Pieces With Good Bones

Do This:
- Lift it before you buy it. Honest materials have real weight
- Look for solid wood, brass, stone, ceramic, and genuine leather
- Clean, polish, and oil a find properly before judging it at home
- Buy slowly, one strong piece at a time, and let it settle in
Avoid This:
- Wobbly particleboard pieces with peeling printed finishes
- Upholstery that carries smells no cleaning has removed
- A bargain that needs three repairs before it can be used
- Filling a whole room in one weekend of secondhand shopping
Materials are what the hand and eye believe. Solid wood with some weight, real brass that can be polished back to life, stone, ceramic, and genuine leather all carry a seriousness that printed plastic never manages. Buy slowly, one strong piece at a time, and let each one raise the room around it.
Set the Scent Like a Boutique Hotel

Quick Facts: The Rule: One scent family for the whole home | Cost: Low | Where It Matters: Entry, living room, bathroom | Refresh: Candles and laundry scents weekly
Choose one scent family, like cedar and amber or clean linen and citrus, and let every candle, hand soap, and laundry scent in the home belong to it. Light the entry candle half an hour before guests arrive. The nose makes its judgment at the door, same as the eyes.
End the Day With a Ten Minute Evening Reset
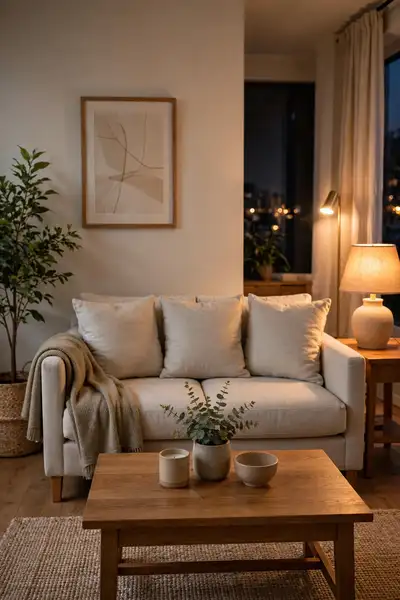
Hotels do not stay beautiful by accident. Every evening, someone walks the room and returns it to the photograph: cushions plumped, surfaces cleared, throws folded to the same neat band. Your living room deserves the same ten minutes, because the expensive look is mostly a room kept at its best.
Build the reset into the last lap of the night. Dishes out of sight, counters wiped, every stray object back on its tray or in its basket, cushions standing straight. You will meet the finished room with your morning coffee, and that first impression sets the tone for the house.
Frequently Asked Questions
1. What is the single fastest change with the biggest effect?
Lighting, and it is not close. Swap cool bulbs for warm ones around 2700K and add one lamp where you actually sit. The same room, with the same furniture, looks richer within one evening.
2. Which room should I start with?
Start where life happens and guests land: the entryway and the living room. One calm, ordered room also teaches you the system before you carry it into the kitchen, bathroom, and bedroom.
3. Can a rental home look expensive without painting or drilling?
Yes. Lamps, curtains on tension or clip solutions where allowed, a leaning mirror, bigger textiles, trays, and editing change a rental completely, and every one of them leaves with you when you move.
4. How much money do I actually need for this?
Less than most people fear. The editing, rearranging, and shopping your own home cost nothing. A realistic first spend of fifty to one hundred dollars covers warm bulbs, a tray or two, and thrifted hardware or a lamp.
5. Which colors read the most expensive?
Warm neutrals carried consistently: warm white, soft beige, greige, and one deep accent like olive, navy, or charcoal. The consistency impresses more than any single shade, because the eye reads agreement as intention.
6. Should my furniture match to look expensive?
No, and matching sets often work against you. A full matched suite reads like a showroom package. Pieces in different woods and ages, tied together by a repeated color story and similar visual weight, read as collected and costly.
Conclusion
Expensive was never really about money. It is about a home where the colors agree, the light is warm, the surfaces are edited, and every object looks chosen on purpose. Work through these ideas one room at a time and you will make home look expensive with furniture you mostly already own. Start tonight with the free edit and the warm bulbs. Save this post on Pinterest so the sizes, heights, and layering rules stay beside you, and share it with a friend who thinks they need a renovation. I’ve seen how small changes like these can completely shift the way a space feels.