
24 Stunning Farmhouse Kitchen Decor Ideas on a Budget
Your kitchen does not need a full renovation to get that warm, lived-in farmhouse feel. If you are staring at plain cabinets and builder-grade finishes, wondering where to even start, this guide to farmhouse kitchen decor is exactly what you need.
In my experience, most people overthink this. They assume farmhouse style means a big budget, but the prettiest kitchens I have seen were built from paint, thrifted finds, and a few smart swaps. You do not need new cabinets or a contractor, just a clear plan and one weekend at a time.
Define Your Farmhouse Look Before You Buy a Thing
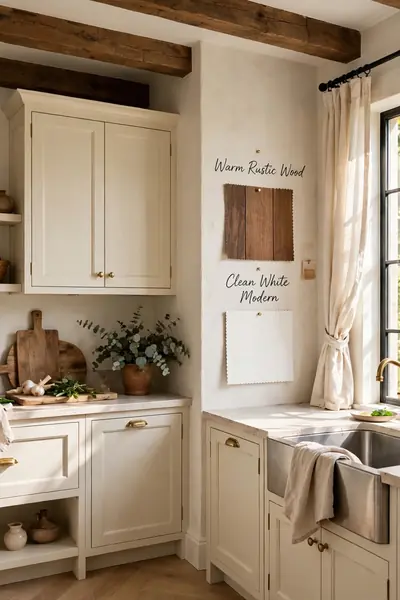
Farmhouse style is not one single look. Some kitchens lean rustic and weathered, with rough wood and vintage metal. Others are cleaner and more modern, with smooth white surfaces and black accents. Before you spend a single dollar, decide which direction feels like home to you.
This one decision will guide everything else. When you walk through a store or scroll online, you will know instantly what belongs and what does not. In my experience, most people skip this step and end up with a mixed bag of items that never quite work together. Pick your direction now and the rest gets easy.
Also View:20 Festive Christmas TV Stand Decor Ideas to Steal
Set a Color Palette That Feels Farmhouse and Cohesive

A limited color palette is what makes a farmhouse kitchen feel calm instead of chaotic. Warm whites, soft grays, and one muted accent like sage green or dusty blue do most of the work. These colors show up on walls, cabinets, textiles, and decor, and they never fight each other.
Here is how to build yours:
- Pick one warm white as your base for walls or cabinets.
- Add one mid-tone neutral like greige or soft gray for depth.
- Choose one muted accent color and use it only in small doses.
- Keep wood tones consistent, either all warm oak or all weathered gray.
- Write the palette on a card and carry it when you shop.
Stick to the card and every purchase will match.
Refresh Cabinets with Paint Instead of Replacing Them

Quick Tip: A $60 gallon of quality cabinet paint can transform a kitchen that would cost $8,000 to replace. The secret is all in the prep, so clean every door with degreaser, sand lightly, and use a bonding primer before the first color coat.
Most cabinets do not need replacing, they just need a better finish. Sanding and priming take one full weekend, but the painted result looks crisp and intentional for years. I have seen this work make the biggest single difference in a budget farmhouse makeover. Let each coat dry fully and your cabinets will look brand new.
Swap Cabinet Hardware for Instant Farmhouse Character
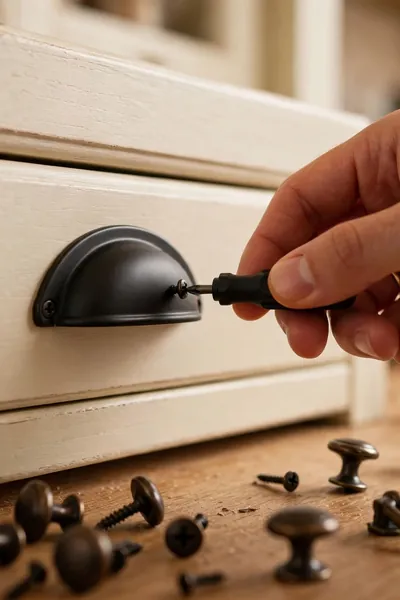
Common Mistake: Most people buy the cheapest shiny knobs at the store and wonder why their kitchen still looks builder-basic. Those generic knobs fight the farmhouse style and undo all the other work you have done.
The Fix: Choose one hardware finish and commit to it everywhere. Oil-rubbed bronze, matte black, or aged brass all read farmhouse instantly, and bin-style cup pulls on drawers are the classic farmhouse signature.
This is the fastest transformation in the whole kitchen. One screwdriver, one afternoon, and every cabinet looks custom. Measure your existing hole spacing before you order, and you will not need to drill a single new hole.
Add Open Shelves with Reclaimed-look Boards
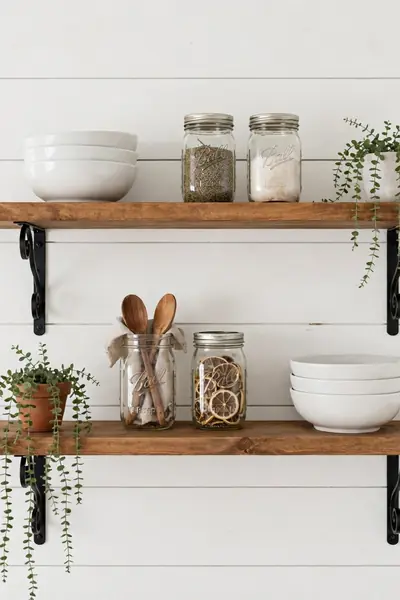
What You Need:
- Two pine or oak boards (1×10, cut to your wall length) for the shelf surface.
- Four sturdy black iron brackets rated for at least 50 pounds each.
- A stud finder and level so shelves sit straight and hold weight safely.
- Wood stain in weathered gray or honey oak for the reclaimed look.
- Ceramic dishes and jars you already own for styling.
Open shelving is the heart of this farmhouse style, and it costs far less than new upper cabinets. Mount two boards where an awkward cabinet sits today. Style them with everyday dishes and the kitchen instantly feels bigger, brighter, and more personal.
Style Open Shelves So They Stay Tidy, Not Cluttered
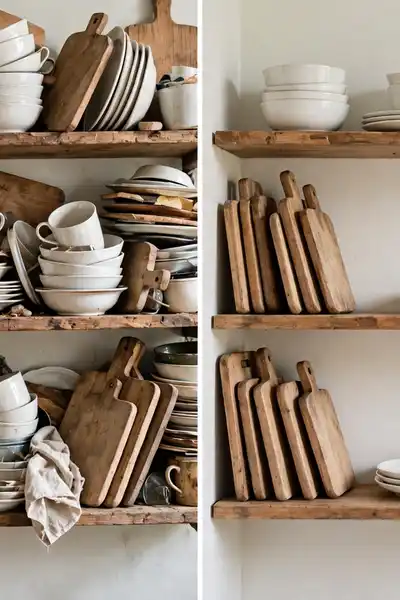
Before: Shelves packed edge to edge with mismatched mugs, spices, and random gadgets. The eye has nowhere to rest, and dusting becomes a dreaded chore you keep putting off.
After: Groups of three to five items with empty space between each cluster. The same dishes now look intentional, light flows through, and a quick wipe-down takes two minutes.
The rule is simple: group, then remove one item. Keep daily dishes at arm height and pretty-but-rarely-used pieces up top. Leave at least a hand’s width of empty space between clusters. This one habit keeps your shelves Pinterest-pretty all year.
Choose a Budget-Friendly Farmhouse Backsplash

Do This:
- Try peel-and-stick subway tile panels for a real-tile look at a fraction of the cost.
- Consider beadboard panels painted the same white as your cabinets for classic charm.
- Test a small hidden area first so you can check adhesion and color in your light.
- Seal edges near the stove with heat-safe caulk for a finished, lasting edge.
Avoid This:
- Do not pick glossy modern tiles that clash with the warm farmhouse palette.
- Do not skip cleaning the wall with degreaser before sticking anything on it.
- Do not grout over peel-and-stick panels unless the product specifically allows it.
A backsplash covers very little square footage, which makes it the cheapest big-impact upgrade in the kitchen. Measure once, start at the center, and work outward. One weekend and the wall behind your stove looks like a full renovation.
Light the Room with Rustic Pendants and Lanterns
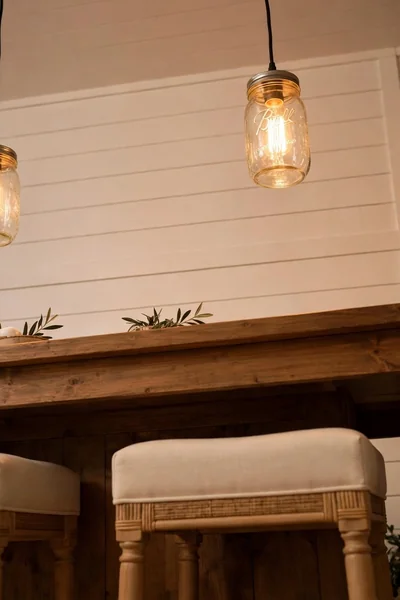
Time Needed: 1 to 2 hours | Difficulty: Easy to moderate | Cost: Low to medium | Tools Required: Screwdriver, wire connectors, step ladder | Best For: Over islands and dining tables | Pro Tip: Keep all fixtures in one finish for a cohesive look
Nothing sets the farmhouse mood like warm lighting. Mason jar pendants, black metal lanterns, and simple iron chandeliers all cast that golden glow the style is known for. Most fixtures swap onto existing wiring, so you rarely need an electrician.
Hang pendants 30 to 36 inches above the island so they light the work surface without blocking sightlines. Warm white bulbs around 2700K keep the light soft, never harsh. This one change makes evenings in the kitchen feel completely different.
Brighten Dark Corners with Cheap Under-Cabinet Lights
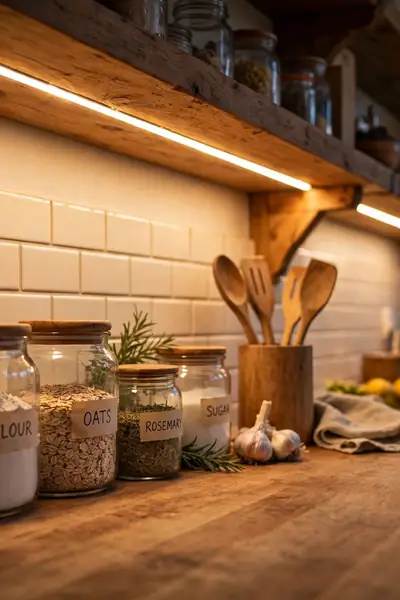
Dark counters make even a pretty kitchen feel gloomy. Battery-powered puck lights and adhesive LED strips fix that for very little money, and they install in minutes with no wiring at all. Stick them under cabinets or open shelves and the whole workspace glows.
I have noticed that most people overlook this step, yet it makes the biggest difference after dark. Warm white strips around 2700K to 3000K look best against wood and cream tones. When the batteries run down, just pop in fresh ones. Most puck lights and LED strips use standard AA or AAA batteries, and some models recharge via USB. Small lights, huge mood upgrade.
Hang DIY Farmhouse Signs and Wall Art

Blank walls are a missed opportunity in a farmhouse kitchen. A stenciled wood sign, a framed botanical print, or a vintage-style clock fills that space for almost nothing. Reclaimed boards from a hardware store plus a stencil kit give you custom art that looks straight from a boutique.
Here is how to make your own sign:
- Sand a pine board smooth and stain it in a warm or weathered tone.
- Position a letter stencil and tape it down so nothing shifts.
- Dab chalk paint through the stencil with a nearly dry brush.
- Peel the stencil while the paint is still slightly tacky for crisp edges.
- Hang it with a simple sawtooth hanger and step back to admire it.
One sign over the stove or sink becomes an instant focal point.
Dress Windows with Simple Cafe Curtains or Linen Panels
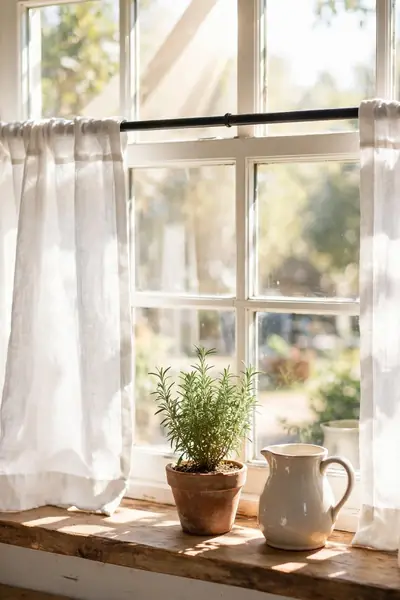
Quick Tip: Cafe curtains are the farmhouse window classic for a reason. They cover only the lower half of the window, so you get privacy without losing any daylight, and a tension rod means no drilling at all.
Striped ticking fabric, plain linen, or buffalo check all work beautifully here. Hem two rectangles, clip them on rings, and slide them onto the rod. The whole project takes under an hour and costs less than a takeout dinner. Light floods in, the view stays open, and the window finally feels dressed.
Layer Textiles: Towels, Runners, and a Jute Rug
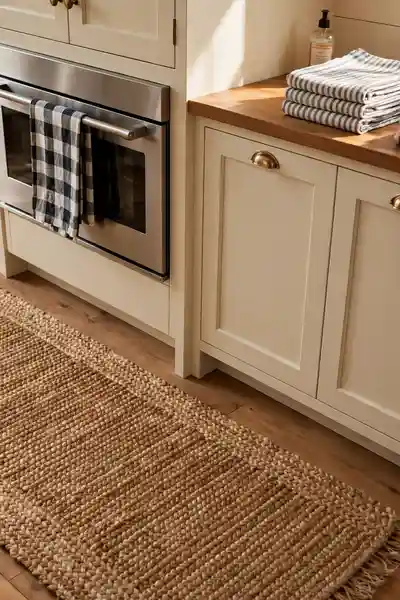
Common Mistake: Many people buy one random rug and a mismatched pile of towels, which makes the kitchen look busy instead of cozy. Without a plan, textiles add clutter instead of warmth.
The Fix: Choose two patterns maximum and repeat them. Buffalo check curtains plus striped towels, for example, look intentional because the eye sees the repeat.
Textiles are the cheapest layer in a farmhouse kitchen. A natural jute runner grounds the floor, matching towels tie the colors together, and the cotton towels go straight in the washing machine. Spot-clean the jute runner as needed with a dry cloth and vacuum it regularly. Jute should never go in the washing machine or get soaked. In spill-prone spots, use a truly washable cotton runner instead. Swap them seasonally and the whole room feels new for the price of a few towels.
Upgrade Your Sink and Faucet Look Without a Plumber
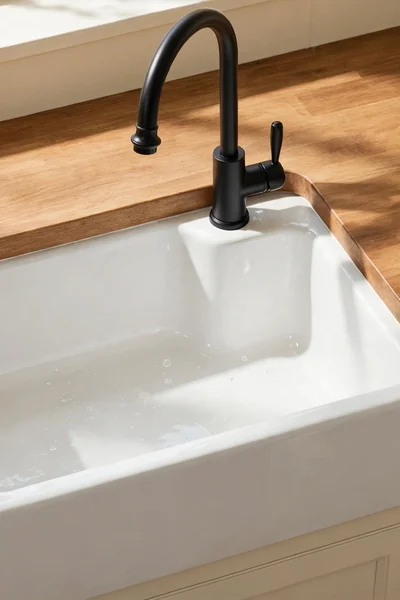
What You Need:
- A faux apron-front sink panel that clips over your existing sink for the farmhouse look.
- A new faucet in a farmhouse finish like matte black or oil-rubbed bronze.
- Plumber’s tape and an adjustable wrench for the faucet swap.
- A fabric sink skirt on a tension rod to hide a plain cabinet base.
The sink area is the kitchen’s workhorse, so it deserves to look good. A faux apron front gives you the iconic farmhouse silhouette without touching plumbing. Most faucets swap out in under an hour with basic tools. Finish with a skirt curtain and the whole zone looks custom-built.
Style a Farmhouse Table Centerpiece for Almost Nothing

Before: A bare table that collects mail, keys, and random clutter. It feels like a dumping ground instead of the warm heart of the kitchen.
After: A simple runner, a few jars of greenery, and one tray that corrals the small stuff. The table suddenly invites people to sit down.
Keep the centerpiece low so conversation flows across it. Use things you already own: jars from the pantry, branches from the yard, a tray from another room. Change the stems with the seasons and it never looks tired. This costs almost nothing and changes how the whole room feels.
Thrift Vintage Finds and Mix Them with Modern Pieces
Also Explore:22 Elegant Bathroom Tray Decor Ideas for a Spa Feel
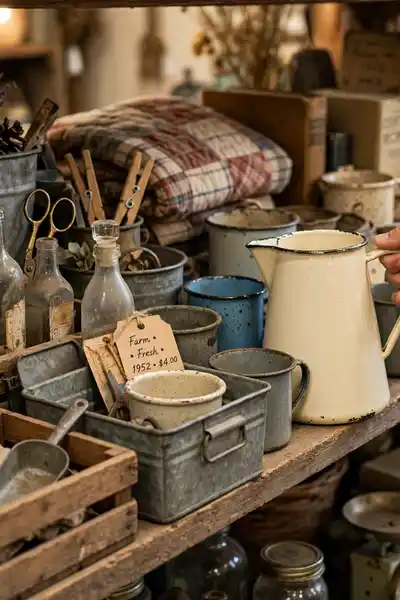
Do This:
- Hunt for enamel pitchers, wooden crates, and galvanized bins at thrift stores and flea markets.
- Check the furniture section for solid wood stools and small hutches with good bones.
- Clean everything well and give wood pieces a light sanding before styling.
- Pair one vintage piece with modern items so the room feels collected, not dated.
Avoid This:
- Do not buy damaged items with wobbly legs or rusted-through metal.
- Do not fill every surface with vintage or the kitchen starts looking like a shop.
- Do not pay boutique prices at antique malls when thrift stores have the same finds.
The mix of old and new is what gives farmhouse style its soul. One vintage crate holding cookbooks beside a modern faucet looks intentional and personal. Shop slowly, buy only what you love, and let the collection grow over time.
Carve Out a Cozy Coffee Corner in One Small Spot

Time Needed: 20 minutes | Difficulty: Easy | Cost: Very low | Tools Required: None | Best For: Small kitchens and rental counters | Pro Tip: A tray keeps everything together and makes the corner look styled, not scattered
You do not need a big kitchen for a coffee corner. One tray on one counter corner is enough. Add your mugs, a jar of beans, and the coffee maker, and that small spot becomes the happiest place in the kitchen.
Keep it to the tray so it never spreads into clutter. A small chalkboard label or a tiny plant adds personality without taking space. Guests will head straight for it, and your mornings will feel a little more special.
Organize Pantry and Counter Storage the Farmhouse Way
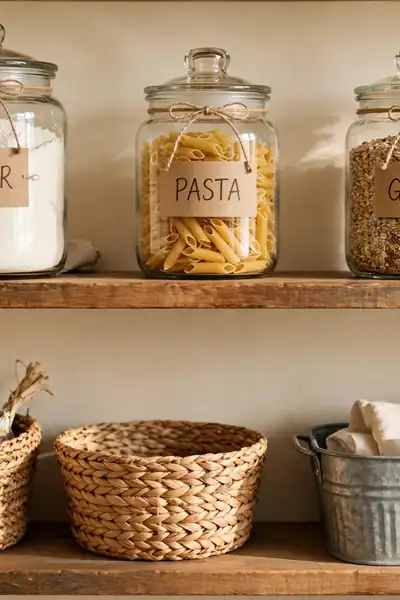
Storage that looks good is the farmhouse secret. Clear glass jars with simple labels turn flour and pasta into decor. Woven baskets hide the messy stuff like snack bags and spare bulbs. Galvanized bins hold potatoes, onions, and anything that does not need the fridge.
Decant one shelf at a time so the project never feels overwhelming. Match your jars and labels for a uniform look that photographs beautifully. When storage looks this pretty, keeping it organized stops feeling like a chore.
Add Greenery and Natural Texture Around the Kitchen
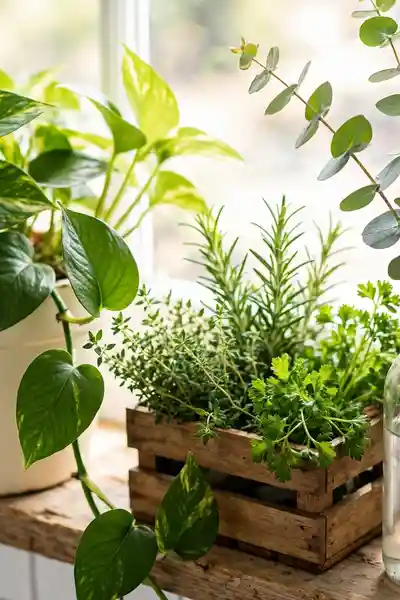
Every farmhouse kitchen needs something alive in it. A trailing plant on the windowsill, a pot of basil by the stove, or eucalyptus stems in a bottle all bring in that natural texture the style depends on. Green against cream and wood is a combination that never misses.
Start with plants you cannot kill: pothos, herbs, and dried stems need almost nothing. Water herbs when the soil feels dry and trim stems as needed. That touch of green softens every hard surface and makes the kitchen feel fresh and cared for.
Anchor the Room with One Statement Piece

Quick Tip: One big piece beats ten small ones. A single oversized clock, a wall-mounted pot rack, or a vintage hutch gives the eye a place to land, and everything else in the room suddenly looks more intentional around it.
Choose the wall everyone sees first when they walk in. Hang the piece at eye level and keep the surrounding area simple so it can breathe. I have seen this make a real difference in rooms that felt scattered before. One anchor, and the whole kitchen pulls together.
Try Small Weekend DIY Projects for Big Charm

Common Mistake: People tackle huge projects first, like shiplap walls, and burn out before the kitchen ever feels finished. Big projects stall, and the half-done room kills all motivation.
The Fix: Start with projects you can finish in one afternoon. Painted mason jars, chalkboard pantry labels, or a stenciled crate all deliver that handmade charm fast.
Small wins build momentum. Finish three tiny projects and you will feel the room changing, which makes the bigger ones feel possible later. Keep a running list of weekend ideas and knock them out one Saturday at a time.
Refresh Seasonally with Tiny Budget Swaps

What You Need:
- A set of seasonal stems like wheat, eucalyptus, or pine branches for the jars.
- Two or three themed hand towels that swap in and out easily.
- A small tray or basket that holds the seasonal grouping in one spot.
- One or two mini accents like pumpkins, ornaments, or spring flowers.
You never need to redecorate the whole kitchen for a season. Swap the stems in your jars, change the towels, and refresh the tray on the counter. Ten minutes and a few dollars keep the room feeling current all year. Store off-season pieces in one labeled bin so the swap stays effortless.
Make Farmhouse Style Work in a Small Kitchen or Rental
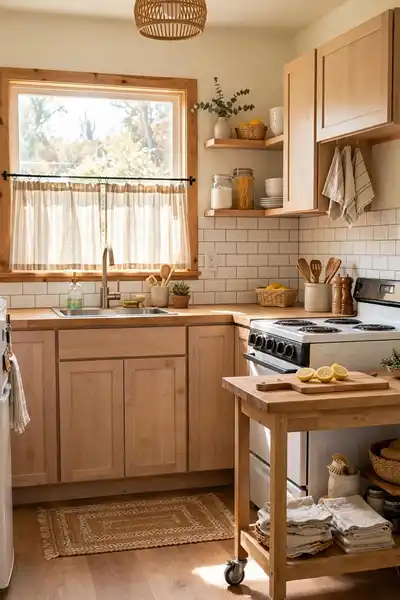
Before: A tiny rental kitchen with blank walls, no storage, and a strict no-drilling lease. It feels temporary, so nothing ever gets decorated and it never feels like home.
After: Removable backsplash panels, tension-rod curtains, and a rolling cart for extra counter space. The same small kitchen now feels warm, personal, and fully yours.
Rentals and small kitchens just need damage-free tricks. Adhesive hooks hold wreaths and art, a freestanding shelf adds storage without screws, and everything comes down clean on moving day. Small space, full farmhouse charm.
Avoid These Common Farmhouse Budget Mistakes
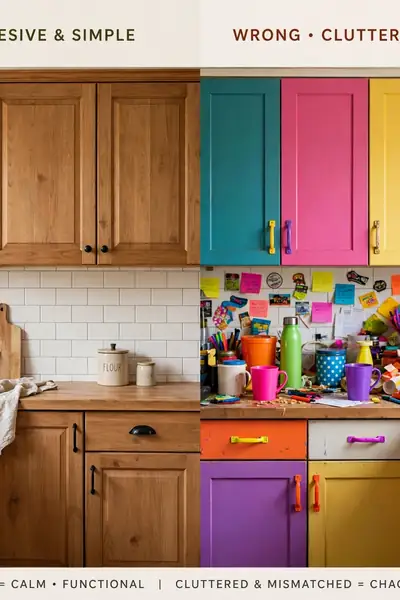
Do This:
- Set a total budget before shopping and track every purchase against it.
- Buy the big anchor pieces first, then fill in small decor with what is left.
- Stick to your color palette card so every item matches the plan.
- Leave some walls and surfaces empty so the room can breathe.
Avoid This:
- Do not buy full matching decor sets, they look flat and cost more.
- Do not mix warm and cool wood tones in the same sightline.
- Do not impulse-buy trendy pieces that do not fit your chosen farmhouse direction.
- Do not fill every shelf and corner, overdecorating kills the cozy feel.
That is why experts always recommend planning the room on paper first. A simple sketch with your palette and budget keeps every purchase intentional. The kitchens that look expensive on a budget are the ones where someone said no to the wrong things.
Farmhouse Kitchen Decor FAQ

1. What is the cheapest way to get a farmhouse look in my kitchen?
Start with paint, hardware, and textiles. A gallon of cabinet paint, new cup pulls, and matching towels cost under $150 total and change the whole feel of the room.
2. Can I mix farmhouse style with modern appliances?
Yes, and it looks great. Stainless appliances blend in fine when the surrounding cabinets, hardware, and decor carry the farmhouse warmth. The mix keeps the kitchen feeling current, not like a museum.
3. How do I keep open shelves from looking messy?
Group items in odd numbers, leave empty space between clusters, and keep daily dishes at arm height. If a shelf starts looking crowded, remove one item from each group.
4. Is farmhouse style hard to maintain?
Not at all. Wipe shelves and jars during your normal cleaning routine, wash textiles weekly, and dust the statement piece monthly. Natural materials age gracefully, so small wear just adds character.
Conclusion:
You now have a complete roadmap to a farmhouse kitchen that feels warm, personal, and pulled together, all without overspending. Start with the paint and hardware, add your shelves and textiles, and let the vintage finds come naturally over time.





3 Comments