
Fail-Proof Cornstarch Clay Recipe From Pantry Staples
You want to make clay ornaments with the kids this weekend, but every homemade recipe you have tried ended in cracks, stickiness, or tears. This fail-proof method changes that story completely.
In my experience, most batches fail for boring reasons: wrong measurements, heat set too high, or dough left uncovered for ten minutes. This guide fixes all three with exact grams and cups, clear doneness cues, and a kid-safe coloring method. You will learn to cook, knead, shape, dry, and seal with confidence.
Why Cornstarch Clay Is So Forgiving for Beginners

Most homemade clays punish small mistakes, but this method forgives them. The dough comes together from just three pantry ingredients, and the cooking process gives you clear visual cues. If it feels sticky, you knead in a spoonful of cornstarch. Too dry? A few drops of water fix it.
In my experience, beginners succeed here because there is no kiln, no exact oven timing, and no expensive materials at risk. A batch costs less than a dollar, so you can practice without pressure. Even a slightly lumpy first batch still dries into usable, paintable pieces.
Cornstarch Clay vs Other Homemade Clays
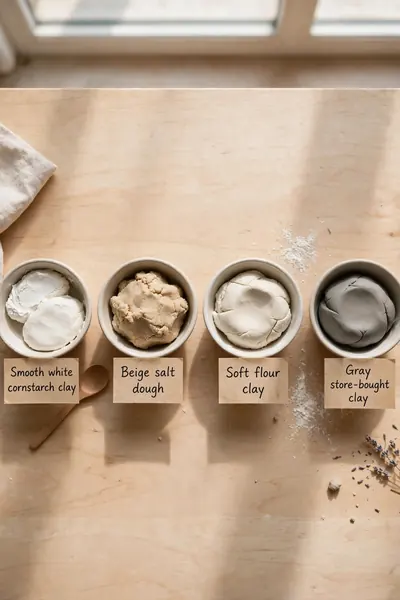
Every homemade clay has its own personality, and picking the right one saves you frustration. This mixture dries smooth and bright white, which makes it ideal for ornaments and painted gifts. Here is how it compares to the other options you might be considering.
- Salt dough is tougher and cheaper but dries with a rough, grainy texture and a dull beige color. Choose this homemade dough when you want a smooth, porcelain-like finish.
- No-cook flour clay never fully hardens and stays soft enough for little hands to reshape. Pick this recipe when you need pieces that dry rock-hard and keep their shape.
- Store-bought air-dry clay costs ten times more per batch and often cracks if rolled thin. This homemade version gives you the same smooth result for pennies.
- Cold porcelain looks similar when dry but needs glue in the recipe and takes longer to cure. This version skips the glue and is ready to paint sooner.
Also View:Easy Air Dry Clay Recipe From Simple Pantry Staples
What You Will Need From Your Pantry

Quick Tip: Check that your cornstarch is fresh and lump-free before you start, since old boxes absorb moisture and cause lumps. Everything else on this list is probably already in your kitchen. You do not need a single craft-store purchase.
You need one cup of cornstarch, one cup of baking soda, and three quarters of a cup of cold water. Grab a medium non-stick saucepan, a wooden spoon, and a damp kitchen towel. A rolling pin and cookie cutters help with shaping, but a glass and a butter knife work too.
Getting the Measurements Right Every Time

Common Mistake: Most beginners scoop the measuring cup straight into the cornstarch box, which packs it down and adds up to two extra tablespoons. They also eyeball the water instead of measuring it. Both habits throw off the ratio and cause sticky or crumbly dough.
The Fix: Spoon the cornstarch into your cup and level it off with a knife, then measure the water precisely. Stick to the ratio of one part cornstarch, one part baking soda, and three quarters part water. In grams, that is about 128 grams cornstarch, 220 grams baking soda, and 180 ml water.
This ratio scales perfectly in either direction. Double everything for a classroom batch, or halve it for a single ornament. Just keep the proportions identical and the dough behaves exactly the same. Write the grams on a sticky note inside your pantry door and you will never have to guess again later.
Cooking the Dough to the Perfect Stage
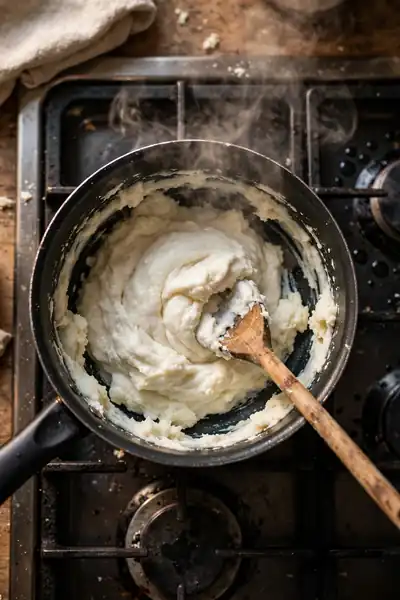
What You Need:
- Medium heat, never high: high heat scorches the bottom before the center thickens.
- Constant stirring: keeps the mixture smooth and stops lumps from forming.
- A silicone spatula or wooden spoon: both scrape the pan bottom cleanly without scratching.
- Your full attention for five minutes: the mixture turns from soupy to dough in under a minute.
- A damp towel ready nearby: you will cover the hot dough the moment it leaves the pan.
Watch for the moment the mixture pulls away from the sides and looks like thick mashed potatoes. That is your cue to take it off the heat. A few more seconds is fine, but a full extra minute makes the dough dry and crumbly later.
Adding Color Without Ruining the Dough

Before: Many crafters knead acrylic paint straight into the raw dough for strong color, but acrylics are not made to be handled this way and the color often turns streaky. Kids end up with stained hands and parents end up worried.
After: With the safe method, you get soft even pastels from food coloring kneaded into warm dough, and bold opaque color from paint applied after drying. The finished pieces look brighter, and the process stays worry-free for little hands.
I have noticed that gel food coloring works best for dough tinting because a tiny drop goes a long way without adding extra moisture. Add it while the dough is still warm and knead until no streaks remain. Save your acrylics and metallic paints for fully dried pieces, where they grip beautifully and stay put.
Making Cornstarch Clay With Kids Safely

Do This:
- Let kids measure and pour the dry ingredients while you handle the hot pan.
- Give little hands the kneading job once the dough is cool enough to touch.
- Make hand-washing part of the craft routine, before and after.
- Use cookie cutters for instant success with younger children.
Avoid This:
- Never let children stand near the stove while the mixture cooks.
- Do not let anyone taste the raw dough, since raw baking soda upsets stomachs.
- Keep acrylic paint out of the dough; save paints for dried pieces only.
- Do not leave small pieces where toddlers could put them in their mouths.
Teachers can prep one double batch for a whole table of students, and the dough keeps well wrapped for a day. The real win is how calm this craft stays: no sharp tools, no oven timing for kids to wait on. Just roll, cut, and let them dry while the excitement builds.
Rolling and Shaping Like a Pro

Best Thickness: 1/4 inch for ornaments, 1/8 inch for jewelry | Tools Required: rolling pin, cookie cutters, straw for hanging holes | Pro Tip: roll between parchment sheets to stop sticking | Drying Note: thinner pieces dry faster and crack less
Roll the dough evenly, turning it a quarter turn every few rolls to keep the thickness uniform. Press cutters straight down without twisting so edges stay crisp. For a hanging hole, poke a straw through before drying, not after. Thicker pieces look chunky but anything over half an inch risks cracking as it dries.
Drying Your Pieces Fully

Patience is the secret ingredient here. Lay your pieces flat on parchment paper in a room with good airflow, away from direct sun and heating vents. Flip each piece every few hours so both sides dry evenly. Most flat pieces need 24 to 48 hours.
In a hurry? Dry pieces in the oven at its lowest setting, around 170°F (75°C), for one to two hours, flipping halfway. A finished piece sounds hollow when tapped and feels light and hard. If the center still feels cool to your cheek, give it more time.
Sanding, Painting, and Sealing
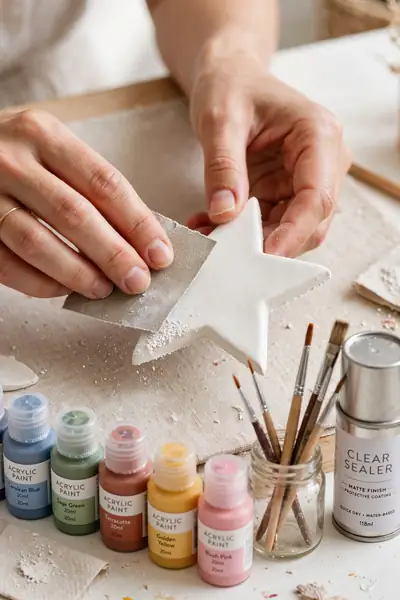
Finishing is what separates homemade-looking crafts from pieces people assume you bought. Sanding smooths the edges, paint adds personality, and sealer locks everything in against moisture. Each step takes only minutes, yet the difference in the final piece is truly dramatic.
- Sand dry pieces lightly with 220-grit sandpaper, focusing on edges and any rough spots. Wipe away the dust with a dry cloth before painting.
- Paint with acrylic craft paints in thin coats, letting each coat dry fully. Two thin coats always look smoother than one thick coat.
- Seal with a clear water-based sealer, either brush-on or spray, to protect against humidity. Apply two light coats for pieces that will be handled often.
Fixing the Most Common Problems
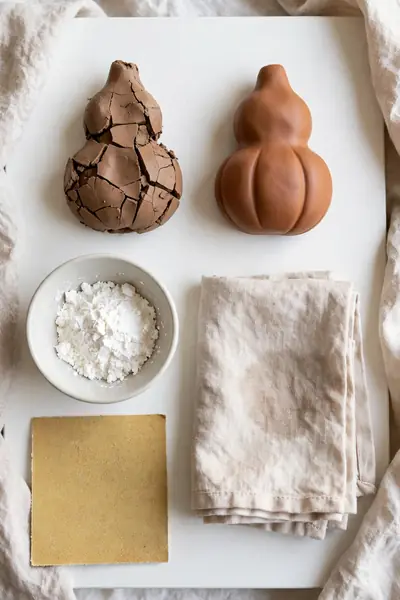
Quick Tip: Almost every problem with this dough traces back to three causes: pieces rolled too thick, dried too fast, or dough with the wrong moisture. Fix the cause and the symptom disappears. Keep this trio in mind and you will rarely need this section twice.
Sticky dough needs more kneading or a dusting of cornstarch. Cracks while drying mean the piece was too thick or sat in a hot spot, so roll thinner and move it somewhere cooler. Crumbly dough revives with a few drops of water. A yellow tint means the heat ran too high.
Also Explore:DIY Clay Trinket Dish Tutorial for Stunning Results
Fun Projects to Make With Your Clay
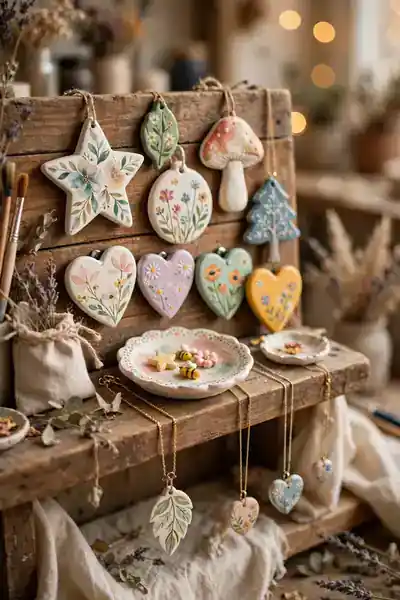
Common Mistake: Beginners often jump straight to bowls or figurines, which need even thickness and slow drying to survive. These ambitious first projects crack, and the crafter assumes the recipe failed.
The Fix: Start with flat projects like ornaments and gift tags, where thickness is easy to control. Once those dry perfectly twice in a row, move up to trinket dishes draped over a bowl, then small jewelry pieces.
Beyond ornaments, try fridge magnets with a glued magnet on the back, diffuser stones with a drop of essential oil, or drawer knobs pressed with lace for texture. Each uses the same dough and drying routine you already know. Pick one, master it, then try the next.
Cooling and Kneading for a Silky Texture

What You Need:
- A damp kitchen towel: covers the hot dough so no crusty skin forms while it cools.
- A clean, smooth countertop: gives you room to knead without the dough picking up crumbs.
- Cornstarch for dusting: a light sprinkle rescues dough that still feels tacky.
- Five unhurried minutes: proper kneading is what turns rough dough silky.
Turn the warm dough onto your counter and fold it over itself again and again, pressing with the heels of your hands. Keep going until the surface looks completely smooth and no cracks appear when you bend a piece. That silky finish is your signal that the dough is ready for color or shaping.
Turning Your Clay Into Christmas Ornaments and Gifts

Before: Plain dried ornaments look charming on your own tree, but they blend into every other handmade decoration. Without paint, ribbon, or packaging, they rarely feel special enough to gift.
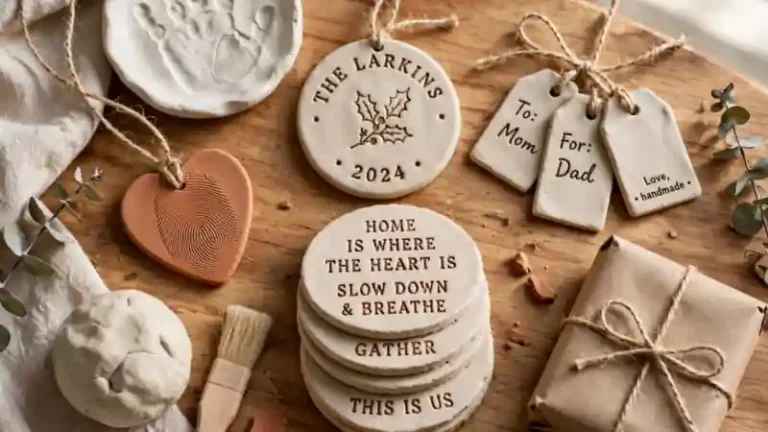
After: With a coat of paint, a sealed finish, and simple kraft-box packaging, the same ornament becomes a gift people keep. Add a handwritten tag and you have a Christmas present that costs under a dollar to make.
These ornaments shine brightest at Christmas because the bright white surface takes paint beautifully. Cut stars, trees, and snowflakes, poke hanging holes, and paint them in classic red, green, and gold. Bundle sets of six in a kraft box with tissue for teacher gifts, neighbors, or your holiday market table.
Storing Leftover Dough and Finished Pieces

Do This:
- Wrap leftover dough tightly in plastic wrap, pressing out all air.
- Store wrapped dough in an airtight container in the fridge.
- Keep finished pieces in a dry box with tissue between layers.
- Dust stored pieces with a soft dry cloth before displaying.
Avoid This:
- Do not leave unused dough uncovered; it forms a crust within an hour.
- Do not store dough longer than two days; it dries out even wrapped.
- Never stack painted pieces without tissue; the paint can stick.
- Avoid damp basements or humid shelves for finished pieces.
Properly wrapped dough stays workable for about two days in the fridge. Let it come back to room temperature before kneading, since cold dough cracks when rolled. Finished, sealed pieces last for years when kept dry, which makes them perfect for making Christmas gifts well ahead of the season.
Conclusion
You now have everything for a homemade recipe that actually works: exact measurements, foolproof cooking cues, and fixes for every common problem. The dough costs pennies, the process stays kid-friendly, and the finished pieces look store-bought.
I’ve seen how making this one change can completely shift the result: measuring the water precisely instead of eyeballing it. Save this guide on Pinterest so it is there when the holiday crafting mood strikes. Then mix a batch this weekend, make something beautiful, and share this with a friend who needs an easy win.




One Comment