How to Make Air Dry Clay Look Just Like Real Ceramic
The bowl is shaped, dried, and painted, yet it still announces itself as clay from across the room. The problem is rarely your making. Real ceramic carries depth, weight, and a finished underside, and learning how to make air dry clay look like ceramic means copying those three things on purpose.
I’ve noticed the pieces that fool people share the same history: smoothed while wet, sanded in stages, primed, painted thin, and finished underneath as carefully as on top. This guide walks that whole road, including the speckle trick, the weight trick, and the rescue route for pieces you already own.
What Real Ceramic Has That Clay Lacks
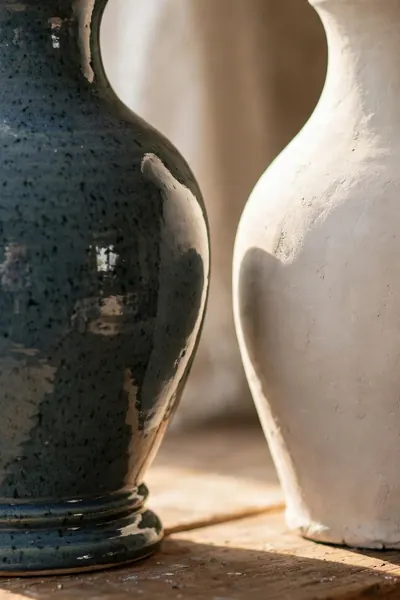
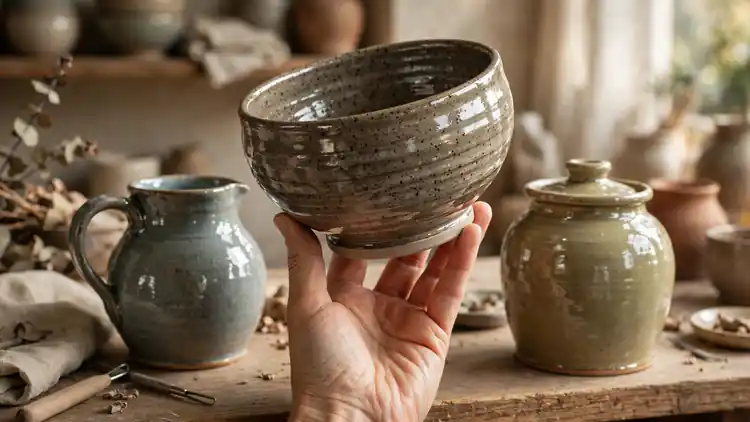
Hold a real ceramic piece and the secret is never the shape. It is four qualities: a surface with depth instead of chalk, a glossy or satin skin that catches light in a gradient, a base that ends in a clean foot ring, and weight in the hand.
Learning to make air dry clay look like ceramic means copying those four qualities, not chasing a magic paint. Every step serves one of them: smoothness for the surface, layered gloss for the depth, a finished bottom, and added heft. Miss one, and the eye keeps doubting.
Start With the Right Clay and a Smooth Build
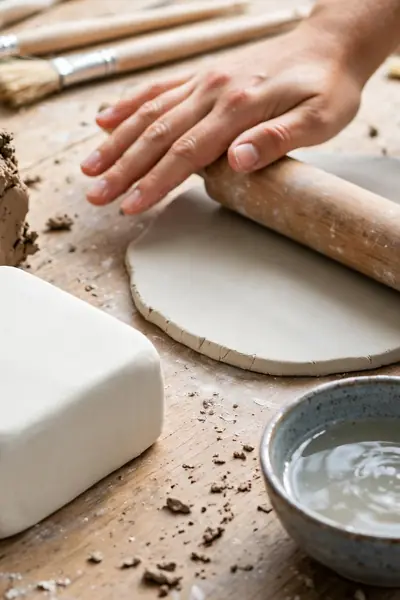
Cheap, coarse clay fights this finish from the first minute, because its fillers dry rough and its surface tears under the sponge. A fine, smooth clay costs a little more and repays it at every later stage, especially sanding, where good clay turns silky instead of crumbly at the edges.
- Choose a fine, premium air dry clay with a smooth, dense feel in the pack.
- Knead until the clay is evenly soft with no dry streaks or air pockets.
- Roll slabs a touch thicker than the finished piece needs, so sanding has material to spare.
- Build joins with slip and blend them until the seam vanishes completely.
- Keep walls even, since thin spots dry faster and show as dips later.
Also View: How to Seal Air Dry Clay for a Waterproof Pro Finish
Wet Smooth Every Surface Before It Dries

Quick Tip: Keep a small bowl of water within reach and re-wet your fingertips constantly. The rule is simple: if the clay drags against your skin, it is too dry to smooth. Work in short passes, turning the piece often, and stop the moment the surface turns slippery and even.
Wet smoothing is the cheapest ceramic secret in this whole guide, because every fingerprint removed now is sanding you never do later. I have noticed pieces smoothed patiently while wet need half the sandpaper of pieces rushed at this stage, and their curves keep the soft, thrown look that reads as pottery.
Dry It Slowly and Evenly
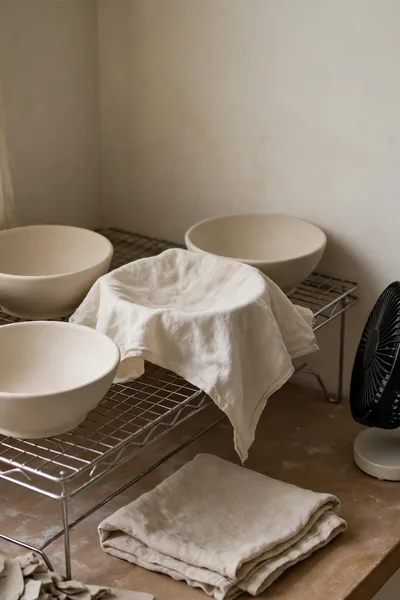
Common Mistake: Parking fresh pieces beside a sunny window or a heater to speed things up. The rim dries and shrinks while the base stays wet, and the piece answers with cracks, warping, or a rock when it should sit flat.
The Fix: Dry in still, shaded air at room temperature, turning pieces daily so every side loses moisture evenly. Thick pieces need several days, not hours. A loosely draped cloth over the first day slows the surface just enough to keep it calm.
Judge dryness by weight and temperature, not the calendar. A dry piece feels light and room temperature all over; a piece still holding water feels cool and slightly heavy at the base. Painting over hidden moisture is the one error no sealer can cover later, so patience here protects everything after it.
Sand in Stages Until It Feels Like Stoneware
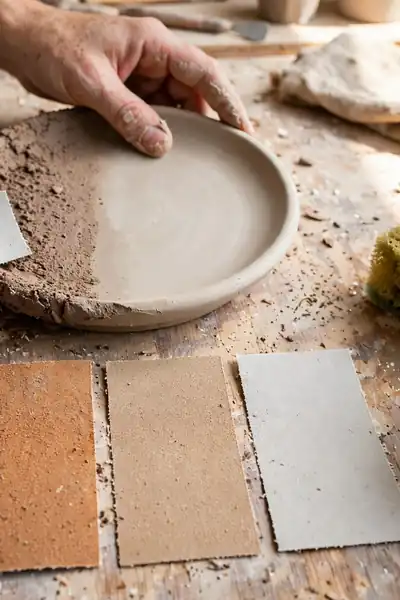
What You Need for Staged Sanding:
- Sandpaper in stages: 220 grit for shaping, 400 for smoothing, 600 to 800 for the finish
- A small bowl of water for the final wet sanding pass
- A damp sponge to wipe slurry and dust between every stage
- A soft brush for the carved details and inner curves
- Good light at a low angle, which shows scratches your eyes miss from above
Wet sanding the final stage is where the ceramic illusion truly starts. A dampened fine grit glides instead of scratching, and the surface takes on the faint satin smoothness of unglazed stoneware. Wipe the slurry away often and judge by touch with closed eyes: real pottery feels smooth before it looks it.
Prime With Gesso for a Pottery Surface

Before: Paint lands straight on raw clay and drinks in unevenly, leaving dull patches, raised fibers, and a finish that looks painted because it is, sitting on top of the surface like a sticker instead of a skin.
After: Two thin coats of gesso, sanded lightly between, give the piece one even, thirsty, stone like surface. Paint now behaves the way glaze behaves on bisque pottery: level, rich, and bonded to what is under it.
Gesso is the quiet step beginners skip and the one professionals in faux finishes never do. It fills the microscopic pores that make clay look like clay under raking light. Let each coat dry fully before the light sanding, and never judge coverage by the first coat’s streaks.
Paint in Thin Coats, Never One Thick One
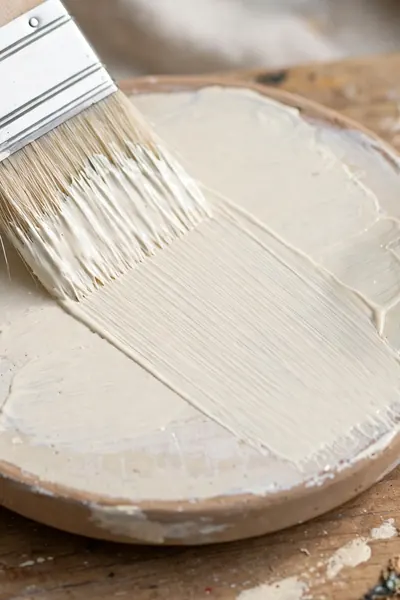
Do This:
- Thin acrylic slightly with water until it flows like cream
- Brush in one direction and leave the coat alone to level
- Let every coat dry fully before the next touches it
- Sand almost nothing between coats, just dust off
Avoid This:
- Loading the brush to finish in one pass
- Brushing back over a coat that has started to dry
- Painting the inside and outside in one handling
- Judging the color after coat one, which always looks weak
Thin coats feel slow, and that is their virtue. Each layer dries in minutes, levels itself, and adds the depth that one heavy coat buries under brush marks and drips. Three thin coats of cream will always out convince one thick coat, because real glaze is itself built in the kiln, layer over layer.
Choose Colors Real Pottery Actually Wears

Quick Facts: Base Colors: Warm white, oatmeal, stone grey | Earth Colors: Terracotta, sage, dusty blue | Rule: Mute every color with warm grey | Accent: One deep tone, charcoal or ink
Pottery colors come from earth and ash, so they sit slightly muted even at their brightest. Mix every color you use with a touch of warm grey or raw umber and it will fall into the pottery family at once. The exception is a deliberate porcelain white, which should stay clean and cool.
Add Speckle for a Stoneware Look
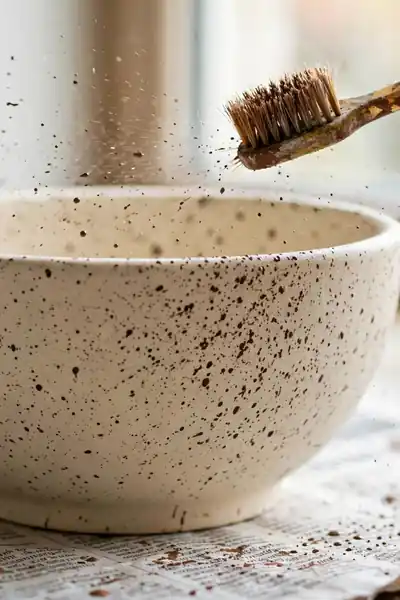
Speckle is the fingerprint of real stoneware. Tiny dark flecks burn through the glaze, and the eye reads them instantly as fired clay. Faking them takes two minutes: thin a brown paint, load an old toothbrush, and flick it across the painted piece from a hand span.
Practice the flick on paper first until the flecks land fine and uneven, denser in some areas, sparse in others, the way speckled ware behaves. Seal over them once the paint dries, and the speckles sit inside the finish instead of on it. Overdone speckle looks like dirt; restraint is the whole skill.
Build a Faux Glaze With Gloss Layers

Glaze convinces because light sinks into it and comes back changed, not because it is simply shiny. Flat paint reflects from the surface only. Layered clear gloss copies the depth honestly, and two or three coats do more for the illusion than any color choice in this guide.
- Gloss medium coats: brush on two to three thin layers of acrylic gloss medium, drying between each.
- Gloss varnish: a water based gloss polyurethane gives a harder, glassier skin in fewer coats.
- Resin, the deep option: a thin poured or brushed resin coat gives true glass depth, with gloves, ventilation, and a dust free box while it cures.
- The rim trick: one extra gloss layer inside the rim, where real glaze pools thickest.
- The two finish test: gloss one hidden spot first and judge it beside a real ceramic piece.
Choose Gloss Porcelain or Matte Stoneware
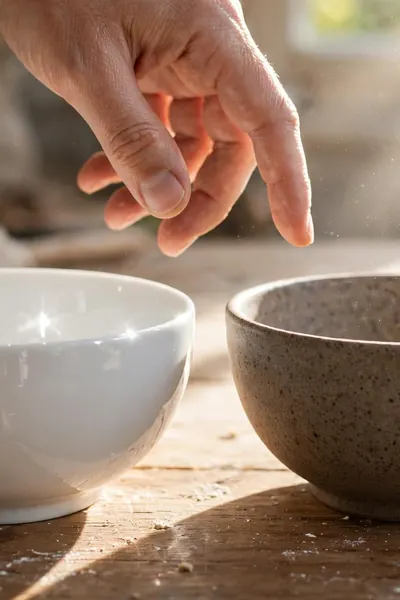
Quick Tip: Decide the finish before the paint, not after it. Gloss belongs to smooth, pale, porcelain style pieces, where reflections do the talking. Matte and satin belong to speckled, earthy, stoneware style pieces, where texture does it. Mixing the signals, glossy and rustic, is what makes a finish feel undecided.
Neither road is more real than the other; real pottery wears both. I have noticed beginners default to maximum gloss on everything, which can tip a rustic piece into looking plasticky. When a piece has speckle and warm color, satin is usually the braver and better choice.
Seal It Like You Mean It
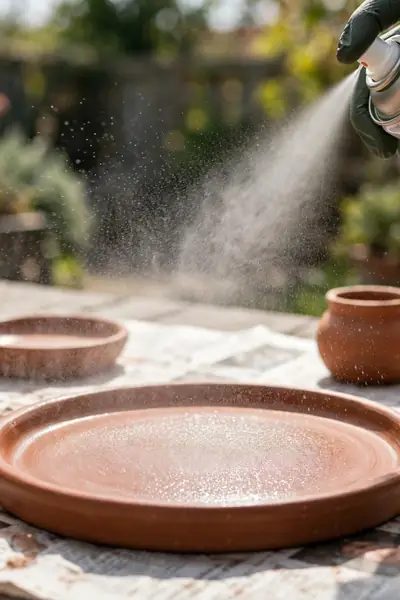
Common Mistake: Flooding the piece with one heavy coat of sealer to be safe. Thick sealer pools in the curves, dries cloudy or tacky, and can wrinkle the paint beneath it, undoing three careful stages in four minutes.
The Fix: Seal like you painted: thin coats, fully dry between, two or three in total. Spray from a hand span away in light passes, or brush a water based sealer in one direction. The final skin should feel like part of the piece, not a wrapper around it.
Give the sealed piece a full day before it earns a shelf, longer before it holds anything damp. Sealers cure after they feel dry, and early handling leaves fingerprints in the gloss that no later coat hides. None of this makes clay waterproof, a truth the FAQ below states plainly.
Also Explore: How to Paint Air Dry Clay for Vibrant Lasting Color
Give It Weight So It Feels Real in the Hand
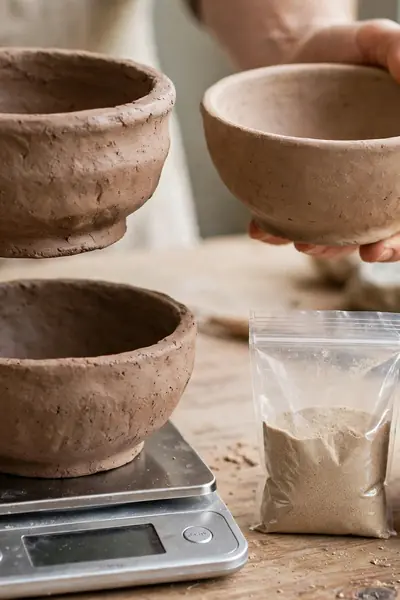
What You Need to Add Honest Weight:
- Thicker walls and base from the start, the simplest and truest method
- A small sealed pouch of fine dry sand or tiny pebbles inside hollow pieces
- An extra coil of clay worked into the base before shaping
- A kitchen scale, so you can match the heft of a real ceramic twin
- Felt pads under weighted bases, so the extra weight never scratches a shelf
People believe their hands before their eyes. A feather light vase gets handled like a toy no matter how perfect its glaze, while a piece with honest heft gets set down carefully, the way real pottery is. Add the weight where nobody sees it, and keep the balance low.
Finish the Bottom and Add a Foot Ring

Before: The top of the piece is perfect and the bottom is raw: rough clay, wobbling on one high spot, with the maker’s fingerprints still pressed into it. Anyone who picks it up and turns it over learns the secret in two seconds.
After: A carved or sanded foot ring gives the base a clean shadow line and a flat, stable sit. The underside is sanded smooth, sealed, and finished in a slightly different tone, the way real potters leave the foot bare or waxed.
The foot ring does practical work too: it lifts the glazed body a hair off the shelf, so the finish never sticks or chips at the edge. Practice the carve on a spare piece first. One confident ring, cut while the clay is firm but not bone dry, beats three timid ones.
Small Details That Fool the Eye
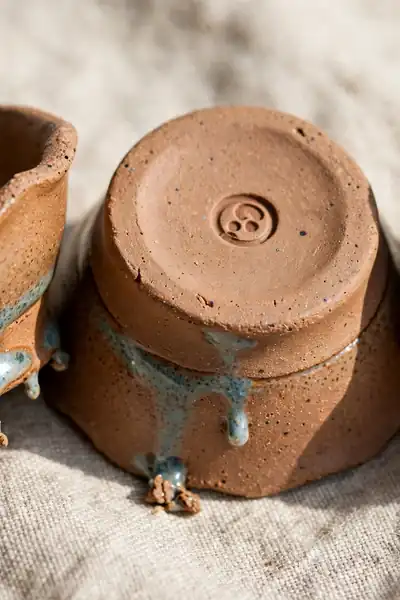
Do This:
- Leave one gentle irregularity in the rim, the handmade signature
- Stamp a tiny maker mark into the base before drying
- Let one gloss drip rest near the foot, the way glaze runs
- Keep the foot ring matte while the body shines
Avoid This:
- Chasing machine straight edges with endless sanding
- Adding fake cracks or distressing that pottery never shows
- Mixing glossy, matte, and speckled signals on one small piece
- Hiding the base unfinished and hoping nobody turns it over
Real pottery is never machine perfect, and that is oddly freeing. The small wobble you almost sanded away is often the very thing that makes a stranger believe the piece. Aim for finished, not flawless: clean surfaces, honest edges, and one or two human marks left standing on purpose.
Test It With the Tap and Shelf Check
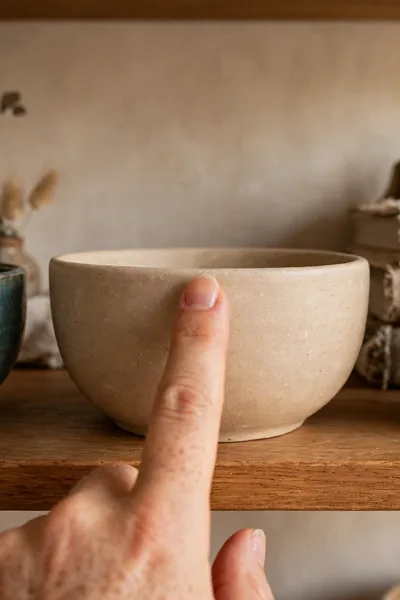
Quick Facts: Tap Test: A soft, dull knock is normal | Shelf Test: Seven days among real pieces | Pass Sign: Your eye stops questioning it | Judge: Daylight, not warm lamplight
The tap will never ring like true porcelain, and honesty matters here: a gentle knock on clay sounds softer and duller than on fired ceramic. What you can win is everything else. If the piece passes the shelf test for a full week of glances, it has earned its place honestly.
Rescue Old Clay Projects With the Same Steps
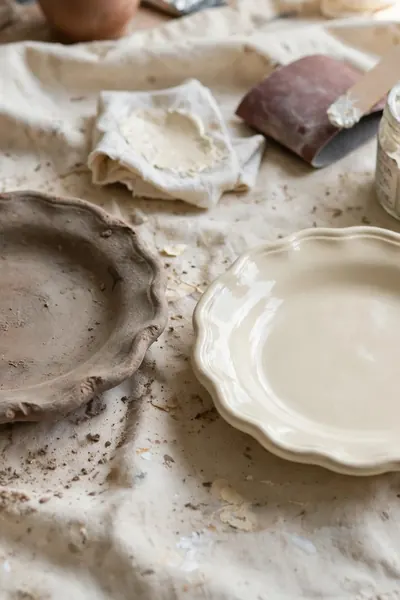
The dish you made last year and hid in a drawer is not a failure. It is a head start. Old pieces are fully dry, fully cured, and free, which makes them the perfect practice ground for every technique, from staged sanding to the layered gloss finish.
Work them in the order: wash off dust, sand through the stages, gesso, thin coats, speckle or gloss, then seal. Chipped edges sand away, tired colors bury under primer, and the weight trick can still be added under a felt pad. Most rescued pieces end up better teachers than new ones, because their flaws were specific.
Mistakes That Give the Secret Away

Every mistake below announces the secret instantly, and every one of them happens in the finishing stages, not the making. Read them as a checklist before your next piece reaches the paint, and cross each one off in order as you work.
- Painting before the clay is fully dry: trapped moisture clouds the paint and lifts it later. Wait for the cool, heavy feel to leave the base.
- Skipping the primer: paint drinks in patchy and dull. Two coats of gesso cost ten minutes and save the whole finish.
- Thick paint coats: brush marks and drips read as paint, not glaze. Thin coats, always, however slow they feel.
- Dust left from sanding: gloss seals the dust in as grit. Wipe with a damp cloth and let it dry before any coat.
- One heavy sealer flood: pooling, clouding, and tacky spots. Two or three light coats beat one brave one.
Frequently Asked Questions
1. Can air dry clay ever become fully waterproof?
No, and any guide claiming otherwise is misleading you. Sealers make a piece water resistant, fine for a wipedown or a splash, but the clay beneath stays clay. Long soaking, standing water, or outdoor weather will always win in the end, so keep faux ceramic pieces indoors and dry.
2. What paint works best for the ceramic look?
Matte or satin acrylic, thinned slightly and layered, beats every specialty paint for this job. It levels smoothly, takes speckle well, and accepts gloss or matte sealers without fighting them. Avoid glossy craft paint as the color layer, since its shine sits on the surface instead of in it.
3. Which finish looks most like real ceramic?
For pale, smooth pieces, layered gloss, which copies glazed porcelain. For speckled, earthy pieces, satin, which copies stoneware honestly. The finish that fools nobody is gloss over a rough, unsanded surface, where every scratch shines. Match the finish to the style of pottery you are copying.
4. Can I use a spray sealer instead of brushing?
Yes, and for smooth porcelain style pieces it is often better, because no brush marks survive. Spray outdoors or with strong ventilation, in two or three light passes from a hand span away, turning the piece between passes. One heavy pass runs and clouds, exactly like a heavy brushed coat.
5. Can faux ceramic clay hold food or drinks?
No. Air dry clay and craft sealers are not food safe, however convincing the finish looks. Keep these pieces to dry and decorative jobs: trinket dishes, catchalls, vases with dried stems, candle holders with a glass insert. For anything touching food or drink, real ceramic is the only honest answer.
6. How long will the ceramic finish last?
Years, on a shelf piece handled gently. The enemies are water, knocks, and sunlight, in that order. A chipped edge can be sanded, repainted, and resealed in minutes, which is the quiet advantage clay holds over real pottery: the real thing, once chipped, stays chipped.
Conclusion
Learning to make air dry clay look like ceramic takes no kiln, no wheel, and no pottery studio fees: just clay, patience, and a finishing method that respects how real ceramic earns its looks. Keep this guide saved on Pinterest for your next making weekend, pull one old piece from the drawer this week, and share the method with a friend whose clay work deserves a second life. I’ve seen how a properly finished piece can completely shift the way a shelf looks, and the quiet pride when a guest picks it up and assumes it came from a pottery shop.