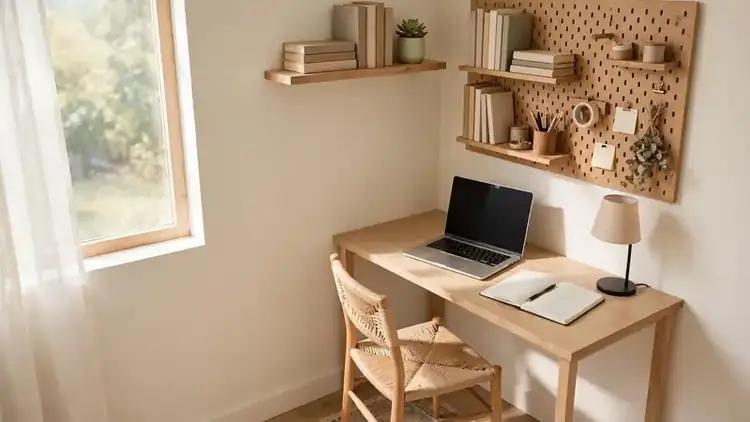
25 Clever Garage Workshop Layouts That Maximize Space
Is your garage more storage chaos than workshop? The right garage workshop layout turns even a cramped single-car space into a place where projects actually get finished.
You will find 25 layouts for every situation: tiny garages, shared parking, woodworking, car repair, and family hobby zones. In my experience, most people do not need a bigger garage, they need a smarter arrangement of the one they have. I have included real measurements, honest costs, and the mistakes to avoid.
Wall-Mounted Tool Storage Layout
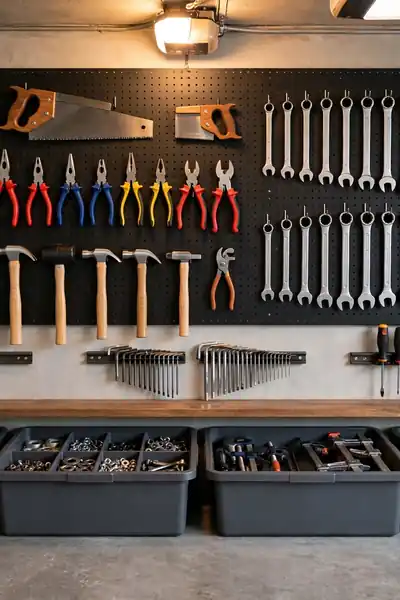
Freeing up floor space is the fastest win in any small garage, and walls do the heavy lifting. A well-planned pegboard or slatwall system keeps every hand tool visible and within arm’s reach, which means no more digging through drawers mid-project. This garage workshop layout works especially well when floor space is tight but wall space is plentiful.
Mount the main panel at eye level, group tools by task, and add small labeled bins for screws and bits. Magnetic strips along the bottom edge hold drivers and wrenches without hooks. In my experience, labeling each outline cuts cleanup time in half because every tool has a visible home.
U-Shaped Workbench Layout

The U-shape wraps your workspace around you, so cutting, assembling, and finishing stations sit steps apart. It suits garages with at least 200 square feet of open floor and works best as a permanent setup.
- Place the longest bench along the back wall for assembly, the biggest task surface.
- Put cutting tools on one side arm and finishing supplies on the other to separate dust from clean work.
- Install under-bench cabinets on all three sides for storage that costs zero floor space.
- Leave 36 inches of clearance in the center so you can turn comfortably with materials in hand.
Rolling Workbench Layout
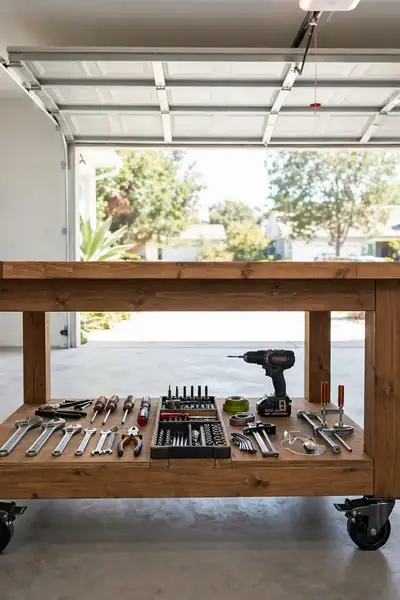
Quick Tip: Buy casters rated for at least twice your bench’s loaded weight. Cheap wheels wobble under a vise and project weight, and a wobbly bench makes precise cuts dangerous. Locking casters are non-negotiable.
A rolling bench gives you a full workstation that disappears against the wall when the car needs the space. Build or buy a bench 48 inches wide with a lower shelf for heavy tools, and pair it with a mobile cart for hand tools. This flexible setup adapts to any project without permanent installation.
Dual-Purpose Workshop and Parking Layout

Common Mistake: People bolt a fixed workbench to the wall and then discover the car door hits it every single day. Within a month the bench becomes a junk shelf because working around the car is too annoying.
The Fix: Keep everything on the workshop side foldable or rolling. A wall-mounted fold-down bench needs just 6 inches of depth when closed, and rolling cabinets tuck under it. Park the car first, then unfold your shop.
Measure your car’s door swing before placing anything permanent. With fold-down solutions the garage switches from parking to workshop in under two minutes, which means you will actually use it instead of avoiding the hassle.
Overhead Storage Layout
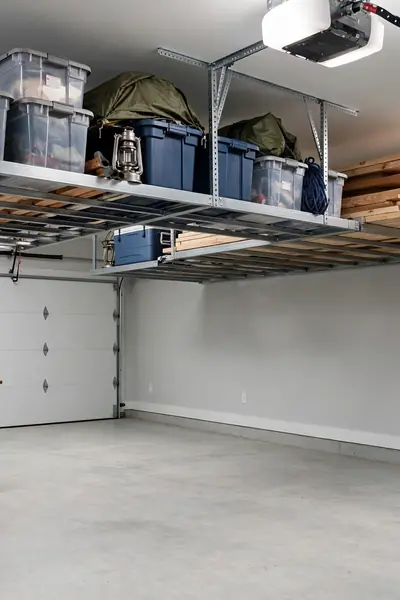
What You Need:
- Ceiling-mounted racks rated for at least 250 pounds per 4×8 section, anchored into joists not drywall.
- Clear labeled bins so you can identify contents from the floor without climbing up.
- A stable step ladder stored nearby, since overhead storage you cannot reach is useless.
- A pulley lift system for heavy items like kayaks or lumber you move seasonally.
Reserve the ceiling for things you touch monthly or less, and keep daily tools at eye level. I’ve noticed that most people overload overhead racks with heavy tools they need weekly, then stop using the racks entirely. Light, bulky, seasonal items belong up high.
Central Island Layout

Before: Tools scattered across folding tables pushed against walls, with you squeezing between them carrying long boards. Every project involves clearing space first, and cords stretch across walkways waiting to trip someone.
After: One solid island anchors the room with 360-degree access. You walk around the project instead of around the furniture, and built-in drawers underneath swallow tools that used to cover every surface.
This layout needs at least 3 feet of clearance on all four sides, so it suits two-car garages or dedicated shops. Place a power strip under the island edge and you will never drag an extension cord across the floor again.
L-Shaped Layout

Do This: run the long arm of the L along the longest wall for maximum continuous counter space. Put your most-used tools at the corner where both arms meet, since that spot is reachable from either side. Add a stool that tucks fully under the bench.
Avoid This: do not block the open side of the L with storage, that open floor is the whole point. Do not make both arms the same depth, a 30-inch main arm with a 20-inch return feels far roomier. Do not skip upper cabinets, they double storage without touching the floor.
The L-shape turns an awkward corner into the hardest-working spot in the garage. It leaves the rest of the floor open for parking or large assemblies while giving you more bench than a straight wall ever could.
Compact One-Wall Layout
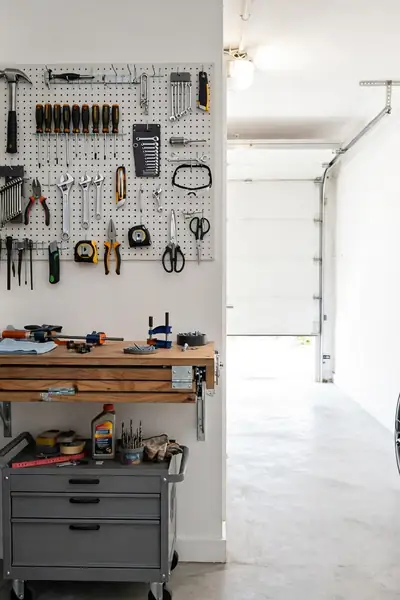
Best For: Single-car garages under 150 sq ft | Cost: Low | Difficulty: Easy | Pro Tip: Go vertical, every inch above the bench is free storage.
When the garage barely fits the car, one wall is all you get, so make it count. Stack tall shelving at one end, mount a fold-down bench in the middle, and cover every spare inch with pegboard or slatwall. The opposite wall stays completely clear, which keeps the space feeling open instead of cramped. This is the highest-impact layout for the smallest garages.
Dedicated Automotive Layout

Car work demands open floor and everything rolling. Keep the center clear for the vehicle, line one wall with a rolling tool chest and a parts-cleaning bench, and mount the brightest lights you own directly over the work zone. A set of ramps or a low-profile jack lives against the wall until needed.
Drainage matters more than beginners expect, so an oil-resistant mat under the engine area saves the concrete and your knees. In my experience, a dedicated automotive corner fails when it shares space with woodworking dust, so keep cutting tools in a separate zone or at least covered.
Garden and DIY Combo Layout

Splitting the garage into zones lets one space serve two hobbies without either one taking over. A physical divider, even just a rug or a shelving unit, keeps soil away from your tools and projects.
- Put the potting bench near the garage door for easy soil and plant hauling.
- Keep the DIY bench on the opposite wall with its own tool storage so zones stay separate.
- Use a freestanding shelf as the divider, it marks the boundary and adds storage for both sides.
- Store shared items like gloves and spray bottles on the divider where both zones can reach them.
Mobile Tool Cart Layout

Quick Tip: Choose carts with locking drawers, not just locking wheels. A cart that rolls across the garage with drawers flying open scatters sharp tools everywhere. Soft-close drawer slides are worth every penny in a mobile setup.
When your projects change weekly, fixed stations fight you. Load each cart by task, one for automotive, one for woodworking, one for electrical, and roll only what the day’s project needs to the bench. At quitting time everything docks against the wall in a neat row, and the garage is clear in minutes.
Natural Light Layout

Common Mistake: People put the workbench against the darkest wall and then wonder why detailed work strains their eyes. They add a harsh overhead bulb that creates glare on the work surface, making things worse instead of better.
The Fix: Move the main bench under the largest window and work facing the light. Supplement with a warm adjustable task lamp for evenings, positioned to the side so your hands do not cast shadows on the work.
Daylight reveals sanding scratches and paint flaws that artificial light hides, which means fewer surprises later. If your garage has no windows, a daylight-temperature LED panel above the bench is the next best thing.
Power Tool Station Layout

What You Need:
- Stationary tools grouped in one zone so noise and dust stay contained in a single area.
- A dust collection system with hoses reaching each tool, because airborne sawdust coats everything.
- A miter saw stand with long support arms for cutting full-length boards safely.
- Vertical lumber storage nearby so wood is at hand without crossing the garage.
Choosing a power-tool-first workshop setup means committing one wall to the loud, dusty work and keeping the rest clean. I’ve seen this make a real difference in shared garages, since the family can use the clean side while you work. Add a ceiling-mounted air filter and the whole garage stays breathable.
Minimalist Layout
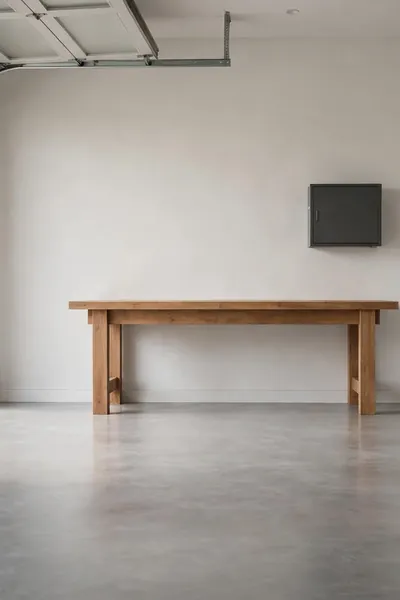
Before: Every flat surface buried under tools bought for one-time projects, three broken gadgets awaiting repair, and boxes nobody has opened in years. Finding a screwdriver takes ten minutes and the stress kills any urge to start.
After: One bench, one cabinet of essential hand tools, and open floor you can actually walk across. Projects start in minutes because everything you own earns its place, and cleanup takes seconds.
Minimalism is not about owning less for its own sake, it is about removing the friction between you and the work. If a tool has not been touched in a year, it does not belong in a minimalist shop.
Professional-Grade Layout
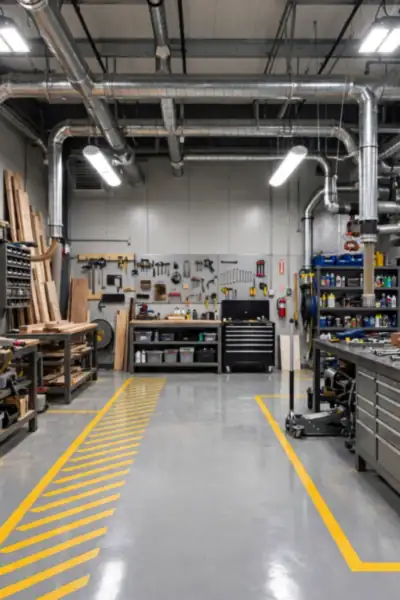
Do This: divide the garage into dedicated zones with marked floor lines, one per trade. Install a 20-amp circuit for every major stationary tool so breakers never trip mid-cut. Mount dust collection ducting along the ceiling with drops at each station.
Avoid This: do not buy professional tools before the infrastructure is ready, a cabinet saw on a 15-amp shared circuit is just frustration. Do not skip climate control, extreme heat and humidity warp wood and rust tools. Do not light it like a basement, high-bay LEDs at 5000K mimic daylight.
This is the layout for people who spend serious hours in the shop. The investment pays back in speed and enjoyment, since a pro-grade space removes every small annoyance that makes hobby time feel like work.
Corner Nook Layout

Best For: Dead corners in any garage | Cost: Low | Difficulty: Easy | Pro Tip: A corner sink or not, keep a small trash bin within arm’s reach.
Corners collect junk because nobody designs for them. A 4-foot corner desk with pegboard on both walls turns wasted space into a complete small-project station for repairs, electronics, or crafts. The two walls give you more hanging storage than a flat wall twice as wide. This nook stays out of the way of cars and big projects while handling most everyday tasks.
Fold-Away Murphy Layout
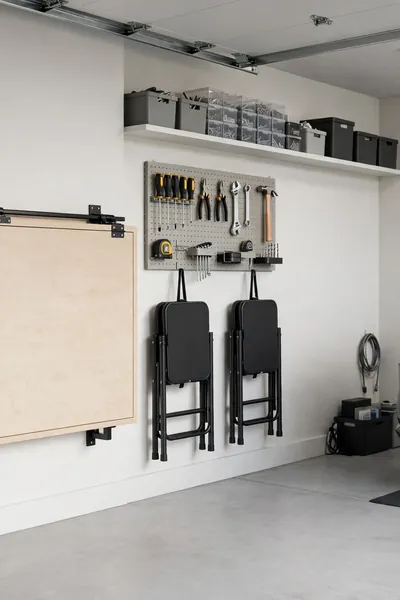
Some garages must be empty garages most of the time. A murphy-style fold-down bench, hinged to the wall with locking legs, gives you a full 2×4-foot work surface that vanishes in seconds. Pair it with fold-flat stools and a slim tool cabinet no deeper than 12 inches.
The trick is making setup so fast you will actually do it. If unfolding takes more than a minute, the bench becomes decoration. Wall-mounted everything, floor completely clear, and your garage stays a garage that occasionally becomes a workshop.
Pegboard Command Wall Layout
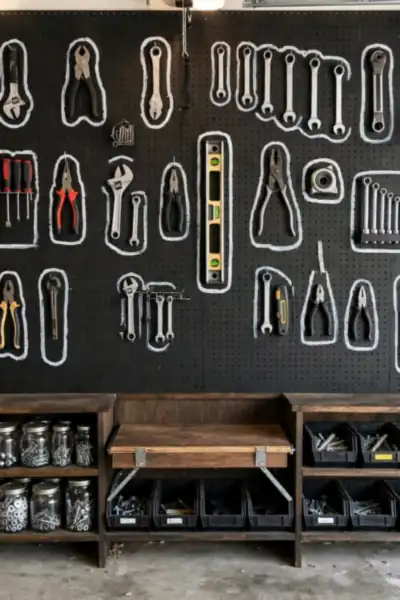
Making one entire wall your organization headquarters changes how the whole garage feels. Tools stop migrating because every item has an outlined, labeled home visible from across the room.
- Cover the wall from 2 feet off the floor to the ceiling with pegboard or slatwall panels.
- Hang your most-used tools at chest height in the center, grouping by task.
- Outline each tool with paint or tape so missing items are obvious at a glance.
- Mount a narrow fold-down bench in the middle for quick tasks without claiming floor space.
Dirty and Clean Two-Zone Layout
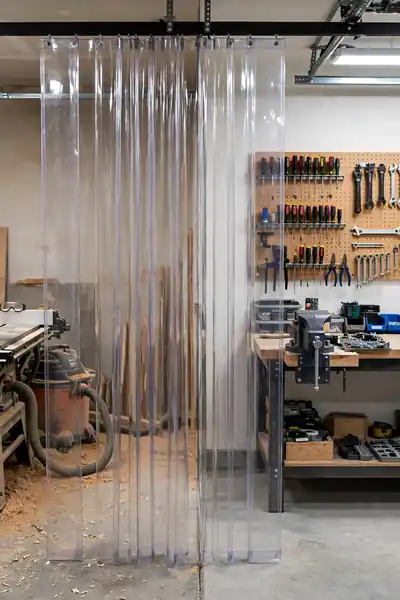
Quick Tip: A ceiling-mounted retractable curtain on a curved track costs little and divides the garage in seconds. It contains airborne dust far better than an open doorway ever will, and you can retract it when you need the full space.
Sawdust ruins finishes and electronics, so keeping the dirty zone physically separate protects your clean work. Put cutting, sanding, and grinding on one side with its own dust collection, and assembly, painting, and repairs on the other. In my experience, this single division does more for project quality than any new tool purchase.
Mezzanine Loft Storage Layout
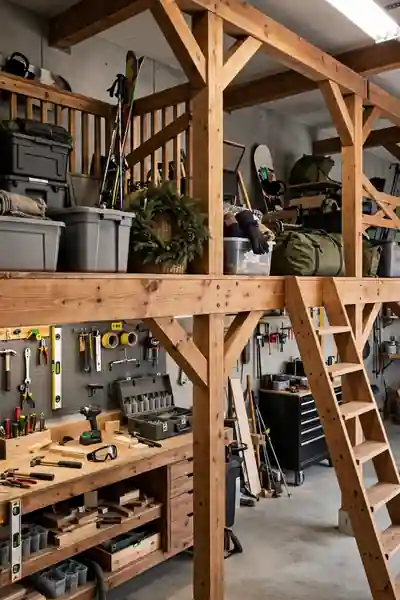
Common Mistake: People pile boxes on the garage floor “temporarily” and lose half their workshop for years. They assume they need a bigger garage when they really need to look up.
The Fix: A simple loft platform 7 feet up over one end of the garage moves all long-term storage off the floor permanently. Build it from 2×8 joists anchored to wall studs, rated for light storage only, never for people.
Keep the loft for seasonal and rarely-used items with labels facing out. The floor space you reclaim underneath fits a full workbench setup that previously seemed impossible in the same garage.
Driveway-Flow Indoor-Outdoor Layout

What You Need:
- A smooth threshold ramp so rolling benches and carts glide over the door track without jolting.
- A heavy-duty outdoor extension cord rated for your tools, since driveway work needs power too.
- Shade or a pop-up canopy for sunny days, because direct sun overheats both you and glue-ups.
- A quick floor-sweep routine so driveway grit never migrates back inside on wheels.
Big assemblies, spray painting, and dusty cuts all work better outside where space and ventilation are unlimited. Design the garage so your main bench rolls straight out the door, and the driveway becomes a seasonal extension of your shop.
Family Hobby Hub Layout
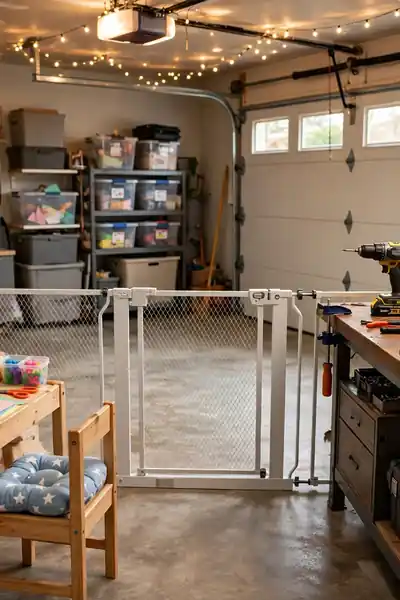
Before: Kids crafting on the kitchen table while you trip over their supplies, and your tools completely off-limits in a locked garage nobody enjoys. Creativity happens in separate rooms and the mess spreads everywhere.
After: One shared space where everyone builds side by side. The kids’ low table keeps their projects contained, your bench stays undisturbed, and a simple safety gate marks the boundary little hands should not cross alone.
Give kids real tools sized for them and a defined zone they own. Shared making time beats separate screen time, and the garage becomes the favorite room in the house.
Sports Gear and Workshop Combo Layout

Do This: dedicate the wall nearest the garage door to gear so bikes roll in and out without crossing the workshop. Use vertical bike hooks to lift wheels off the floor. Keep a small repair stand near the gear wall for quick bike fixes.
Avoid This: do not store balls and loose gear on the workshop floor, they migrate under benches and become trip hazards. Do not hang heavy kayaks above the workbench, one failed strap ruins tools and potentially hurts someone. Do not let gear storage eat the 3-foot clearance your bench needs.
Active families need both storage and shop space. Walling off gear vertically leaves the floor open for real work while keeping every helmet and ball exactly where it belongs.
Enclosed Dust Room Layout
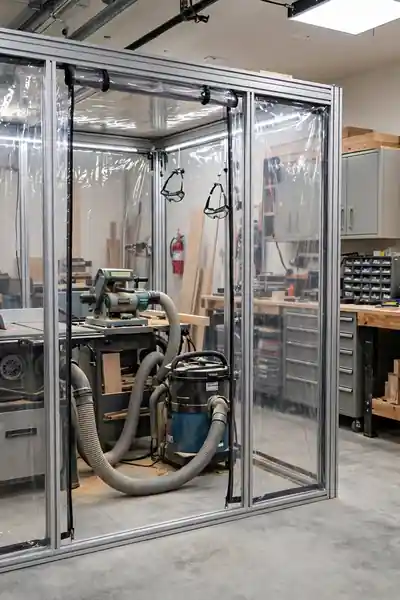
Best For: Woodworkers sharing garage space | Cost: Medium | Difficulty: Moderate | Pro Tip: Add a cheap box fan with a furnace filter inside for extra-fine dust.
Framing a simple 8×8-foot enclosure around your dustiest tools quarantines the mess at its source. Clear plastic walls keep it bright and let you see in, while a dedicated dust collector inside handles the heavy particles. The rest of the garage stays clean enough for assembly, finishing, and parking. This is the single biggest upgrade for anyone whose family complains about dust everywhere.
Windowless Garage LED Lighting Layout

No windows does not have to mean a cave. Layered LED lighting can make a windowless garage feel brighter than most rooms in the house. Start with flat LED panels across the ceiling for even base light, then add under-cabinet strips directly over the bench where detail work happens.
Aim for 5000K daylight color temperature and around 100 lumens per square foot at bench height. The strips eliminate the shadows that overhead lights alone always leave on your work. Done right, you will forget the garage has no windows at all.
Measure First, Plan Safe: Setting Up Your Space Right

Every good layout starts with honest numbers, not enthusiasm. Measure the full garage, mark doors, windows, outlets, and the parked car’s footprint, then sketch it on graph paper where one square equals one foot.
- Record the exact length and width, plus ceiling height for overhead storage planning.
- Mark a 3-foot clearance around the car so doors open without hitting anything.
- Note every outlet and plan workbench positions near them to avoid extension cords.
- Walk the sketch mentally: can you carry a full sheet of plywood from the door to the bench?
Which Layout Fits Your Situation?

Quick Tip: Match the layout to how you actually use the garage, not how you wish you did. Be honest about whether the car sleeps inside every night, because that single fact eliminates half the options instantly.
Still need to park daily: rolling workbench, fold-away murphy, or compact one-wall setups keep the car happy. Mostly woodworking with no car inside: U-shaped, L-shaped, or the power tool station give you room to spread out. Car enthusiast: the dedicated automotive layout is the obvious pick, while multi-hobby families should look at the garden combo or family hub.
Layout Mistakes That Waste Precious Space

Common Mistake: Buying storage before planning the layout. People fill the garage with shelves and cabinets first, then discover the workbench does not fit anywhere sensible and the car barely squeezes in.
The Fix: Plan the work zones on paper first, then buy storage to fit the plan. Place the bench position, mark walkways with tape on the floor, live with the tape for a week, and only then commit to furniture.
The tape trick sounds silly until it saves you from a $400 bench in the wrong spot. I’ve noticed that most people skip this step and rearrange heavy furniture three times instead.
What Each Layout Really Costs
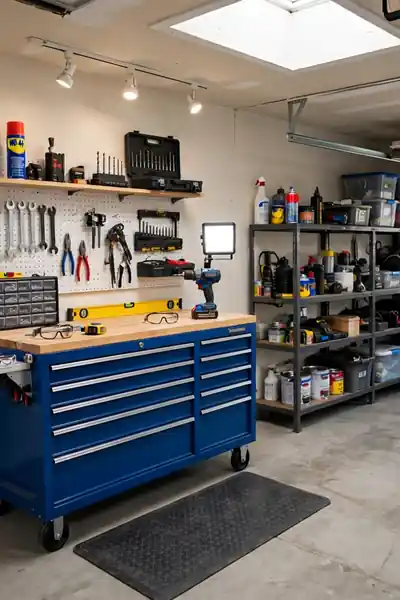
What You Need:
- Under $200: pegboard panels, a basic fold-down bench, and magnetic strips handle the essentials.
- $200 to $800: rolling workbenches, modular shelving, task lighting, and an L-shaped bench setup.
- $800 and up: central island benches, dust collection, pro-grade lighting, and climate control.
Most garages transform completely in the middle tier, so do not assume you need the premium budget. Spend first on layout fundamentals like lighting and storage, since a well-planned $500 shop outperforms a cluttered $2,000 one every time.
Frequently Asked Questions

1. What is the best layout if I still park in the garage?
Rolling workbench, fold-away murphy, or compact one-wall layouts keep the car space clear while giving you a real workstation.
2. How much clearance do I need around a workbench?
Leave at least 36 inches on the working side so you can move comfortably with materials in hand.
3. Do I need special electrical work for a workshop?
Small hand tools run fine on existing outlets, but stationary power tools deserve a dedicated 20-amp circuit to avoid tripped breakers.
4. How do I control dust in a shared garage?
Group dusty tools in one zone with dust collection, or add a simple curtain divider between the dirty and clean areas.
5. What flooring works best under a workbench?
Sealed concrete or epoxy coating resists oil and impact, with an anti-fatigue mat where you stand longest.
Conclusion
You now have 25 proven ways to turn wasted garage space into a workshop that works as hard as you do. The right garage workshop layout means no more clearing clutter before every project and no more tripping over tools.
Save this guide on Pinterest so it is handy when you start rearranging. Pick one layout that fits your garage this weekend, measure first, and share this with a friend whose garage is still just a parking lot. I have seen how making this one change, planning zones before buying anything, can completely shift the result.