22 Hidden Under Sink Organizing Ideas That Double Space
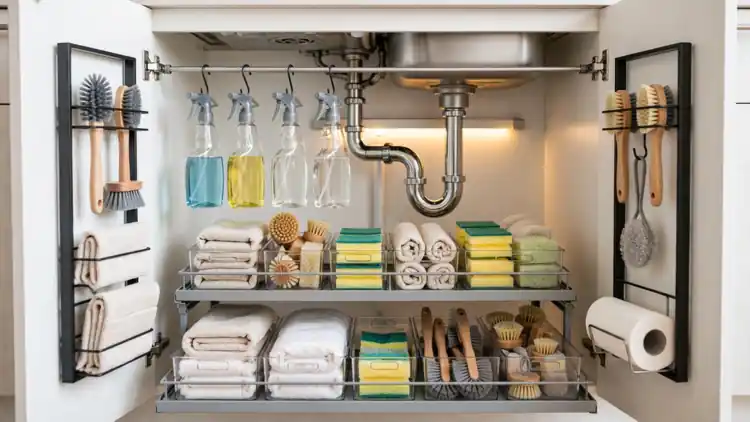
That cabinet under your sink is not small. It is just badly used, with pipes stealing the middle, bottles hiding at the back, and half the height going to waste. These under sink organization ideas change the math completely, using the doors, the walls, the air above the bottles, and even the dark back corners you gave up on long ago.
Inside you will find 22 practical setups in plain order, starting with the measurements that make everything else fit. There are renter friendly options with no drilling, budget picks that cost very little, and a five minute monthly reset that keeps it all working. I’ve noticed the cabinets that stay tidy are never the biggest ones. They are the ones with a system.
Why Your Under Sink Cabinet Always Feels Too Small

Open that cabinet and the same three problems stare back at you. The pipes steal the middle, the back half sits in darkness, and every product you own is a different height and shape. Nothing about the space was designed for storage, so clutter is the default setting.
That is why good under sink organization ideas start with the space itself, not with prettier containers. The cabinet usually holds more than it looks like. It hides its room in the corners, on the doors, and in the tall empty air above the bottles. This guide goes after all of it.
Empty, Measure, and Sort Before You Buy Anything

Every failed cabinet makeover I have seen skipped the same boring step: measuring. Organizers bought by guesswork either block the pipes or leave inches unused, and the whole system gets abandoned within a month. Twenty honest minutes with a tape measure now saves every dollar you spend later.
- Take everything out, wipe the floor of the cabinet, and toss anything empty, expired, or unused for a year.
- Measure the inside width, depth, and height, then note where the pipes and disposal sit and how much room they take.
- Check the door swing and the clearance between the closed door and anything stored at the front.
- Sort what is left into five groups: cleaning sprays, dish supplies, tools and cloths, trash bags, and refills.
- Photograph the empty cabinet with your measurements written down, and keep both on your phone for shopping.
Also View: 23 Clutter-Free Bathroom Organization Ideas That Work
Line the Floor With a Waterproof Leak Mat
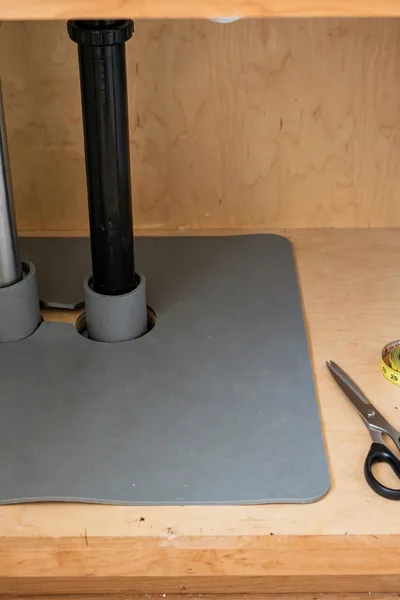
Quick Tip: Buy the mat one size larger than the cabinet and trim it yourself with scissors. Factory sizes rarely match the real space around pipes, and a mat cut to your exact floor covers the corners where drips actually travel.
Slow drips from the trap and the spray hose can leak for weeks before anyone notices, and by then the cabinet floor is swollen and stained. A mat with a small raised edge holds that water in one wipeable place. It costs about ten to fifteen dollars and protects everything you organize above it.
Slide in a Two Tier Pull Out Organizer

Common Mistake: Ordering a standard kitchen drawer unit and discovering on delivery day that the drain pipe and disposal sit exactly where its frame needs to go. The unit either will not slide or steals half the cabinet to fit around them.
The Fix: Choose an organizer built for sink cabinets, with a raised or offset frame that leaves the pipe zone open, and match its width to the clear space beside your plumbing, not the full cabinet width.
Two levels on one footprint is the closest thing this cabinet has to doubling in size. Bottles ride below at full height while the shallow top tier carries sponges, tablets, and brushes. Pull the whole thing forward and the dark back row simply stops existing.
Stack Clear Bins to Build a Second Level

What You Need:
- Two shallow clear stackable bins with straight sides
- One deeper clear bin for the base layer
- A roll of non slip shelf liner
- Plain labels or a white marker
- Your written cabinet measurements from earlier
Stack no more than two high, and keep the heavier bin at the bottom so the tower never wobbles when a door closes hard. Shallow bins matter more than big ones. The moment a bin gets deep enough to dig through, it becomes the same black hole you started with, only transparent.
Hang Spray Bottles From a Tension Rod

Before: Spray bottles stand shoulder to shoulder across the whole cabinet floor. Every grab knocks one over, the sticky ring underneath never gets cleaned, and not one inch of floor is left for anything else.
After: The same bottles hang in a row from a slim rod near the top of the cabinet, triggers hooked over it like coats on a rail. The entire floor beneath them is suddenly free for a bin of trash bags and cloths.
A small spring tension rod, the kind sold for curtains, fits most sink cabinets and twists tight in minutes with no screws. Fit it high and toward the front, hang only bottles with sturdy trigger handles, and give the row a firm tug before trusting it. Renters keep their deposit, owners keep their floor space.
Turn Bottles Around on a Small Lazy Susan
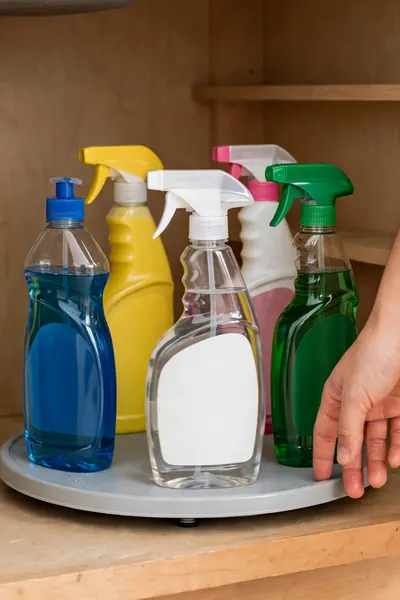
Do This:
- Pick a turntable around ten inches wide with a non slip top
- Load only the bottles you reach for every day
- Place it on the wider side of the cabinet, clear of the pipes
- Leave a finger of space around it so it spins freely
Avoid This:
- A large turntable that scrapes the door frame or the trap
- Loading every cleaner you own onto one spinning plate
- Storing glass bottles where a spin can knock them together
- Hiding the turntable behind bins, where it never gets used
Keep the turntable small, around ten inches across, and it will spin freely without clipping the pipes or the door frame. It earns its space only when it stays half empty. The day it needs a hard push to turn, something on it has to move to a bin instead.
Claim the Inside of Both Cabinet Doors

Quick Facts: Cost: Low | Time: 15 minutes | Best For: Sponges, brushes, gloves, and tablets | Watch Out: Door clearance and rack weight
Small and light is the rule for door storage. Sponges, brushes, gloves, and tablet boxes disappear onto the doors and free a surprising amount of shelf. Before the first screw or sticky pad, close each door slowly and check the rack clears the pipes and the front row of bottles inside.
Fit U Shaped Shelves Around the Pipes
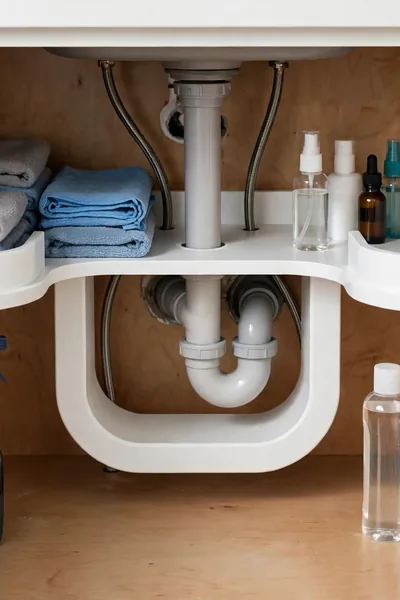
The pipes will always own the center of this cabinet, so the smartest move is to build around them instead of fighting them. A U shaped shelf does that. Its open middle wraps the trap and drain while the raised platform on top turns dead air into a shelf.
Set the platform height so your tallest everyday bottle still slides under it or stands at the open sides. Light things live on top: cloths, sponges, and small bottles. Heavy jugs stay on the floor where the shelf legs never have to carry them, and the pipes stay reachable for repairs.
Tuck Narrow Bins Into the Pipe Side Gaps

Measure the leftover strips beside your pipes and you will probably find three to five forgotten inches on each side. Nothing standard fits there, which is why the space sits empty in most homes. Slim bins turn those scraps into two of the hardest working spots in the cabinet.
- Measure the gap on each side of the plumbing, from the pipe to the cabinet wall.
- Choose bins at least one inch narrower than the gap so they slide in and out freely.
- Give each side one job. Gloves and brushes on one side, sponges and scrubbers on the other works well.
- Write the contents on the front of each bin where your hand already reaches.
- Close the doors and confirm nothing rubs, then load the bins only two thirds full.
Roll Garbage Bags Into a Grab and Go Dispenser

Quick Tip: Stand the roll upright in a tall narrow bin and feed the bags from the center of the roll, the way tissue leaves a box. The next bag presents itself every time, and the roll never unravels across the cabinet floor.
Separate rolls for kitchen, recycling, and compost end the wrong size hunt completely. Each type keeps its own slim section, marked once with a label or a colored tie on the roll. The whole setup takes less floor width than the crushed cardboard box the bags arrived in.
File Cleaning Cloths Upright Like Paperwork

Common Mistake: Stacking cloths flat in one soft pile at the back of the cabinet. The pile slumps, clean and used cloths mix together, and pulling the bottom one drags half the stack out with it every single time.
The Fix: Fold each cloth in thirds and file the whole set upright in a small open bin, like folders in a drawer. Every cloth stays visible, and one pulls free without disturbing its neighbors.
Sort the rows by job and the system runs itself: one row for kitchen counters, one for glass, one for rough scrubbing. Used cloths go straight into a small wash bag hung on a hook, never back into the clean rows. A set of eight to ten cloths covers most homes comfortably.
Give Sponges a Ventilated Home of Their Own
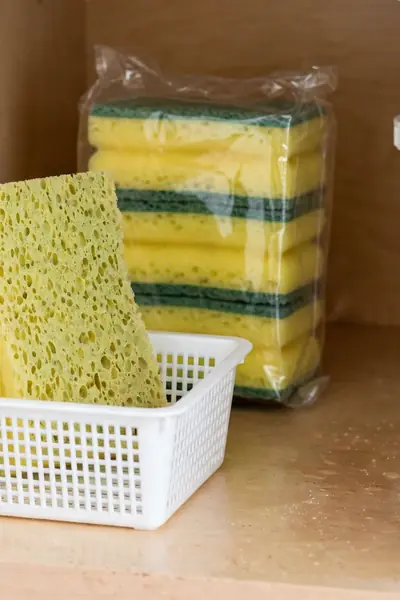
What You Need:
- One small basket or holder with open ventilated sides
- An adhesive hook or suction mount for the cabinet wall
- A sealed pack of spare sponges, kept separate
- A small tray underneath to catch the last drips
A sponge that stays damp in a closed box turns sour within days, and the smell greets you every time the door opens. Airflow is the whole secret here. Standing the working sponge upright in a ventilated holder lets it dry fully between washes, and a dry sponge simply lasts longer.
Park Daily Essentials in One Front Basket

Before: The dish soap lives at the front left, the spray hides behind the pipes, and the detergent sits somewhere near the back. Every cleaning session starts with three separate searches and a small amount of swearing.
After: One handled basket at the front holds all three together. Dishes, counters, or a full clean out, the whole kit lifts out in one hand and goes back the same way.
Choose a basket with a real handle and a footprint smaller than the cabinet door opening, so it passes in and out without tilting. Anything used daily that does not fit in the basket is a sign the basket is too small or the item is not truly daily.
Decant Refills Into Slim Matching Bottles
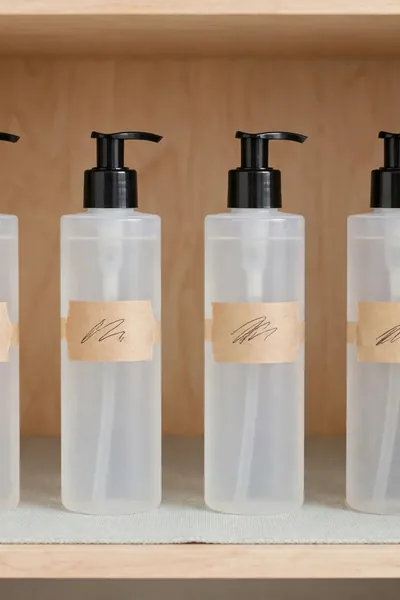
Do This:
- Choose one slim bottle shape and use it for every refill
- Pour with a funnel and wipe the neck before capping
- Label each bottle with the product name the day you fill it
- Store the bulky original jugs outside the cabinet
Avoid This:
- Pouring any cleaner into a bottle that once held a drink
- Leaving a decanted bottle unlabeled, even for a day
- Mixing the last of one product into a different one
- Decanting anything whose warnings you have not saved
Keep the original container until the first refill bottle is labeled and in use, and photograph its warnings with your phone. After that, the wide jug can live in a garage or laundry shelf. Four slim bottles in a row take the width of two bulky jugs, and the cabinet gains a hand of space.
Roll a Caddy Into the Dead Back Space

Quick Facts: Cost: Low to medium | Time: 10 minutes | Best For: Heavy jugs and rarely used products | Works In: Deep cabinets with a flat floor
Load the caddy with the heavy and the rare: the spare jug, the oven cleaner, the drain treatment you reach for twice a year. Daily things stay at the front where they belong. One pull brings the whole back row into daylight, and nothing gets forgotten long enough to expire back there.
Stick On Hooks for Gloves and Brushes

Vertical wall space inside this cabinet is almost always bare, and it is free. Adhesive hooks claim it without a single hole. Gloves drip dry instead of stewing in a bin, brushes stop vanishing under bottles, and everything hangs at the height your hand naturally reaches when the door opens.
Prep decides whether the hooks stay up. Wipe the spot with rubbing alcohol, press the pad firmly for a full minute, then wait a full day before hanging anything heavier than a glove. Respect the weight limit printed on the pack and a good hook will hold for years.
Label Only the Bins That Need It
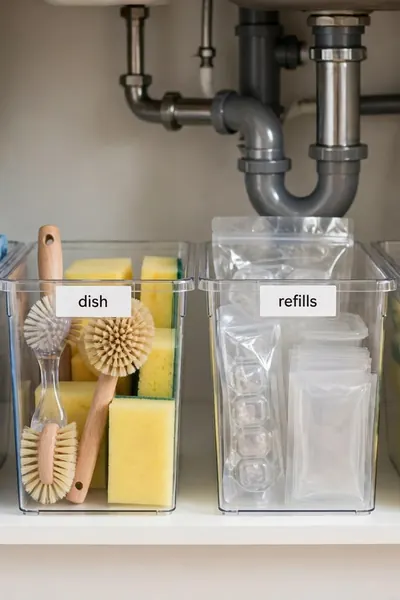
Labels fail in two opposite ways: none at all, or one on every single jar until nobody reads any of them. The middle path works. A few big plain labels on the group bins teach the whole household the system in one glance, including guests and teenagers.
- Label the group, not the item. Cleaning, dish, tools, trash, and refills are enough for the whole cabinet.
- Use large plain letters that can be read in the cabinet’s dim light without bending down.
- Place each label on the front top edge of the bin, where eyes land first.
- Skip labels on clear bins whose contents are already obvious at a glance.
- When a bin changes jobs, change its label the same day, before the wrong things move in.
Build a Bathroom Sink Version That Works Harder

Quick Tip: Give every person in a shared bathroom exactly one small bin for their daily products. Skin care, hair things, and medicines all live in that one bin, and anything that stops fitting goes back to the bedroom shelf where it honestly belongs.
Bathroom cabinets are smaller and damper than kitchen ones, so the bins shrink too. Hair products, skin care, cleaning, and backups each get a compact clear bin, while spare toilet paper stacks vertically in the tallest corner. Keep medicines and anything humidity can harm somewhere drier if you can.
Also Explore: 21 Jaw Dropping Budget Bathroom Makeovers Under $100
Split the Cabinet Into Three Honest Zones
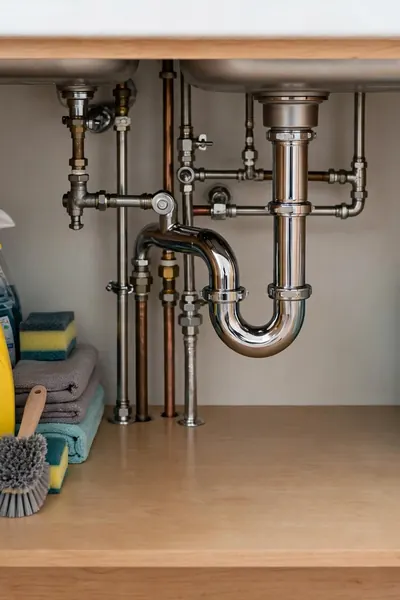
Common Mistake: Arranging the cabinet by shape, tallest bottles in one row and small things wherever they squeeze in. It photographs well for one day, then daily life destroys it, because the things you grab most are never the things in front.
The Fix: Arrange by how often each item is used. Daily products take the easy front zones, weekly things sit behind them, and refills live at the back where slow access costs nothing.
Concretely, most kitchens settle into the same map. Left side: the pull out or basket of daily cleaning. Center: open floor around the pipes with only the leak mat showing. Right and back: bins of refills, cloths, and the caddy of rare heavy things. Frequency first, shapes second.
Keep One Small Basket for Sink Repairs
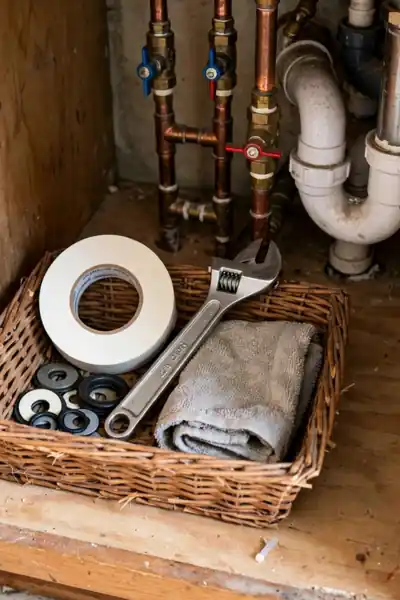
What You Need:
- One roll of white plumber tape for threaded joints
- One small adjustable wrench that fits your tap fittings
- A few spare rubber washers in the sizes your taps use
- One spare drain stopper
- One folded hand towel for the first drip you ever find
Leaks rarely announce themselves during shop hours. They start at night, drip quietly, and turn into a soaked cabinet by morning. With the tape and wrench already under the sink, the first response takes two minutes instead of a flooded floor and a panic drive. Check the basket during every reset.
Keep Just One Backup of Everything
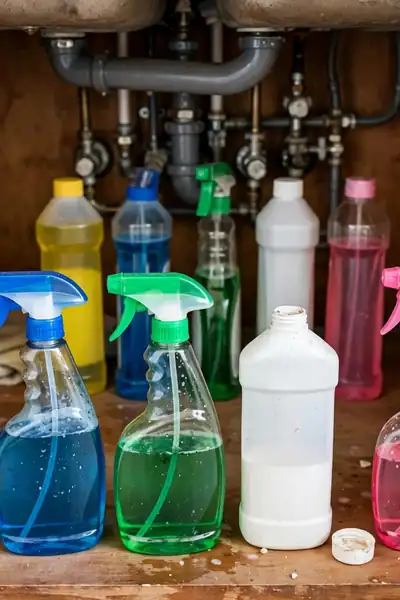
Before: Sale shopping has filled the cabinet with five spare sprays, three detergents, and two extra dish soaps, all crowding out the things you actually use this week. The cabinet stores a small shop instead of serving a kitchen.
After: One backup of each product stands behind the bottle in use, and nothing more. Bulk extras live on a garage or laundry shelf, or simply get bought when the backup opens.
The rule runs on its own once it starts. The day a backup moves forward into use, its name goes on the shopping list. You never run out, you never stockpile, and roughly a third of the cabinet quietly empties itself within one normal shopping cycle.
Mount a Slim Rail on the Side Wall
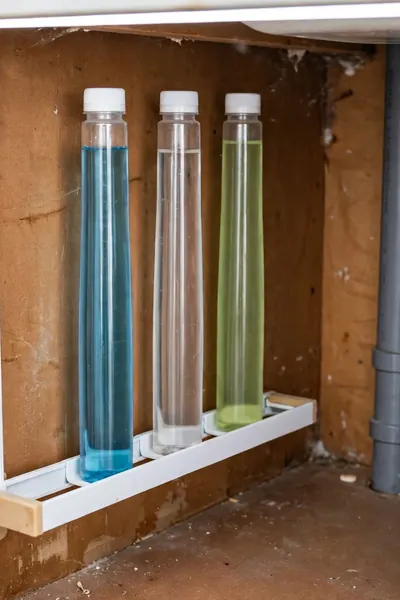
Do This:
- Choose the side wall away from the pipes and the trap
- Fit the rail at a height your tallest thin bottle clears
- Prefer strong adhesive mounting where drilling feels risky
- Keep only light bottles on the rail, never heavy jugs
Avoid This:
- Drilling blindly into a wall where pipes may run behind it
- Mounting the rail where it blocks access to the shut off valve
- Loading the rail until it bows or the pads start peeling
- Placing it where the closing door can clip the bottles
Side walls suit tall thin bottles best: the ones that topple in bins and waste the gaps between round containers. Keep the rail on the wall away from the plumbing so the trap stays fully reachable, and load it lightly. A rail is a shelf for bottles, not for jugs.
Light Up the Back With a Motion Sensor Strip

Quick Facts: Cost: Low | Power: USB rechargeable or batteries | Time: 5 minutes | Result: The whole cabinet visible at a glance
Fit the strip along the top front edge, facing down and slightly inward, and the light lands exactly where your eyes struggle. Rechargeable models run for weeks on one charge and stick on with a magnetic strip, so there are no wires and no drilling. Darkness was never a storage problem you had to accept.
Mistakes That Waste Half Your Cabinet
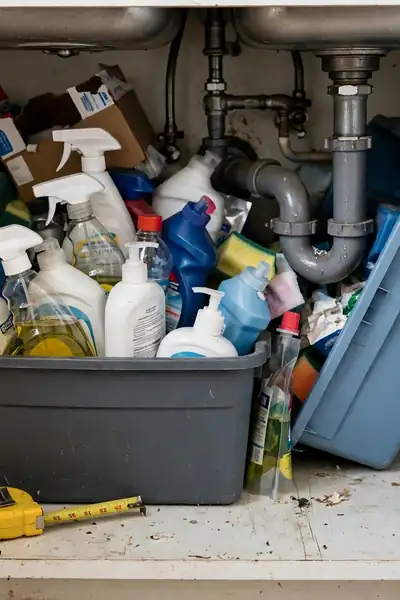
Nearly every wasted cabinet repeats the same four errors. Organizers get bought before a measurement is taken, so they fight the pipes from day one. Bins come home deep enough to hide bottles behind bottles. Every container gets filled to the brim, and sale backups pile in until the working space is gone.
None of these errors needs money to fix. Measure first and buy second. Choose shallow bins your eyes can cross in one look. Leave every container a third empty on purpose. Keep one backup only. The cabinet you already own is bigger than the habits filling it.
A Five Minute Reset That Keeps It Working
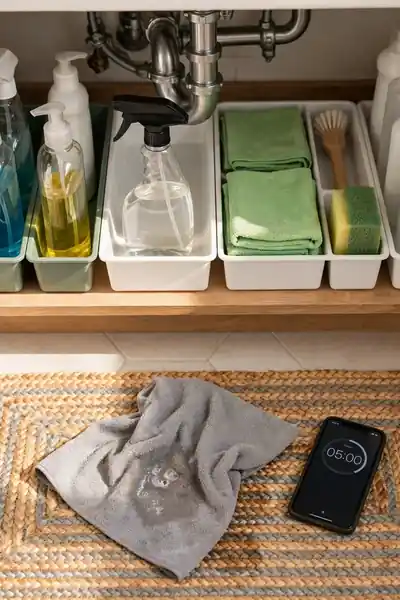
Systems do not fail in one dramatic moment. They fade through ten small moments when a bottle lands in the wrong zone and stays there. A five minute reset once a month is cheaper than a full reorganization twice a year, and it keeps the doubled space doubled.
- Return every stray item to its zone, including anything that migrated to the counter.
- Run one hand across the leak mat. Any dampness means a drip to find this week, not next month.
- Pull out empties and near empties, and add their replacements to the shopping list.
- Wipe the sticky ring where the bottles stand and rinse the sponge holder.
- Check the backup row. One of each, nothing more, and the doors close on a finished job.
Frequently Asked Questions
1. How do I organize around a garbage disposal?
Treat the disposal as a wall. It takes one side of the cabinet, so give the other side the pull out organizer or stacked bins, and let the doors and the U shaped shelf carry the small things the lost side would have held.
2. What should never be stored under a sink?
Keep flammable products, anything that heat or damp can spoil, and medicines in a steamy bathroom cabinet somewhere safer. Strong chemicals belong in a latched or high spot whenever small children are in the house.
3. How much does a full under sink makeover cost?
A mat, a tension rod, adhesive hooks, and budget bins can come together for roughly thirty to sixty dollars. A pull out organizer is the one bigger purchase, usually twenty five to fifty dollars on its own.
4. Can renters organize under the sink without drilling?
Yes, completely. Tension rods, adhesive hooks and rails, door racks that hang over the top, and freestanding bins and caddies all install and remove without leaving a single hole behind.
5. What size bins fit most sink cabinets?
There is no safe universal size, which is the honest answer. Most kitchen sink cabinets run thirty to thirty six inches wide, but pipe positions differ in every home. Your five measurements from the start of this guide decide every bin.
6. How do I stop the damp smell under my sink?
Dry storage is the cure. Stand sponges in a ventilated holder, wipe spills the day they happen, and check the mat for leak water monthly. A sour smell that survives cleaning usually means a slow drip is hiding somewhere.
Conclusion
Your sink cabinet was never short on space. It was short on a system, and now it has one. Start with the leak mat and the measurements, add the two or three ideas that fit your cabinet best, and these under sink organization ideas will repay you daily. Pick one idea this weekend and feel the difference by Monday. Save this post on Pinterest so the measurements, zones, and reset steps stay within reach, and share it with anyone whose cabinet door barely closes. I’ve seen how small changes like these can completely shift the way a space feels, and this cabinet proves it fast.