25 Sweet and Cute Air Dry Clay Ideas You’ll Want to Try
A fresh block of clay sits on the table, and the same question always follows: what should I actually make? These 25 cute air dry clay ideas answer it properly, with mushrooms, heart dishes, mini rainbows, and sleepy moon trays that are small, sweet, and honestly beginner sized.
I have noticed the projects people finish are never the complicated ones. They are the pieces that dry in two days, paint in soft colors, and earn a real job at home: holding rings, guarding keys, cheering up a shelf. Pick one small project, roll the clay, and let your hands learn as you go.
Start With Soft Clay and Simple Tools
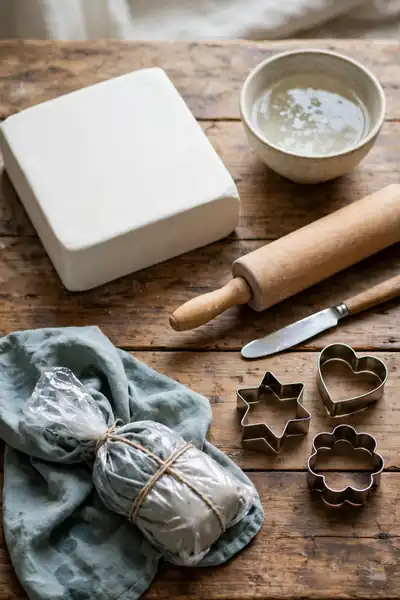
Every cute result in this list starts long before the shaping, with clay that is soft, clean, and evenly rolled. Most cute air dry clay ideas fail for a boring reason: the clay dried out on the table, or one side was rolled twice as thick as the other.
Knead each piece for a full minute before shaping, and keep a small bowl of water beside you for smoothing cracks as they appear. Roll between two guides of equal height so every piece dries at the same speed. Wrap leftovers tightly in plastic, then in a damp cloth.
Mini Mushroom Decorations
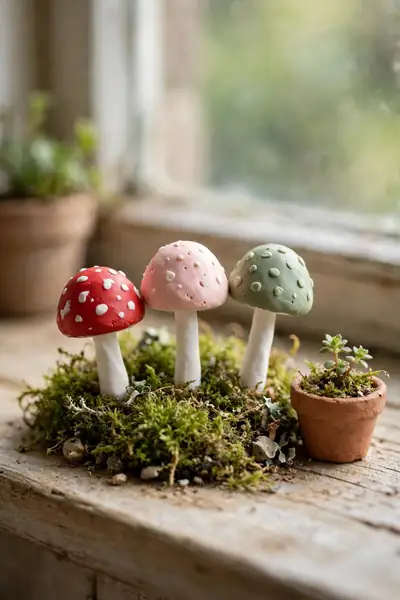
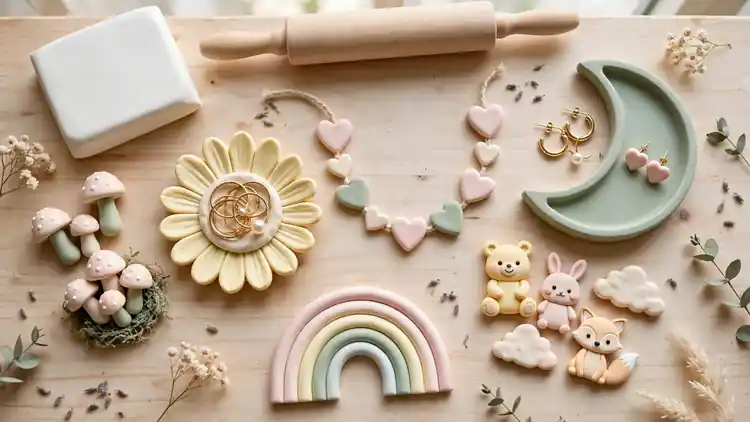
Few shapes forgive a beginner like the mushroom. Two simple parts, a dome and a stem, and suddenly a shelf corner has a tiny woodland living on it. Painted in classic red or soft pastels, these are the pieces friends ask about first.
- Roll a small ball for the cap and flatten it gently into a dome, hollowing the underside slightly with your thumb.
- Roll a short thick cylinder for the stem, a little wider at the base so the mushroom stands on its own.
- Score both joining faces, dab with water, press together, and smooth the seam with a wet fingertip.
- Let the mushrooms dry fully for a day or two before painting, so the colors sit cleanly.
- Add tiny white dots to the caps with the end of a paintbrush handle for the classic spotted finish.
Also View: 23 Essential Air Dry Clay Tips Beginners Always Miss
Cloud Wall Hooks
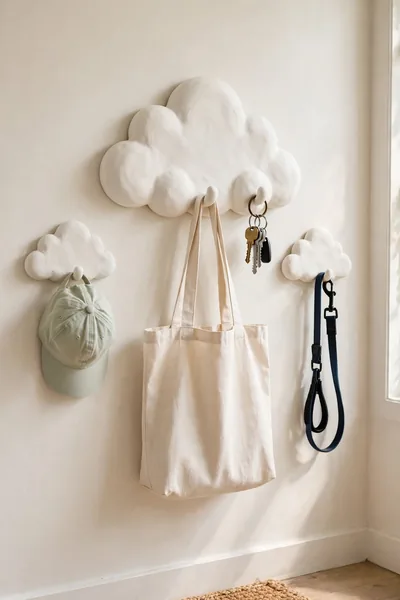
Quick Tip: Make the back of each cloud perfectly flat while the clay is wet, pressing it once on a smooth board. A flat back is what lets the hook sit flush against the wall later, with no rocking and no weak contact patch.
Keep the loads honest and light: keys, caps, leashes, and empty totes are the cloud’s weight class, not heavy bags. Fix each dried and sealed hook with a heavy duty adhesive pad rated above what it will hold, or a small picture hook set into the clay before drying. Check the hold after a day.
Daisy Trinket Dish
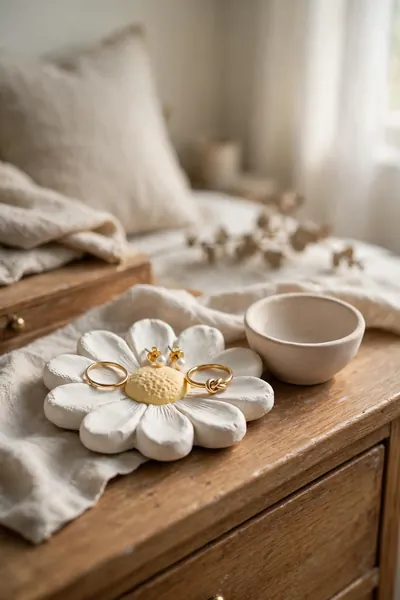
Common Mistake: Rolling the daisy paper thin so the petals look delicate, then watching them curl upward as they dry and chip at the first touch. Thin petals also snap where they meet the center, which is exactly where rings press down every day.
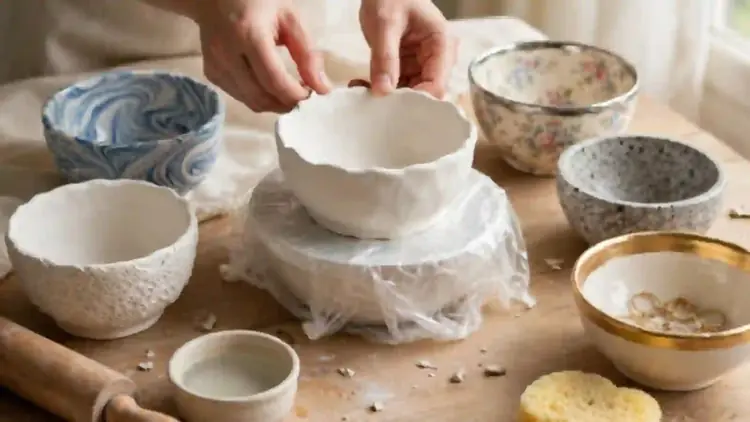
The Fix: Keep the petal slab at least a quarter inch thick, and shape the whole daisy over a small bowl lined with plastic wrap so the petals lift gently instead of curling. The wrap releases the dried dish cleanly, and the petals dry in their curved shape.
Smooth every petal edge with a wet fingertip before drying, because rough edges are where chips begin. Paint the center first and the petals last, so any slip lands on white and wipes away. A clear seal at the end keeps ring metal from marking the paint.
Heart Garland Strand
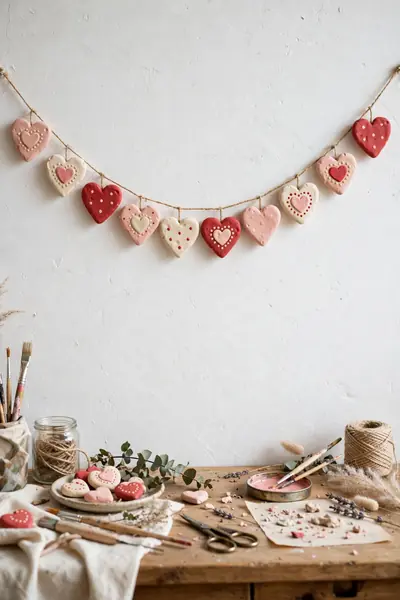
What You Need:
- A heart shaped cookie cutter in one or two sizes
- A straw or skewer for clean thread holes
- Fine twine or cotton string, cut longer than the wall span
- Acrylic paints in two or three soft shades
- Clear sealant for a gentle protective sheen
Space the hearts unevenly on purpose, mixing two sizes and letting the colors repeat in a loose rhythm rather than a strict pattern. Handmade irregularity is the charm here. Thread the twine after painting and sealing, and knot it gently behind every third heart so the spacing survives hanging and storage.
Cute Mini Plant Pots
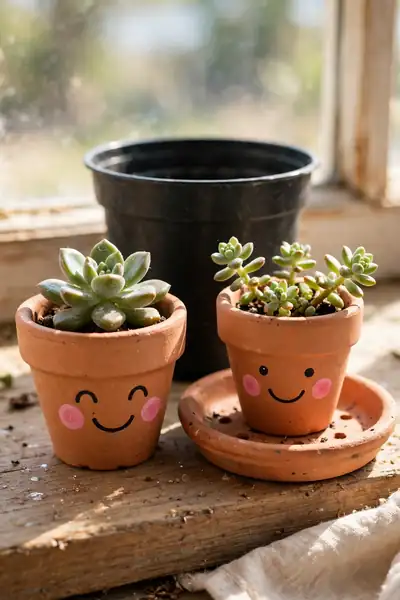
Before: A new succulent sits in its dull plastic nursery pot, or worse, in a cute clay pot with no drainage, where water pools at the roots after every watering. The plant fades slowly while the pot still looks adorable in photos.
After: The clay pot has a real drainage hole and a matching saucer, its inside is sealed against moisture, and the plant stays healthy for months. The painted face is still the star, but now the pot works as hard as it charms.
Form the pot around a small real pot or cup so the walls stay even, and poke the drainage hole while the clay is leather hard, not wet. Seal the inside with two coats, letting each dry fully. For thirsty plants, keep the clay pot as a decorative cover instead.
Tiny House Tea Light Holders
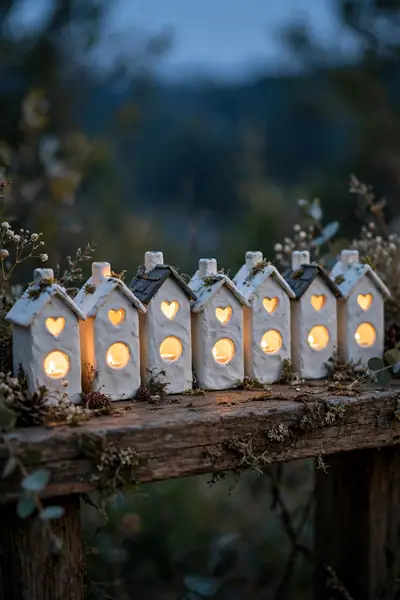
Do This:
- Use flameless LED tea lights only, never a real flame
- Keep the walls a steady quarter inch so the house stands strong
- Cut windows and doors while the clay is soft and easy to trim
- Leave the back or base open for the light to slip in
Avoid This:
- Putting any real candle or flame inside a clay house
- Making a closed roof with no opening for the light
- Rushing the drying, which warps the little walls
- Placing the houses near curtains or paper decorations
Cut every window and door while the clay is still soft, supporting the wall from inside with a fingertip so the shape does not cave in. A straw makes perfect round windows. Leave the back or the base open, so the light slips in and out easily and heat never builds.
Moon Phase Wall Hanging
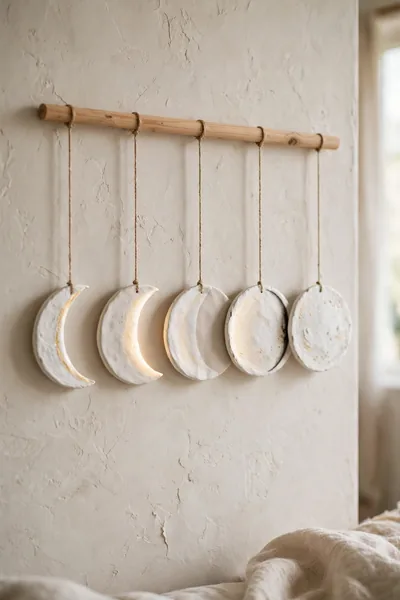
Quick Facts: The Pieces: Five moons, crescent to full | The Cutter: One round cutter for all five | Drying Time: Two to three days for thin discs | Best For: Bedrooms and quiet reading corners
Cut all five moons from one rolled slab using the same round cutter, so the family matches in thickness and size. Trim the crescents with the same cutter offset to one side. Lay the finished row out on its cords before knotting anything, because even spacing is far easier to judge flat.
Bow Hair Clips and Pins
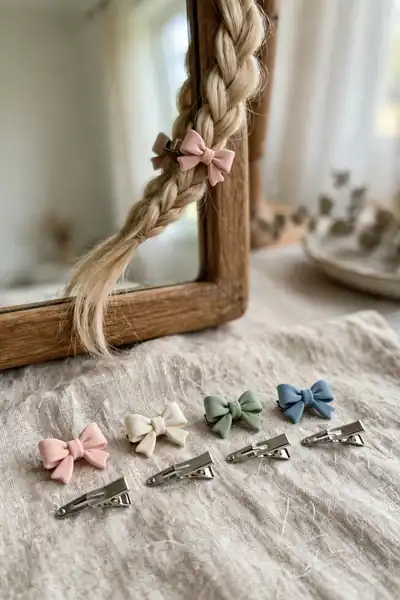
A clay bow holds its shape far better when it is built from flat pieces instead of pinched from a ball. Cut two rounded triangles for the loops, one small rectangle for the tails, and one tiny strip for the center knot. Pressed together with scored joins, the bow looks tailored, not squeezed.
Glue the metal clip on only after the bow is painted and sealed, using a strong craft glue and a full day of curing before the first wear. I have noticed small bows sell and gift well in mixed color sets of four, packed on a card.
Heart Ring Dish
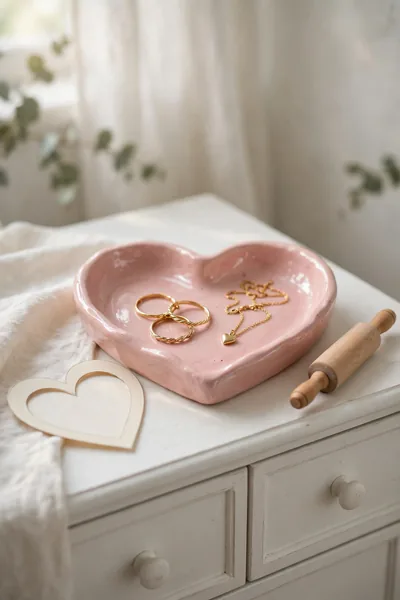
The ring dish is where clay turns into a daily habit. A heart shape takes ten minutes to cut, and then it quietly guards rings and earrings beside the sink or bed for years. Small, useful, and impossible to buy in quite this shape.
- Roll the clay to an even quarter inch and cut a heart with a cutter or a paper template and a craft knife.
- Lift the edges gently all around with your thumbs, pinching a low rim that keeps rings from sliding out.
- Smooth the rim and the inside with a wet fingertip until no cracks or fingerprints remain.
- Dry the dish flat for two full days, since the raised edges dry slower than the base.
- Paint or leave it natural, then seal the inside well, because that surface meets metal daily.
Star and Moon Nursery Mobile

Quick Tip: Balance the mobile before the final knots. Hang it from one finger at its center string and shift the pieces until it sits level, because a lopsided mobile spins toward its heavy side and never looks peaceful, however pretty the pieces are.
Keep every piece small and light, since clay grows heavy in groups and the hoop should never strain. Hang the finished mobile well out of a baby’s reach, as decor rather than a toy, and check the knots monthly. Soft colors keep the whole piece restful at nap time.
Rainbow Shelf Decor
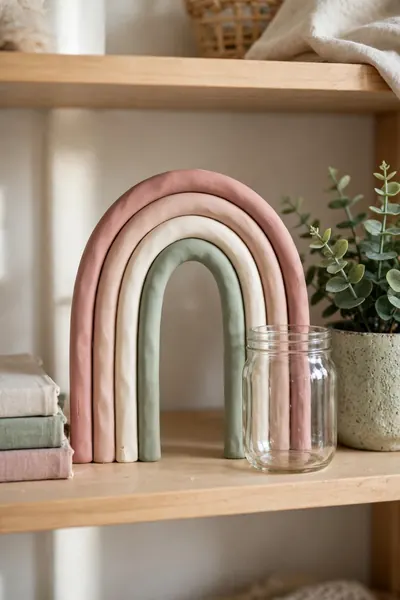
Common Mistake: Building the rainbow from separate arch strips joined at the base, then finding hairline cracks along every join after drying. The arches also lean when each strip is bent freehand to a slightly different curve.
The Fix: Bend each strip over the same round form, a jar or a can, so every arch shares one true curve. Score and slip the ends before joining them at the base, and dry the whole rainbow standing on a flat board.
Roll the strips a little thicker than feels necessary, because thin arches flex and crack as they dry. Paint after full drying, one arch at a time with the others masked by tape. A matte seal keeps the dusty colors looking soft instead of turning shiny.
Mini Rainbow Bookends
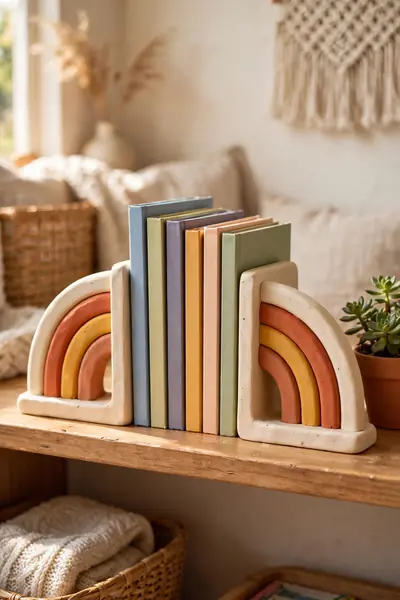
What You Need:
- A heavy core for each bookend, a wrapped brick offcut or wood block
- Enough clay to coat the core in a smooth, even layer
- Two flat base boards the books will rest against
- Paints in three or four warm rainbow shades
- A strong matte sealant for shelf duty
Clay alone is too light to argue with books, so the weight hides inside: build each rainbow around a small heavy core, a wrapped brick offcut or a block of wood, and let the clay be the costume. Make the pair in one session from one slab so both match in thickness and curve.
Decorative Leaf Bowl
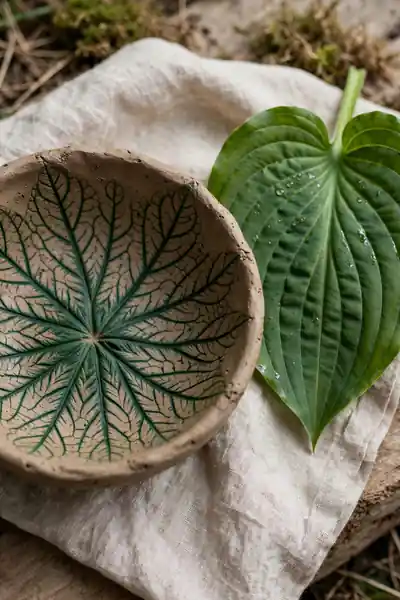
Before: A leaf bowl pressed from a thin, smooth leaf dries almost flat, its pattern too faint to see and its rim slightly warped. Painted over, it reads as an ordinary small bowl with a green tint and no story.
After: A bold veined leaf pressed firmly into clay draped over a form leaves a deep, readable pattern. The bowl keeps its gentle curve, the veins catch a darker wash of paint, and the leaf’s own design does all the decorating.
Pick leaves with thick raised veins, like hosta or grape, and press the vein side into the clay. Small leaves vanish at bowl scale, so go bigger than feels right. Keep the clay on its form until fully dry, because a leaf bowl peeled early dries flat.
Flower Fairy Garden Stakes
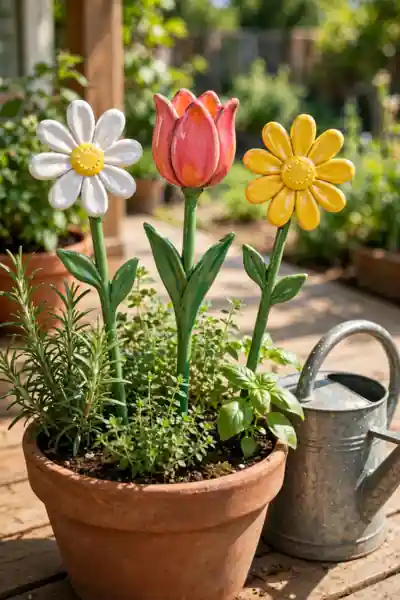
Do This:
- Seal every flower completely, front, back, and stem join
- Set the stake deep into the clay flower head before drying
- Paint in bright colors that survive strong sunlight visually
- Bring the stakes under cover during heavy rain
Avoid This:
- Leaving unsealed clay outdoors, where rain softens it again
- Gluing the stake on after drying, which snaps off easily
- Pushing stakes through a plant’s roots when placing them
- Making the flower head much wider than the stem can carry
Bury at least a third of each stem in the soil or the pot, because a top heavy flower on a short anchor tips over in the first breeze. Push the stake in beside the plant rather than through its roots. A row of three matching flowers reads as a set from the path.
Hanging Clay Wall Flowers
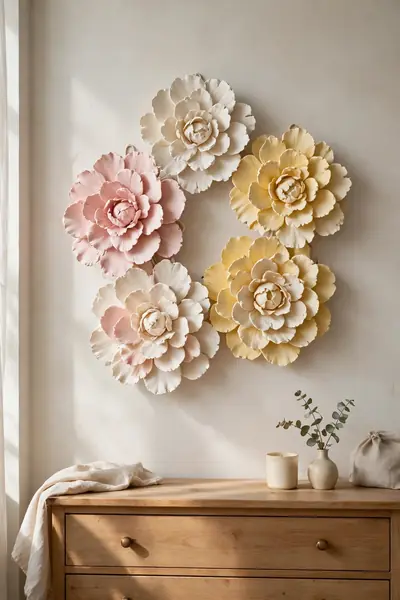
Quick Facts: The Count: Clusters of three, five, or seven | The Backs: Flat, with a loop or hook set in | Drying Time: Two days for layered petals | Best For: Bare walls above dressers and desks
Lay the whole cluster out on the floor or table first and photograph it before any hook touches the wall. Odd numbers group more kindly than even ones, and one larger flower gives the smaller ones a leader. Once the photo looks right, hang in that exact order and the wall is right first time.
Sleepy Moon Jewelry Holder
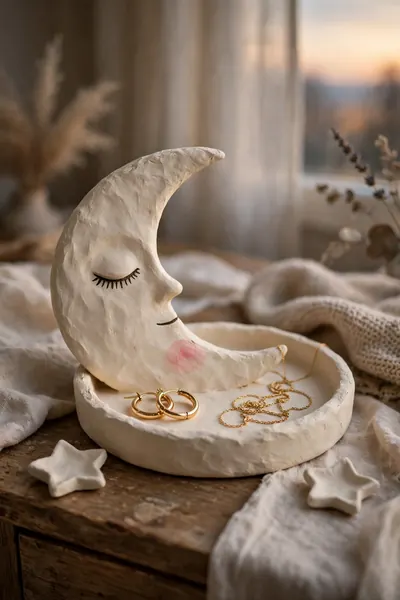
The crescent moon earns its place beside the bed because its curve is a natural fence. Earrings and chains slide toward the middle and stay there, instead of wandering off a flat tray’s edge in the dark. A raised rim along the outer curve finishes the job.
Paint the sleepy face last, with the finest brush you own and a steady rest for your wrist. One closed curved eye, three tiny lashes, and a soft cheek are the whole expression. Gold paint on the moon’s tips makes the piece glow under a bedside lamp.
Cute Animal Magnets
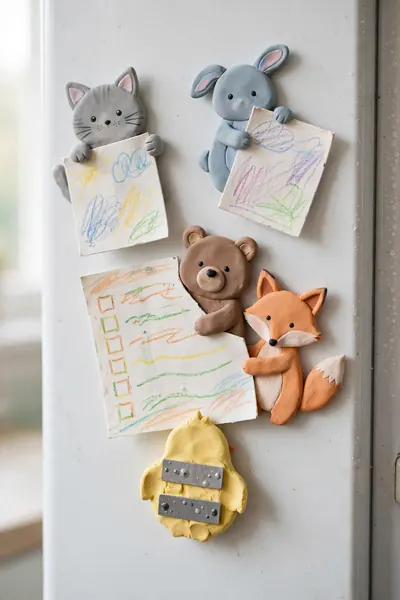
A fridge door is the busiest gallery in the house, and flat clay animals were made for it. Each one takes minutes to shape, holds a drawing or a list without complaint, and turns the most ordinary kitchen surface into the family’s favorite board.
- Roll the clay a quarter inch thick and cut simple animal silhouettes with cutters or a paper template.
- Keep the shapes flat and smooth, rounding every edge with a wet fingertip so nothing chips later.
- Paint the faces after full drying, using the handle end of a brush for round eyes and dots.
- Glue a strong flat magnet to the back only after sealing, and let the glue cure a full day.
- Test each magnet with two sheets of paper before trusting it with the good artwork.
Tiny Ghost Garland
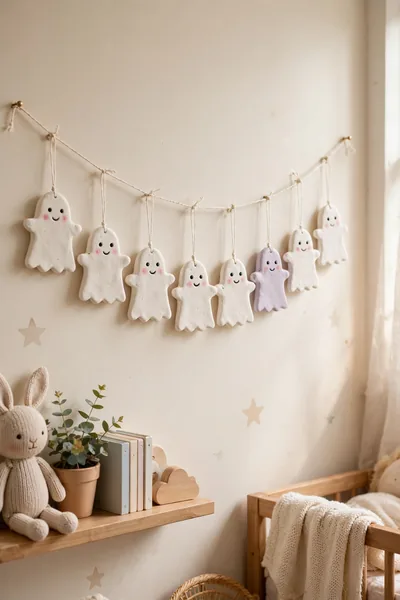
Quick Tip: Poke two holes in every ghost before drying, one near each side of the head. Two holes keep each ghost facing forward on the string instead of slowly spinning to show its back, which is the fate of every one hole garland piece ever made.
Keep the faces sweet rather than spooky and these ghosts work for the whole season in a child’s room. Paint the eyes and smile after drying with the very tip of a fine brush, and add the rosy cheeks with a fingertip dab of pink. White ghosts read best against colored walls.
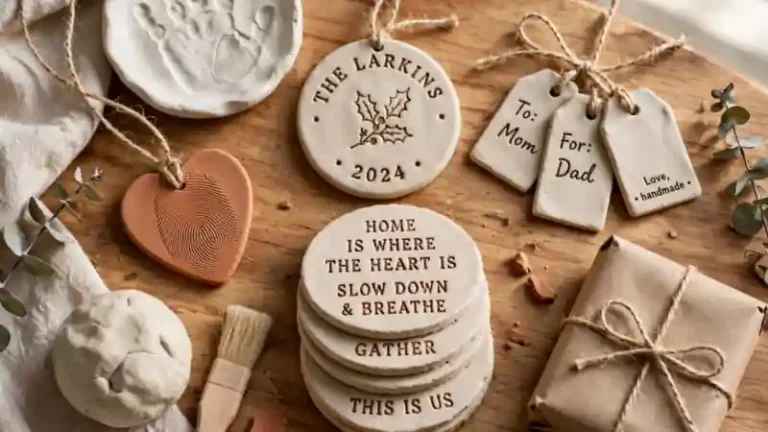
Personalized Name Tags
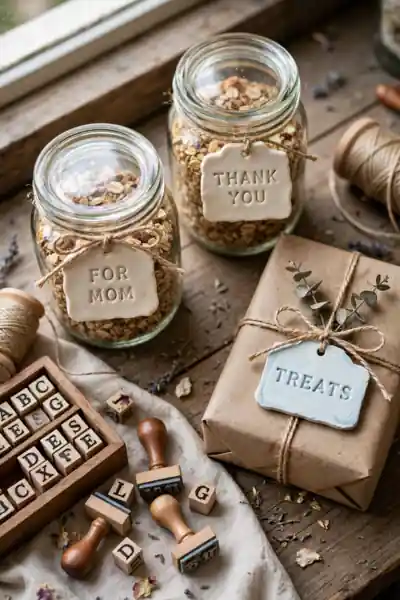
Common Mistake: Stamping the letters once the tag has started drying, so the surface cracks around every letter. The other classic is writing the name with a marker after sealing, then watching the ink feather and blur across the glossy coat.
The Fix: Stamp while the clay is freshly rolled and soft, pressing each letter evenly to the same depth. After drying, either paint inside the stamped letters with a fine brush, or write on the unsealed surface and seal gently over the top.
Poke the string hole before drying and sand its edge smooth after, because a rough hole saws through twine over time. Tags earn their keep far beyond gifts: pantry jars, plant names, luggage, and the family charging drawer all finally become easy to find at a glance.
Pocket Hug Tokens

What You Need:
- A small heart cutter or a steady hand and a knife
- Letter stamps for one short word per token
- Paint in one warm color, or left natural
- Small note cards or drawstring pouches for giving
- A soft sealant that survives pocket life
The token works because of the ritual around it: slipped into a lunchbox on a hard day, carried in a coat pocket, or left on a pillow. Stamp the word deep enough to read by touch as well as sight. One spare token kept by the giver makes the pair feel connected.
Minimalist Incense Holder
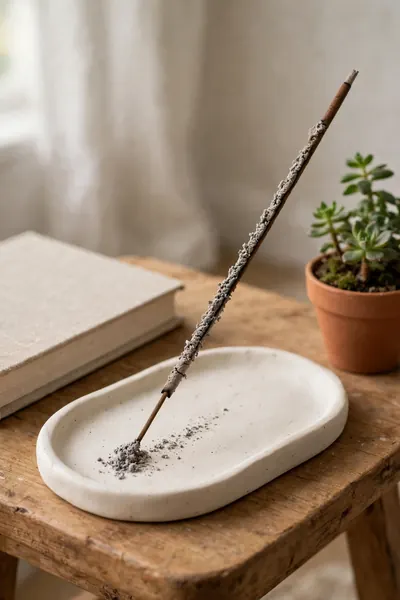
Before: An incense stick gets propped in a plant pot or balanced on a random dish, and fine ash drifts onto the table, the book, and the floor. The scent is lovely and the mess quietly ruins the calm it was meant to create.
After: A flat clay holder made to the stick’s full length catches every bit of ash in one place. The stick rests at a gentle, steady angle, burns evenly to the end, and the table underneath stays clean enough to forget about.
Test the hole with the actual sticks you burn, because brands differ slightly in thickness and a loose stick leans and drops. Make the hole while the clay is soft, at a slight angle, and widen it a fraction after drying with the stick itself used as a gentle file.
Also Explore: Craft an Air Dry Clay Incense Holder for Calm Corners
Butterfly Wall Clips
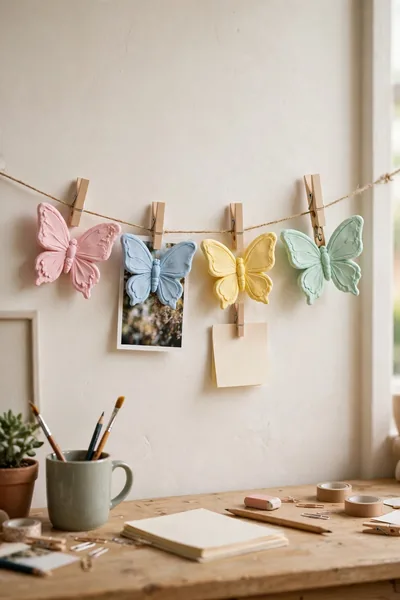
Do This:
- Build the body thick enough to carry the clip’s pressure
- Fold the wings upward along the body line before drying
- Glue the mini clothespin flat across the back of the body
- Test the clip on thick paper before hanging real photos
Avoid This:
- Making the wings as thin as the body is thick
- Hanging heavy cards that slowly pull the butterfly down
- Painting the wings together where they touch the body
- Skipping the seal, since clips rub paint at the grip
Keep the butterfly’s body thick and its wings only slightly thinner, because the body carries the clip and the stress. Wings folded upward along the body line look alive and cast small shadows that flat butterflies never manage. A set in one color family looks designed rather than random.
Speckled Decorative Beads
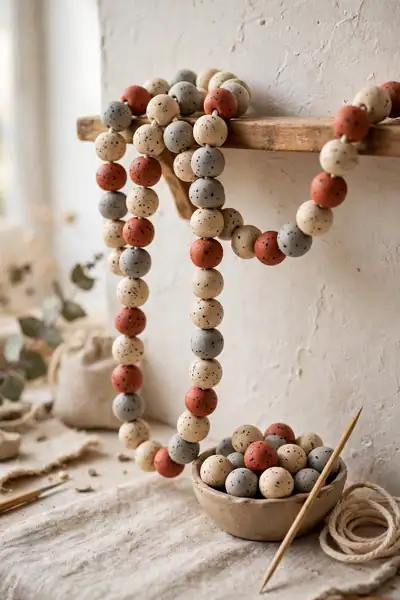
Quick Facts: The Speckle: Paint flecks or fine dried herbs mixed in | The Tool: One small scoop for matching sizes | The Hole: Pierced soft, cleared again after drying | Best For: Garlands, tassels, and curtain ties
Roll every ball with the same small scoop or spoon so the beads match without measuring each one. Pierce the holes while the clay is soft, then clear them again after drying with the same skewer, because holes shrink slightly as the clay dries. String on cotton cord for a soft finish.
Daisy Wall Mirror Frame
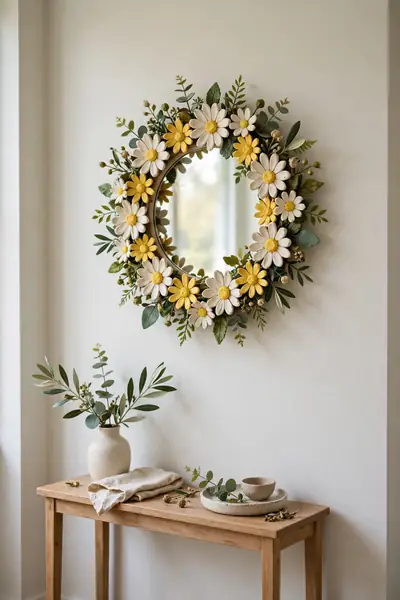
A plain craft mirror turns into the happiest object in the hallway when its rim grows daisies. Build the flowers separately from the mirror, in small batches, and the project never feels big. Leaves tucked between the blooms hide every gap where two flowers fail to meet perfectly.
Glue each dried and painted flower onto the mirror’s rim with a strong craft glue, working around the circle in one sitting so the spacing stays even. Craft mirrors with finished, smooth edges are the safe choice here. One flower glued slightly over the hanging point hides the nail as well.
Rainbow Keychains
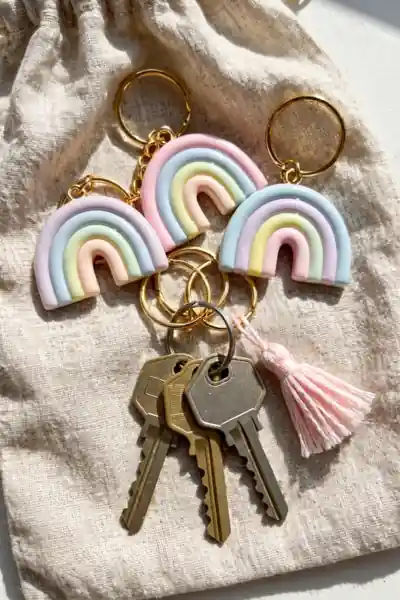
The mini rainbow survives in keychain form because it is small, thick, and sealed like it means it. Keys are the roughest job any clay piece will ever do, rattling against metal all day, so this version is built from the start for hard daily life.
- Roll the arch strips thicker than the shelf version, at least a third of an inch.
- Pierce a clean hole through the top arch while the clay is soft, sized for the split ring.
- Dry the rainbows flat and paint after full drying, keeping colors inside their own arches.
- Seal with two or three coats, letting each coat dry, since keys scratch at the finish daily.
- Thread the split ring only after the final coat cures, and check the hole’s edge for wear monthly.
Fix the Cracks and Wobbly Edges Before Painting
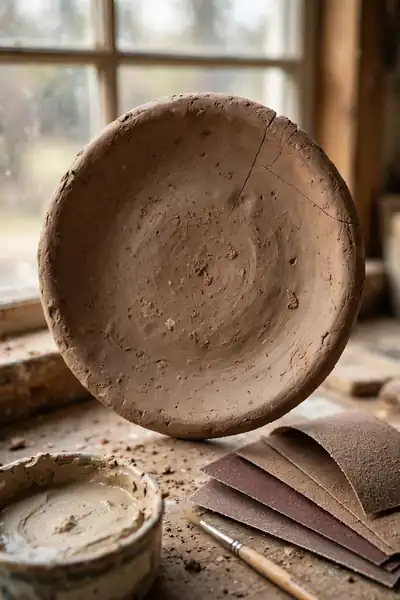
Quick Tip: Hold every dried piece up to a window or lamp and turn it slowly before painting. Hairline cracks and rough edges hide in flat light and shout under paint, while the same cracks take two minutes to fill at this stage and an hour to disguise later.
Fill cracks with a paste of fresh clay mixed with water to a cream, pressed in with a fingertip and smoothed flat. Let the repair dry fully, then sand the whole piece once with fine paper. Wobbles come from uneven drying, so flip flat pieces halfway through their drying time.
Frequently Asked Questions
1. How long does air dry clay take to dry completely?
Small flat pieces often feel dry in a day, but full drying usually takes two to three days depending on thickness and room humidity. Paint and seal only after the piece feels room temperature all over, since a cool center means moisture is still leaving.
2. What paint works best on dried clay pieces?
Ordinary acrylic craft paint is the reliable choice: it covers in two thin coats, dries fast, and comes in every soft shade these projects use. Thin coats matter more than the brand, because one thick coat hides the clay’s smooth surface under brush marks.
3. Do finished pieces really need to be sealed?
Anything that gets handled, hung outside a frame, or sits near water should be sealed, yes. A clear brush on or spray sealant protects the paint from rubbing and the clay from everyday moisture. Display only pieces in dry corners can skip it, though sealing rarely hurts.
4. Can children make these projects safely?
Most of them, yes, with an adult handling the cutting and any glue steps. Choose a clay labeled non toxic, keep tiny magnets and keychain parts away from very small children, and let kids own the shaping and painting, where the real fun lives anyway.
5. Can clay decorations live outdoors all year?
Sealed pieces do well on covered porches and in pots, but no air dry clay is truly waterproof. Heavy rain and winter frost will soften or crack pieces left fully exposed. Bring favorites under cover in bad weather and they will last for many seasons.
6. Why did my piece crack while it was drying?
Usually one of three causes: it dried too fast near heat, it was rolled unevenly so thin areas shrank against thick ones, or a join was pressed together without scoring. Fill hairline cracks with clay paste, sand smooth, and dry the next piece slowly away from vents.
Conclusion
Twenty five small projects later, the pattern is clear: the sweetest pieces are simple shapes made carefully, dried patiently, and given a real place to live. Most of them ask for one afternoon, one block of clay, and a little patience. Keep these cute air dry clay ideas saved on Pinterest for your next craft afternoon, start with one tiny mushroom or heart dish this week, and share the list with a friend who keeps buying clay and staring at it. I’ve seen how small handmade touches like these can completely shift the way a home feels, one shelf at a time.