25 Easy Halloween Costumes You Can DIY This Weekend
Halloween costumes do not need a store run, a sewing machine, or a big budget. With the party invite on the fridge and two weeks left, one good idea and the clothes already in your closet are enough. This guide gives you 25 easy DIY costumes you can finish this weekend.
In my experience, the costumes people remember are rarely the most expensive ones. They are the ones with one clear idea and a clean finish. Each costume below starts from a closet piece, lists exactly what you need, and takes under an hour for most readers.
Why Most Last-Minute Costumes Fail

Most Halloween costumes fail at the same point: the shopping trip. You drive to three stores, everything good is sold out, and you come home with random pieces that never become a costume. Start with what is already in your closet, and let one piece decide the character.
In my experience, one strong base piece beats a full shopping cart. A flannel shirt becomes a scarecrow. A black dress becomes a witch. Pick the piece, name the character, then gather only the two or three small extras that finish the look.
Classic Bedsheet Ghost

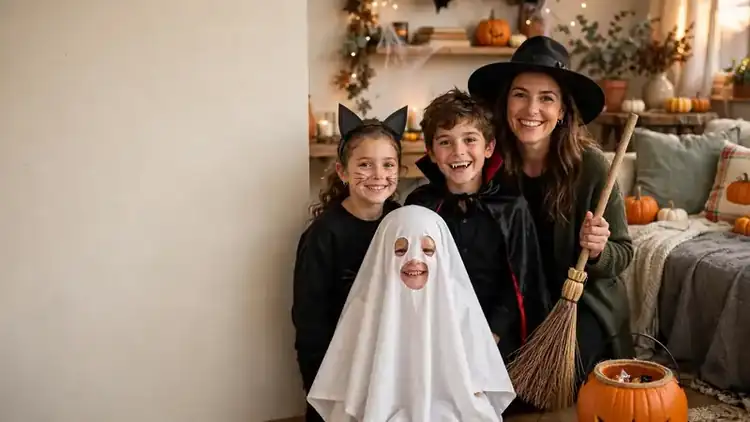
The bedsheet ghost is the fastest costume on this list, and it works for kids and adults alike. You need one white sheet, scissors, and a marker. The whole thing takes less than half an hour, and nothing about it needs sewing or shopping.
- Lay a white sheet over the person and mark where the eyes sit with a small dot.
- Take the sheet off, cut two round eye holes slightly larger than the dots, then put the sheet back on.
- Trim the bottom edge so it sits a few inches above the ankles, and add armholes if the wearer wants hands free.
- Pair it with dark shoes and a pumpkin bucket, and the costume is done.
Also View:22 Eerie Halloween Outdoor Decorations That Dazzle
Scarecrow From a Flannel Shirt

Quick Tip: Straw sells the scarecrow more than any other detail. Tuck a few strands into the collar, cuffs, and hat band, and even a plain flannel shirt reads as a scarecrow from across the street.
Start with a flannel shirt, jeans, and boots you already own. Add a straw hat, then stuff the sleeves and collar loosely with straw or raffia. A few drawn stitches on the shirt finish the look. The costume takes under an hour and holds up well through trick or treat.
Witch With a Homemade Hat
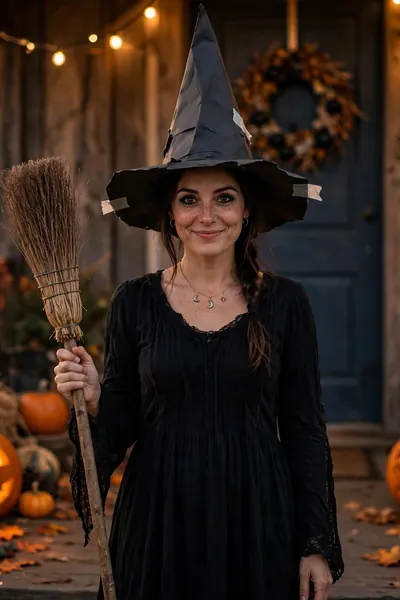
Common Mistake: Most people buy a thin costume-shop witch hat that flops over by mid-evening. A hat that will not hold its shape ruins the whole look, no matter how good the dress is.
The Fix: Build the hat from stiff cardboard, tape the cone closed, and add a wide brim. It holds its shape all night, and it costs almost nothing.
Start with any long black dress or black skirt and top you already own. Add striped socks, dark boots, and the cardboard hat. A broom from the closet and a little green or dark eye makeup finish the character. The full look comes together in about an hour.
Vampire With a Sheet Cape
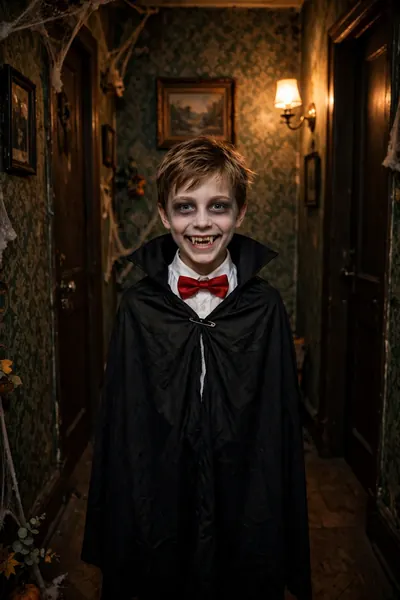
What You Need:
- Black bedsheet or large black cloth: this becomes the cape, cut to shoulder width.
- White shirt and dark pants: the clean base that makes the cape stand out.
- Red ribbon or bow tie: one small red accent sells the vampire at a glance.
- Pale face makeup and fake fangs: the two details that finish the face.
- Safety pins or clips: these hold the cape without any sewing.
Drape the sheet over the shoulders and pin it at the collar so it hangs like a cape. Comb the hair back, add pale makeup, and press in the fangs. The look reads clearly from across the room, and it survives a full evening of trick or treat without any repairs.
Zombie From Old Clothes

Before: A clean outfit with a bit of face paint looks like a person in makeup, not a zombie. Strangers guess the costume for a while, then give up.
After: Torn edges, dirt smudges, and one slow walk turn the same outfit into a zombie nobody mistakes. The mess is the costume.
Take old clothes you were about to throw away and tear the hems, sleeves, and knees. Rub in a little brown makeup or dirt for stains, then add pale green face makeup and dark circles under the eyes. Walk slowly, arms forward, and let the torn clothes do the rest of the talking.
Skeleton With Tape Bones
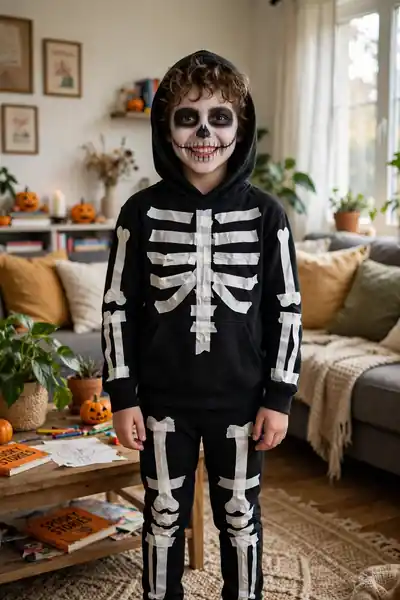
Do This:
- Lay the black outfit flat and plan the bones before you stick anything down.
- Cut white tape into short ribs, one spine line, and simple arm and leg bones.
- Press each piece firmly so the tape holds through a full evening out.
- Add skull face makeup with dark eyes and a white nose to finish the look.
Avoid This:
- Avoid thin paper bones that tear the moment the costume moves.
- Avoid placing bones only on the front, since people see the back too.
- Avoid a hood that covers the face, because the skull makeup is half the costume.
The tape method beats paint because it is faster and it washes off the clothes later. Peel the tape off at the end of the night and the hoodie goes straight back into the closet. Kids love this one because they can help place every bone themselves.
Black Cat With Ears and Whiskers
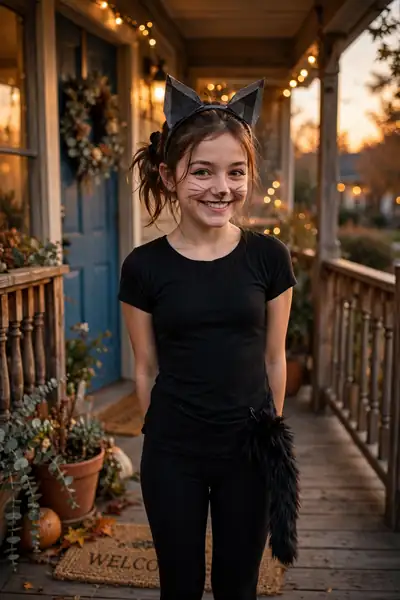
Time Needed: 20 minutes | Difficulty: Very easy | Cost: Almost nothing | Best For: Kids and adults
All-black clothes do most of the work here. Cut two triangle ears from black paper and glue them to a headband, then draw whiskers with eyeliner. Pin a black sock or ribbon tail to the back. The result is cute, quick, and comfortable enough to wear all evening.
Also Explore:25 Spooky-Cute Pumpkin Painting Ideas With No Carving
Pumpkin With an Orange Top
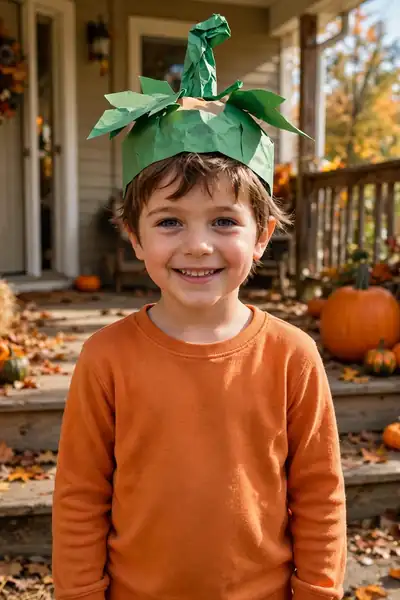
The pumpkin is the easiest costume in this guide, perfect for toddlers who will not keep a complicated outfit on. An orange top, orange pants, and a green hat are the whole costume. Nothing needs to fit a certain way, which is why it works for small kids.
Make the stem from green paper rolled into a cone and pinned to the hat. Draw a few curved lines on the orange top to suggest pumpkin ridges. Add green shoes or socks if you have them. The whole costume takes about fifteen minutes, and it photographs beautifully.
Mummy With White Strips

The mummy looks impressive, but it is one of the simplest costumes here. You need white cloth strips, safety pins, and a white base outfit. Skip toilet paper, which tears and trails everywhere. Cloth strips stay put all evening long.
- Cut an old white sheet or white fabric into long strips about three inches wide.
- Dress in a white top and pants, then wrap the strips around the arms, legs, and torso, pinning each layer as you go.
- Leave small gaps between strips so the white base shows through like bandages.
- Finish with dark eye makeup and let a few strip ends hang loose for effect.
Pirate With a Striped Shirt

Quick Tip: The bandana matters more than the sword. Tie a red or black bandana over the hair and the costume reads as a pirate even before anyone notices the sword.
Start with a striped shirt, dark pants, and boots. Add a vest or an open jacket, a belt, and the bandana. A cardboard sword and a drawn mustache finish the look. The whole costume takes under an hour, and it works just as well for adults as for kids.
Cowboy or Cowgirl With Jeans and Plaid

Common Mistake: People skip the hat because they cannot find a real cowboy hat. Without the hat, jeans and plaid just look like everyday clothes.
The Fix: Make a paper hat from cardboard in ten minutes. The hat alone turns the outfit into a cowboy.
Wear jeans, a plaid shirt, and boots from the closet. Add the paper hat, a bandana around the neck, and a belt. A coiled rope or a toy lasso completes the look. The costume is comfortable, warm, and easy to wear for a long evening out.
Superhero With a Pillowcase Cape
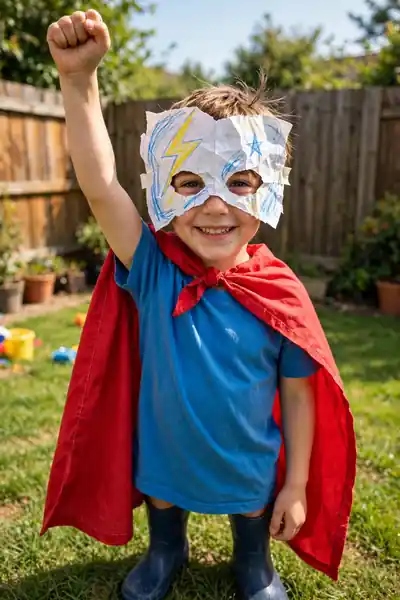
What You Need:
- Pillowcase in a bold color: this becomes the cape with one corner cut off.
- Plain top and pants: the base outfit under the cape.
- Paper or cardboard mask: cut two eye holes and tie it with string.
- Felt letter or drawn symbol: one big letter on the chest makes it a hero.
- Safety pins: these hold the cape at the shoulders without sewing.
Pin the pillowcase at the shoulders so it hangs straight down the back. Add the mask and the chest symbol, then let the kid strike a hero pose. The costume takes about twenty minutes, and kids love inventing their own hero name to go with it.
Fairy With Cardboard Wings
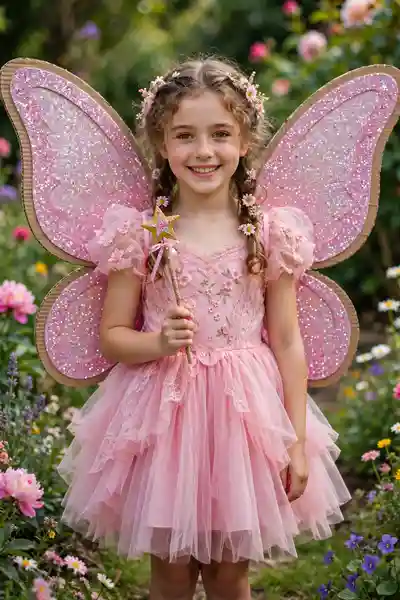
Before: A pink dress alone reads as a party outfit, not a fairy. Without wings, nobody guesses the character.
After: Big cardboard wings and a wand turn the same dress into a fairy in seconds. The wings do all the talking.
Cut two wing shapes from cardboard and cover them with glitter paper or foil. Attach them to the back with ribbon loops over the shoulders. Add a wand from a stick and a star cutout. The wings fold flat for the car ride, then open up again at the party.
Butterfly With Paper Wings
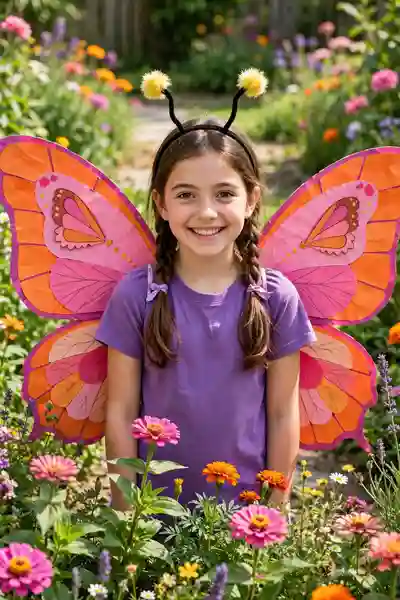
Do This:
- Make the wings big, at least as wide as the shoulders, so they read as butterfly wings from far away.
- Use bright paper in two colors for the wings, with darker spots or edges for contrast.
- Add antennae from a headband, pipe cleaners, and two small pom-poms.
- Match the top to one wing color so the whole costume looks planned.
Avoid This:
- Avoid small wings, since they disappear behind the wearer in photos.
- Avoid heavy cardboard wings that pull backward and tire small shoulders.
- Avoid gluing the wings to the clothes, because they will peel off mid-evening.
Paper wings are the lightest option on this list, which makes them ideal for younger kids. The wings fold for the car and open again at the door. Pair them with face paint dots on the cheeks, and the butterfly is ready for evening photos.
Bumblebee With Stripes
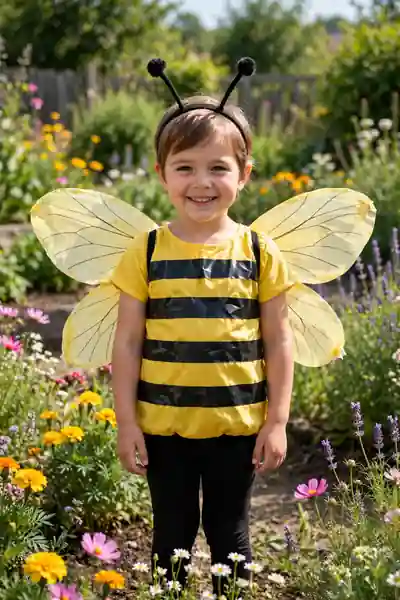
Time Needed: 25 minutes | Difficulty: Easy | Cost: Low | Best For: Toddlers and young kids
Yellow plus black stripes is all it takes for people to say bee at first glance. Wrap black tape in even bands around a yellow top, then add paper wings and antennae. The stripes do the heavy lifting, so the rest can stay simple and bright.
Chef With a Paper Hat

The chef works for kids who love helping in the kitchen, and it comes together from things you already own. A white shirt, an apron, and a paper hat are the full costume. Add a wooden spoon or a whisk, and the character is obvious before anyone asks.
Roll white paper into a tall cylinder, tape it closed, and pin it to a paper band that fits the head. The hat is the one piece that sells the costume, so make it tall and crisp. Everything else can stay plain, and the chef still reads clearly in every photo.
Tourist With a Camera and Hat

The tourist gets the most laughs of any costume on this list, and it needs nothing you do not already own. Loud clothes are the whole joke. Pull the brightest shirt in the closet, add a hat, and the character builds itself.
- Put on the loudest shirt in the closet, plus shorts and sandals.
- Add a sun hat, sunglasses, and a camera hanging from a strap around the neck.
- Tuck a folded map into one pocket and carry a water bottle for effect.
- Walk slowly, point at everything, and ask strangers where the nearest landmark is.
Minion With Yellow and Overalls
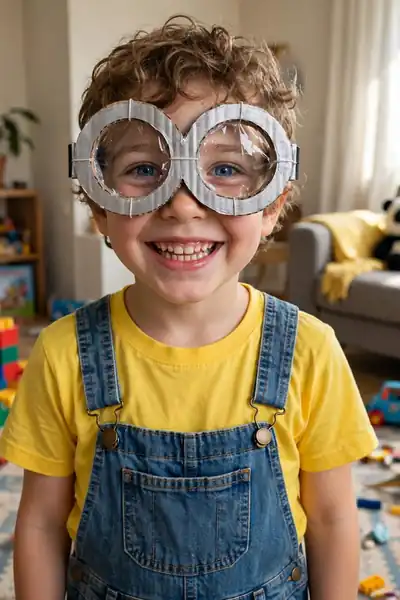
Quick Tip: The goggles make the minion. Round goggles from paper and string do more for this costume than the overalls ever will.
Wear a yellow top with blue overalls and black shoes. Add the paper goggles and a few black gloves if you have them. Kids love this one because the character is silly by nature. The costume takes about half an hour, and it works for any age.
Couples Costume: Salt and Pepper

Common Mistake: Couples pick two costumes that have nothing to do with each other. Two separate costumes are just two people standing together, not a couples costume.
The Fix: Pick one shared idea with two halves, like salt and pepper. The pair reads as one joke the moment people see both of you.
One person wears all white with a big S on the chest, the other wears all black with a big P. Cut the letters from paper and pin them on. The whole pair costs almost nothing, takes twenty minutes, and gets a laugh at every door.
Family Costume: The Garden Set

What You Need:
- Flower: a bright top and a petal headband made from colored paper.
- Bee: a yellow top with black tape stripes and paper wings.
- Gardener: jeans, a plaid shirt, a hat, and gloves from the garage.
- Petal and wing supplies: colored paper, scissors, and tape for both kids.
- A watering can prop: one garden prop ties the whole family theme together.
Assign one character per person and build all three from the same supplies. The shared garden theme makes the family read as one group in every photo. Start with the flower and bee for the kids, then add the gardener for the adult. The set takes about an hour together.
Pet Costume: A Safe Pumpkin Pup

Before: A stiff pet costume makes the dog freeze, chew at the fabric, or hide under the table. Nobody enjoys the photos, least of all the pet.
After: A soft, loose pumpkin cape lets the dog move, walk, and wag normally. The pet looks happy, and the photos come out cute on the first try.
Drape a small piece of orange fabric over the back and pin a green felt stem on top. Skip anything tight around the neck, legs, or face. Keep the costume on for photos and short walks only, then take it off. If the pet pulls at it, the costume comes off right away.
Mistakes That Ruin a DIY Costume
Do This:
- Test the full costume once before the night, including shoes and makeup.
- Pin and tape everything in place, then move around to check it holds.
- Keep a small fix kit handy with tape, pins, and makeup wipes.
- Start the costume a day early so mistakes have time to get fixed.
Avoid This:
- Avoid starting two hours before trick or treat, when every store is closed.
- Avoid face paint that has never been tested on skin.
- Avoid masks or hoods that block vision on dark streets.
- Avoid costumes that drag on the ground, since they trip kids and tear fast.
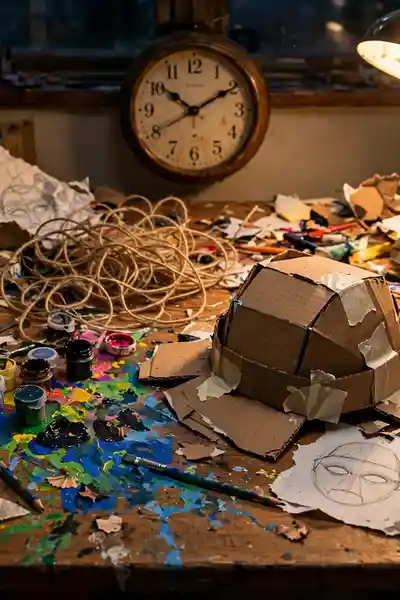
Most costume disasters come from rushing, not from lack of skill. A quick test run the day before catches nearly every problem. Check the fit, the vision, and the walking distance in the costume. Fix what fails at home, and the night itself stays easy.
Pro Tips to Make It Look Store-Bought
Time Needed: 10 extra minutes | Difficulty: Easy | Cost: Nothing extra | Result: A cleaner, store-bought look
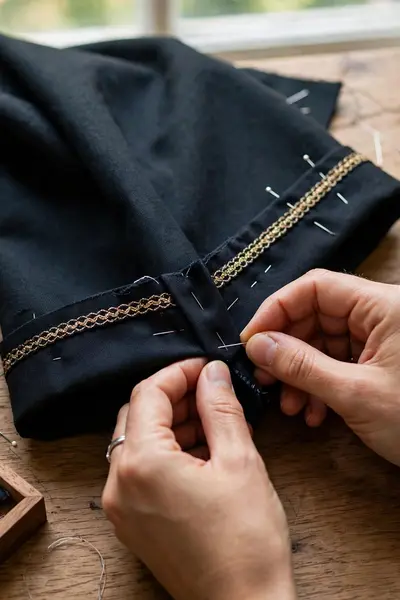
The difference between homemade and store-bought is almost always the finishing. Press the seams, trim loose threads, and match the tape to the fabric color. One clean edge beats three extra accessories. These small touches take ten minutes, and they show up in every single photo.
Frequently Asked Questions
1. Can I make a costume without sewing?
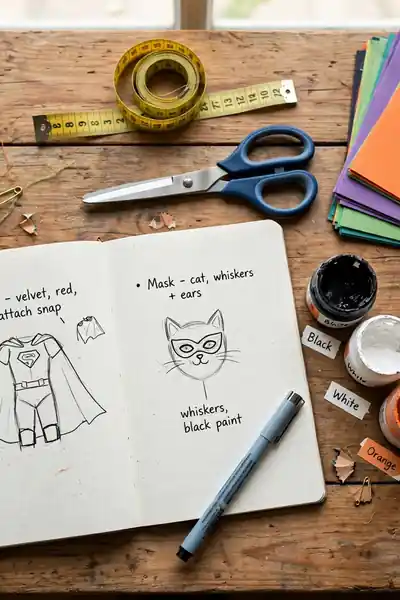
Yes. Every costume in this guide uses tape, safety pins, glue, or tying instead of sewing. Nothing here needs a needle or a sewing machine.
2. How much does a DIY costume cost?
Most of these cost nothing because they start with clothes you already own. If you buy anything, it is usually just face paint, felt, or paper, which runs under ten dollars.
3. What is the easiest costume for a toddler?
The pumpkin or the bumblebee. Both use one colored top, need no mask, and stay comfortable while a toddler walks and sits.
4. How long does a DIY costume take to make?
Most single costumes take twenty to sixty minutes. Couples and family sets take about an hour because you are building two or three looks at once.
5. What if I only have one evening left?
Pick the ghost, the black cat, or the tourist. All three come together in under half an hour from closet clothes alone.
6. How do I keep a DIY costume safe for kids?
Keep the eyes and vision clear, trim anything that drags on the ground, and test face paint on a small patch of skin first. Add a strip of reflective tape for dark streets.
Conclusion
You now have 25 easy Halloween costumes that start in your closet, cost almost nothing, and come together in a single weekend. Pick the one that made you smile, build it with what you already own, and wear it with confidence. Save this guide on Pinterest so it is waiting for you next Halloween, and share it with a friend who is still staring at an empty costume box. One small change, starting from a closet piece instead of a store run, is what turns a stressful week into a fun one. I’ve seen how making this one change can completely shift the result.