DIY Halloween Wreath That Looks So Store Bought Chic
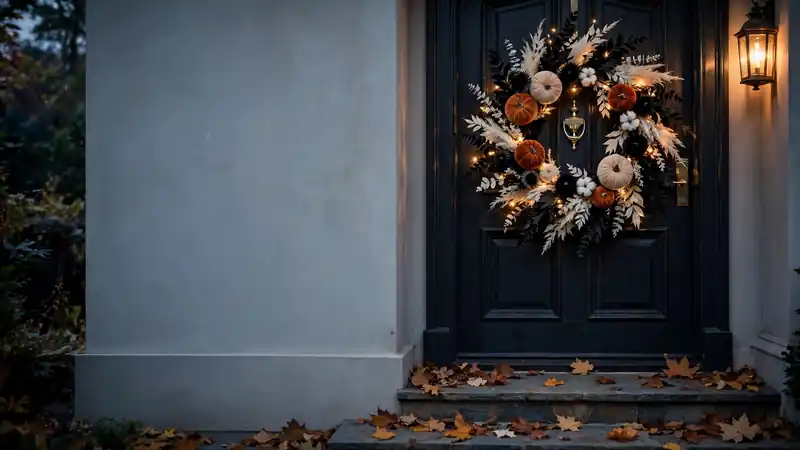
Store-bought Halloween wreaths with real style cost a fortune, and the cheap ones look it. This diy halloween wreath tutorial shows you how to build a chic, expensive-looking wreath for under twenty-five dollars. No craft experience needed, just an afternoon and a few simple materials.
In my experience, the difference between chic and cheap comes down to restraint: three colors, layered textures, and hidden mechanics. Most beginners pile on decorations, but this guide teaches you the stylist’s approach instead. You will learn the exact layering order, a palette that photographs beautifully, and hanging tricks that work on any door.
Why This Wreath Earns Its Place on Your Door

A store-bought Halloween wreath with presence costs forty dollars or more, and most look identical. This handmade wreath delivers the same polished look for under twenty-five, built around colors you choose. It greets every visitor for weeks and photographs beautifully for fall.
You also get something no store shelf offers: a wreath that matches your home exactly. Pick ribbons that echo your front door, dried stems from your garden, lights in the tone you love. When neighbors ask where you bought it, you get to smile and say you made it.
Also View:21 Creepy-Cute Halloween Flower Pots for Your Porch
Nailing the Chic Look: The Two Choices That Matter Most
Quick Tip: Your wreath’s entire look comes down to two decisions: the base material and the color palette. Get these right and even simple decorations look expensive. Get them wrong and no amount of extras will save it.
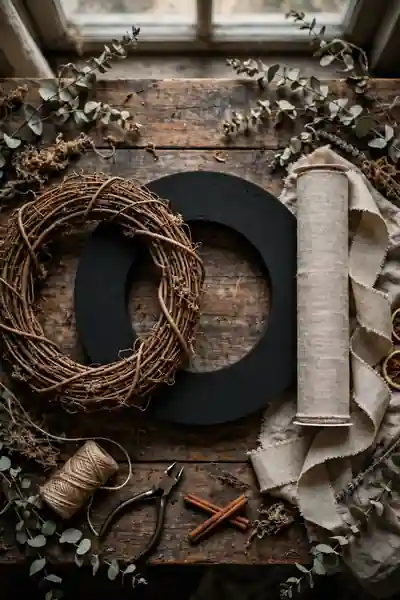
Start with a grapevine or foam base wrapped in neutral fabric, never shiny plastic. Then commit to three colors maximum: a deep base like charcoal, a warm accent like amber, and one metallic for glow. In my experience, restraint is what separates chic from cluttered.
Materials and Tools You’ll Need

What You Need:
- Grapevine wreath form (14-inch): the textured base that reads expensive even before decorating.
- Dried stems and pampas grass: filler that adds height and softness without wilting.
- Velvet mini pumpkins: the chic Halloween accent; choose rust, cream, or black.
- Battery fairy lights (warm white): for evening glow; pick a strand with a built-in timer.
- Hot glue gun and floral wire: glue for light pieces, wire for anything heavy.
Buy your base first and build everything around it, since its size sets your quantities. One 14-inch form needs roughly two bunches of dried stems and six to eight mini pumpkins. Measure your door before shopping so the finished wreath hangs in perfect proportion. A quick photo of your door helps you shop with confidence.
Building Your Halloween Wreath
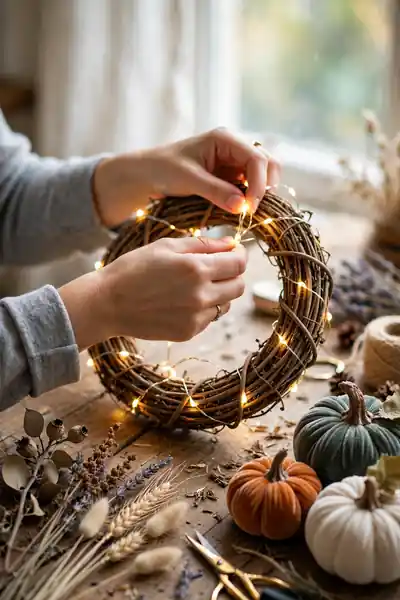
This diy halloween wreath builds in layers, and the order matters more than any single decoration. Follow the sequence below and each layer has something solid to grip. Rushing the order is where most beginners go wrong, so take it one layer at a time.
- Wrap your grapevine form with neutral linen ribbon, overlapping slightly, and secure the end with hot glue. This gives every later layer a clean surface to grip.
- Wind the fairy lights around the form, spacing them evenly, and tuck the battery pack at the back with the switch facing out. Test the lights now, before anything covers them.
- Push dried stems and pampas grass into the grapevine, working in one direction around the wreath. Wire any stem that feels loose instead of trusting glue alone.
- Nestle the velvet pumpkins into gaps between stems, varying their sizes and colors. Step back every few placements to check the balance.
- Tie your hanging ribbon through the top, hold the wreath at arm’s length, and adjust any bare spots. Turn the lights on for a final check.
What It Really Costs, Without the Guesswork
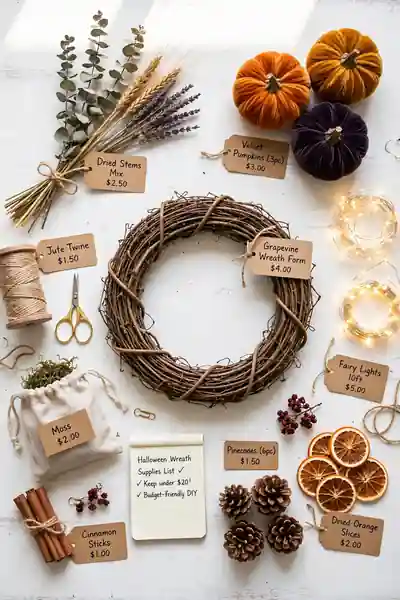
Before: Before pricing things out, most people either overspend on premium craft-store bundles or buy too little and make three extra trips. Both mistakes turn a fun afternoon into a frustrating one. A clear budget keeps the project enjoyable from cart to door.
After: After a quick price check, this wreath lands between eighteen and twenty-five dollars total. The grapevine form is the biggest single cost at eight to twelve dollars. Everything else comes from dollar stores, garden cuttings, or your craft stash.
Write your list before you shop and stick to it, since craft stores are designed to tempt you. Buy the form and lights new; source stems and pumpkins from sales or your own yard. I’ve noticed that shoppers with a list spend nearly half of those who browse.
Picking the Right Wreath Size for Your Space
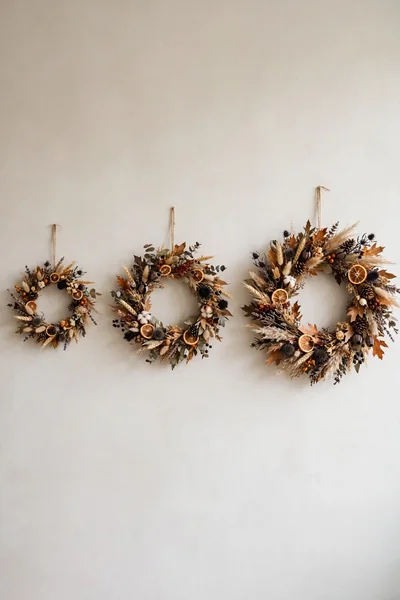
Best Size: 14-inch form for standard front doors
Small Spaces: 10 to 12-inch for interior doors and narrow walls
Large Doors: 16 to 18-inch for double doors and wide entries
Pro Tip: measure your door width and choose a wreath two-thirds as wide
A wreath that is too small disappears on a big door, while an oversized one overwhelms a narrow entry. Hold a dinner plate against your door to preview the scale before buying. The right proportion makes even a simple wreath look intentional and professionally styled. When in doubt, size up slightly.
How Long It Takes, Honestly Timed

Expect about two hours from unboxing to hanging, and most of that is decorating, not prep. Wrapping the base and lights takes twenty minutes. Arranging stems and pumpkins takes the rest, because stepping back to check balance eats more time than the gluing itself, so budget for it.
Give yourself an unhurried afternoon rather than squeezing this before guests arrive. Rushing shows in lopsided clusters and visible glue. Put on music, lay everything out first, and enjoy the slow part; that is where the chic comes from, not from expensive materials.
Pro Tips for a Flawless, Store-Bought Finish

Do This:
- Vary stem heights so the silhouette stays interesting from every angle.
- Hide every glue dab under a leaf, petal, or pumpkin edge.
- Wire heavy pieces instead of trusting glue on a vertical door.
- Step back three feet after each layer to check balance.
Avoid This:
- Don’t cluster all pumpkins on one side; spread them around the ring.
- Don’t use cool white lights; they flatten warm autumn tones.
- Don’t over-glue dried stems; they become brittle and snap.
- Don’t hang it before the glue fully cools and sets.
The difference between homemade and store-bought is rarely the materials; it is the finishing discipline. Take ten extra minutes to hide mechanics and balance the design. That final pass is what guests actually notice when they walk up to your door. Professionals never skip this step, and neither should you.
Mistakes That Make DIY Wreaths Look Cheap

Common Mistake: The most common mistake is adding too many colors, thinking more means more festive. Six competing shades turn a wreath into visual noise. Your eye never settles, so the whole thing reads cheap instead of chic.
The Fix: Limit yourself to three colors and repeat each one at least three times around the ring. Repetition is what makes a design feel intentional. If a fourth color tempts you, swap it for a different texture in an existing color.
Another frequent error is hanging the wreath and never adjusting it after the first day. Doors slam, wind shifts stems, and pumpkins settle. Check your wreath once after a windy day and tuck anything loose; thirty seconds keeps it flawless for weeks, all season long.
Chic Variations Worth Trying

Once you know the base technique, the same wreath becomes a template for endless seasonal looks. Swapping one accent family changes the entire mood. Here are four directions that keep the chic promise intact, each with its own character. Pick the one that matches your home.
- Midnight botanical: all-black dried florals with a charcoal ribbon. Moody, dramatic, and surprisingly elegant on a light-colored door.
- Harvest luxe: cream pumpkins, wheat stems, and gold accents. Reads Thanksgiving-ready the moment Halloween ends.
- Gothic romance: deep plum florals, black velvet ribbon, and antique-gold moth pins. Dark without a single cartoon ghost.
- Woodland witch: moss, twigs, tiny pinecones, and one amber glass pumpkin as the focal point. Organic and quietly spooky.
Making It a Family Project: Kid-Friendly Roles

Quick Tip: Give kids the jobs with zero burn risk. They can arrange dried stems, choose pumpkin placements, and tie ribbon bows. You handle every hot glue gun moment yourself.
Crafting together works best when roles are clear before anyone picks up a tool. Let young helpers own the styling decisions while you own the assembly. They will remember choosing the look long after they forget who held the glue gun that afternoon. That division keeps the afternoon fun and frustration-free.
Where to Hang It for Maximum Impact
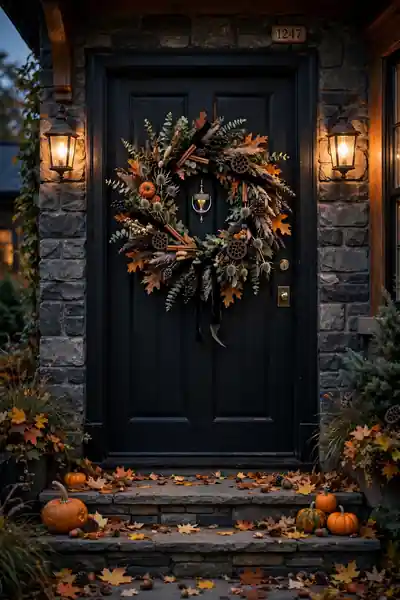
Do This:
- Hang at eye level, with the wreath center about 57 inches from the ground.
- Use an over-door wreath hanger for metal doors to avoid damage.
- Choose a covered spot if your wreath has paper or fabric accents.
- Light it with a timer so it glows every evening without effort.
Avoid This:
- Don’t use adhesive hooks on textured or dirty doors; they fail fast.
- Don’t hang dried-floral wreaths in direct rain; they will mildew.
- Don’t place it where the door slams against a wall.
- Don’t forget to check the hanger weight rating against your wreath.
Placement decides how many people actually see your work. A street-facing door earns compliments daily, while a bedroom door pleases only you. Put your best wreath where the most eyes land, and save simpler versions for private spaces. I’ve seen a great wreath wasted on a hidden back door too many times.
Also Explore:22 Eerie Halloween Outdoor Decorations That Dazzle
The Chic Halloween Palette: Colors That Look Expensive
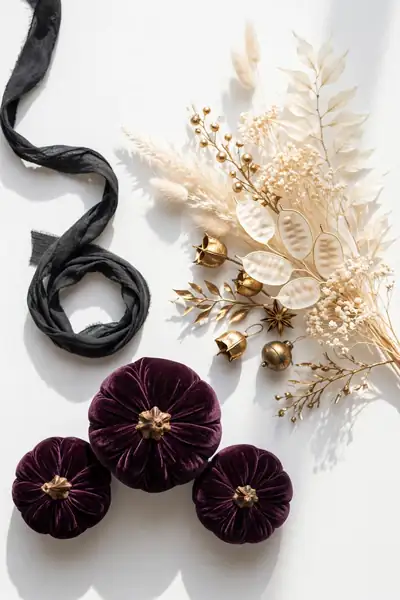
Expensive-looking wreaths share one trait: a disciplined palette of three colors or fewer. Think charcoal black, warm ivory, and antique gold. Or deep plum, dusty mauve, and soft bronze. Each combination feels intentional because every element belongs to the same story. Limiting colors is the fastest upgrade a beginner can make.
Test your palette by photographing the materials together before you glue anything. Phone cameras reveal clashes your eyes forgive in person. If one item fights the group in the photo, swap it out; the camera never lies about color harmony.
Daylight vs. Nighttime: Styling for Around the Clock

Before: Before thinking about lighting, most wreaths are designed for one moment: either bright daylight or evening glow. A wreath that stuns at night can look flat and lifeless at noon. Designing for only half the day wastes half your effort.
After: After balancing both, your wreath holds up at noon and glows after dark. Matte textures and deep colors carry the daylight hours. Warm fairy lights take over in the evening, and the shift from afternoon to night feels natural.
Build daylight interest first, since that is when most neighbors actually see your door. Layer textures that read well without light: dried grasses, velvet, rough bark. Then add the lights as the evening bonus, not the main event. A wreath that works in both lights gets admired twice as often.
Storing Your Wreath So It Lasts for Years
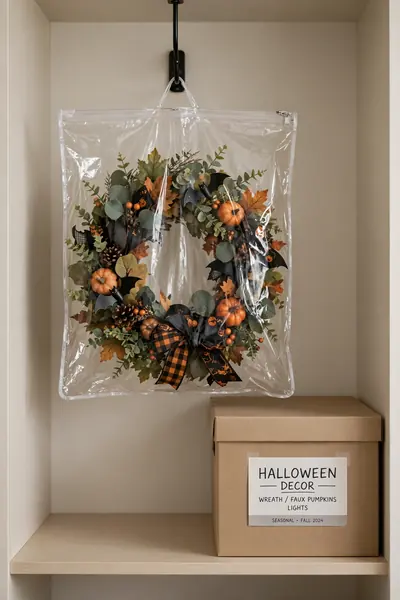
Quick Tip: Never crush a wreath into a box. Store it flat in a wreath bag or hung on a closet hook, away from direct sun. Faded velvet and flattened pampas grass are the two things you cannot fix next year.
Remove batteries from the light strand before storing, since leaking batteries corrode contacts over summer. Give the wreath a gentle shake outdoors to drop dust, then cover it loosely. Next October, fluff the stems and it looks new again. Proper storage turns a one-season craft into a five-year tradition.
Frequently Asked Questions
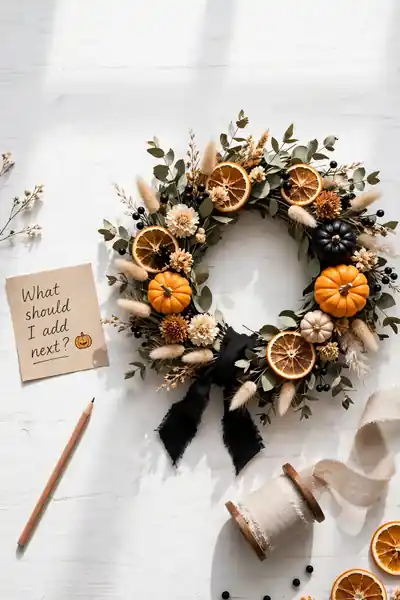
These are the questions readers ask most before starting their first wreath, gathered from real beginners. If yours is answered here, you can begin with full confidence. Let’s clear up the last doubts together before you shop for supplies today.
1. Can I hang it outdoors?
Yes, on a covered porch or under an overhang. Keep dried florals and paper accents out of direct rain.
2. How long do the batteries last?
A standard fairy light strand runs about two to three weeks on a timer. Swap batteries mid-season if the glow dims.
3. What if I have no craft experience?
This project needs no special skills, only patience. The layering order does the hard work for you.
4. Can I reuse it next year?
Absolutely. Store it flat in a wreath bag with batteries removed, and fluff the stems next fall.
5. How much will it really cost?
Between eighteen and twenty-five dollars if you shop with a list. The form is the biggest single expense.
Conclusion:
You now have everything for a wreath that looks boutique-bought: the right base, a disciplined palette, and the layering order that does the heavy lifting. I’ve seen how making this one change can completely shift the result, swapping clutter for intention in a single afternoon. Save this diy halloween wreath guide on Pinterest so it’s ready every fall. Then gather your materials and build yours this weekend. And if a friend’s door needs some Halloween magic, send this her way. The best decorations are the ones you truly make yourself.