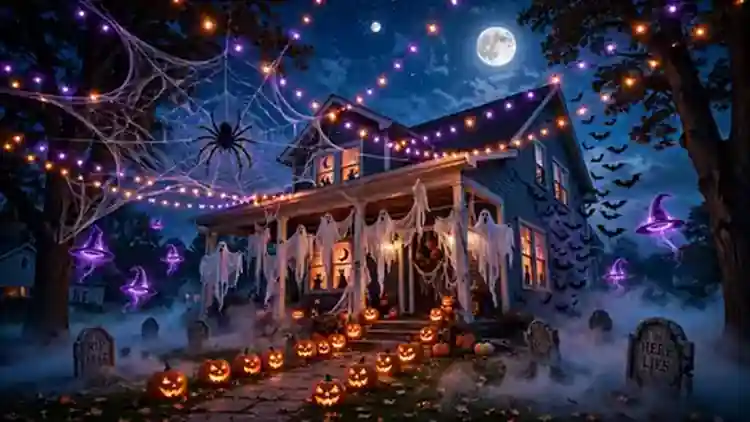
22 Eerie Halloween Outdoor Decorations That Dazzle
Every October, the same thing happens on my street: one house glows with ghosts and pumpkins while the rest stay dark. If you want yours to be the glowing one, these outdoor displays will get you there without a big budget or pro skills.
I’ve noticed the houses people slow down for are never the most expensive ones. They are the ones with a little repetition, some height, and warm light after dark. This guide gives you 22 ideas organized by zone, door, walkway, yard, windows, so you can plan your actual space.
Monster Door Wrap
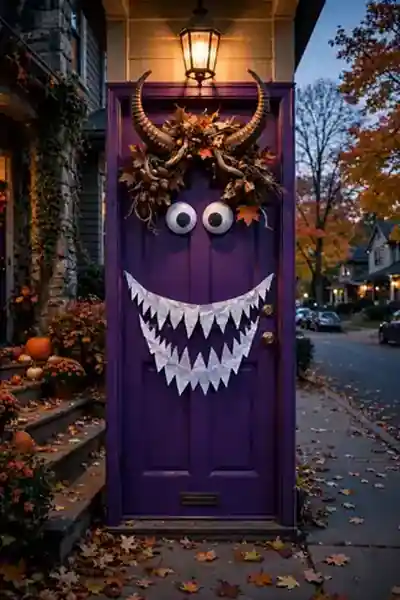
If you only try one of these outdoor displays, make it your front door. A monster face built from paper, tape, and two giant googly eyes costs less than a pizza and stops every kid on the sidewalk. It takes twenty minutes and zero craft skills.
In my experience, oversized features read best from the street. Small details vanish after dark, so make the eyes huge and the mouth wide. Step back to the curb before taping anything down, and adjust until the face looks right from far away.
Also View:DIY Halloween Wreath That Looks So Store Bought Chic
Pumpkin Staircase Cascade
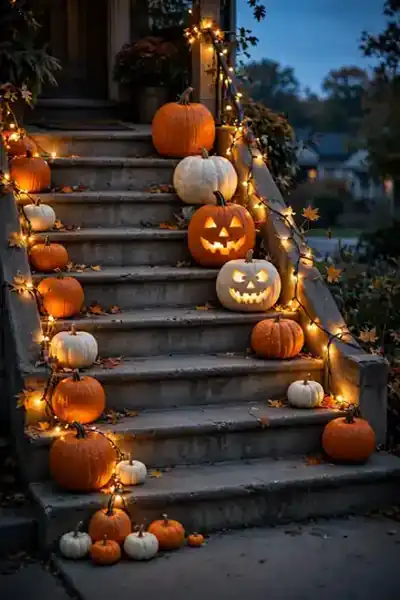
A staircase of pumpkins pulls every eye straight to your front door and looks planned instead of random. The secret is graduation: arrange them from largest at the top to smallest at the bottom so the display flows downward naturally.
- Count your steps and buy one pumpkin per step, plus two extras for the ground.
- Set the biggest pumpkin on the top step and shrink the sizes as you move down.
- Mix orange and white pumpkins, and nestle battery tea lights inside any carved ones.
- After dark, view the stairs from the sidewalk and shift any pumpkin that breaks the flow.
Floating Cheesecloth Ghosts
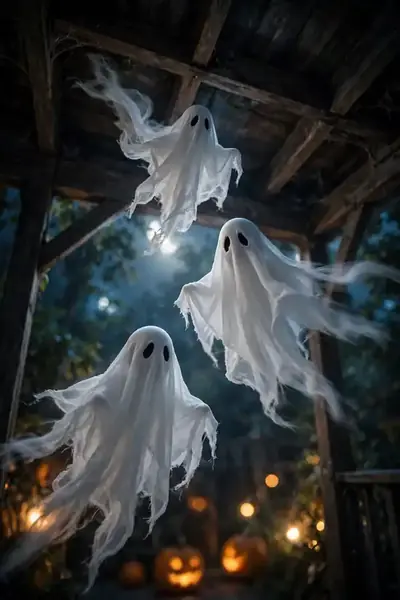
Quick Tip: Stiffen your cheesecloth with fabric stiffener or watered-down glue before hanging, or the ghosts will sag into sad lumps overnight. Hang them at staggered heights on clear fishing line so they look truly airborne and twist gently in the breeze.
These ghosts cost almost nothing and take about twenty minutes, yet they photograph beautifully. Keep the lowest ghost a foot above head height so guests never bump into one. A small fan nearby makes them sway like they are haunted. That little movement is what sells the effect after dark.
Glowing Witch Hat Lanterns
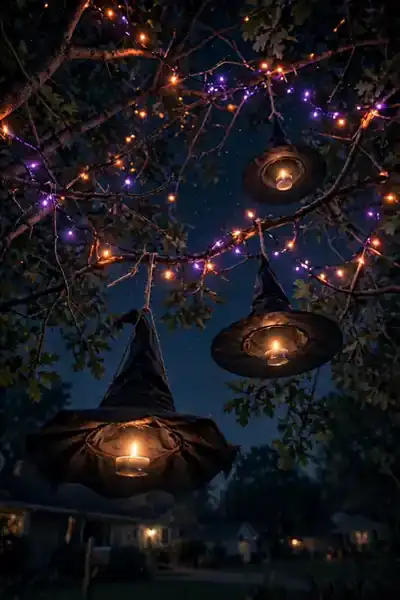
Common Mistake: Most people hang the hats in a straight row at the same height, which looks flat and a little boring. They also use real candles inside, which is a fire risk outdoors near dry leaves and branches.
The Fix: Hang hats at three different heights in a loose triangle so the eye moves between them. Drop a battery tea light inside each one. The glow through the fabric looks magical and stays completely safe all night.
Space the hats a few feet apart so each one reads as its own floating shape. I’ve seen this make a real difference on dark streets where houses sit far apart. One glowing hat gets lost, but three together pull attention from down the block.
Hay Bale and Mums Corner
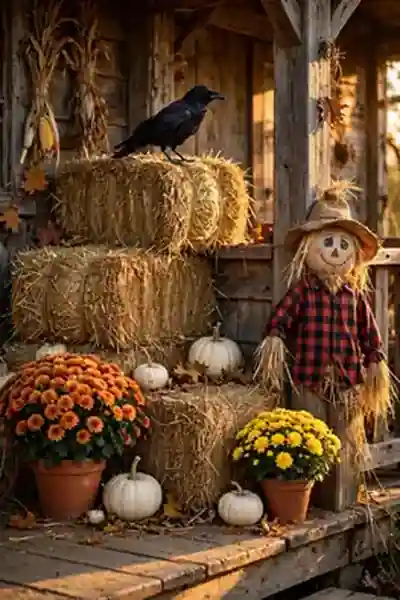
What You Need:
- Two small hay bales: they form the base layers and give instant farmhouse texture.
- Three mum pots in fall colors: orange, yellow, and deep red fill the gaps beautifully.
- Mini pumpkins and gourds: tuck them between pots for a gathered harvest look.
- One spooky accent: a crow figure or small skeleton hand makes it Halloween, not just fall.
- Clear walkway space: keep everything a foot from the door swing so guests pass easily.
This corner takes fifteen minutes and works even if you never touch a craft supply. Start with the hay bales as your base, then layer in color. The trick is mixing heights so it looks collected over time rather than bought in one trip. That layered look is what makes neighbors slow down.
Also Explore:21 Creepy-Cute Halloween Flower Pots for Your Porch
Paper Bag Luminaries
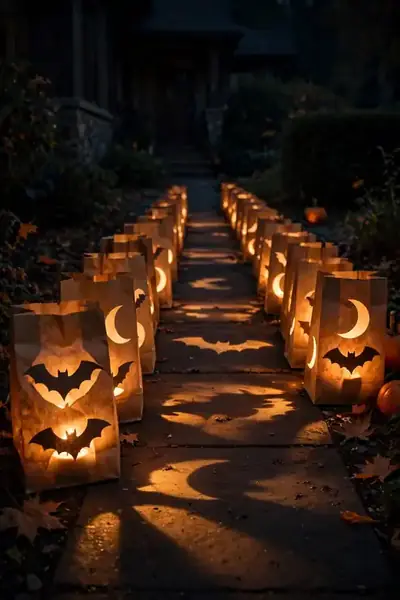
Before: A dark walkway swallows your whole display after sunset. Guests squint to see the path, and everything you built on the porch goes unnoticed.
After: With glowing bags marking each edge, the path feels like an invitation. Visitors follow the light straight to your door, and the whole yard ties together.
Cut simple shapes, bats, moons, stars, with a craft knife before placing the lights. Fold the top rim down an inch so the bags stand stiff in evening dew. Space them three feet apart for a steady rhythm of light. Battery tea lights last all evening and stay cool to the touch.
Foam Tombstone Row

Do This:
- Cut tombstones from rigid foam board so they survive wind and rain.
- Write funny epitaphs with a paint marker for a playful, family-friendly tone.
- Tilt a few stones at angles so the graveyard looks aged and real.
- Stake them with wooden dowels pushed deep into the soil.
Avoid This:
- Do not use cardboard, it melts into mush after one rainy night.
- Avoid blocking the walkway, keep stones a foot back from the path edge.
- Skip gory or scary wording if small kids visit your street.
- Do not place them where sprinklers hit nightly.
A tombstone row frames your yard and gives trick-or-treaters something to read while they wait. Keep the humor light and the setup simple. When the season ends, foam stones stack flat in the garage for next year. That easy storage is why foam beats wood or stone for most families.
Glowing Eyes in the Bushes
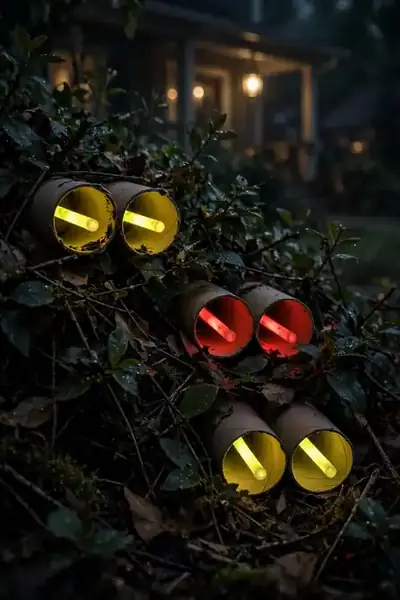
Time Needed: 20 minutes | Difficulty: Easy | Cost: Under $5
Best For: bushes and hedges along the front of the house
Pro Tip: use red and yellow glow sticks together for a scarier mix
Cut eye shapes into empty toilet paper rolls, crack glow sticks inside, and tuck the rolls deep into your bushes. From the street, only the glowing eyes show. Kids love spotting them, and adults always ask how you did it. Replace the glow sticks on Halloween night itself for maximum brightness.
Oversized Candy Corn Stakes
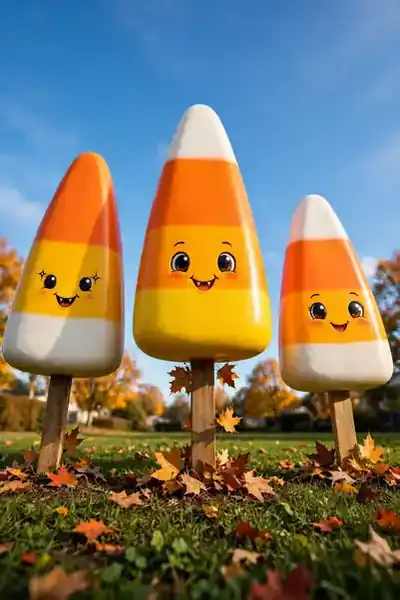
Few halloween outdoor decorations are as cheerful as giant candy corn stakes. They mark your yard boundary clearly and give kids something fun to spot from the car. Build them from foam cones painted in three stripes, then mount each on a wooden dowel.
Push the dowels a foot into the ground so wind cannot topple them. Space the stakes four feet apart for a neat rhythm along the lawn edge. They store easily too, just pull them up and stack them in the garage. Next October they go right back out.
Giant Spider Web
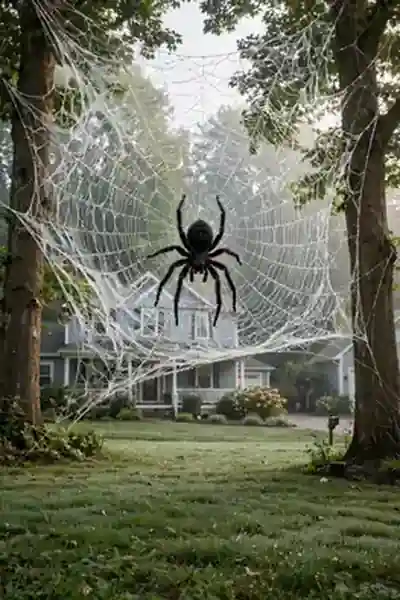
Nothing says Halloween like a web big enough to walk under. A giant web turns two ordinary trees into the scariest corner of the block, and it costs less than dinner out. Kids dare each other to stand beneath it, which tells you it works.
- Tie one end of white rope or thick yarn to a high branch on the first tree.
- Stretch the rope to the second tree and tie it off, then add radiating strands like wheel spokes.
- Weave circles of rope around the spokes, leaving gaps wider as you move outward.
- Hang a large store-bought spider in the center with fishing line so it sways.
Skeleton Scene
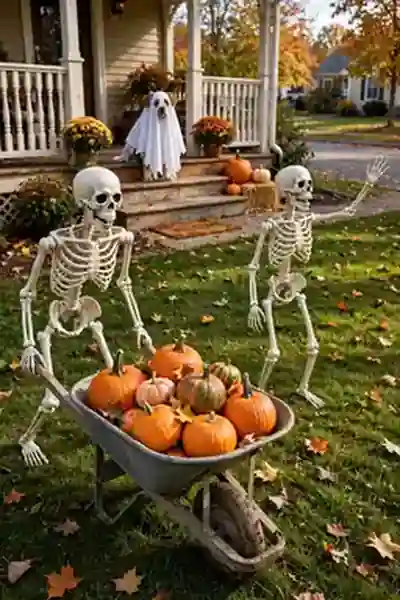
Quick Tip: Pose your skeletons doing something funny, not just standing around. A skeleton walking a dog, raking leaves, or waving at cars gets ten times the attention. Humor is what makes neighbors stop and take photos.
Move the skeletons into a new pose every few days through October. Returning visitors will notice, and it keeps your display feeling alive all month. Poseable joints are worth the extra few dollars for this reason alone. That small effort turns one decoration into a month-long show.
Foggy Graveyard Corner
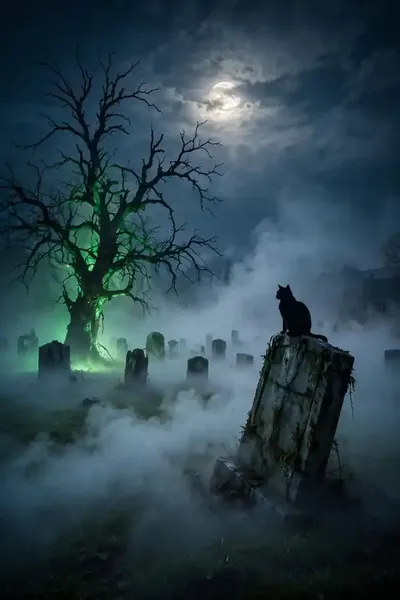
Common Mistake: Most people run their fog machine nonstop, which burns through fluid in an hour and leaves the yard smelling like chemicals. They also place it where wind blows the fog straight into the street.
The Fix: Run the fog in short bursts on a timer, ten seconds on and fifty off. Tuck the machine behind a tombstone or bush so the fog rolls out mysteriously. One bottle of fluid then lasts the whole month.
Add a green or purple uplight behind the fog source for color that glows through the mist. Keep the machine dry under a small cover, and never aim fog at the walkway where guests need to see their footing. Safety first, atmosphere second, every single night.
Cornstalk Entry Columns
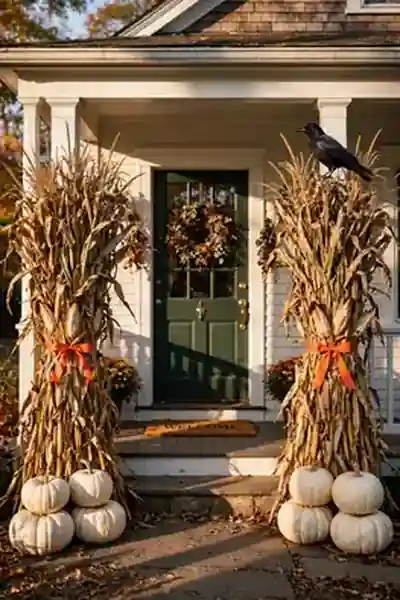
What You Need:
- Dried cornstalk bundles: most garden centers sell them in bunches of six through October.
- Orange ribbon or twine: tie each bundle tightly at the middle and near the top.
- White pumpkins: stack two or three at each base to anchor the columns visually.
- A sturdy stake: drive one behind each bundle so wind cannot knock them over.
- One spooky topper: a crow figure or small lantern finishes the look.
Stand the bundles upright on both sides of your door or walkway entrance for instant symmetry. They frame everything behind them and make the whole entry feel taller. When they dry out further, just tighten the ribbon and they last the season. Few decorations give this much height for so little money.
Scarecrow Sentinel
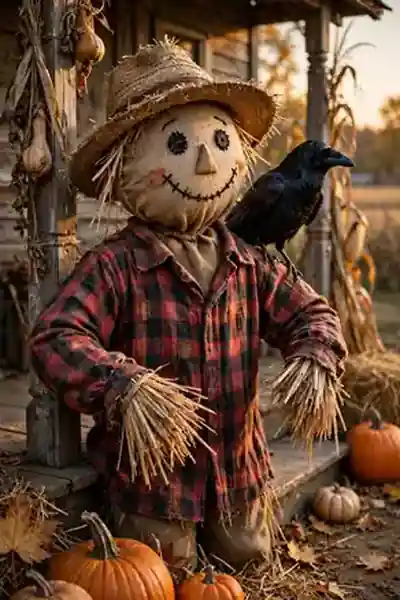
Before: A bare porch corner looks empty no matter how much you spend on small decorations. Everything sits low, and the space feels unfinished.
After: A scarecrow fills that vertical gap instantly. It gives the porch a friendly guardian, and kids love posing for photos beside it.
Build yours from old clothes stuffed with straw or crumpled newspaper. A burlap sack makes the perfect head, just draw the face with a marker. Lean it against the porch post so it never topples in wind. Total cost is near zero if you raid the closet first.
Backlit Window Silhouettes
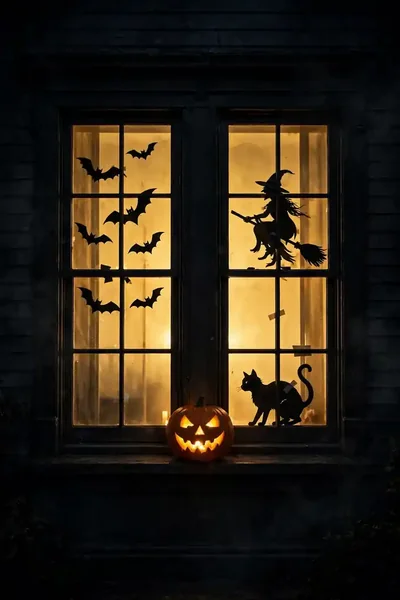
Do This:
- Cut bold simple shapes from black cardstock so they read clearly from the street.
- Tape silhouettes to the inside of the glass where weather cannot reach them.
- Leave one warm lamp on behind the window all evening for backlighting.
- Mix shapes across windows, bats on one, a witch on another, for variety.
Avoid This:
- Do not cut tiny detailed designs, they turn into visual mush from the sidewalk.
- Avoid taping shapes outside where rain ruins them in one night.
- Do not use a bright white bulb, warm light looks far spookier.
- Skip covering every window, leave some dark for contrast.
This is the highest impact per dollar on this list after the monster door. Black paper and tape cost almost nothing, yet the effect stops dog walkers mid-stride. Take them down gently and they store flat for next year. It is the rare project that is cheap, fast, and genuinely striking.
Projected Ghost Show
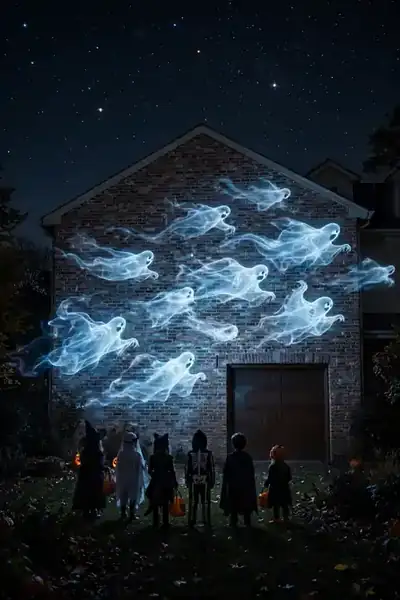
Time Needed: 30 minutes to set up | Difficulty: Easy | Cost: Medium (projector)
Best For: a large blank wall or garage door facing the street
Pro Tip: project onto a white sheet for a brighter image on dark walls
A small outdoor projector loops ghost animations across your wall all evening. Neighbors will gather on the sidewalk to watch, and kids point at every new ghost. Keep the projector dry under the porch overhang and run the cord safely along the wall. It is the closest thing to a haunted house without building one.
Bat Swarm Wall
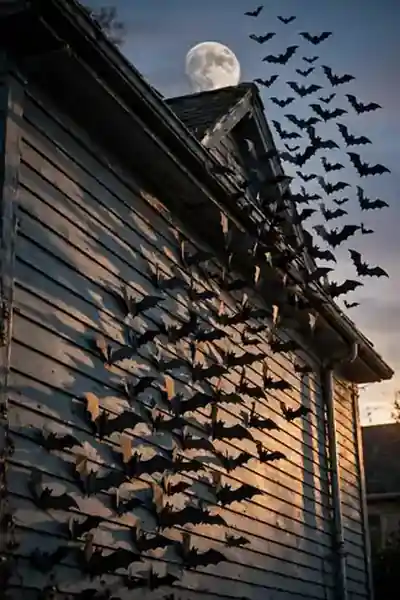
A swarm of bats climbing your wall looks like the house itself is coming alive. Cut them from black cardstock in three sizes, then tape them in a sweeping curve from the ground toward the roofline. The upward motion is what makes it dramatic.
Fold each bat slightly down the middle so the wings lift off the wall. That small fold catches light and shadow, which sells the 3D effect. Start the swarm low near a window and let it scatter as it climbs. From the street, it reads as one living shape.
Draped Spooky Trees
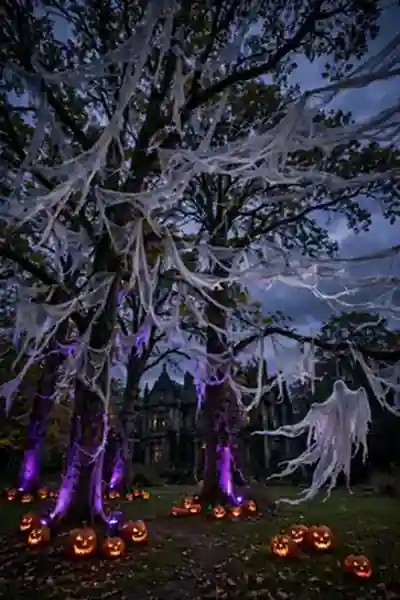
If your yard has trees, you already own the frame for the spookiest of all halloween outdoor decorations. Long strips of cheesecloth turn ordinary branches into a haunted canopy that moves with every breeze. It takes minutes to hang and looks incredible after dark.
- Cut cheesecloth into strips six to eight feet long.
- Drape strips over low branches, letting the ends hang free and uneven.
- Aim purple or green uplights at the trunks so the cloth glows from below.
- Add one hanging ghost or lantern deep inside for a surprise focal point.
Pumpkin Archway
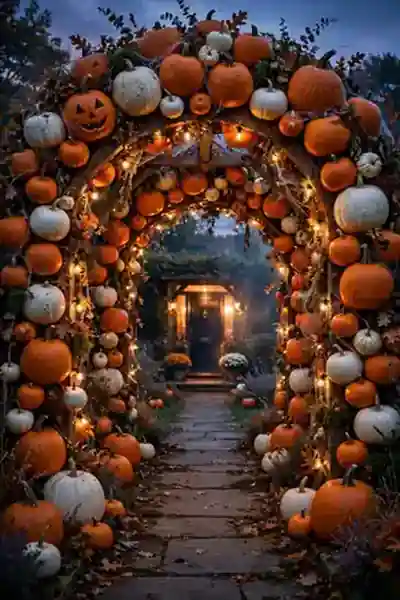
Quick Tip: Build the arch on a cheap metal garden arbor, not freestanding. Zip-tie faux pumpkins to the frame from the bottom up, mixing sizes as you go. Real pumpkins are too heavy and rot within days.
An archway turns your walkway into a photo tunnel that every visitor walks through. It frames the front door beautifully from the street. Take photos at dusk when the string lights glow against the darkening sky. That golden window lasts about twenty minutes, so be ready.
Floating Light-Up Witch Hats
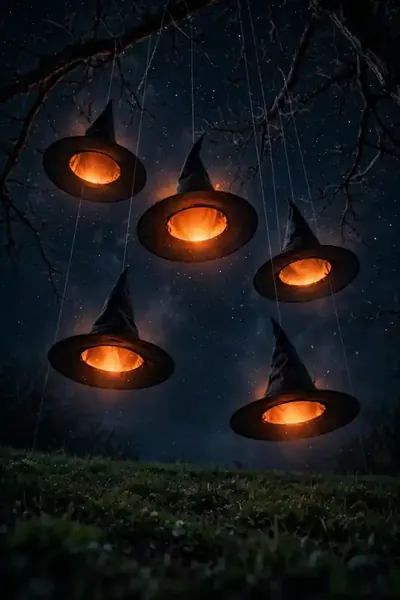
Common Mistake: People hang the hats too close together, so they read as one black blob instead of floating individuals. They also skip the inner light, which wastes the whole effect.
The Fix: Space hats at least three feet apart and hang a battery tea light inside each one. The orange glow spilling from under the brim is what makes them look enchanted.
Hang the lines from high branches so hats float well above head height. A gentle breeze makes them bob and turn like they are alive. From the sidewalk, guests cannot tell how they float, which is exactly the magic you want. Take a video, because photos never capture the movement.
Orange and Purple Light Canopy

What You Need:
- Two to three strands of orange string lights: they set the Halloween base tone.
- One strand of purple lights: woven through the orange, it adds depth and spookiness.
- Outdoor extension cord: rated for exterior use, run along the house edge.
- Small adhesive hooks: they hold lights without damaging siding or trim.
- A timer plug: set lights to switch on at dusk automatically.
A light canopy ties every decoration below it into one display. Without overhead light, each piece sits in its own dark island. Crisscross the strands loosely rather than pulling them tight for a softer, more magical drape. Step back to the curb once it is dark to check for gaps.
Trick-or-Treat Candy Station
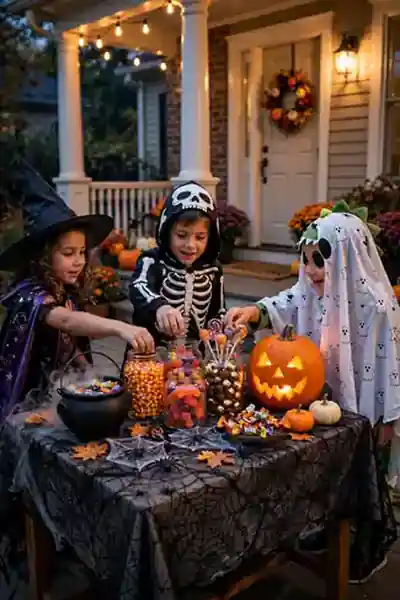
Before: On Halloween night, answering the doorbell fifty times ruins your evening. You miss the fun, the candy bowl empties unevenly, and shy kids skip your house entirely.
After: A self-serve candy station on the porch solves all of it. Kids help themselves, you enjoy the night, and your decorated table becomes part of the display.
Set the table near the porch steps where it is visible from the sidewalk. Refill the jars once mid-evening so late visitors still find treats. A small sign that says take two keeps the bowl lasting till the end of the night. You get to enjoy the evening instead of guarding the door.
Conclusion
You now have 22 ways to turn an ordinary yard into the street’s favorite haunt. Start with the door and the walkway, since those shape every visitor’s first impression, then let the yard and lighting build the full effect. These halloween outdoor decorations work best when you add a few each week instead of rushing everything in one weekend.


4 Comments