
Snowy Mason Jar Candle Holders for a Christmas Glow
Every December the houses with the warmest glow are never the ones with the priciest decorations. With kitchen jars and a few cheap supplies, these christmas mason jar candle holders bring that cozy light home. One relaxed afternoon is all it takes for a frosted finish that looks lit from within.
New to crafting? This is the perfect place to start. No special skill needed, just glue, salt and a little patience while things dry. I have noticed beginners fear making a mess, but these materials forgive almost every mistake.
Why Snowy Mason Jars Give the Prettiest Christmas Glow
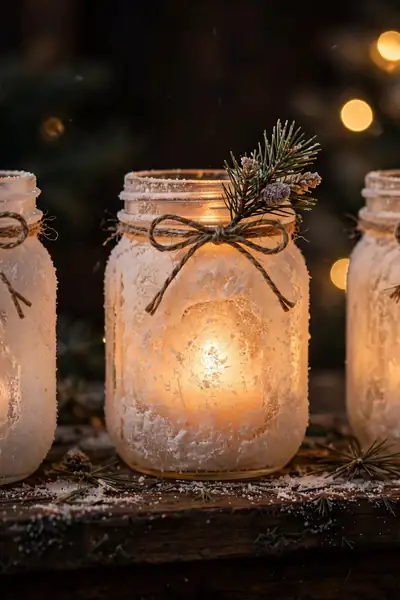
There is a reason these snowy jars look so magical at night. The frosted coating breaks candlelight into a soft, scattered glow instead of one harsh beam. Plain glass lets light shoot straight through, but the snowy texture diffuses it, so the whole jar seems lit from within.
I have noticed the effect looks best in a dim room without bright overhead lights. Real snow catches light the same uneven way, which is why this finish fools the eye. Once you see that warm shimmer on your mantel, you will know why this craft returns every December.
Also View:DIY Cinnamon Candle That Makes Home Smell Like Fall
What You Will Need
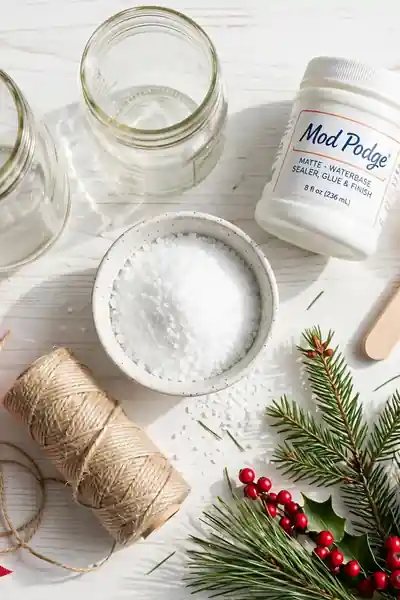
What You Need:
- Clean mason jars in any size: pint jars suit tea lights while quart jars fit pillar candles better.
- Matte Mod Podge: the matte finish gives the most realistic frosted snow look.
- Foam brush: it spreads the glue evenly without leaving streaks or bristles behind.
- Epsom salt or extra-fine white glitter: this creates the snowy texture you press into the glue.
- Twine, ribbon and small greenery sprigs: these dress up the jar neck for that finished holiday feel.
- Tea lights or LED candles: LEDs are safest around the coating, while real tea lights give a warmer flicker.
You probably own half of these already, which is the beauty of this project. Check your recycling bin for jars and your craft drawer for ribbon before buying anything new. In my experience, one bottle of Mod Podge covers about six pint jars, so a single shopping trip sets you up for the whole batch.
Choosing the Right Jars and Candles

Quick Tip: If kids or pets are around, choose battery LED tea lights every time. They give a lovely glow with zero fire risk. Save real candles for high shelves where little hands cannot reach.
Jar size matters more than most beginners expect. Pint jars are the sweet spot for mantels and tables, while tiny jelly jars get lost in a display. For candles, short tea lights suit small jars and chunky LED pillars fill quart jars nicely. Match the candle to the jar and the glow stays balanced.
Step-by-Step: Making Snowy Jar Candle Holders

The process is simple enough for a first timer, but order matters. Each step builds on the last, so rushing one stage shows up in the final finish. Follow them in sequence and your finished jars will look store bought.
- Wash the jars in warm soapy water, peel off every label, then rub sticky spots with rubbing alcohol and let them dry fully.
- Brush a generous, slightly uneven coat of matte Mod Podge over the outside of each jar with the foam brush.
- Roll the tacky jar through Epsom salt on a shallow tray, pressing gently so the texture sticks, then set it upside down to dry for one full hour.
- Tie twine or ribbon around the neck, tuck in a greenery sprig, and drop in your tea light.
Snow Texture Options Compared
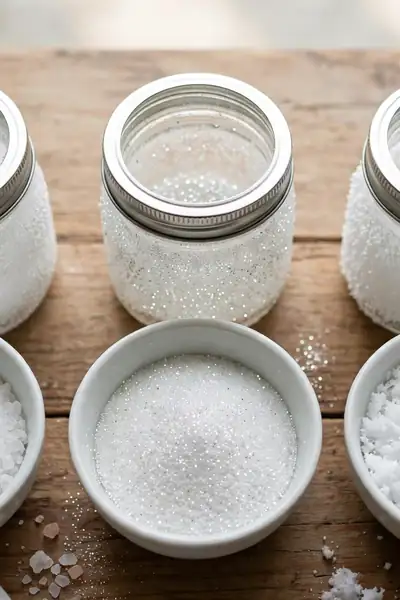
If you can only buy one, pick Epsom salt. It is the cheapest option and gives the most convincing snow. Glitter wins when you want sparkle over realism. On a side by side shelf, guests always reach for the Epsom salt jars first to check whether the snow is real.
Candle Safety Rules Worth Following
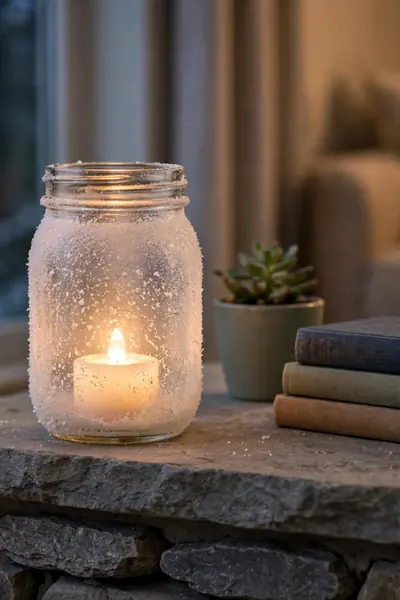
Do This:
- Keep lit jars at least one foot away from curtains, paper and dry greenery.
- Place jars on a heat proof tray or stone coaster, never directly on wood.
- Trim real candle wicks to a quarter inch before lighting for a smaller flame.
- Blow out real candles before leaving the room, even for a few minutes.
Avoid This:
- Never leave a burning candle unattended in a coated jar.
- Do not use tall taper candles that bring the flame close to the jar rim.
- Avoid placing jars where pets or kids can knock them over.
- Do not pour water into a hot jar to put out a candle.
These rules sound strict, but they take seconds to follow and protect your home. The coating sits on the outside of the glass, so normal tea lights pose little risk, yet caution costs nothing. I have seen too many holiday accidents start with “just for a minute,” so build the safe habit from day one.
Pro Tips for a Flawless Finish
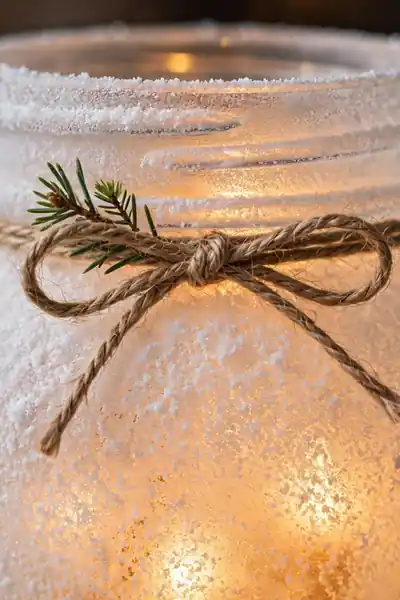
Quick Tip: Work on one jar at a time from glue to salt. Mod Podge starts setting within minutes, and a half dry coat will not grab the texture evenly. Finish each jar completely before brushing glue on the next one.
Rotate the jar slowly as you roll it so no side gets a thicker coat than the rest. If you spot a thin patch after drying, dab a little glue on that spot only and re roll it. Small touch ups like this are invisible once the candle is lit and the whole jar glows.
Mistakes That Can Spoil the Look

Common Mistake: Most beginners brush the Mod Podge on too thick, thinking more glue means more snow sticks. The heavy coat slides, pools at the base and dries with ugly drips. Thick glue also takes far longer to set, which invites dust to settle in.
The Fix: Aim for a medium coat you can still faintly see through, then build texture in two light passes instead of one heavy one. Let the first salted layer dry for twenty minutes before adding the second. Two thin layers beat one thick layer every time.
Another classic error is skipping the label residue cleanup, which shows through as shiny patches under the frost. A quick alcohol wipe takes thirty seconds and saves the whole jar. Take your time on prep and the fun part becomes truly fun instead of frustrating.
Display Ideas for a Magical Holiday Home

Group your jars in odd numbers on the mantel, mixing tall and short jars for natural rhythm. Weave a simple pine garland between them and let a string of warm fairy lights snake through the whole arrangement. The layered glow looks straight out of a holiday catalog.
Do not stop at the mantel though. A single jar on a bathroom tray feels like a small luxury, and a row of three down the dining table turns dinner into an occasion. Even your porch steps earn a warm welcome with two jars flanking the door on dark December evenings.
Also Explore:20 Festive Christmas TV Stand Decor Ideas to Steal
Storing and Reusing Them Next Year

Good storage is what turns a one season craft into a yearly tradition. The snowy coating is tougher than it looks, but it still needs basic protection from knocks and damp. Pack them properly once and next December starts with unpacking, not remaking.
- Wrap each jar in tissue paper or a soft cloth so the coated surfaces never touch each other.
- Stand them upright in a sturdy box with crumpled paper filling every gap.
- Store the box somewhere dry and cool, since damp air can soften the glue over months.
- Next season, dust them gently and re tie fresh ribbon for a brand new look.
Troubleshooting Quick Fixes

Quick Tip: Almost every flaw in this project is fixable without starting over. Bare patches, drips and dull spots all have simple repairs. Diagnose first, then fix only the damaged area.
Peeling texture usually means the glue went on too thin or the jar was dusty, so clean the spot, add fresh glue and re roll. Cloudy finish comes from humidity during drying, so move jars to a drier room next time. If glitter sheds, a light mist of clear sealant spray locks it down.
Frequently Asked Questions

1. Can I use real candles instead of LED tea lights?
Yes, small tea lights work well in pint jars. Keep the flame low, never leave them burning unattended, and always follow the safety rules in section six.
2. How long do the finished holders last?
With dry storage and gentle handling, they easily last three to four holiday seasons. The Epsom salt finish holds up best, while glitter may need a fresh sealant coat each year.
3. Will the Epsom salt fall off over time?
A little shedding in the first week is normal. After that the Mod Podge bond stays firm. If you notice thin spots, dab on glue and re roll just that area.
4. Can I wash the finished jars?
Do not soak them. Wipe the inside with a damp cloth only, since water breaks down the glue holding the snow texture.
5. Is this craft safe to do with kids?
Yes, with supervision. Let kids handle the salt rolling and decorating while an adult manages the glue. Always finish with LED tea lights in kid made jars.
Conclusion
You now have everything to make christmas mason jar candle holders that fill your home with the softest holiday light. Beautiful Christmas decor does not need a big budget, just an afternoon and a little creativity. I have seen how making this one small project can completely shift the feel of a holiday home. Save this guide to your Christmas Pinterest board so it is waiting next December, try a batch this weekend, and share it with a friend who loves cozy crafts. Then light your first jar, step back, and enjoy the glow you made yourself.



One Comment