
How to Glaze Polymer Clay for a Perfect Glassy Shine
Your baked clay looks dull and chalky, and you want that gorgeous glassy finish you keep seeing online. Learning how to glaze polymer clay is the step that takes your pieces from homemade-looking to truly professional.
In my experience, most beginners either skip glazing entirely or slather on one thick coat and end up with a sticky mess. I have tried this enough times to know the real secret is simpler than people think: the right finish, applied thin, on a properly prepped piece.
This guide walks through every option in plain language, so you can pick the finish that suits your project and budget, then apply it with confidence on your very first try.
Why Glazing Makes Polymer Clay Look Professional
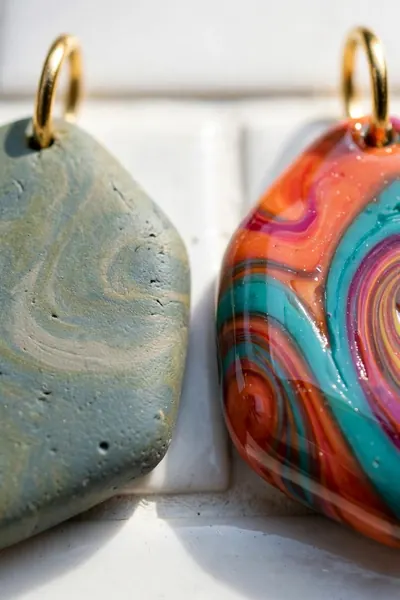
Fresh out of the oven, polymer clay looks flat and chalky. That is completely normal, but it is also why so many beginners feel disappointed with their first pieces. A good glaze changes everything: it deepens the colors, adds a rich shine, and gives your work that smooth, finished look you see in shops.
Glaze also protects. It seals the surface against scratches, fingerprints, and everyday wear, which matters most for jewelry and handled items. Once you get the glazing technique right, your pieces stop looking handmade and start looking professional.
Prep Your Piece the Right Way Before Any Glaze
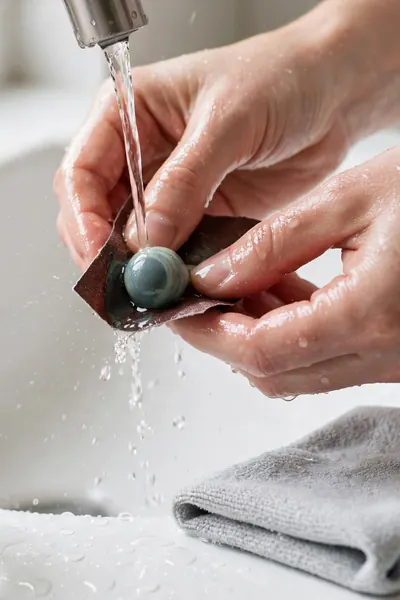
Skipping prep is the fastest way to ruin a glaze job. Dust, fingerprints, and rough spots get locked under the finish forever. A few minutes of prep now saves you from staring at flaws later.
Here is how to prep properly:
- Bake your piece fully and let it cool completely to room temperature.
- Wet-sand with 400-grit sandpaper, then 600-grit, using water to keep dust down.
- Rinse the piece and pat it dry with a lint-free cloth.
- Wipe once more with a slightly damp cloth to catch every last speck.
- Let it air-dry fully before any glaze touches it.
Smooth, clean, dry. That is the surface glaze loves.
Also View:How Long to Bake Polymer Clay for Truly Perfect Results
Brush-On Glazes: The Easiest Start for Beginners
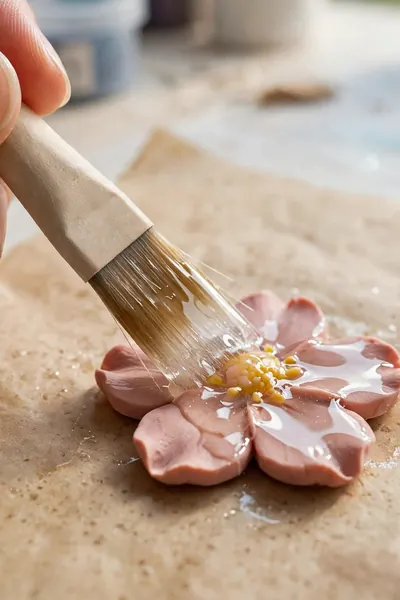
Quick Tip: Thin coats are everything. Load just a little glaze on a soft brush, paint it on in one smooth direction, and resist the urge to go back over it. Two thin coats always beat one thick coat, and they dry crystal clear instead of cloudy.
Let the first coat dry fully before adding the second, usually one to two hours. Hold the piece by an edge or stick it on a toothpick so you can coat all sides without fingerprints. This method is forgiving, cheap, and perfect for your first glazing projects.
Also Explore:How to Make an Air Dry Clay Paint Palette So Easily
Spray Sealants and Polyurethane Varnish
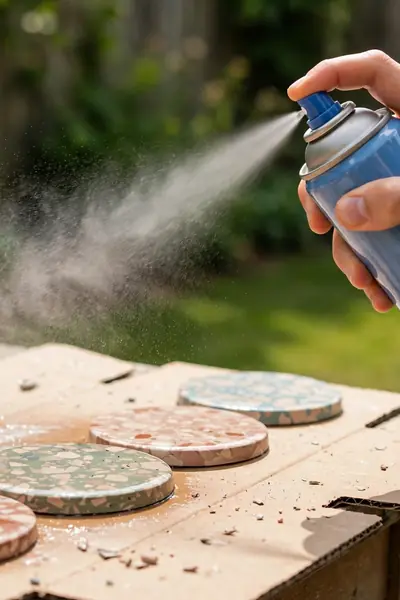
Common Mistake: Most beginners spray too close and too heavy, which leaves drips, bubbles, and a cloudy finish. They also spray indoors, where fumes linger and dust settles into the wet coat.
The Fix: Hold the can 10 to 12 inches away and use light, sweeping passes. Two to three thin mist coats beat one heavy coat every time. Always spray outdoors or in a ventilated garage, and let each coat dry fully before the next.
Water-based polyurethane varnish is the community favorite for a reason: it brushes on smooth, stays clear, and rarely turns tacky. Test any spray on a scrap piece first, since some brands react badly with certain clays.
UV Resin for a Thick Glassy Dome
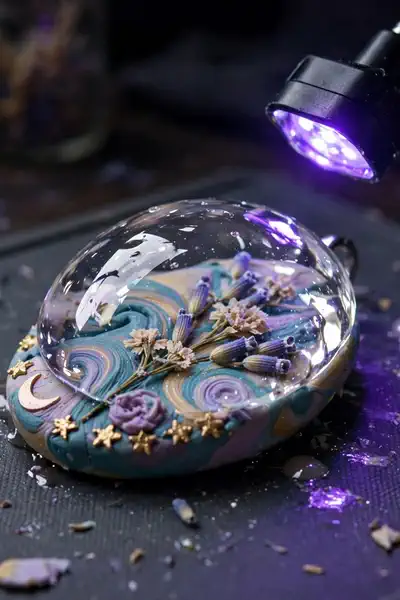
What You Need:
- A bottle of UV resin formulated for crafts, not industrial use.
- A UV lamp (36W or higher) or strong direct sunlight for curing.
- A silicone mat to protect your table from drips and spills.
- Tweezers or a toothpick to pop bubbles and position the resin.
- Nitrile gloves to keep sticky resin off your skin.
UV resin gives the deepest, wettest shine of any finish. Squeeze a small dome onto your piece, pop any bubbles with a toothpick, and cure under the lamp for two to four minutes. It is the go-to for pendants and earrings that need to survive daily wear.
Two-Part Epoxy Resin for Large Flat Pieces

Before: A large flat piece like a coaster or dish with a brush-on glaze that shows every stroke. The finish looks streaky, thin in spots, and nowhere near the glassy look you wanted.
After: The same piece with a poured epoxy layer, perfectly level and mirror-smooth. Light bounces off it like a pond surface, and the colors underneath look richer and deeper.
Mix the two parts exactly per the ratio on the bottle, stir slowly to avoid bubbles, and pour in the center so it self-levels. Cover the piece with a box while it cures to keep dust off. Epoxy takes hours to cure, but the result is worth the wait.
Budget Options: Mod Podge and What to Skip
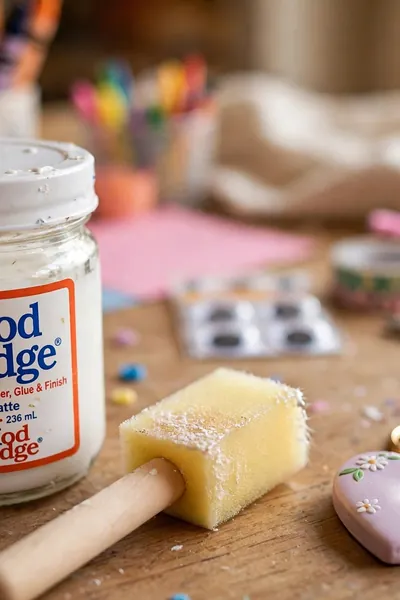
Do This:
- Use Mod Podge only for low-stakes projects like kids’ crafts or decorative items that won’t be handled much.
- Apply it in very thin coats with a foam brush to reduce streaking.
- Let each coat dry completely, at least an hour, before adding another.
- Seal the finished piece away from humidity, which makes Mod Podge turn tacky.
Avoid This:
- Do not use Mod Podge on jewelry you will wear daily, it softens with handling.
- Do not treat clear nail polish as a real glaze, it yellows and chips within weeks.
- Do not layer nail polish over a proper glaze, the solvents can ruin the finish underneath.
- Do not expect budget sealants to match resin’s durability, they simply won’t.
Cheap options have their place, just know their limits. For practice pieces and gifts that sit on a shelf, Mod Podge does the job fine. Save the good finishes for pieces you want to last.
The No-Glaze Option: Wax Buffing for a Soft Shine
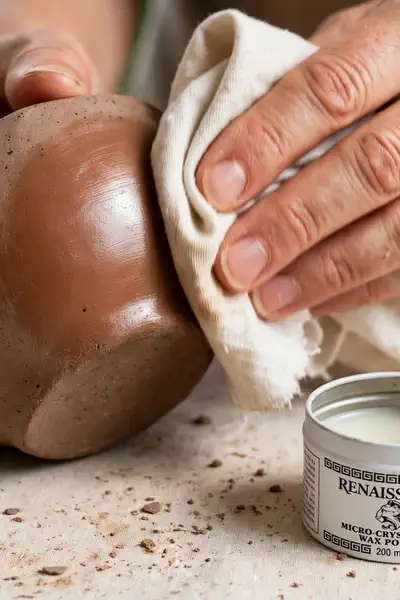
Time Needed: 15 to 20 minutes | Difficulty: Easy | Cost: Low | Tools Required: Soft cloth, paste wax | Best For: A natural, soft sheen without harsh chemicals or fumes | Pro Tip: Buff in small circles and let the wax haze for 10 minutes first
Not every piece needs a glossy coating. Rubbing a thin layer of paste wax into baked clay and buffing it by hand gives a warm, satin glow that feels natural and touchable. There are no fumes, no brushes, and no curing time.
I have noticed that most people skip this option entirely, yet it is perfect for earthy, rustic pieces where high gloss would look wrong. Apply a whisper-thin layer, wait for it to haze, then buff until it glows. Simple, safe, and surprisingly beautiful.
Choose the Right Finish and Sheen for Your Project
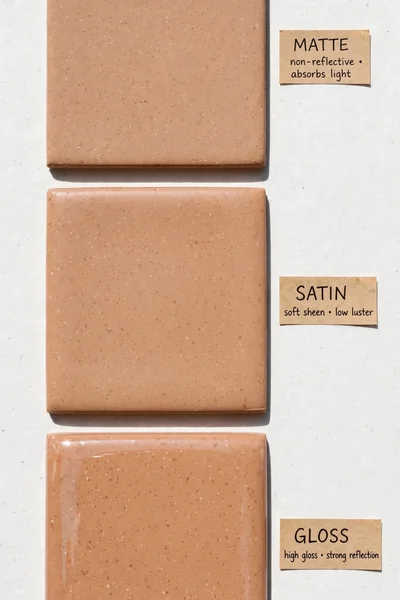
Picking the finish is where your project comes together. Jewelry that gets daily wear deserves the armor of UV resin or epoxy. Decorative pieces that sit on a shelf do beautifully with a brush-on glaze or spray. And rustic, handmade-look items often shine brightest, figuratively, with just wax.
Sheen matters too. Gloss screams vibrant and modern, satin feels soft and elegant, and matte keeps things earthy and understated. Match the sheen to the mood of the piece, not just the brightest option. When the finish fits the project, everything looks intentional.
Safety, Yellowing Prevention, and Long-Term Care
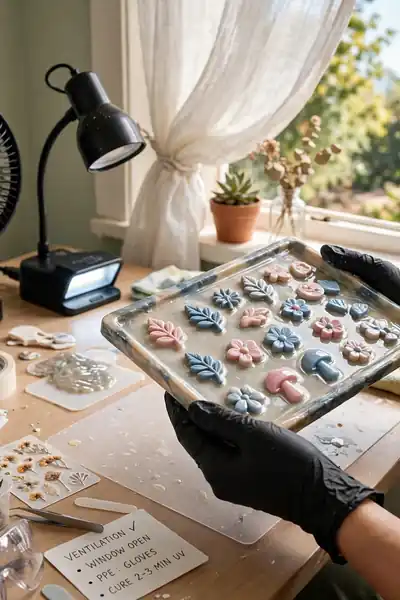
Glazing is safe when you respect the materials. Resin fumes need fresh air, so work near an open window or run a small fan. Nitrile gloves keep sticky resin and solvents off your skin. These two habits cover most of the risk.
Here is how to protect your work long-term:
- Keep glazed pieces out of direct sunlight to prevent yellowing.
- Wipe jewelry with a dry cloth after wearing to remove oils.
- Store pieces separately so hard finishes don’t scratch each other.
- Never use glazed polymer clay pieces for food, no glaze is food-safe.
That’s why experts always recommend reading the product label before you start. A few precautions now keep both you and your pieces in great shape for years.
Common Mistakes and How to Fix a Tacky Glaze
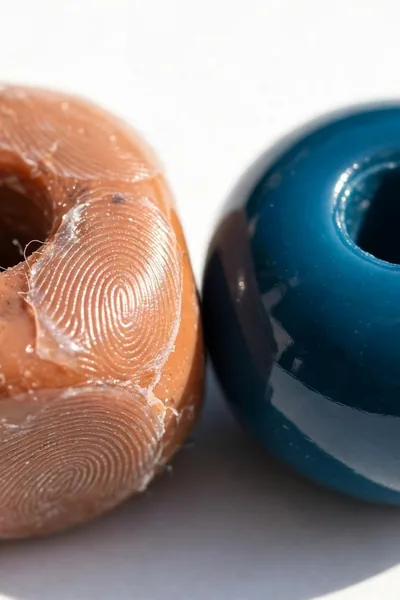
Common Mistake: The number one error is laying the glaze on too thick, which traps solvents underneath and leaves a tacky surface that never fully cures. Glazing a warm piece or skipping the scrap test runs a close second.
The Fix: If your glaze is already tacky, let it cure a full extra week in a warm, dry spot, many finishes harden with more time. If it stays sticky, wipe the surface with a cloth dampened with rubbing alcohol, let it dry, and recoat with one thin layer.
I have seen this make a real difference for frustrated beginners. Patience fixes most tacky finishes, and the next piece always goes better. Test on scrap, coat thin, and let every layer cure fully.
Glazing Polymer Clay FAQ
1. Do I have to glaze my polymer clay pieces?
No, glazing is optional. Unglazed pieces are perfectly durable once baked properly. Glaze adds shine, color depth, and scratch protection, so it is worth it for jewelry and gift pieces.
2. Can I use the same glaze on air-dry clay and polymer clay?
Usually yes for water-based glazes and varnishes, but always check the label. Some products react differently with each clay type, so test on a scrap piece of each first.
3. Why did my glaze stay tacky?
The most common cause is coats applied too thick. Humidity, glazing before the piece cooled, or an incompatible product can also cause it. Give it extra cure time in a warm, dry spot before recoating.
4. Which finish lasts longest on jewelry?
UV resin lasts longest for pieces worn daily, followed by two-part epoxy. Brush-on glazes work for occasional-wear items. Avoid Mod Podge and nail polish on anything you wear often.
Conclusion:
You now know exactly how to glaze polymer clay for that perfect glassy shine, from simple brush-on coats to deep resin domes and even wax buffing. Pick the finish that fits your project, prep well, coat thin, and let every layer cure fully.
Grab a practice piece and try your favorite finish this weekend, since the fastest way to build confidence is to glaze something real and watch it transform. When that first glassy shine catches the light, you will understand why so many makers never go back to bare clay, and you will be ready to glaze everything you create next.




5 Comments