
DIY Clay Diffuser Stones for a Naturally Fresh Home
Plug-in fresheners fade in a week, sprays vanish in an hour, and both leave a chemical smell hanging over your home. These diy clay diffuser stones solve that problem quietly: small pieces of clay that hold essential oil and release a soft, natural scent for days.
In my experience, the simplest crafts are the ones that stay in daily use, and these stones earn their place because they ask for nothing: no outlet, no refill pods, no flame. This guide walks you through shaping, drying, and scenting your first batch, plus the mistakes that ruin stones and the quick fixes that save them.
What Clay Diffuser Stones Are and How They Work
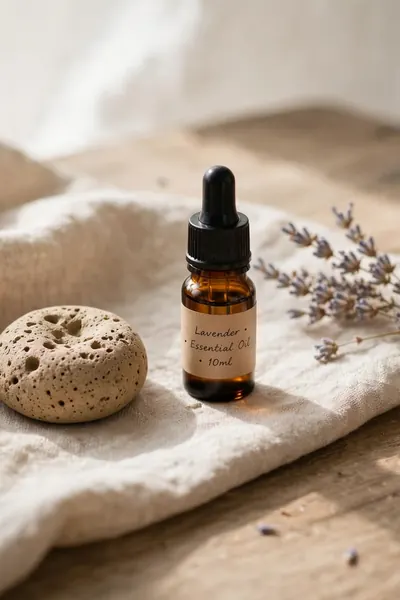
A clay diffuser stone is a small piece of unglazed, fully dried clay that drinks in essential oil and lets the scent drift out slowly over several days. There is no plug, no water, and no flame. The clay itself does all the work, quietly scenting a small space.
Making your own diy clay diffuser stones costs pennies per piece, and each one can be refreshed with fresh oil for months. They suit the small spots sprays miss, like drawers, closets, and the corner of a desk, where a strong blast of fragrance would be too much.
What You Need Before You Start
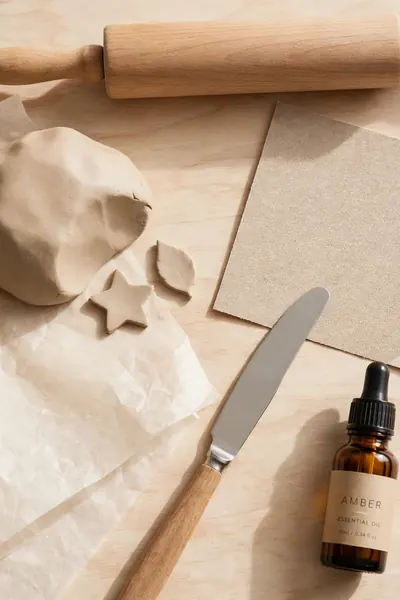
Everything for this project is cheap and probably half familiar already. The clay is the only real choice to make, because it must stay porous and unsealed to hold oil. Gather the rest in minutes and you are ready to shape your first batch.
- Pick a pack of white or natural air dry clay, about one cup per small batch, since leftover clay dries out fast once opened.
- Choose one essential oil you love, such as lavender or sweet orange, because the first batch is for learning your scent strength.
- Lay out a rolling pin or smooth bottle, a butter knife or clay cutter, and parchment paper for shaping and drying.
- Add fine sandpaper and a small brush for finishing, plus twine if you plan to make hanging stones later.
Also View: Fail-Proof Cornstarch Clay Recipe From Pantry Staples
Prepare Your Workspace

Quick Tip: Water is your smoothing tool and your biggest risk at the same time. Keep a small dish of water beside you for wet fingertips, but never pour it into the clay. Wet fingers fix cracks; watery clay turns sticky, soft, and hard to shape.
Cover your table with parchment paper before you open the clay, because dried clay crumbs get everywhere and parchment lifts them away in one sheet. Set out every tool within arm’s reach now. Stopping mid batch with clay on your hands is how pieces get knocked and ruined.
Soften and Roll the Clay

Common Mistake: Most beginners grab a cold lump straight from the pack and start shaping. Stiff clay cracks at the edges, tears when rolled, and shows every fingerprint, so the stones look rough before they even dry.
The Fix: Warm the clay in your hands and knead it for two to three minutes first. Work it until it feels soft and flexible like dough, and smooth any small cracks with a damp fingertip as they appear.
Roll the softened clay to an even thickness between a quarter inch and half an inch, using two pencils or sticks as guides if your rolling wanders. In my experience, even thickness matters more than perfect shapes, because thin spots dry brittle and snap later.
Cut and Shape Your Stones
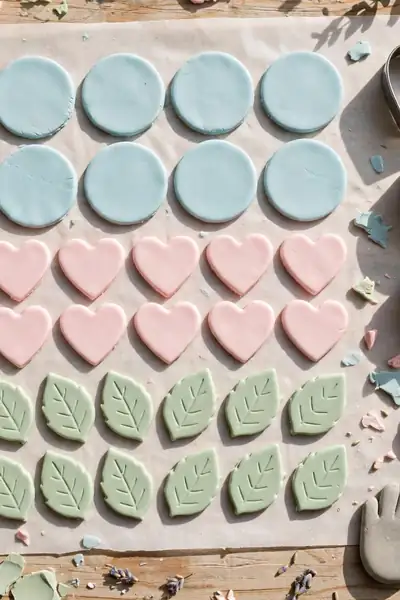
What You Need:
- Cookie cutters in two or three sizes: Simple circles, hearts, and leaves give a tidy, giftable look with almost no skill.
- A butter knife or clay cutter: Straight edges and small squares come from cutting, not from cutters.
- Your own hands for pebble shapes: Slightly uneven stones look natural and hide beginner wobbles well.
- A small bowl of water nearby: A wet fingertip erases cutter marks and joins seams on the spot.
Cut more stones than you think you need, because a few will crack, warp, or simply come out ugly, and that is normal. A mixed batch of shapes also lets you match each stone to its spot later, small ones for drawers and bigger ones for trays.
Add Texture and Detail

Before: A plain smooth stone works fine, but it looks like a lump of leftover clay. On a tray or dresser it reads as a craft accident, not as something you made on purpose.
After: The same stone carries a lace imprint or a pressed leaf vein, and suddenly it looks like a small piece of decor. Texture also gives the oil tiny ridges to sit in, so the surface holds scent a little better.
Press your texture in gently while the clay is still soft, deep enough to show but never so deep that the stone gets thin. Lift the lace or leaf straight up cleanly in one motion, because dragging it sideways smears the pattern you just made.
Make Hanging Stones for Closets and Cars
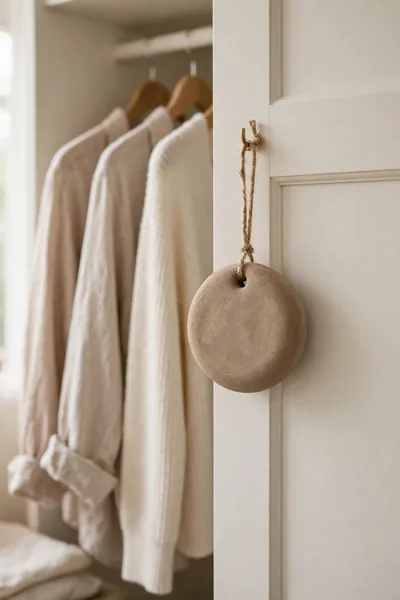
Do This:
- Poke the hole while the clay is still soft, using a drinking straw for a clean, round opening near the top edge.
- Leave at least a quarter inch of clay above the hole, so the loop point stays strong after drying.
- Test the hole size with your twine before drying, because clay shrinks slightly and tight holes get tighter.
- Smooth the hole edges with a wet fingertip, since rough edges fray twine over time.
Avoid This:
- Avoid making the hole after drying, because drilling or poking dry clay cracks the whole stone.
- Avoid thin stones for hanging, since they swing, knock against doors, and chip faster than tray stones.
- Avoid scenting a car stone too strongly before a long drive, because heat builds scent fast in a closed car.
A hanging stone works where flat stones cannot go: on a closet rail, a hook by the door, or the rear view mirror with a short loop. Make two or three in every batch. They are the version friends always ask you to make for them.
Dry the Stones Completely
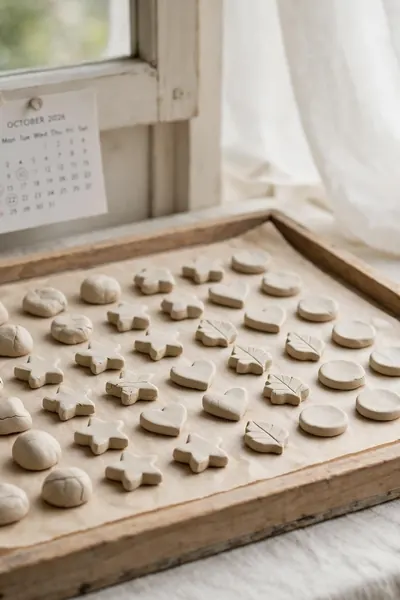
Time Needed: 24 to 48 hours | Difficulty: Easy, just patience | Cost: None | Best For: A dry, airy spot away from steam
Lay the stones on fresh parchment in a single layer with space between them, and flip each one halfway through so the bottom dries too. A bathroom counter is the worst drying spot in the house, because shower steam keeps feeding the clay moisture it is trying to lose.
How to Tell When the Clay Is Fully Dry
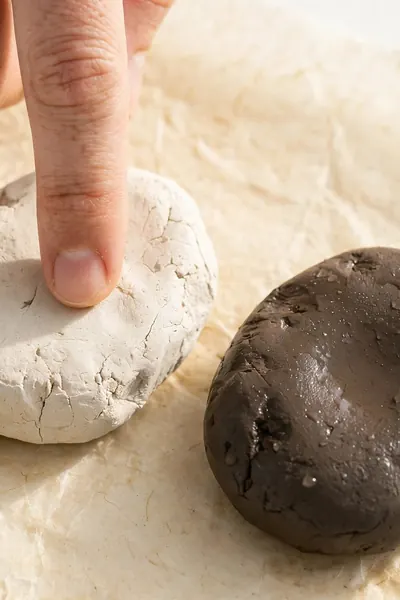
Fully dry clay feels room temperature all the way through, never cool. A cool spot means moisture is still leaving the piece, and oil added now will sit on a damp core instead of soaking in. Dry clay also sounds right: tap it gently and it clicks, almost like a tiny plate.
Color tells the truth too, because wet air dry clay looks darker and slightly grey, while dry clay turns pale and even. Still unsure? Give the batch one more day. I’ve noticed that nearly every disappointing stone traces back to oil added a day too early.
Sand the Edges Smooth
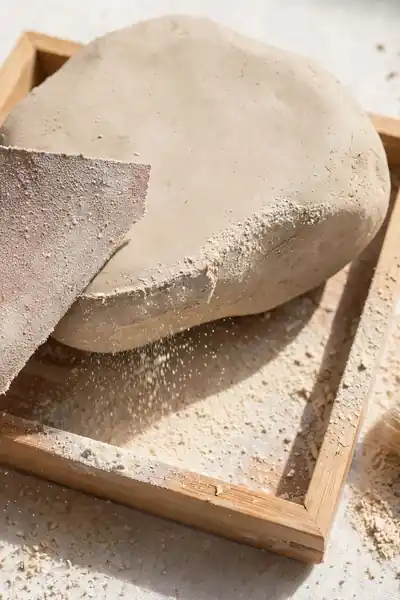
Dry clay almost always has a few rough edges, tiny bumps, and one corner that dried sharper than you planned. Two minutes of gentle sanding fixes all of it, and it is the step that makes a handmade stone feel finished instead of homemade.
- Use fine grit sandpaper, around 220 grit, and rub each rough edge with light, short strokes.
- Turn the stone as you go and check with your fingertip, because your fingers feel bumps your eyes miss.
- Brush or blow off every trace of clay dust afterward, since dust blocks the pores the oil needs.
- Sand over a tray or paper, because clay dust is fine, pale, and drifts onto everything nearby.
Should You Paint Diffuser Stones?
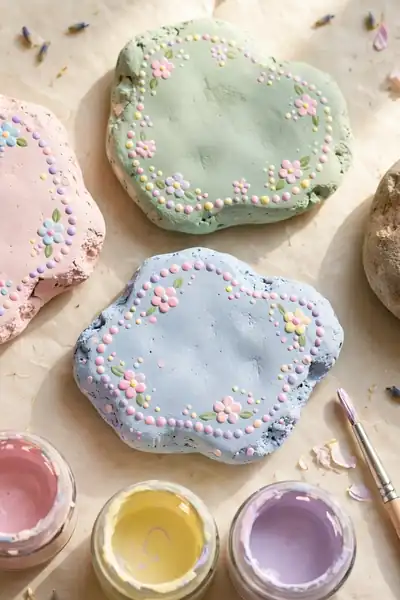
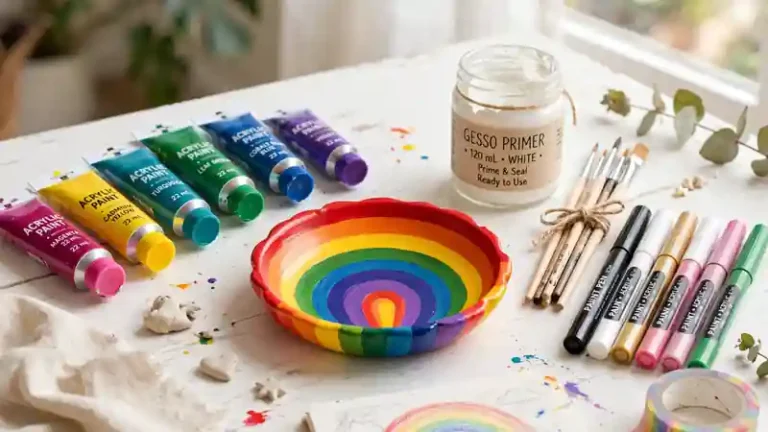
Quick Tip: Paint is decoration, but it is also a lid. A thick coat of acrylic or any sealer closes the clay’s pores, and a sealed stone can smell like almost nothing. Paint small details only, and always leave most of the surface bare.
Simple painted dots, a tiny flower, initials, or a painted border give a stone personality without stealing its job. Color mixed into the clay before shaping is even safer, because the color goes all the way through and the surface stays open and thirsty for oil.
Also Explore: How to Paint Air Dry Clay for Vibrant Lasting Color
Scent the Stones With Essential Oil
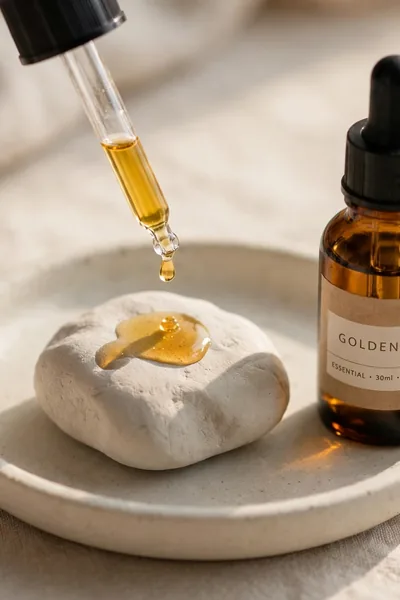
Common Mistake: New makers flood the stone, adding drop after drop until the surface shines wet. Too much oil at once overwhelms a small room, stains whatever the stone touches, and still fades in the same few days.
The Fix: Start with two to five drops on the back of the stone, where stains never show. Let the oil soak in for a few minutes, then add one or two drops more only if the scent feels too soft.
Put the scented stone on a small dish or coaster for its first day, until you know the oil has fully soaked in. That one habit protects wood, paint, and fabric from the ring of oil a fresh stone can leave behind while it settles.
Best Scents and Simple Blends to Try

What You Need:
- Lavender oil: The classic bedtime scent, soft and floral, and the one most guests recognize and like.
- Peppermint oil: Sharp and clean for desks and cars, where a sleepy scent would be wrong.
- Sweet orange oil: Bright and friendly for kitchens and entryways, and it blends with almost everything.
- Eucalyptus oil: Fresh and herbal, made for bathrooms and sick days.
- One blend to start with: Two drops of lavender plus one drop of sweet orange gives a calm scent with a lift at the end.
Keep your first blends to two oils, because three or more can turn muddy fast. Write the winning mix and its drop counts on the storage tin, because memory fades and you will never recreate the exact scent your family keeps asking about again and again.
Where to Use Your Stones Around the Home

Before: One scented stone on the living room shelf tries to perfume the whole house and fails quietly. Big open rooms swallow gentle scent, so the stone seems useless and ends up forgotten in a drawer.
After: The same stones sit where scent actually works: one on the nightstand, two in the closet, a small cluster in the bathroom. Small, closed spaces hold the fragrance close, and every spot smells cared for.
Think in zones, not rooms. A stone scents about an arm’s length around itself, so place stones at nose height near where people pause: by the bed, inside the wardrobe door, beside the sink. Three small stones in the right spots beat one stone in a big room every time.
Pretty Variations to Make Next
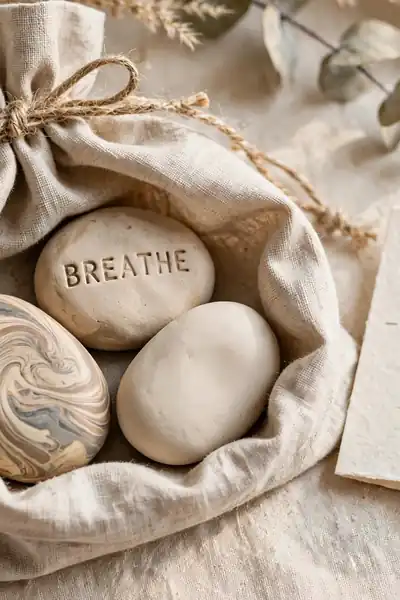
Do This:
- Mix a few drops of natural pigment or acrylic into the clay before shaping for soft, even color.
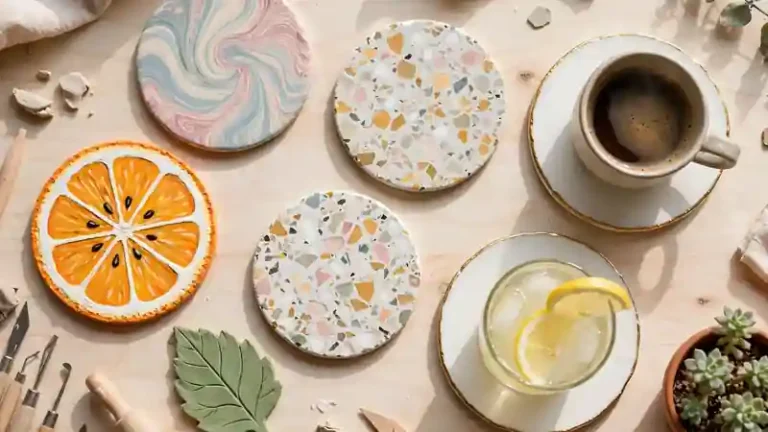
- Twist two clay colors together lightly for a marbled stone that looks different on every side.
- Press alphabet stamps into soft clay to spell calm words like breathe, rest, or home.
- Group three small stones in a shallow dish as a tray set for a guest room or a gift.
Avoid This:
- Avoid dark, heavy coloring all over, because tinted oils plus dark clay can look muddy together.
- Avoid stamping deep letters in thin stones, since the letters can crack through while drying.
- Avoid copying a photo exactly, because handmade stones look best when each one is slightly different.
I’ve seen this work beautifully as gifts: one marbled stone, one stamped stone, and one plain stone in a linen bag, with a tiny card naming the scent. It looks like a shop set, and the whole gift costs less than a single scented candle.
Make the Scent Last Longer

Scent Life: 3 to 7 days per application | Refresh: 2 to 3 drops | Storage: Airtight tin or jar | Best For: Small, closed spaces
When you want a new scent on an old stone, let it air out in the open for three or four days first, because yesterday’s lavender under today’s lemon smells muddy. Stones kept for one scent family, citrus stones and floral stones, always smell cleaner and stronger.
Mistakes That Ruin Clay Diffuser Stones

The fastest way to ruin a good stone is to seal it. Paint, varnish, and resin close the clay’s pores for good, and a sealed stone can hold almost no oil. The second killer is rushing: oil added to clay that still feels cool inside soaks in unevenly and fades within a day.
Too much water while shaping causes the third classic failure, cracks, because soggy clay shrinks unevenly as it dries. And thick, chunky stones dry so slowly that many beginners give up and scent them damp, then blame the oil when the smell disappears by morning.
Fix Weak Scent, Cracks, and Slow Drying

Most problems with these stones have simple causes and simple repairs, and none of them mean you need to start over. Work through the three fixes below in order, because weak scent, cracks, and slow drying often come from the same rushed batch.
- For weak scent: move the stone to a smaller space or add two more stones beside it, because one stone cannot perfume a big room.
- For cracks: press a tiny piece of fresh soft clay into the crack, smooth it with a wet fingertip, and let that spot dry again fully.
- For slow drying: move the stones to a drier room with moving air, space them apart, and give thick pieces up to two extra days.
- Retest before re-scenting: the stone should feel room temperature and pale all over, not cool or dark in the middle.
Safety Notes for Oils, Kids, and Pets

Quick Tip: Treat a scented stone like a tiny open bottle of oil, because that is what it is. Undiluted essential oil can soften paint, stain finished wood, and mark fabric, so a stone always sits on a dish, never straight on furniture or cloth.
Keep stones where small hands and paws cannot grab them, high in a closet or inside a drawer they cannot open. Some oils are too strong for young children and pets, so check your oil’s guidance first, and skip scented stones in a nursery or near a pet bed.
Frequently Asked Questions
1. How long does the scent last on a clay diffuser stone?
About 3 to 7 days in a small space, and longer inside a closed drawer or wardrobe. When it fades, add two or three fresh drops to the back of the stone.
2. How long do the stones themselves last?
For months or even years, if they stay dry and are handled gently. The clay does not wear out; only the scent fades, and drops bring it back.
3. Can I use polymer clay or glazed clay instead?
No. Polymer clay and glazed or sealed clay cannot absorb oil, so the scent sits on the surface and vanishes fast. Air dry clay left unsealed is the right material.
4. Can I change the scent on the same stone?
Yes. Let the stone air out in the open for three or four days until the old scent is faint, then add the new oil. Citrus after citrus works best.
5. Do the stones need any cleaning?
Almost none. Brush off dust with a dry soft brush now and then, and never wash or soak them, because water can soften the clay and weaken the stone.
Conclusion
You now have a way to scent your home that costs pennies, asks for no plug, and looks like decor instead of a gadget. Your diy clay diffuser stones can live in drawers, closets, bathrooms, and cars, refreshed with a few drops whenever the scent fades. I’ve seen how making this one change can completely shift the result, because a home that smells calm feels cared for the moment you walk in. Save this guide on Pinterest for your next craft afternoon, make your first small batch this week, and share it with a friend who loves a naturally fresh home.


One Comment