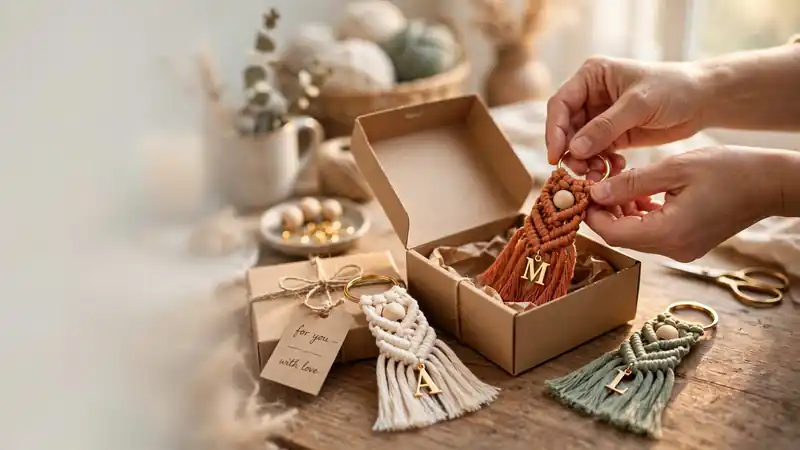
DIY Macrame Keychain Tutorial for Thoughtful Gifts
Finding a gift that feels personal without costing a fortune is harder than it should be. This diy macrame keychain tutorial solves that in about twenty minutes: two simple knots, a few dollars of cord, and you have a handmade gift people actually keep.
In my experience, beginners overthink macrame because wall hangings look intimidating. A keychain is the same craft at a tiny, forgiving scale, where a crooked knot costs you seconds, not hours. This guide walks you through every knot slowly, then shows you how to personalize, batch, and wrap your gifts.
How to Make a Macrame Keychain: Step by Step

This diy macrame keychain comes together with just two knots repeated in a simple rhythm. Once you learn the lark’s head and the square knot, the rest is repetition. Follow these steps slowly the first time; speed comes naturally on your second keychain.
- Cut two cords, each about 6 feet long. Fold them in half together so you have a loop at the top and four loose ends.
- Push the folded loop through your key ring from front to back, then pull all four ends through the loop and tighten. This lark’s head knot anchors everything.
- Separate the four strands: the two outer cords will do the knotting while the two middle cords stay still as fillers. Keep the middle cords taut with one hand.
- Tie square knots down the length: left cord over the middles and under the right cord, right cord under the middles and up through the loop, tighten, then mirror the motion. Repeat 10 to 14 times.
- Trim the four ends evenly for a tassel, then clip the top loop onto your keychain clasp. Comb the fringe gently for a soft finish.
Why a Macrame Keychain Makes a Thoughtful Gift
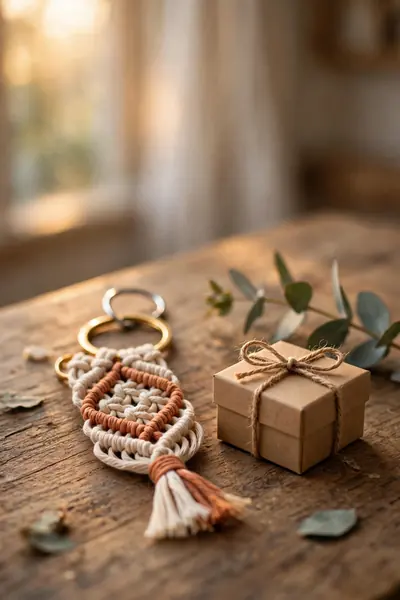
A handmade keychain carries something store-bought gifts never can: proof that someone spent their own time on you. Every knot is a small decision, every color choice a quiet message about who you are to the giver. It is personal without being expensive, which is exactly what makes it memorable.
Keychains also get used every single day, unlike decor that sits on a shelf. Each time your friend grabs their keys, they think of you for half a second. That daily reminder is the real gift hiding inside this small project.
Also View:DIY Resin Coasters With Dried Flowers for Beginners
Skill Level, Time, and Cost Per Keychain
Quick Tip: Your first keychain will take about 45 minutes because you will double-check every knot. By the third one, most people finish in 20 minutes. Make your practice piece for yourself and gift the smooth ones that follow.
This is a true beginner project that needs only two knots and no special tools. Cord costs under ten dollars and makes several keychains, so each gift runs about two to three dollars. That combination of low cost, short time, and handmade charm is hard to beat.
Choosing the Best Cord for Keychains

Common Mistake: Most beginners grab whatever cord looks prettiest in the package, usually something thin and shiny. Nylon and satin cords look lovely on the shelf but slide around while you knot. The result is a loose, uneven keychain that takes twice as long to finish.
The Fix: Start with 3mm cotton cord in a light color so you can see every knot clearly. Cotton grips itself, which holds your tension steady while you learn. Save the slippery synthetics for your fifth or sixth keychain, not your first.
Cord thickness matters as much as material. Anything under 3mm gets fiddly fast on a small project, while 5mm and up feels bulky on a key ring. In my experience, beginners who start with cotton finish faster and actually enjoy the process instead of fighting it.
Materials and Tools You’ll Need

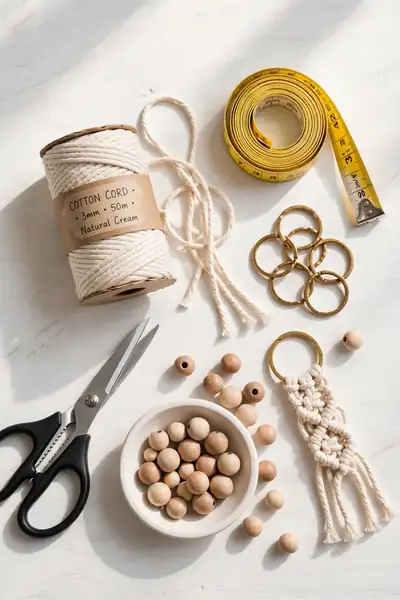
What You Need:
- 3mm cotton cord: the beginner-friendly choice that grips well and shows knots clearly.
- Key ring or clasp: a split ring or lobster clasp, whichever suits the recipient’s keys.
- Sharp scissors: clean cuts prevent fraying that makes threading beads frustrating.
- Tape measure or ruler: for cutting cords to the right length the first time.
- Wooden beads (optional): add weight and personality to the finished tassel.
- Clipboard or hook (optional): anchors your work so cords stay taut while knotting.
Cut each cord about four times your finished length, since knots eat up length fast. Two 6-foot cords folded in half give you a comfortable working length for a standard keychain. Measure twice, cut once, and trim the extra at the end rather than running short midway.
Gift-Worthy Variations to Try
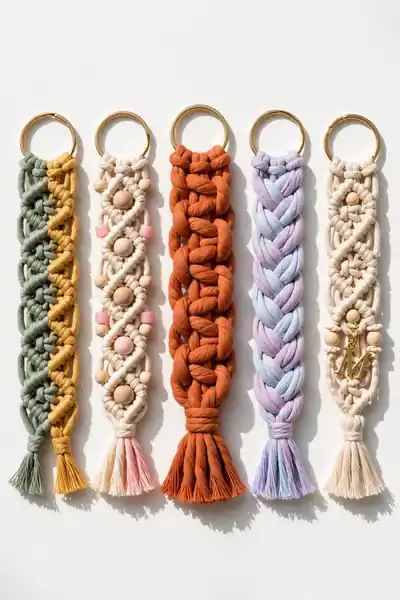
These knotted keychain variations all use the same two knots you just learned, so none of them require new skills. Changing color, texture, or one small detail creates a completely different gift. Pick the variation that matches your recipient’s style.
- Two-tone: use two different cord colors folded together at the lark’s head knot. Cream paired with terracotta or sage looks effortlessly stylish.
- Beaded tassel: thread small wooden beads onto each strand before trimming. The extra weight makes the tassel hang straighter.
- Chunky: swap to 5mm cord and tie just six or seven knots. Fewer knots still look substantial at this thickness.
- Initial charm: thread a small metal letter onto the middle cords mid-pattern. It turns a simple keychain into a personal keepsake.
Personalizing Keychains for the Recipient
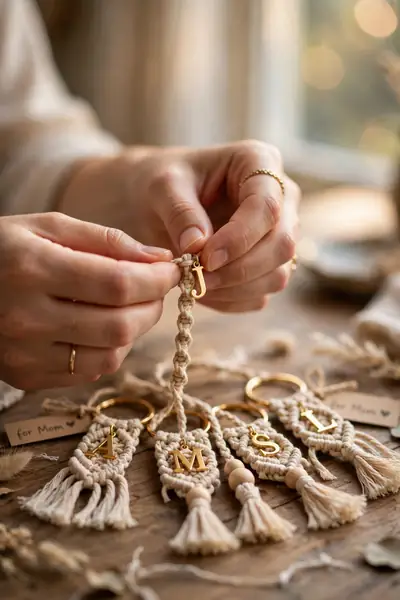
Do This:
- Match the cord color to the recipient’s everyday style, not just your favorite shade.
- Add their initial or a small charm that references a shared memory.
- Choose a clasp style that fits how they actually use keys, ring or clip.
- Keep the design simple for minimalists and bolder for statement lovers.
Avoid This:
- Don’t pick neon colors for someone whose wardrobe is all neutrals.
- Don’t add heavy charms that make the keychain uncomfortable in a pocket.
- Don’t overcomplicate the pattern; a clean simple knot beats a messy ambitious one.
- Don’t forget to check for metal allergies before adding nickel charms.
Personalization is what turns a nice craft into a gift that gets kept. Think about the person for thirty seconds before you cut a single cord. That small pause guides every choice that follows, from color to charm to clasp, and the result feels made for them alone.
Making a Batch: Gifts for Everyone on Your List

Time Needed: about 20 minutes per keychain once you know the pattern
Cost: roughly two to three dollars per gift in cord and findings
Best For: holidays, bridesmaid gifts, teacher appreciation, party favors
Pro Tip: cut all cords for the full batch first, then knot assembly-line style
Batch-making turns an afternoon into a stack of finished gifts. Cut every cord first, then tie all the lark’s head knots, then work through the square knots one keychain at a time. The rhythm speeds you up, and each piece comes out more even than the last.
Also Explore:How to Sell Candles on Etsy and Get Your First Order
Wrapping and Presenting Your Handmade Gift

A beautiful presentation makes a two-dollar keychain feel like a ten-dollar gift. Slip the finished piece into a small kraft jewelry box or a linen drawstring pouch. Tuck in a handwritten tag with the recipient’s name and one honest line about why you made it for them.
Keep the wrapping simple so the handmade piece stays the star. Twine, dried flowers, or a sprig of eucalyptus cost almost nothing and photograph beautifully. I’ve noticed that a thoughtful tag gets kept long after the wrapping is gone, so write something real.
Mistakes Beginners Make and How to Fix Them
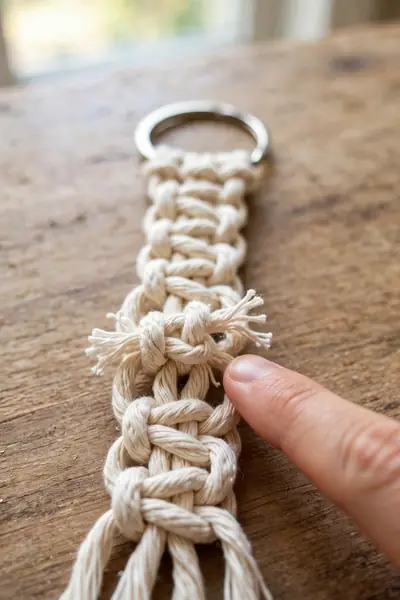
Common Mistake: Beginners cut their cords too short because six feet feels excessive for something so small. Knots eat length far faster than your eyes expect. Running out of cord two-thirds through means unraveling everything and starting over.
The Fix: Always cut longer than the pattern suggests, especially on your first attempt. Extra cord costs pennies and trims away in seconds. A generous cut is the cheapest insurance in macrame.
The second most common error is mixing up working and filler cords mid-pattern, which twists the design lopsided. Pause every few knots and check which cords are moving. Catching it early means retying one knot instead of ten, and your pattern stays straight from ring to tassel.
Caring for Your Finished Keychain
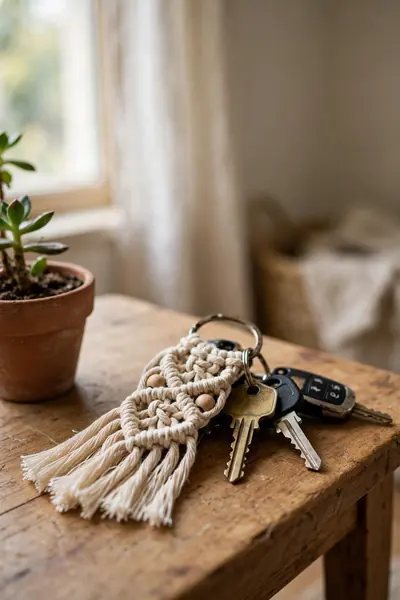
Quick Tip: Keep cotton keychains dry whenever you can. If one gets soaked, let it air dry fully before it goes back in a pocket. Damp cord left bunched up can develop a musty smell.
Expect gentle fading over time, especially with bright dyes and daily sun exposure. This is normal wear, not a mistake you made. If a knot loosens after months of use, just pull the working cords snug again by hand without redoing the whole pattern. A quick comb through the tassel freshens the fringe in seconds.
Frequently Asked Questions
Here are the questions beginners ask most before starting their first keychain, gathered from real first-timers. If yours is not answered here, the steps above have you covered. Let’s clear up the last doubts together so you can start with confidence.

1. Do I need special tools?
No, just cord, a key ring, scissors, and a ruler. Everything else is optional.
2. What is the best cord for beginners?
3mm cotton cord, because it grips well and shows every knot clearly.
3. Can I wash my keychain?
Hand wash gently with mild soap and air dry fully. Avoid machine washing, which tangles the fringe.
4. How do I stop the ends from fraying?
Trim with sharp scissors and comb the tassel straight. Cotton fringe is meant to look soft, not sealed.
Conclusion:
You now have everything to turn a few dollars of cord into a gift that feels truly personal: two knots, a personalization trick or two, and wrapping that makes it shine. I’ve seen how making this one change can completely shift the result, swapping a plain craft for a keepsake someone carries daily. Save this diy macrame keychain tutorial on Pinterest so it’s ready at gift time. Then pick your first recipient and start knotting this weekend. And if a friend is stuck for gift ideas, send this her way. The best gifts are the ones you make yourself.


5 Comments