Craft an Air Dry Clay Candle Holder Safely at Home
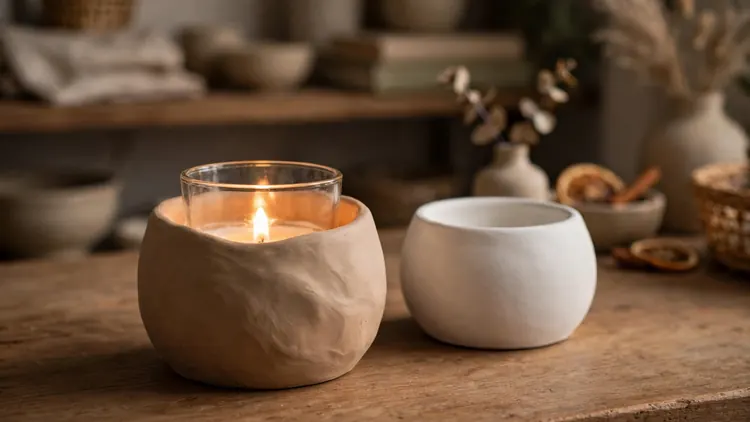
This air dry clay candle holder glows like nothing store bought, and it is built the safe way from the first step, around a glass insert that keeps every flame off the clay. If a handmade holder has been sitting on your idea list because the safety part worried you, this is your project.
I’ve noticed the makers who love their finished holders longest are the ones who slowed down twice: once at the seam, once at the sizing. Follow the steps here and you will roll, wrap, dry, and seal a holder that fits its candle perfectly, then finish it plain, textured, or faux ceramic.
Why a Candle Holder Is the Perfect Next Clay Project
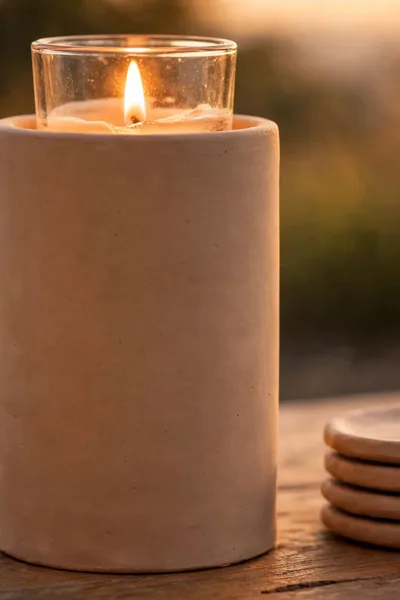
Flat dishes and ornaments teach your hands the basics, but height teaches them judgment. A well made air dry clay candle holder asks more of you: even walls, a steady base, and patience while it dries, and it repays that effort every evening it sits glowing on your table.
It also happens to be the project that fools guests often. With a smooth finish and a soft painted wash, a block of inexpensive clay reads as pottery, the kind sold in a paper bag with tissue. Yet the reward is simpler: a useful object you made, holding real light.
The Safety Rules That Make This Project Work
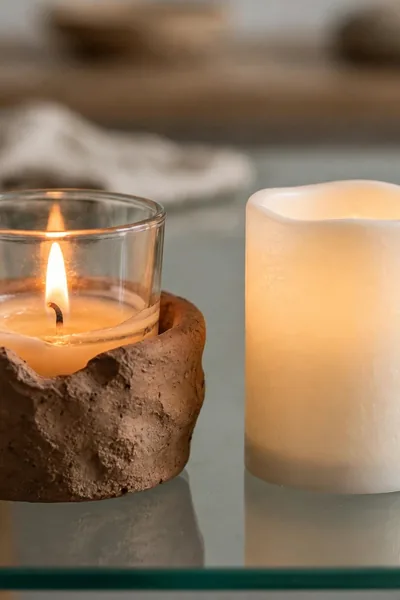
Air dry clay is dried mud and paint, not fired ceramic, so it must never meet a naked flame. Every safety rule in this project follows from that one fact, and none of them limit the design; they simply decide how the candle sits inside the holder you build.
- Always burn the candle inside its own glass votive cup or tealight casing, set inside the clay holder, so glass always stands between flame and clay.
- Build the holder around that glass cup from the start, sizing the mold to the cup as section 8 explains, never the other way round.
- Choose flameless LED candles for bedrooms, kids’ rooms, and any spot you cannot watch, and enjoy the same glow with no flame at all.
- Set the finished holder on a flat, heat safe surface away from curtains, paper, and trailing cloth, and never leave a lit candle alone in the room.
Also View: How to Keep Air Dry Clay From Ever Cracking It Again
What Makes the Wrapped Shape Different
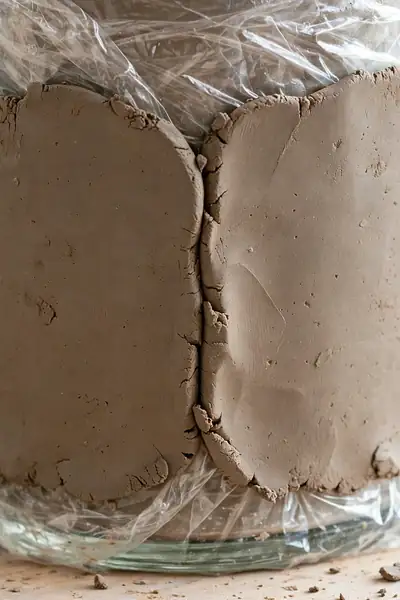
Quick Tip: The seam decides everything on this project. Where the two clay edges meet around the mold is the one spot that can show as a line, split while drying, or catch the light forever after. Blend it slowly with a wet fingertip now, and the whole holder reads as one clean piece later.
Height changes the drying rules too. The outer wall dries in the room air while the base stays damp against the table, so a tall piece firms unevenly and can slump if it leaves the mold early. Support it a full day, and the shape you wrapped is the shape you keep.
Materials You Will Need
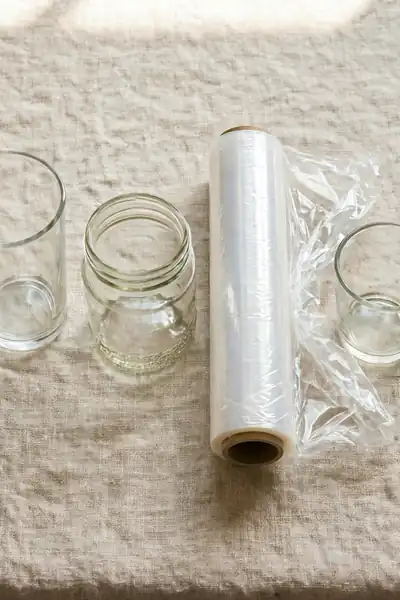
What You Need:
- Air dry clay, about half a standard block per holder: enough for one wrapped wall at a quarter inch thick with trimming spare.
- A cylindrical mold object: a drinking glass, small jar, or clean can, soon wrapped in plastic so the clay releases cleanly.
- Plastic wrap: the release layer between mold and clay, smoothed on to keep wrinkles off the clay’s inner wall.
- One glass votive cup or metal cased tealights: the insert the candle actually burns in, chosen before you size anything.
- Fine grit sandpaper: for the dry rim and seam once the holder leaves the mold.
- Acrylic paint and a clear sealant: optional color, then the protective coat that keeps the surface wipeable.
Buy the glass insert first, before the clay, because its diameter quietly decides the whole project. Tealight casings and votive cups come in near standard sizes, so a mold that fits one usually fits the next pack too, which is why holders made this way never end up candleless on the shelf.
Tools You Will Need
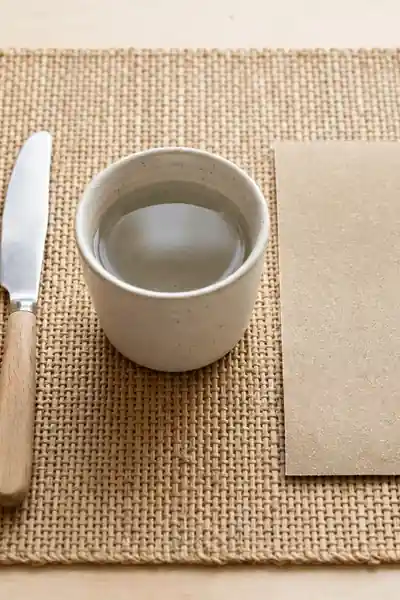
Main Tool: Rolling pin, for an even quarter inch sheet | Key Tool: A butter knife or clay tool, for trimming the seam | Smoothing: A fingertip and a small cup of water | Finishing: Fine sandpaper and a soft paintbrush
Nothing on this list needs a craft store trip. The rolling pin sets the wall thickness, the knife trims where the edges meet, and water does the fine work that tools cannot, blending, slicking, and erasing fingerprints while the clay is still soft enough to forgive you.
Swaps and Substitutions That Actually Work
Common Mistake: Putting the project off until you can buy a proper candle mold and spray sealant. Neither is required, and waiting usually means the clay block dries out in its packet while the idea fades, which is how most first holders never get made at all.
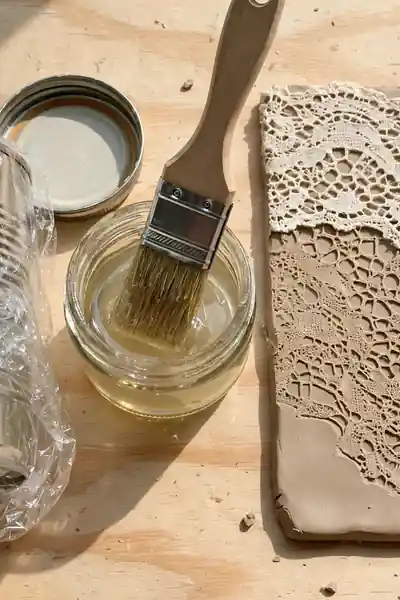
The Fix: Use the tested swaps below. A clean food can wrapped in plastic gives a straighter, more consistent cylinder than most glasses, and two thin coats of Mod Podge seal a holder nearly as well as spray, with a slightly softer sheen.
Texture swaps work the same way. Press lace, a ribbed sweater cuff, or a carved rolling pin into the flat sheet before wrapping, and the pattern sets into the wall with no extra step later. Swap freely with molds, sealers, and texture, but never swap the glass insert for a bare candle.
Step by Step: Wrap, Blend, Dry, and Finish
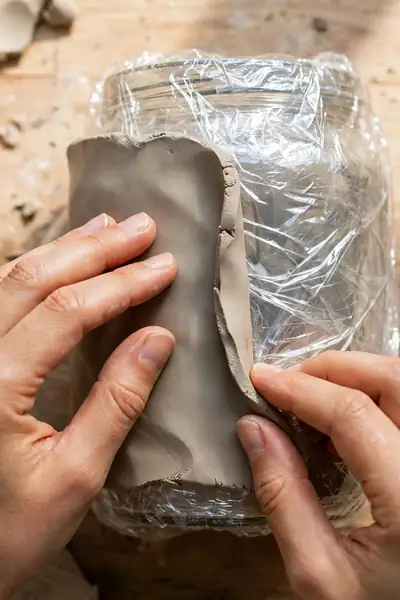
Eleven small steps carry this holder from a lump of clay to a sealed, candle ready piece, and none of them is hard on its own. The order is what protects you: shape before drying, dry before sanding, sand before paint, and seal last of all.
- Wrap your mold in plastic wrap, smoothing the sheet so deep wrinkles cannot print themselves onto the clay’s inner wall.
- Knead the clay until soft, then roll a sheet about a quarter inch thick, tall as the mold and long enough to wrap around with a small overlap.
- Wrap the sheet gently around the mold, pressing it evenly against the surface as you go.
- Trim the overlap so the edges meet cleanly, then blend the seam with a wet fingertip until the line disappears.
- Press the bottom edge flat on the table for a stable base, and smooth the top rim with damp fingers.
- Add texture or carved details now if you want them, while the wall is supported by the mold.
- Leave the holder drying on the mold for at least 24 hours, longer in a cool or humid room.
- Slide the holder off the mold and stand it to dry for another day or two, turning it once so the base dries too.
- Sand the rim, seam, and base with fine grit paper until every edge feels smooth under your thumb.
- Paint if you like, in thin coats, and let the color dry fully before the final step.
- Seal with spray or brush on sealant in thin coats, and let it cure before the first candle goes in.
Sizing the Holder to Its Glass Insert
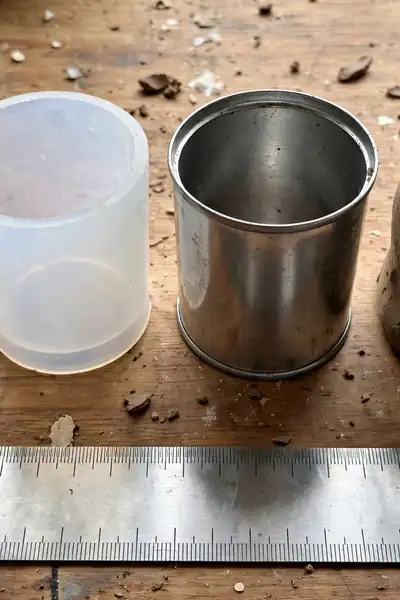
Measure First: The glass cup’s outer width, before choosing any mold | Mold Choice: About a finger’s width wider than the cup | Wall Thickness: A steady quarter inch all the way around | Test Fit: The cup slides in and lifts out without catching
Sizing backwards is the quiet mistake behind most wobbling holders. If the mold is chosen by eye and the cup bought later, the flame’s glass either rattles in a too wide holder or never fits at all. Measure the cup you already own, and every holder you make fits it.
Tips From Making a Shelf of Holders
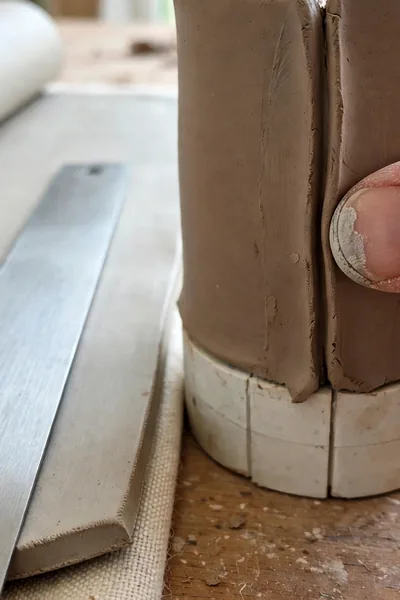
The seam deserves your slowest minute of the whole project. I’ve noticed that makers rush it because the wrap looks finished, then spend ten minutes sanding a line that thirty patient seconds with a wet fingertip would have erased completely while the clay was still soft.
Leave the holder on its mold longer than feels necessary, and roll your sheet against a ruler the first few times so the wall stays one honest thickness. Sand before sealing, always, because sealant locks in whatever surface it meets, rough patches, fingerprints, and all.
Mistakes That Scorch, Slump, or Crack
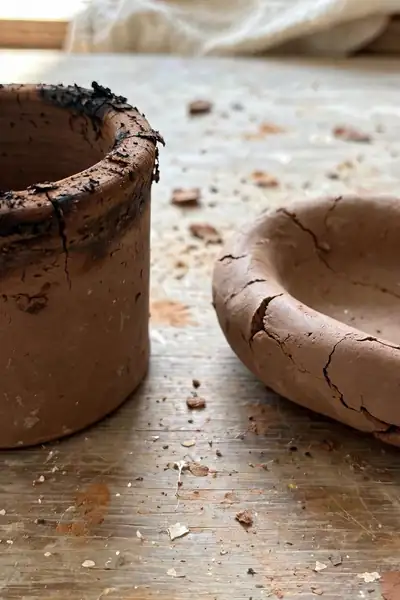
Common Mistake: Testing a real candle in the finished holder before checking where the flame sits. A low burning candle in a too tall or insert free holder can scorch the clay rim before you notice, and one scorched test piece taught this rule faster than any warning could.
The Fix: Never test with a bare flame at all. Set the glass insert in first, light the candle inside it, and watch the flame’s height against the rim from across the room; the glass should always stand taller than the flame’s reach.
The other two classic failures happen earlier and quieter. A holder lifted off its mold after a few eager hours slumps gently out of round as it finishes drying, and walls rolled thinner at the top crack there first while the thick base stays perfect and smug.
Troubleshooting: Seams, Warps, and Cracks
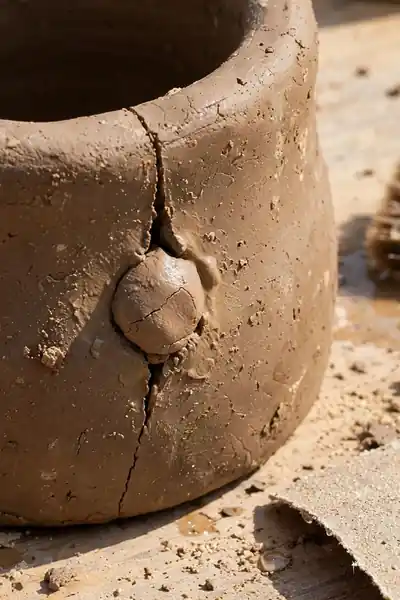
Quick Tip: Judge every drying problem by time before you touch anything. A visible seam, a soft warp, and a hairline crack all trace back to the same family of causes: uneven thickness or a holder freed from its mold too soon. Most fixes are really next time rules.
A seam that survives drying can hide under an intentional texture band pressed and painted over it, turning the flaw into the design. A crack in a finished piece is not the end either; small cracks fill with fresh clay, dry, sand smooth, and disappear under paint and sealant.
Variations: Faux Ceramic, Textured, Two Tone, and Mini Clusters
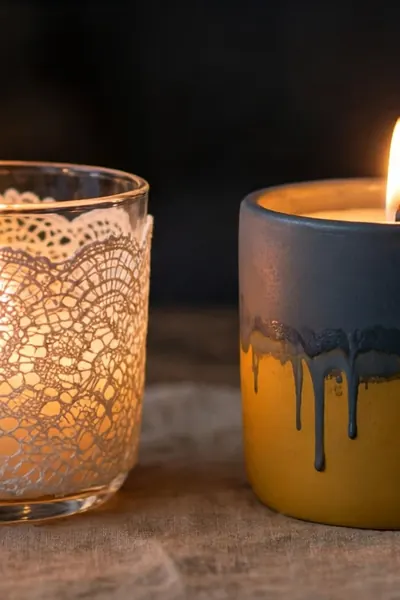
One plain holder is a lesson; a small family of them is a centerpiece. The four variations below all start from the same wrapped cylinder, so finish, texture, and color do the decorating while your hands repeat a shape they already know well.
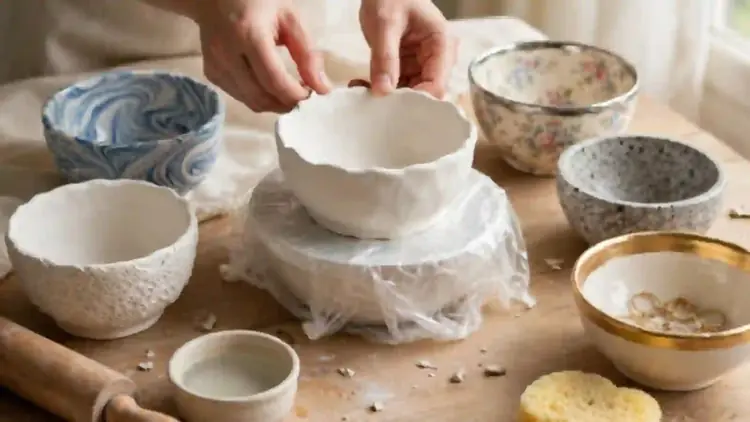
- Faux Ceramic: Paint the whole holder white, then rub a thin gray or beige wash into its texture and wipe it back, so the grooves hold the color like a glazed pottery glaze line.
- Textured Wrap: Press lace or a carved pattern into the flat sheet before wrapping, so the design is born in the wall and needs no carving later.
- Two Tone Dip: Paint only the bottom half in a solid color and leave the top natural or a contrasting shade, for the dipped boutique look.
- Mini Tealight Cluster: Make three or five smaller holders at different heights and group them as a centerpiece, each with its own glass insert or LED candle.
Also Explore: How to Make Air Dry Clay Look Just Like Real Ceramic
Caring for Your Holder and Storing It Safely
Do This:
- Wipe the holder clean with a barely damp cloth whenever dust settles in its texture.
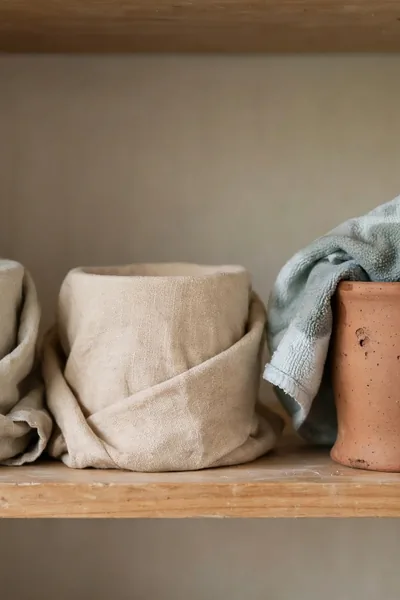
- Store spare holders in a dry cupboard, wrapped in soft cloth so painted rims never chip against each other.
- Check the glass insert for wax buildup and wash the glass, never the clay, in warm water.
Avoid This:
- Never submerge the holder or hold it under a tap, since sealed clay still drinks water through any worn spot.
- Never store it in a damp bathroom cabinet where steam softens the sealant over time.
- Never move a lit holder by its clay wall; set the candle out first, then carry the cold holder.
Treated this gently, a holder keeps its finish for years of evenings. The clay itself is the fragile partner in the pair, while the glass insert does the hard, hot work; care for each part its own way and the set never asks for more.
Frequently Asked Questions
1. Is air dry clay safe to use for a candle holder?
Yes, with one firm condition: the candle always burns inside its own glass cup or casing set within the clay, or you use a flameless LED candle, so a flame never touches the clay itself.
2. Can I make this without a proper mold?
Yes. Any smooth cylinder from the kitchen works, a drinking glass, a small jar, or a clean food can, wrapped in plastic wrap so the clay releases cleanly once dry.
3. How do I make the seam line disappear completely?
Blend it while the clay is soft, with a wet fingertip worked along the join until the line vanishes. Once the holder is dry, only sanding or a deliberate texture band can hide a seam.
4. Can I use the holder as a small vase for water?
Not reliably. Sealed clay still is not truly waterproof, so keep water inside a glass insert if you want flowers, and never let the clay itself hold water directly.
5. How long does this project take from start to finish?
Hands-on shaping takes about 30 to 40 minutes, but allow 2 to 3 days in total for drying on and off the mold before sanding, painting, and sealing.
Conclusion
You now know the whole craft: an even sheet, a patient seam, a full day on the mold, and a glass insert doing the hot work forever. That is the entire secret of an air dry clay candle holder that looks like pottery and behaves safely on any shelf in the house.
Save this tutorial on Pinterest before your next craft afternoon, wrap your first holder this weekend, and share it with the friend who lights a candle every evening. I’ve seen how small changes like these can completely shift the way a handmade piece earns its place at home.