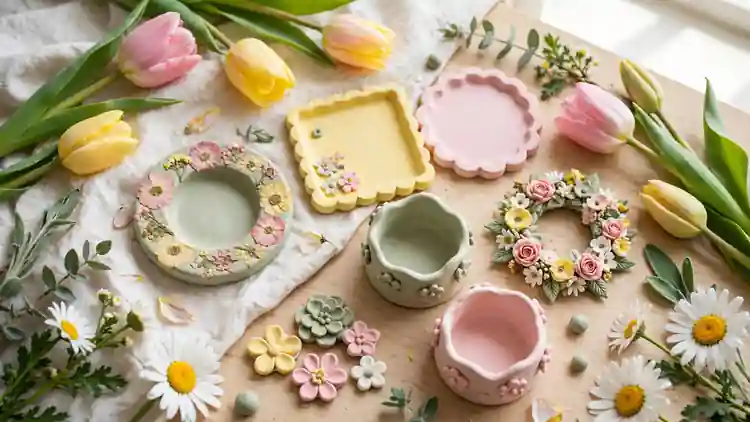
20 Blooming Air Dry Clay Crafts for a Fresh Spring
Spring arrives and every shelf still looks like winter. One pack of white clay fixes that faster than any shopping trip. These spring air dry clay crafts turn pressed flowers, pastel paint, and an afternoon into dishes, wreaths, garden markers, and mobiles that bloom all season.
In my experience, spring is the kindest season for beginners. The projects are small, the colors forgive uneven painting, and real flowers do half the decorating. If a piece wobbles, it reads as handmade charm instead of a mistake.
Spring Clay Basics: The Kit, the Colors, and Dry Times

Spring clay work runs on a short, forgiving kit: white air dry clay, a rolling pin, cookie cutters, acrylic paints in pastel shades, and a brush. The season’s colors do half the decorating. Blossom pink, butter yellow, sage, and sky blue over white clay read as spring before any detail is added.
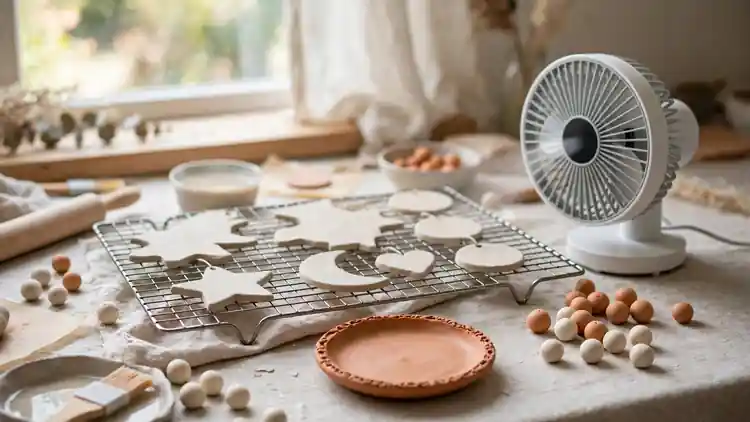
Drying is the only rule spring changes. Humid spring air slows it, so thin pieces need a day and thick ones two, turned once. Rushing paint onto damp clay is how work clouds and cracks. The spring air dry clay crafts ahead are sized to dry fast and forgive beginners.
Pressing Real Flowers and Leaves Into Clay

Pressed flowers are the signature of this whole collection, and the technique is kinder than it looks. A fresh petal or leaf laid on rolled clay keeps its shape and veins when you roll over it once, gently. Learn this move here and six of the crafts below open up.
- Pick flat faced flowers and small leaves, and pat them dry so no water spots the clay
- Roll the clay to an even sheet, about a quarter inch thick
- Lay each flower face down on the clay and roll over it once, gently, in one direction
- Peel the flower away slowly with a pin or fingertip, leaving its full print behind
- Cut or shape the piece now, while the print is safe inside the clay’s surface
Also View: How to Paint Air Dry Clay for Vibrant Lasting Color
Floral Ring Dishes With Pressed Petals
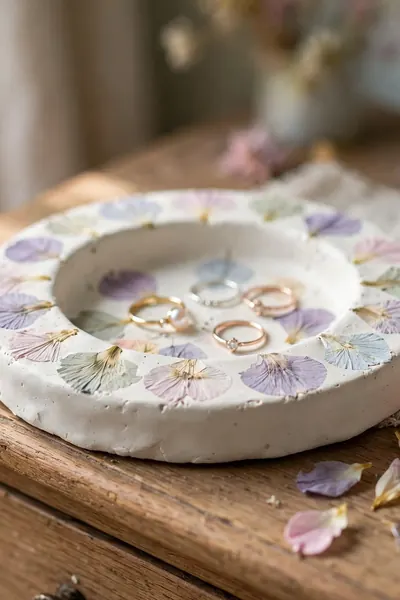
Quick Tip: Press the petals into the clay while the dish is still flat, before you lift its edges. Petals pressed after shaping crack along the curve. Flat first, shape second, and the flowers survive the bending that makes the dish a dish.
Choose small, flat faced flowers: violets, primroses, daisy petals, and tiny fern leaves press best. Roll the clay, lay the flowers face down, roll once to set them, then peel each one away slowly. The print left behind carries every vein, and a wash of pastel paint settles into the lines beautifully.
Mini Trinket Trays in Pastel Shades

Common Mistake: Rolling the tray walls too tall and too thin, like a tiny bowl. The walls dry faster than the base, curl inward, and the tray rocks on its own rim forever after.
The Fix: Keep walls low and thick: half an inch tall, a quarter inch thick, pinched up from the disc itself. Low walls dry at the base’s pace and the tray sits flat for life.
Cut the tray shape with a craft knife around a small plate or template, because freehand rectangles wobble at the corners. Keep the walls low, half an inch at most. Trays this size take twenty minutes to shape, and a set of three in different pastels stacks into a gift people actually keep.
Botanical Wall Hangings on Wooden Rounds
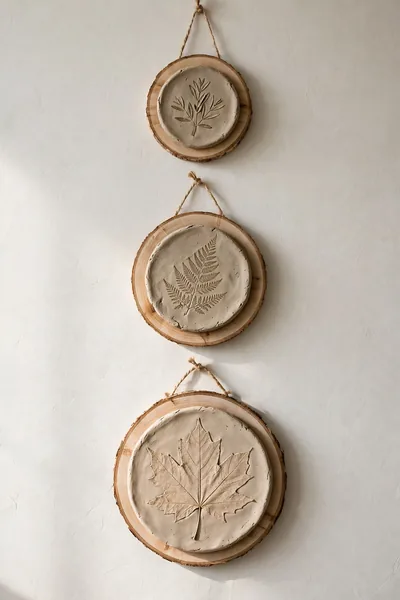
What You Need:
- Rolled clay discs, about half an inch thick, for a warp free base
- Wooden rounds slightly wider than the discs, for the mounted backing
- Fresh leaves with strong veins, picked the same morning you press them
- Strong craft glue and a sawtooth hanger per disc, for a flat, secure hang
Press the leaf prints first, while the disc is flat, using the technique from section two. A thicker disc, about half an inch, hangs without warping and takes a sawtooth hanger glued at the back. Group three discs in uneven sizes on one wall and the arrangement looks collected, not crafted.
Personalized Clay Gift Tags With Stamped Names

Before: Spring gifts wrapped in nice paper and finished with a paper tag that tears, smudges in the first rain shower, and lands in the bin before the jam is even opened.
After: A clay tag with the name stamped deep and a tiny flower pressed beside it, tied on with twine. The jar gets refilled for years, and the tag stays on it like a label it was born with.
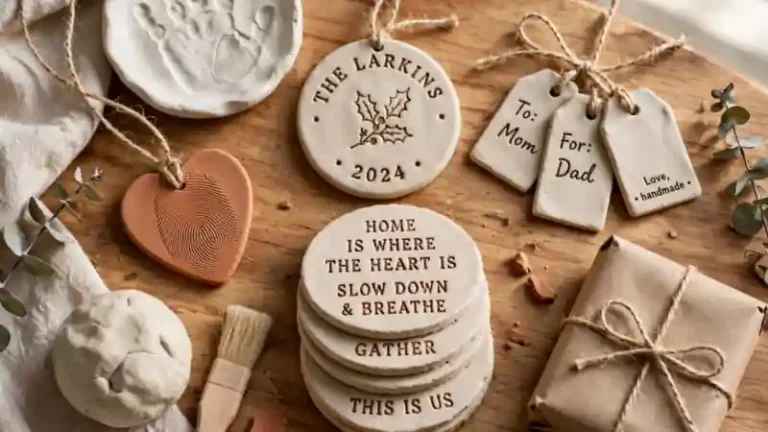
Stamp the name before the tag dries, pressing each letter straight down without rocking, because rocked letters double their edges. A tiny pressed flower beside the name turns a label into a keepsake. String finished tags on jars of spring jam, seed packets, and the gift bags you hand over at Easter brunch.
Pastel Candle Holders for the Spring Table
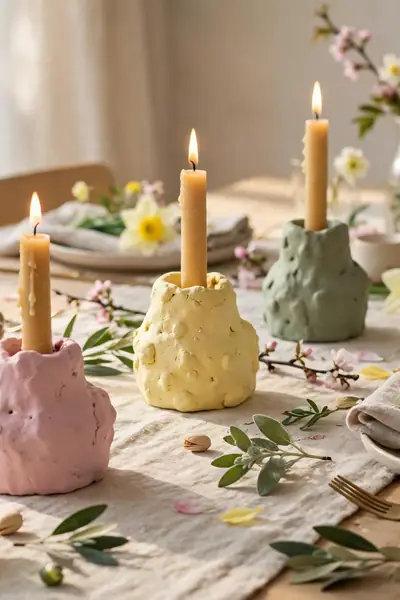
Do This:
- Build each holder a quarter inch wider than its candle, for drying shrinkage
- Press a shallow well in the center to catch the first wax drips
- Sand the base flat after drying so the holder never wobbles
Avoid This:
- Tall, thin walls that crack as they dry at a different pace than the base
- Painting before the holder is fully dry, which seals moisture inside
- A holder grouped alone; these are made to travel in threes
Measure your candle’s base and build the holder a quarter inch wider, because clay shrinks a little as it dries. A shallow well in the center catches the first drips. Group three holders in pink, yellow, and sage down the table’s middle and the spring setting is done before flowers arrive.
Garden Plant Markers That Survive Rain
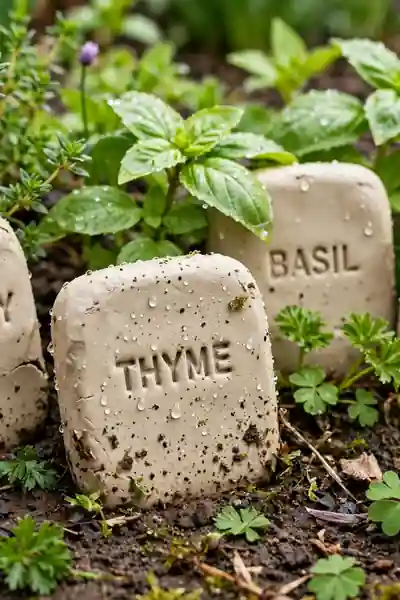
Time Needed: 30 minutes plus sealing | Difficulty: Beginner | Cost: scrap clay and varnish | Result: names readable all season
A rain ready marker is a sealed marker; two coats of outdoor varnish, front and back and edges, are what separate garden tools from garden litter. Stamp the herb’s name deep, then rub dark paint into the letters and wipe the face clean. The name stays readable through a whole wet season.
In my experience, markers fail at the stake end first, where soil moisture sits all day. Push a short wooden skewer into the base before drying and let the clay grip wood instead of wet earth. Your basil will be harvested and gone before these markers give up.
Spring Flower Fridge Magnets
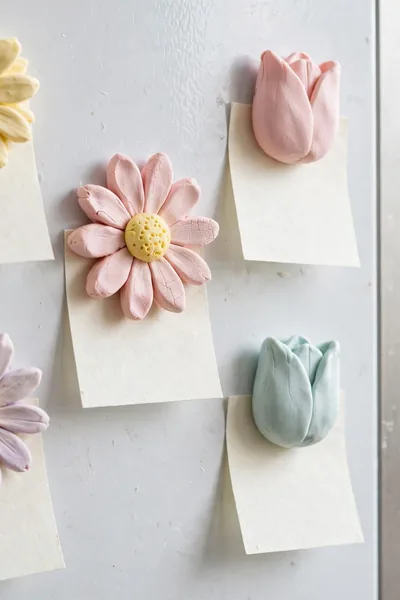
Bundles are the point: one magnet is a sample, five are a product of your afternoon. Mix daisies and tulips in each bundle and vary the greens so no two sets match exactly. On the fridge they hold the season’s first garden lists, which is where spring planning honestly starts.
- Roll small daisy and tulip shapes, keeping each magnet under two inches wide
- Press a tiny leaf print into one petal of each flower for the handmade detail
- Dry the flowers fully, then paint petals in white, yellow, and the softest pink
- Glue a strong magnet disc at the back center of each flower and let the glue cure overnight
Flower Trinket Bowls With Ruffled Edges

A trinket bowl earns its edges: pinch the rim upward between finger and thumb at petal intervals, and the flat disc becomes a flower you can drop earrings into. The ruffle is not decoration added later. It is the shaping itself, which is why these bowls read handmade in the best way.
- Roll a disc and cut a wide flower outline with five or six rounded petals
- Drape the flower over an upturned small bowl so gravity starts the curve for you
- Pinch each petal’s tip upward slightly to sharpen the ruffle
- Dry it on the mold, then lift it off and sand the base flat
Clay Wall Hooks With Blossom Knobs

Quick Tip: Test your hook with a bag of sugar before trusting it with keys. A hook that holds a kilo overnight holds a spring scarf forever. Five minutes of testing saves the one crash that makes people distrust handmade hooks for years.
A clay hook holds real weight only when its back is flat and its glue joint is wide, so roll the base thick and sand it level after drying. The blossom knob at the front hides the screw or the pad completely. Hang one by the door for keys and spring scarves.
Minimal Candle Plates in Soft Spring Colors

Common Mistake: Adding texture, stamps, and a colored rim to a plate whose whole job is restraint. Every added detail fights the candles beside it, and the minimal plate becomes the loudest object on the table.
The Fix: One tint, one clean edge, nothing else. Mix the color into the clay itself or paint a single flat coat, lift the rim once, and stop while the plate still looks like a decision, not a draft.
One color per plate, mixed with white until it barely tints, is what minimal means here. Roll, cut a clean circle, lift the rim a whisper, and stop. The discipline is the decoration. In a row of three down a spring table, these quiet plates make the patterned pieces around them look richer.
Floral Clusters for Shelf Styling

What You Need:
- Small blossoms in three sizes, made with cutters or pinched by hand
- Short wire or toothpick stems, for arranging the blooms at angles
- A dab of hot glue per bloom, to fix the arrangement once it pleases you
- One deeper green for leaves, because all pastel clusters read flat
Clusters are the forgiving craft in this collection: no two blooms need to match, and yesterday’s practice flowers finally have a job. Work in the season’s pastels with one deeper green for contrast. A cluster at a vase’s base hides the foam, the tape, and every other arrangement secret.
A Statement Spring Wreath of Clay Flowers
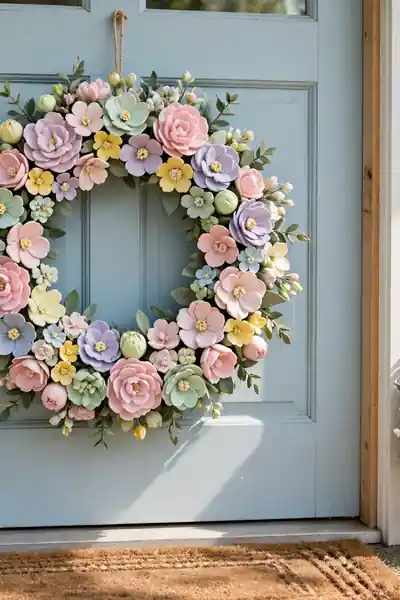
Before: A front door in March still wearing winter’s plainness, or last year’s faded wreath with its hot glue scars showing. The first thing guests see announces a season the house has not joined yet.
After: A full ring of thirty clay blooms in spring pastels, wired on so any tired flower can be swapped in a minute. It goes up with the first daffodils and still looks made yesterday when the roses arrive.
A wreath this size is built in one sitting but assembled in two: make every flower first, thirty or more, and let them dry fully before the ring comes out. Flowers wired onto a dry base can be moved, swapped, and replaced; flowers glued wet are a commitment your taste will outgrow.
Jewelry Dishes With Lace Texture

Do This:
- Lay real lace or a doily over the rolled clay and roll once to print it
- Peel the lace away slowly before cutting the dish shape
- Form the dish over a mold so the texture faces up, not into the bowl
Avoid This:
- Rolling twice, which double prints the lace into a blur
- Synthetic lace with a melted looking pattern; cotton lace prints sharpest
- Deep bowls; a jewelry dish should be shallow enough to see every ring at once
Lace prints best on clay rolled slightly thicker than usual, because the pattern needs depth to survive the dish’s curve. Cotton doilies from a charity shop print sharper than any texture mat I have bought. Paint thin, then wipe the raised lace lines clean so the pattern, not the paint, does the talking.
Butterfly Wall Art Set

Time Needed: an afternoon | Difficulty: Beginner | Cost: one pack of clay | Result: a wall that feels like spring arriving
Paint the butterflies after drying, not before assembly, and keep one color family per butterfly so the set reads calm instead of carnival. A dot of white at each wing tip is the detail that photographs best. Cluster them rising diagonally; a rising line makes any wall feel taller.
Daisy Chain Garland for the Mantel
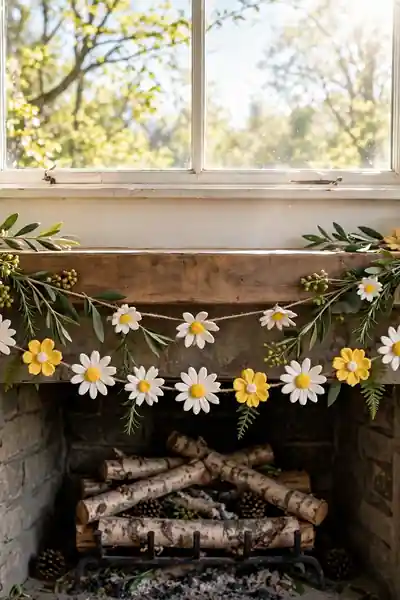
String the daisies through two holes per flower, one at each side of the center, because a single hole lets every bloom spin and face the wall. Knots between flowers keep the chain’s spacing honest. This garland across a kitchen window makes dish washing feel like a garden job in the best sense.
- Make twelve to fifteen daisies with two holes pierced beside each center before drying
- Paint white petals and yellow centers after drying, and seal each flower lightly
- Thread twine through both holes of every daisy, knotting between flowers to hold the spacing
- Drape it in soft swags, never pulled straight, because chains hang in curves in nature
Clay Flower Napkin Rings

A napkin ring needs an inner band wide enough for a rolled linen napkin: pinch the flower onto a small clay band sized around your thumb and one finger. Make the band first, dry it fully, then attach the flower with fresh clay and slip, so the join dries as one piece.
- Roll small clay bands and dry them fully; these are the ring bases
- Make one flower per ring, slightly wider than the band itself
- Join each flower to its band with slip and a pinch of fresh clay at the back
- Paint after the join has dried, so no wet paint weakens the bond
Bird and Nest Shelf Sitters
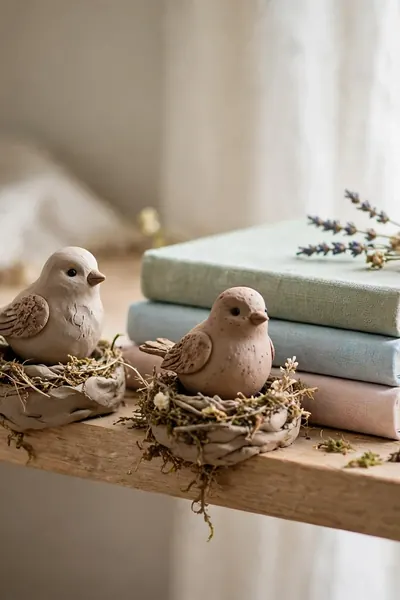
Quick Tip: Paint the bird’s eye as the very last step, one tiny black dot per side with a toothpick. Eyes placed early get painted over, smudged, and redone; eyes placed last make the bird look alive in a way no other detail manages.
Model the bird from one egg shaped lump: pull the beak out of the body clay instead of gluing one on, because glued beaks are the first parts children and dusting find. The nest is a small coil bowl with shredded clay pressed around the rim. Perched together, they read as a story.
Tulip Bud Vases That Hold Real Stems
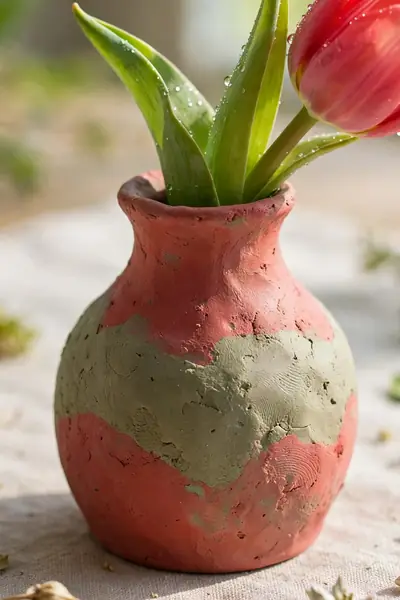
Common Mistake: Sealing only the outside of the vase and filling it with water for the first guests. Unsealed clay drinks water through its inner walls, softens, and the vase weeps onto the table it was meant to decorate.
The Fix: Seal the inside tube twice, letting each coat dry fully, and test with water a day before it matters. A vase that passes its own overnight test will never embarrass you at a table full of people.
Quick Tip: Test the vase with water before the flowers go in for guests. Air dry clay is not waterproof unless sealed, and two coats of varnish inside the stem tube are the difference between a vase and a slow, sad leak on the tablecloth.
Roll the tulip’s petals around a narrow tube: a drinking straw or a pencil wrapped in clay gives the vase its water channel. Three petals overlapping make the bloom, and a short green stem base steadies it. One tulip vase at each place setting is the spring table people photograph before sitting down.
Mushroom and Snail Garden Stakes

What You Need:
- Thick clay shapes on wooden skewers or dowels, pushed in before drying
- Bright outdoor paint, because pastel washes out in full summer sun
- Two coats of outdoor varnish, the garden’s non negotiable finish
- One snail per bed at most; whimsy works in small doses
Push the stakes into soft soil at an angle facing the path, because garden pieces are read by people walking, not standing. Bright paint reads best outdoors; pastel washes out in full sun by midsummer. Bring the snails in before the first frost and they will greet many springs.
Hanging Clay Flower Mobiles

Before: A bright window doing nothing but light, in the one room where spring arrives first and is celebrated least. Still decor on the sill catches the season; the air above it stays empty.
After: Small clay flowers turn slowly over the sill all day, catching light at new angles every hour. The window becomes the room’s spring display without losing a single inch of sill to pots.
Hang the mobile where air moves a little: near a window that opens, or above a porch chair. The flowers turn slowly all day and catch light at different angles, which no still decor does. Keep the lowest flower above reaching height if toddlers visit; the clay is light but the string invites pulling.
Displaying Your Spring Clay: Styling Shelves and Tables
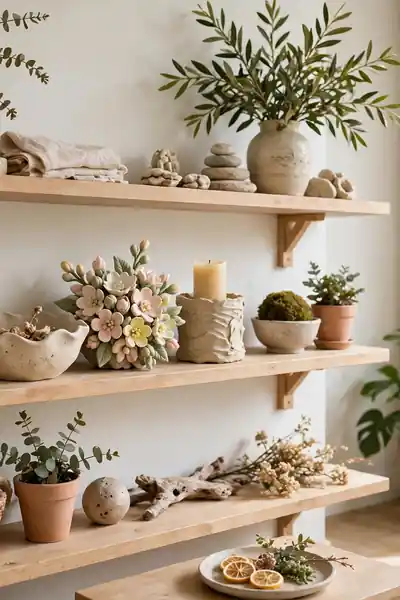
Styled shelves follow one rule: clay pieces in threes, with one green living thing near them. A trinket bowl, a floral cluster, and a small framed print make a group; a real plant at the group’s edge keeps the clay flowers from reading as a craft display instead of decor.
- Group pieces in threes: one flat, one tall, one round per shelf cluster
- Repeat one pastel color in every group so separate shelves read as one home
- Leave breathing space around each group; styling is mostly what you do not add
- Put the statement pieces, the wreath and the clusters, at eye level where guests actually look
Drying, Sealing, and Storing Spring Pieces
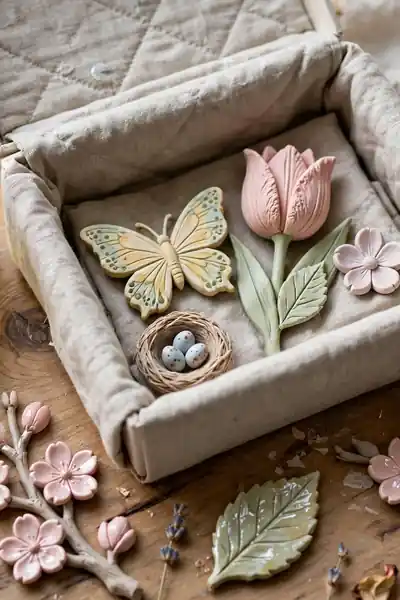
Time Needed: 20 minutes per batch | Difficulty: Beginner | Cost: one pot of varnish | Result: pieces that return next spring like new
Store spring pieces the way you store ornaments: wrapped in tissue, in a lined box, out of damp rooms. Clay that survives storage comes back next spring looking made yesterday. Label the box with its contents and the year, because February you will not remember where the good daisies went.
Also Explore: How to Keep Air Dry Clay From Ever Cracking It Again
Frequently Asked Questions
1. How long does air dry clay take to dry in spring?
Longer than the packet suggests, because spring air carries moisture. Thin pieces like tags, magnets, and napkin rings need a full 24 hours; thick pieces like wreaths and vases need two days or more. Turn every piece once halfway through, and never paint a piece that still feels cool to the touch, because cool means damp inside.
2. Can spring clay pieces really go outdoors in the garden?
Yes, with honest limits. Garden markers, stakes, and snails survive a wet spring when they are sealed with two coats of outdoor varnish on every side, edges included. What they cannot survive is standing water or a frost while damp. Set them in soil that drains, and bring the special pieces in before the first hard frost.
3. My clay cracked while drying. Can it still be saved?
Almost always. Fill the crack with a pea of fresh clay worked in with a wet fingertip, smooth it level, and let that spot dry again slowly, away from direct heat. Sand once fully dry and paint as planned. Hairline cracks on flat pieces like plates often vanish under paint entirely, so repair first and judge after the color goes on.
4. What paints and sealers work best on these spring pieces?
Matte or satin acrylic craft paint gives the soft pastel finish spring pieces want, and it covers in two thin coats better than one thick one. Seal indoor pieces with a clear matte varnish, and outdoor pieces with an outdoor rated varnish. Always seal after the paint is fully dry, never the same hour, or the finish clouds.
5. How do I press real flowers without them tearing the clay?
Pick flat faced flowers, pat them fully dry, and lay them face down on the rolled clay. Roll over each flower once, gently, in a single direction, then peel it away slowly from one edge using a pin. Thick, juicy petals tear clay and leave mush; thin petals and small leaves print cleanly every time.
6. Can kids make these spring crafts safely?
Most of them, yes. The magnets, tags, garland daisies, garden snails, and butterfly sets use no sharp tools beyond a butter knife and no heat at any stage. Adults should handle the craft knife cuts and the varnish, and small magnets belong out of reach of toddlers. Paints should be the non toxic craft kind for young makers.
Conclusion
Your home does not need a shopping trip to feel like spring; it needs one pack of clay and a free afternoon. That is the honest promise of spring air dry clay crafts: twenty pieces, from a pressed flower dish to a full wreath, all within a beginner’s reach. I’ve seen how small changes like these can completely shift a room’s whole mood. Save this collection on Pinterest before the first flowers open, start with the ring dish this weekend, and share it with a friend whose shelves are still wearing winter. Your spring starts at the craft table.



One Comment