Make Adorable Air Dry Clay Gnomes for Every Season
One gnome is a craft. A gnome for every season is a collection, and collections fill shelves and gift lists all year. These air dry clay gnomes all grow from one body, so the first one teaches your hands everything the other eleven will ask.
In my experience, gnomes succeed because they forgive. There are no eyes to paint crooked and no face to get wrong; a nose, a beard, and a tall hat carry the personality. Beginners who failed at figurines before finish a gnome and plan the next season’s.
What You Need: Clay, Tools, and the Gnome Kit

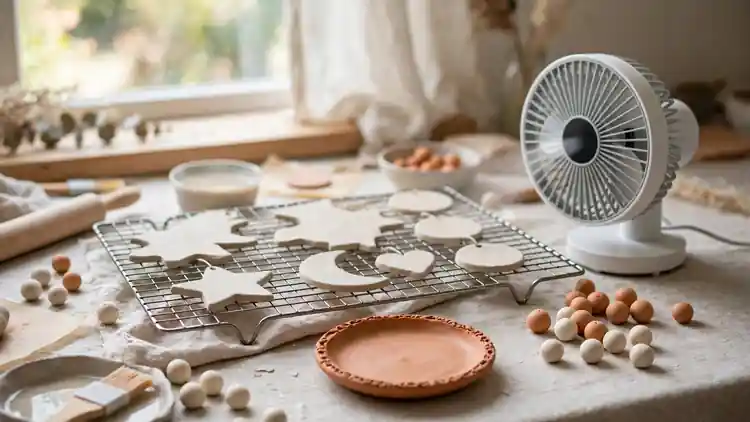
Every gnome in this article, for every season, is built from the same kit: white air dry clay, a rolling pin, a craft knife, acrylic paints, and a brush. Colored clay saves painting on big areas like hats, but white clay plus paint gives you every season from one pack.
Work on parchment or a silicone mat so pieces lift cleanly, and keep a cup of water nearby for smoothing seams. The air dry clay gnomes ahead all stand 4 to 6 inches tall, the size that reads clearly on a shelf and dries in two days.
The Basic Gnome Body Every Season Starts From

One body carries the year: learn this shape once and every seasonal gnome after it is a new hat and a new paint job. The body is a cone with a rounded belly, because gnomes are charm built on a triangle. Take your time here; the seasons are the easy part.
- Roll a ball of clay and shape it into a cone with a wide, flat base and a soft belly curve
- Add a round nose ball at the front, slightly above the middle, and blend its edges into the body
- Roll a flat beard piece, texture it with fork lines, and press it under the nose so the face hides behind it
- Shape a cone hat, bend its tip to one side, and set it low over the top of the beard
- Smooth every seam with a wet fingertip, then stand the gnome on parchment to dry
Also View: 25 Sweet and Cute Air Dry Clay Ideas You’ll Want to Try
Proportions That Make Gnomes Read Adorable

Quick Tip: Make the nose bigger than feels sensible. A nose about a third of the face width reads adorable at shelf distance and merely normal up close. Small noses are the number one reason homemade gnomes look like chess pieces instead.
Hat height does the second half of the work: a hat as tall as the body doubles the charm, because the eye reads the gnome as a child sized figure in an oversized hat. Keep the belly widest at the base, and your gnome will stand steady and read sweet from across the room.
Hats, Beards, and Noses: The Three Parts That Carry Personality

Common Mistake: Designing a gnome as one fixed figure, then trying to paint a personality onto it afterward. Paint cannot rescue a plain silhouette, and every season ends up looking like the same gnome in a different colored shirt.
The Fix: Think in parts from the start. One body, but hats that swap by season, beards long or short, noses big or bigger. The personality lives in the three parts, and the parts are quick to make in batches.
Change one part and the gnome changes identity: same body, tall black hat, and he is a witch; same body, red hat, and he is Christmas. This is why a row of identical bodies on your shelf is not repetition. It is a cast waiting for the season to dress it.
Painting and Sealing for a Finish That Lasts

What You Need:
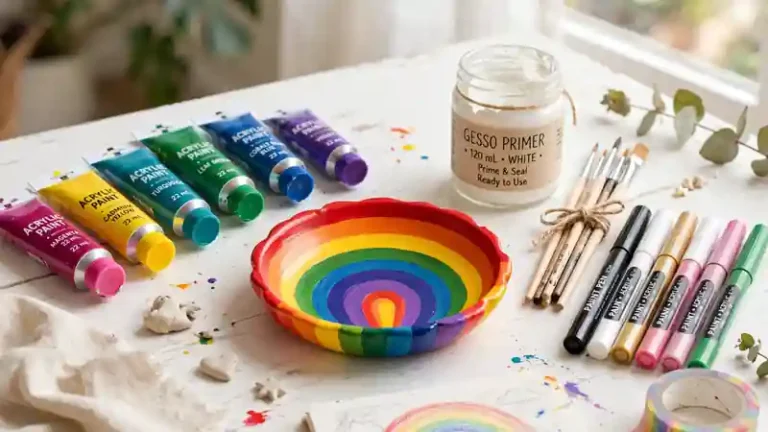
- Acrylic craft paints in your season’s colors, because they cover clay in two thin coats
- A white or grey option for beards, since most gnomes wear one of the two
- A fine brush for nose shine and hat trim, where the details live
- Matte sealer for indoor gnomes, outdoor varnish for garden ones, matched to the job
Paint the beard before the hat color goes near it, because white and grey beards forgive splashes and dark hats do not forgive white ones. Two thin coats always beat one thick coat on clay; thick paint fills the fork lines you worked to carve into the beard and the nose’s smooth shine.
Classic Garden Gnome for Every Day
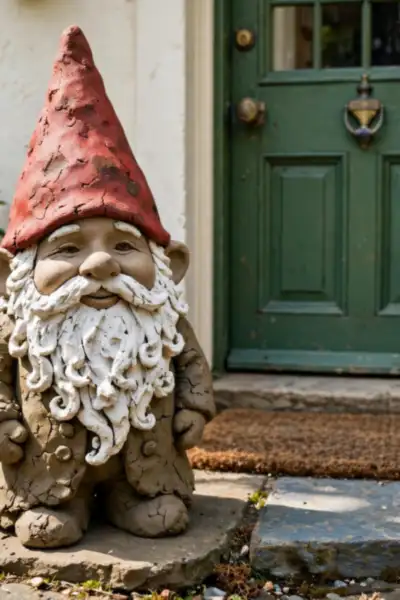
Before: A front step or herb bed with nothing to greet anyone: tidy, pleasant, and completely forgettable. The garden does its work in silence and the doorstep says nothing about the people inside.
After: A stocky little greeter with a red hat and a white beard, sealed against the dew, standing his post by the door. He is the first thing visitors photograph and the last thing they mention when they leave.
Give him the classic colors without apology: red hat, blue or green coat body, white beard, boots painted at the base if you want them. In my experience, visitors smile at this one before they notice any other gnome you own, because he is the gnome from every storybook they grew up with.
The Simple Rounded Gnome for Beginners

Do This:
- Shape the body as one plump teardrop, wider than it is tall
- Skip the separate hat entirely; the rounded top is the hat
- Make this gnome first, before the classic, so your hands learn the clay kindly
Avoid This:
- Adding arms, eyes, or a mouth; the rounded gnome’s charm is what it leaves off
- A small nose on this body; plump shapes need the biggest nose of all
- Comparing him to the classic mid build; he is a different, softer species
The rounded gnome is the body with its edges forgiven: no sharp cone, no separate hat seam, just one plump teardrop wearing a nose and a smile you cannot see. Beginners finish this one in a single sitting, and finishing is the whole point. A finished round gnome teaches more than an abandoned classic.
Spring Gnome With a Flower Hat

Time Needed: 40 minutes plus drying | Difficulty: Beginner | Cost: one clay pack makes three | Result: the windowsill’s spring greeter
Spring’s gnome wears his garden on his head: five or six tiny flowers pressed around the hat’s brim while the clay is still soft. Paint the hat a leaf green or the softest yellow, and let the flowers carry the color. He belongs on the windowsill where the real seedlings are growing.
Easter Gnome With Bunny Ears

Bunny ears change the hat’s whole job: make the hat first, then press two long ears into its back while the clay is soft, so they dry as one piece. A gnome whose ears are glued on later will lose them by the second Easter, usually into the grass.
Paint the egg he holds in the same pastel as the hat’s trim, and the pair reads as an outfit instead of two accidents. Perch him in the Easter basket or at the brunch table’s center. He is small, quick, and the gnome children ask to make next.
Summer Gnome With Sunglasses and a Sun Hat
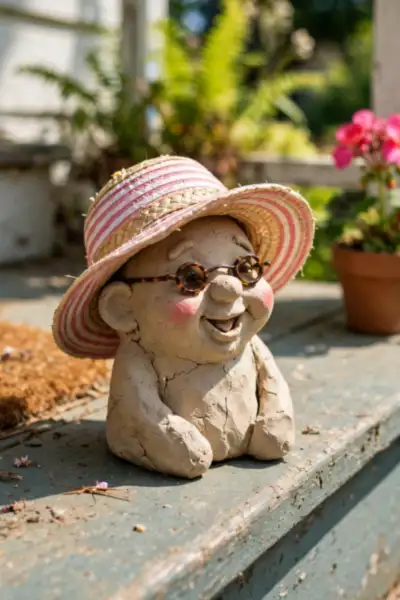
Sunglasses on a gnome with no eyes sounds like a joke and works like a charm: two black discs or one bent wire pair resting on the nose. The humor is the point of this one. Summer gnomes are allowed to be silly in a way Christmas gnomes never are.
- Build the basic body with a shorter, wider sun hat in coral or turquoise stripes
- Roll two tiny black discs, or bend a short wire into two loops, for the sunglasses
- Rest the glasses on the nose with a dab of slip, tilted slightly, because straight glasses look stern
- Paint a stripe of sunscreen white on the nose if you want the joke to land twice
Beach Gnome With a Tiny Shell

Quick Tip: Press a little real sand into the base while the clay is still tacky. It dries in place, reads as the beach itself at shelf distance, and costs nothing. Brush off the loose grains after drying so the shelf stays clean.
The beach gnome’s hat is a cone with stripes, rolled from two colors twisted gently before shaping, and his beard gets a dusting of real sand pressed in while the clay is tacky. Keep him small; beach gnomes read best in a row of three along a bathroom shelf or a porch rail.
Autumn Gnome With a Pumpkin Hat

Common Mistake: Painting the pumpkin hat one flat orange straight from the bottle. At shelf distance it reads as a traffic cone with a beard, and the gnome gets quietly moved to the back of the shelf by mid October.
The Fix: Two oranges: a deep shade worked into the pumpkin’s grooves and a bright one brushed over the ridges. Add the curled green stem last. The shading takes four extra minutes and does all the work.
Paint the pumpkin hat in two oranges, a deep shade in the grooves and a bright one on the ridges, because flat orange reads as a traffic cone at shelf distance. A curled green stem on top finishes the joke. This gnome owns October’s shelf and lends himself happily to the whole harvest season.
Halloween Gnome With a Witch Hat

What You Need:
- Black clay or black paint for the tallest hat in this article
- Purple trim paint, because black on black disappears at shelf distance
- A tiny star or buckle shape for the hat’s tip or band
- A slightly bent hat tip, shaped while soft, for the spell casting silhouette
Keep the witch hat’s brim wide and slightly wavy, because a perfect circle reads as a plate, not a spell. Purple trim and one tiny star at the tip carry the whole costume. This gnome and the pumpkin gnome can share a shelf for exactly one month a year.
Christmas Gnome With a Red Hat and White Beard

Before: A mantel dressed with the same garland as last year and the year before, pretty and completely invisible to everyone who lives with it. December decor that never changes stops being decor and becomes furniture.
After: A tall hatted gnome with a white beard and a gold bell at his hat’s tip, standing in the garland like he owns it. Guests ask where you bought him, which is the finest compliment a clay gnome can earn.
The Christmas gnome is the one strangers ask you to make for them, so build him in batches of three from the start. A white beard left unpainted, just sealed, reads richer than any white paint. Add a tiny gold bell at the hat’s bent tip and he chimes faintly when the shelf gets dusted.
Also Explore: 20 Blooming Air Dry Clay Crafts for a Fresh Spring
Winter Gnome With a Scarf and Ear Muffs

Do This:
- Wrap a thin scarf band where the hat meets the beard, joined with slip
- Add ear muffs as two half moons joined by a strip over the hat
- Keep every added layer thin, because thick layers crack away as they dry
Avoid This:
- Real fabric scarves on clay gnomes; they age at different speeds and look it
- Gluing the muffs on after drying; slip joins made while soft are the strong ones
- Skipping the scarf on the winter gnome; the layers are his whole costume
Winter layers are added clay, not paint: a scarf band wrapped where hat meets beard, and two half moons as ear muffs joined by a strip over the hat. Keep the layers thin, because thick additions crack as they dry at different speeds.
Valentine Gnome With a Heart
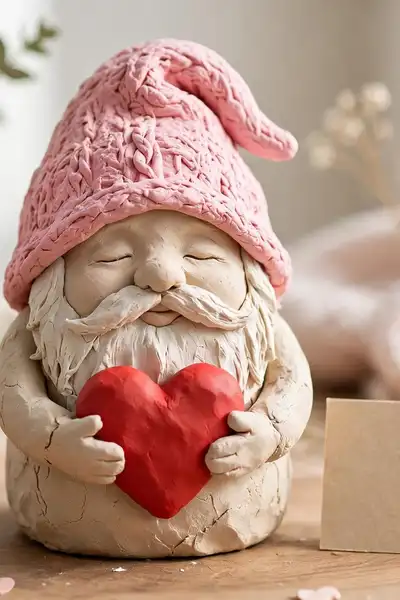
Time Needed: 20 minutes of shaping | Difficulty: Beginner | Cost: pennies of clay | Result: the fastest gift gnome of the year
A heart held at the belly turns a gnome into a Valentine: shape it flat, press it on with slip, and paint it last in the deepest red you own. This is the fastest seasonal build in the article, which makes it the perfect first gnome to make together.
Birthday Gnome With a Party Hat

Every family has a birthday month that sneaks up, and this gnome is the standing answer: a party hat, a bright body, and a place on the table next to the cake. Make two in neutral colors now and you own a gift for every surprise party of the year.
- Build the basic body in a cheerful color that suits nobody’s team or season
- Shape the party hat as a striped cone with a tiny ball on its tip
- Add a matchbox sized clay cake or a single candle shape beside his base
- Write the birthday name and date under the base in fine marker after sealing
Making Gnomes With Kids: The Safe, Simple Version

Kids succeed with the rounded gnome and fail happily at nothing, because every step forgives: the body is one lump, the nose is one ball, the hat is one cone. Give each child a lump the size of their own fist and the proportions come out right by instinct.
Keep the session to shaping only, and paint on a second day when everything is dry and nobody is tired. Aprons, water cups for fingers, and newspaper under it all are the whole safety kit. What children remember is the gnome on the shelf with their name under its base.
Displaying and Gifting Your Gnomes All Year

Quick Tip: Give each gifted gnome a name and a tiny card that says which season he belongs to. Recipients keep named gnomes on shelves for years and unnamed ones in drawers by spring. The thirty seconds of naming is the difference between a gift and a keepsake.
Set gnomes where eyes travel: the end of a shelf, beside the plant that needs company, at the front door’s corner. Groups of three read as a family; a single gnome reads as a greeter. Rotate the seasonal ones through one spot instead of scattering all twelve, and the shelf stays fresh all year.
Drying Times, Cracks, and Fixes

Common Mistake: Judging dryness by the surface. A gnome’s belly can feel bone dry while his center is still damp, and paint or a warm room then rushes the outside, splitting the hat seam as the inside finally shrinks.
The Fix: Give a 5 inch gnome two full days, turned once halfway, and test the base: cool means damp, whatever the surface says. Paint only a gnome that feels room temperature all over, base included.
Hat seams are the classic crack site: the hat and body shrink at slightly different rates and the join opens a hairline. Work a thin clay snake into the seam before drying and smooth it flat, and the crack has nowhere to start. Repairs after drying take fresh clay, patience, and paint to hide.
Frequently Asked Questions
1. How long do clay gnomes take to dry?
A 4 to 6 inch gnome needs about two full days in open air, turned once halfway through. The belly is the thickest part and the last to dry; if the base still feels cool against your wrist, the center is damp. Painting a damp gnome traps moisture under the paint and invites the hat seam cracks this article warns about, so the patience here is structural, not fussy.
2. Why did my gnome crack at the hat seam?
Because the hat and the body dry at slightly different speeds, and the join is where the difference shows. The prevention is a thin snake of clay worked into the seam and smoothed flat before drying. A crack that already happened is repairable: press fresh clay into the line with a wet fingertip, let that spot dry a full day, sand lightly, and repaint.
3. What clay is best for making gnomes?
Standard white air dry clay is the workhorse: cheap, paintable, and light enough that a finished gnome will not strain a shelf. Colored clay is worth it for hats you make in batches, like Christmas red, because it saves a painting step. Avoid the very soft foam clays for gnomes; they dent where a gnome gets handled and their surface takes paint unevenly.
4. How tall should a beginner’s first gnome be?
Four to six inches. Smaller gnomes dry faster but their noses and beards become fiddly, and bigger ones take three days to dry and crack more readily while they do. The 5 inch gnome is the sweet spot this whole article is sized around: big enough to read across a room, small enough to finish in a weekend including paint.
5. Can clay gnomes live outdoors in the garden?
One gnome in this article is built for it: the classic garden gnome, made stockier and sealed with two coats of outdoor varnish on every surface, base included. Even he should come in before hard frosts and standing winter wet. The seasonal shelf gnomes are indoor pieces; their paint and sealer are not rated for weather, and a winter outside will fade and soften them.
6. Can I sell gnomes I make from these designs?
Handmade gnomes are a craft fair staple, and the seasonal sets in this article were designed with gifting and small selling in mind. Build in batches by season, price the drying time honestly, and photograph them in their display spots, because a gnome shown on a shelf sells faster than one shown on a worktable. Check any local rules for selling handmade goods where you live.
Conclusion
You now own a skill that pays out twelve times a year: one gnome body, endless seasons. That is the quiet charm of air dry clay gnomes; learn the shape once and every holiday hands you a reason to make another. I’ve seen how small changes like these can completely shift a shelf’s whole mood. Save this guide on Pinterest before the next season turns, make the classic gnome this weekend, and share it with a friend who collects something for every holiday. Your first gnome is one lump of clay away.