20 Tropical Monstera Crochet Patterns to Obsess Over
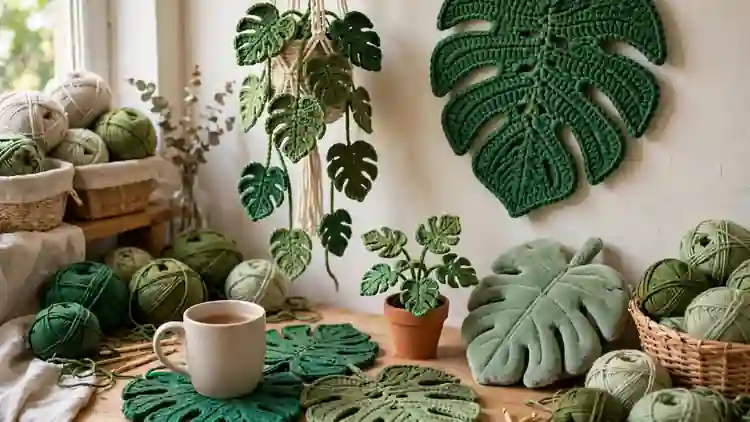
Real monsteras demand light, water, and forgiveness you do not have. The crochet kind asks for one evening and never drops a leaf. These monstera crochet patterns turn a basic leaf shape into coasters, vines, pillows, and wall art that fools guests daily.
In my experience, crocheters fall for this leaf because it forgives beginners. The splits hide uneven tension, the holes are chain spaces, and one good leaf teaches your hands a shape that scales from an earring to a rug without learning anything new.
Yarn, Hooks, and the Greens That Look Real
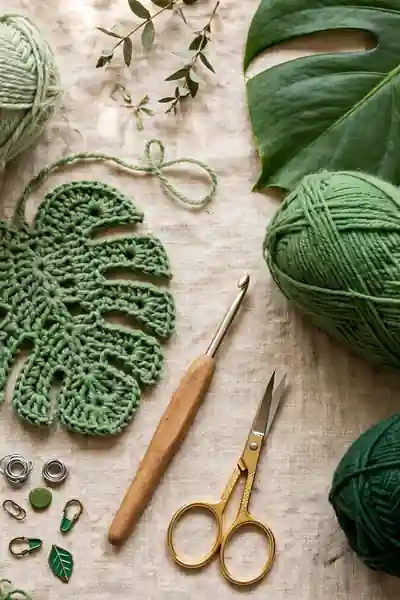
Every pattern in this collection runs on the same kit: medium weight cotton or acrylic yarn, one comfortable hook, and greens chosen with more care than beginners expect. Real monstera leaves are not one green. They layer deep forest, fresh spring, and a yellow green where the light hits.
Work with two or three greens together and your leaves gain the depth that makes strangers ask which plant they came from. Cotton yarn holds the leaf shape best for flat pieces, while soft acrylic wins for pillows and plush. The monstera crochet patterns ahead name their best yarn at each step.
The Basic Monstera Leaf Shape Every Pattern Uses
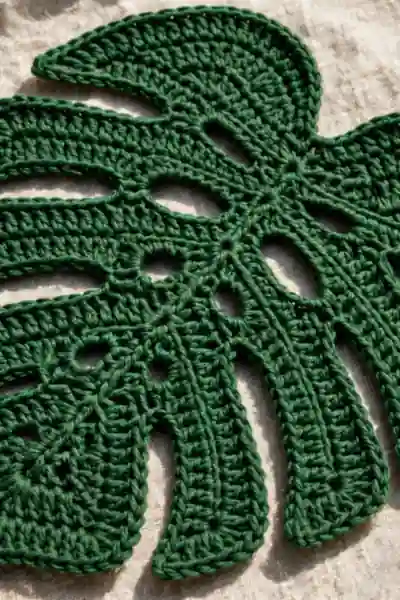
Learn one leaf and you have learned twenty patterns, because every project is this shape at a different size. The splits come from chains skipped along the edge, and the holes from chain spaces worked into the body. Master this leaf once, and the rest is repetition.
- Chain the leaf’s spine length, then work single crochet back along it to form the center vein
- Build the first side with rows of half double crochet, adding chain spaces where the holes belong
- Shape the splits by skipping stitches at the edge and chaining across the gap
- Mirror the second side, then finish with a slip stitch border and a short stem
Also View: Easy Crochet Baby Hat Pattern for Truly Adorable Gifts
Reading the Patterns: Sizes, Skill Levels, and Time
Quick Tip: Start with the pattern whose finished size matches your patience, not your ambition. A keychain or coaster finished tonight teaches more than a rug abandoned in March. Quick wins first; the giant leaf will still be there when your hands are faster.
Each pattern below lists its finished size, its honest skill level, and the time it usually takes, so nothing surprises you mid row. Beginner patterns use one leaf shape and simple stitches. The intermediate ones add joining, shaping, or a second color. Choose by the clock you really have, not the one you wish for.
Classic Monstera Leaf Applique
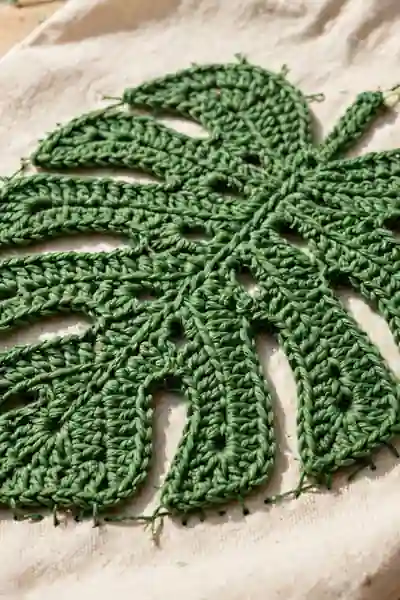
Common Mistake: Sewing the applique straight from the hook, while its splits are still curled from the working tension. The leaf puckers the fabric beneath it, and the motif looks glued on by hope instead of finished by a crafter.
The Fix: Block the little leaf flat first, pinning through the split tips, and let it dry fully. Then sew it down with small stitches through the border round only, so the leaf lies like print on the fabric.
Work the applique in the round of the basic leaf, then block it flat for ten minutes before sewing anything. A blocked applique sits like a printed motif; an unblocked one curls at the splits and fights every stitch. This tiny leaf is also your practice piece for the whole collection.
Monstera Leaf Coasters
What You Need:
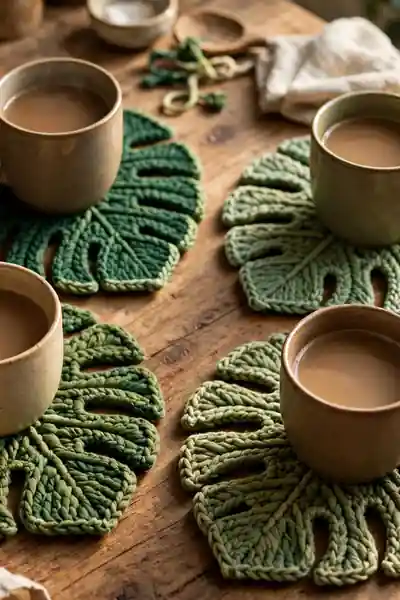
- Cotton yarn in two or three greens, because coasters meet heat and water daily
- A hook one size smaller than the yarn suggests, for a tight, flat fabric
- The basic leaf pattern worked to 4 or 5 inches across
- A blocking board or a heavy book, for the final flattening
Size the coaster leaf to 4 or 5 inches across, big enough for a mug and its drips. Two strands of cotton held together make it thick enough to protect wood from heat rings. A set of four in mixed greens photographs like a product listing and gifts like one too.
Hanging Monstera Vine Garland
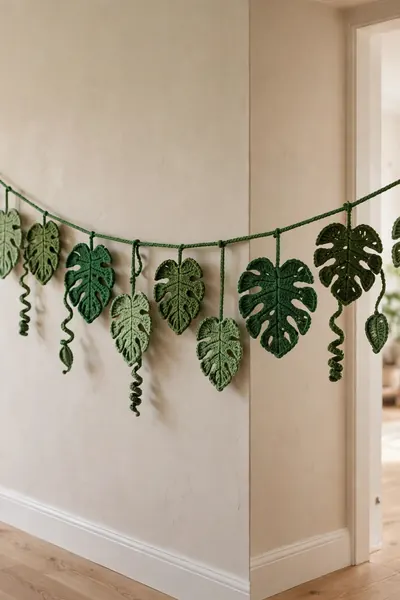
Before: A dark hallway or a bathroom with no window, where every real plant you have tried slowly gave up. The space reads bare, and the bare space makes the whole home feel unfinished.
After: A green vine of nine or eleven leaves drifts across the wall, full and bright in the dimmest corner. It needs no water and no light, and it never drops a single leaf on the floor.
Hang the finished vine where real plants struggle: the dark hallway, the bathroom with no window, the rental wall that forbids pots. It asks for no water, no light, and no forgiveness after holidays. Of all the patterns here, this is the one guests touch first and disbelieve longest.
Monstera Plant Pot Cover

Do This:
- Measure the pot’s widest point and size the cover an inch wider
- Work leaves around the cover’s band so the monstera theme shows from every side
- Add a drawstring or elastic at the top edge to keep it seated
Avoid This:
- A cover sized exactly to the pot, which rides up as the crochet relaxes
- Acrylic yarn for a pot that sits in strong sun, where colors fade fast
- Covering the drainage area so tightly that watering becomes a flood risk
Measure your pot before starting and size the cover one inch wider than its widest point, because crochet pulls in as it works up. A drawstring or elastic top edge keeps the cover seated when the plant gets moved for watering. Nobody will guess the nursery pot underneath.
Mini Monstera Keychain
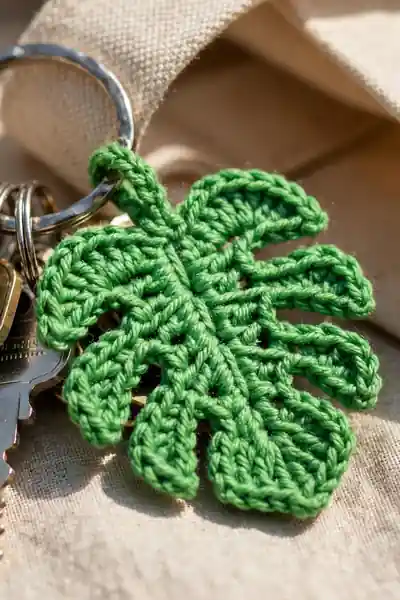
Time Needed: about 1 hour | Difficulty: Beginner | Cost: scrap yarn only | Result: the fastest gift in this collection
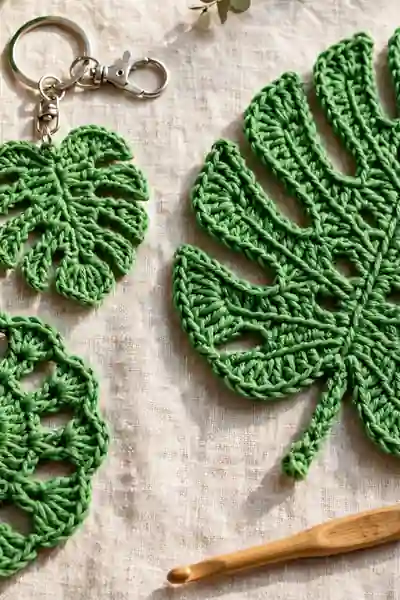
Stuff nothing into this one; the keychain leaf works flat and small, about 2 inches long. A slightly tighter tension than usual keeps the splits crisp at this size. Finish with a jump ring through the stem top, and make five at once, because they leave your bag as gifts.
Monstera Leaf Bookmark
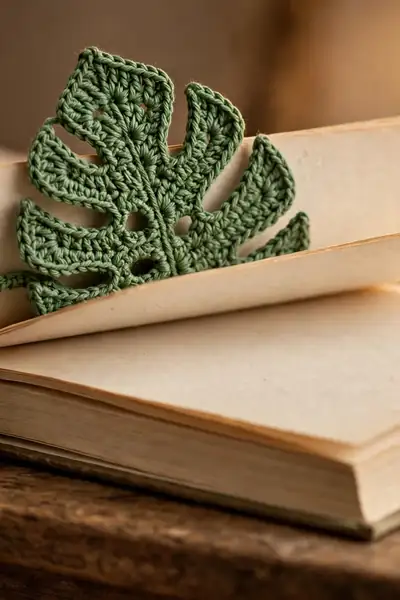
A bookmark leaf must be genuinely flat, or it will bulge the book and annoy the reader it was gifted to. Work it in fine cotton with a smaller hook, skip the border round, and press it under a heavy book overnight. The stem becomes the tassel point at the top.
Length matters more than width here: 8 to 10 inches including the stem lets the leaf peek from the book’s top like a real plant marker. In my experience, readers keep these for years, long after paper bookmarks are lost, because closing a book on a leaf feels like a small ritual.
Monstera Wall Hanging
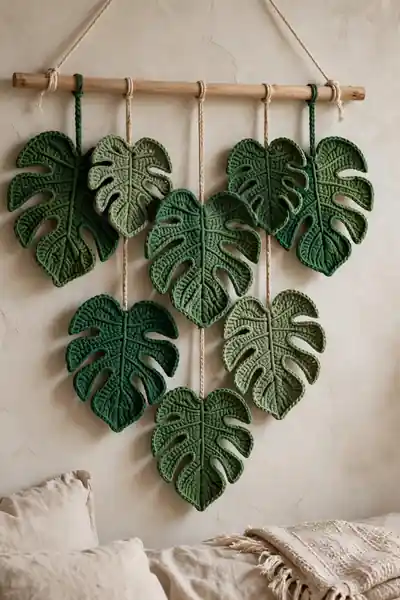
A wall hanging succeeds on arrangement, not on any single leaf. Lay all your leaves on the floor first and photograph two or three layouts before stringing anything. The arrangement you choose in a photo is the one your eye actually likes; the one you imagine is usually too even.
- Make five to nine leaves in mixed sizes and at least two greens
- String each leaf on its own cord at uneven heights from a wooden dowel or branch
- Add wooden beads above two or three leaves for warmth and spacing
- Hang it where light falls across it, so the splits cast tiny shadows
Monstera Plush Pillow
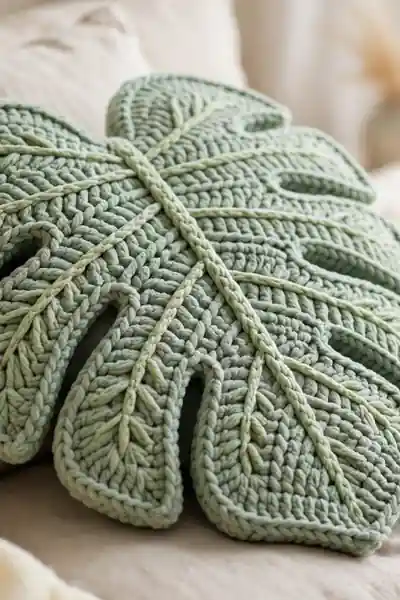
Quick Tip: Stuff the pillow leaf a little firmer than feels polite. Crochet fabric relaxes over the first month, and a firmly stuffed leaf keeps its splits open and readable, while a soft one slumps into a green blob by spring.
Work two leaves back to back and stuff firmly, because a plush leaf that loses its stuffing loses its splits. A line of surface stitch down the center vein after stuffing gives the pillow its handsome crease. This is the pattern children claim, so consider making it in their favorite green.
Monstera Tote Bag Panel

Common Mistake: Crocheting the leaf straight onto the bag’s fabric, stitch by stitch through the canvas. The panel puckers, the bag stops opening fully, and removing the leaf later means unpicking the bag itself.
The Fix: Build the panel as its own piece, block it, and sew it on through the leaf’s border round only. The bag stays a bag, the panel stays flat, and both can be separated later without damage.
Make the panel first and the bag second, even if the bag is store bought. Sew the leaf panel onto the tote’s front with small, even stitches in matching yarn, catching only the leaf’s border round. Removable panels, pinned before sewing, let one bag wear a leaf in summer and none in winter.
Monstera Leaf Placemats

What You Need:
- Tight cotton yarn in two greens, because placemats meet hot plates and spills
- The basic leaf worked large, to 12 or 13 inches across
- A smaller hook than usual, for the firmest, flattest fabric you can make
- Blocking time after every leaf, since placemats must lie perfectly flat
Work placemats in the tightest cotton you own, because a leaf that stretches under a hot plate stops being flat by the second dinner. Six leaves make a table for six, and a spare seventh covers the serving dish. Guests always ask; the answer always surprises them.
Baby Monstera Mobile
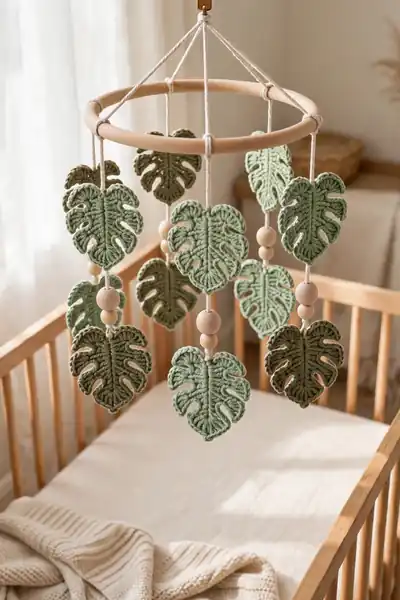
Before: A nursery corner with a bare ceiling hook and a mobile budget already spent twice over at the baby store. The space above the crib, the baby’s whole first view of the world, stays blank.
After: Five small green leaves turn slowly above the crib, spaced by wooden beads, soft from every angle. It looks like the expensive handmade mobiles, because it is handmade, by you, for almost nothing.
Hang the leaves at uneven heights, because real vines never line up and neat rows read as decals. Use wooden beads between leaves to space them and add the nursery warmth mobiles need. Keep every string end double knotted and trimmed short; this hangs above a crib, so finish it like it matters.
Monstera Earrings
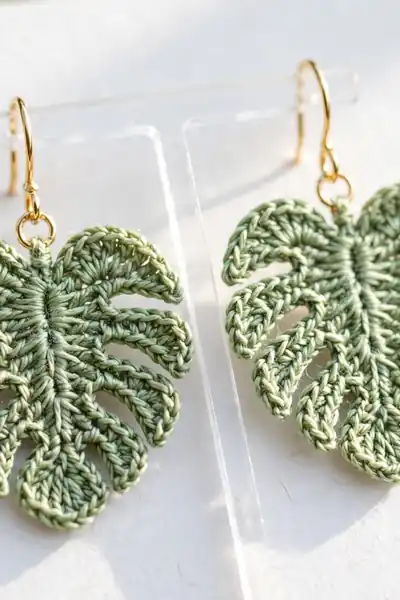
Do This:
- Use crochet thread or your finest yarn, with a hook two sizes smaller than instinct
- Work both leaves in one sitting so their tension matches perfectly
- Add fishhook ear wires through the stem tops and a dab of glue at the backs
Avoid This:
- Worsted yarn, whose leaves will pull on your ears all evening
- Skipping the stiffening step, so the splits fold shut by lunchtime
- One earring noticeably larger than its twin, the classic one sitting mistake
Earrings live or die on weight: use crochet thread or the finest yarn you own and a hook two sizes smaller than instinct says. Each leaf should weigh almost nothing, or it will pull all evening. Seal the backs with a dab of clear glue so the splits hold their shape.
Also Explore: Free Crochet Bandana Pattern With Easy Stitch Guide
Monstera Leaf Rug
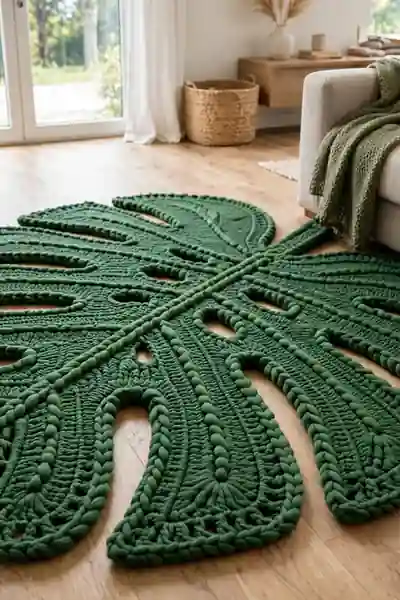
Time Needed: a weekend of short sessions | Difficulty: Intermediate | Cost: bulky yarn, several balls | Result: the room’s most photographed corner
A rug leaf wants the bulkiest yarn and the loosest tension in this collection, worked in short rows that build the leaf’s wide body fast. Back it with a non slip mat cut to the same shape, because a leaf that travels across the floor is a prank, not a rug.
Monstera Curtain Tiebacks
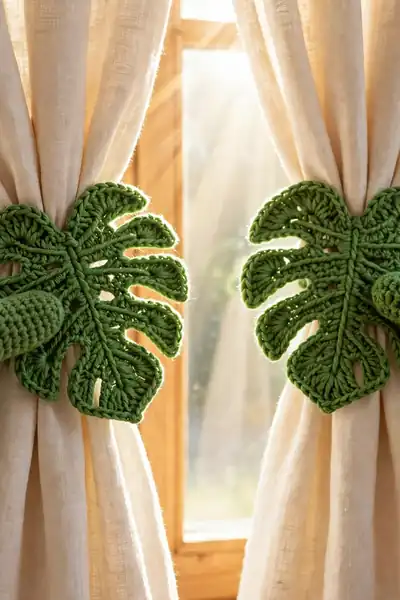
Curtains are the largest green opportunity in a plain room, and they are usually left bare. A pair of leaf tiebacks borrows the window’s light, backlighting the splits the way sun lights a real leaf. Renters win here, because tiebacks ask for no holes and leave no trace.
Work tiebacks as a long stem with two or three leaves along it, so the curtain gathers into a green hand. A loop and button at the ends keeps them adjustable. In a plain rental room, these two green touches do the work of a whole plant shelf.
Monstera Table Runner
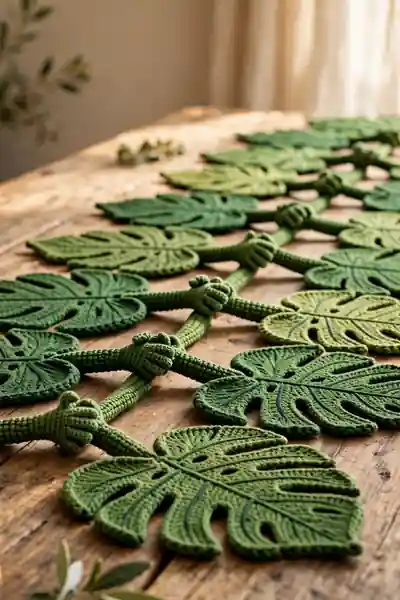
A runner is just leaves holding hands: make them all first, in one sitting rhythm, then join stem to tip with slip stitches on the back side only. Joining as you go sounds efficient and usually produces one long, curling caterpillar of regret. Batch the leaves, then build the runner.
- Make five to seven leaves in one size and alternating greens
- Block every leaf before joining, because joined leaves cannot be flattened later
- Lay the full runner out and pin the joins before stitching a single one
- Join on the back side only, so the front reads as one flowing vine
Mini Potted Monstera That Never Needs Water
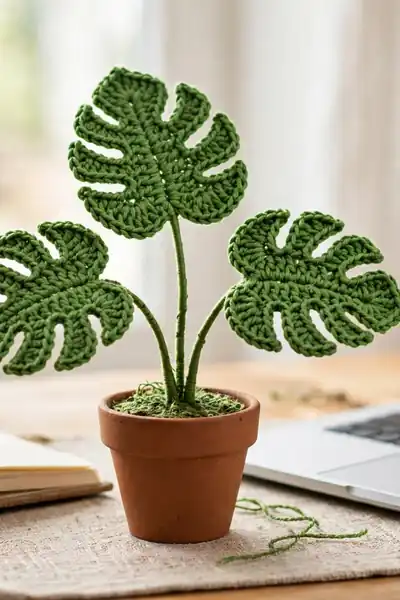
Quick Tip: Bend the wired stems at slightly awkward, natural angles instead of lining them up like soldiers. Real monsteras lean toward light and sprawl a little. One leaf tipped toward the room sells the whole illusion.
The pot does half the acting: choose a real terracotta pot one size smaller than the plant you are faking, and fill it with brown yarn or foam under the stems. Three leaves at different heights, wired stems bent at natural angles, and your desk plant fools everyone who does not water it.
Monstera Leaf Hair Clips

Common Mistake: Attaching the leaf with glue alone and calling it finished. Hair clips flex, warm up, and get pulled through hair all day, and a glue only bond lets go at the worst moment, usually in public.
The Fix: Glue first for placement, then add three or four small stitches through the leaf’s stem end into the clip’s top bar. The stitches carry the stress; the glue just keeps things tidy underneath.
Barrettes and clips take the smallest leaf in this collection, worked in fine cotton at tight tension. Glue and two stitches both to the clip, because glue alone surrenders to a warm afternoon. A pair takes under an hour, which makes these the fastest gift in the entire set.
Giant Statement Monstera Leaf
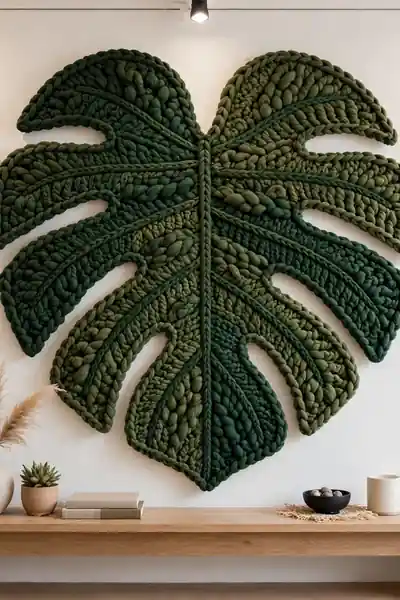
What You Need:
- Bulky or double stranded yarn, because the leaf must hold a large shape
- The biggest hook you own, to keep the work fast and the fabric light
- Craft wire for the border round, so the finished leaf can be posed
- A wall hook or two small nails rated for its modest weight
Quick Tip: The giant leaf shows every tension wobble at three times life size, so work it in short sessions with fresh hands. Ten calm rows a day beats forty tired ones, and this leaf deserves your calmest stitching.
Scale changes everything except the shape: the same basic leaf, worked in bulky yarn with an oversized hook, or by following the pattern at double strand. Wire threaded through the border round lets you pose the finished leaf on the wall, bending its tip like a real one catching light.
Monstera Bunting Banner

Before: A porch or party wall dressed with a paper banner that wilts by the second hour and lands in the bin by morning. The photos keep the memory; the decor itself is disposable.
After: A leaf bunting that comes out for every summer party, birthday, and porch evening for years. It folds into a shoebox between events and looks better in photos than anything paper ever made.
String the bunting with leaves facing forward and flags behind, so the green reads first from the street or the sofa. Outdoor yarn or a weatherproof spray keeps a porch banner honest through one surprise shower. Between parties it folds into a shoebox, which no real vine has ever done.
Monstera Leaf Hot Pad and Trivet

Do This:
- Work two strands of cotton together at the tightest tension you can manage
- Size it wider than your largest pot base, splits and all
- Test it under your own kettle for a full boil before gifting one
Avoid This:
- Acrylic yarn anywhere near heat, because it melts instead of scorching
- A single layer, which lets heat through the leaf’s decorative holes
- Loose stitches that stretch the pad thinner with every use
Use two strands of cotton and a tight stitch so no heat sneaks through the holes; the splits make this pattern decorative, and the double layer makes it honest. Test with your own kettle before gifting one. A hot pad that cannot take heat is just a coaster with ambitions.
Shaping, Blocking, and Stiffening Your Leaves
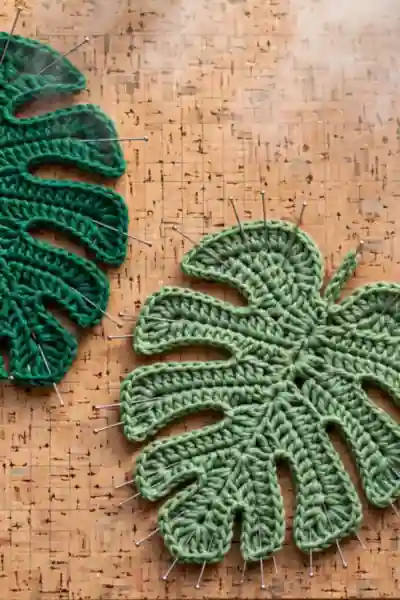
Time Needed: 10 minutes of pinning, a day of patience | Difficulty: Beginner | Cost: pins and a board | Result: leaves that stay leaf shaped for years
Pin the leaf to a blocking board through every split tip and along the center vein, then mist lightly and leave a full day. Leaves blocked once hold their shape through years of use. Skipping this step is why handmade leaves curl, and curling is what separates craft fair polish from first attempt.
Frequently Asked Questions
1. What yarn is best for crochet monstera leaves?
Cotton for anything flat that meets heat or water, like coasters, placemats, and hot pads, because it holds shape and washes well. Soft acrylic for plush, pillows, and wearables, where comfort matters more. For the most realistic leaves, mix two or three greens in either fiber; depth of color sells the plant illusion more than any stitch.
2. I am a beginner. Which pattern should I make first?
Start with the Classic Monstera Leaf Applique or the Coasters. Both teach the basic leaf shape, splits, and holes in under an evening, and both forgive uneven tension kindly. Once one leaf sits flat and makes you smile, the keychain and bookmark follow naturally, and by then your hands know the shape for everything bigger.
3. Why do my crochet leaves keep curling?
Curling is tension plus no blocking. Tight edges and looser centers cup the leaf as it grows, and unblocked crochet keeps the shape it was worked in. Pin every split tip and the center vein to a board, mist lightly, and leave a full day. Leaves blocked once hold their shape for years; it is the least glamorous and most important step here.
4. How do I make the splits and holes look realistic?
Copy the real leaf’s logic: splits start at the edge and stop before the center vein, and holes sit in pairs along the vein, never reaching it. Keep both sides roughly symmetrical but not perfect. One slightly uneven split reads as nature; a ruler straight set reads as a stencil, and the eye knows the difference instantly.
5. Can I sell monstera pieces I make from these patterns?
Finished physical pieces are generally fine to sell at craft fairs and in your own shop, with credit to the pattern source where a pattern is not your own design. What you cannot do is copy, resell, or give away the written patterns themselves. When in doubt, sell the leaves, not the instructions, and you stay on safe ground.
6. How long does each pattern take to make?
The smallest pieces are honest one session projects: hair clips and keychains in about an hour, coasters and bookmarks in an evening. Mid size pieces like the tote panel, wall hanging, and pot cover take a weekend each. The rug and the giant statement leaf are the long games, best worked in short daily sessions over a week or two.
Conclusion
One leaf shape now lives in your hands, and with it a whole tropical shelf that never needs watering. That is the quiet magic of monstera crochet patterns: learn the splits and holes once, and twenty projects open up, from an hour long keychain to a wall sized leaf. I’ve seen how small changes like these can completely shift a beginner’s confidence. Save this collection on Pinterest before your next yarn order, start with the coaster set tonight, and share it with a plant loving friend whose real monstera is struggling. Your first leaf is one evening away.