22 Must-Have Air Dry Clay Tools for Flawless Results
The difference between clay work that frustrates and clay work that flows is rarely talent. It is the roller that marks the slab, the knife that drags the edge, the missing sandpaper at the end. The right air dry clay tools fix all three before they happen.
In my experience, beginners do not need more tools. They need the right ones, in the right order, without paying for a giant kit full of pieces that never leave the box.
This guide walks through 22 tools in buying order: the core five first, then the shaping, texture, and finishing tools as your projects grow. Start where your budget is, add tools as real projects ask for them, and every piece you make will come out cleaner for it.
Start With the Core Five

Most beginners buy clay tools backwards: a fancy set first, then the five basics everyone uses, bought twice. The truth of a clay table is smaller. A roller, a mat, a blade, one shaping set, and sandpaper carries nearly every first year project.
So build this way and add tools when a project asks for them. This guide walks through 22 air dry clay tools in the order I would buy them, what each one does, and the cheap version that works versus the upgrade worth it. Start with the core five and your first pieces will look made, not practiced on.
Acrylic Rolling Pin

- Material: solid acrylic, smooth and non porous, nothing for clay to grip
- Weight: its own heft rolls slabs flat with less arm pressure from you
- Cleanup: a rinse and a wipe, no clay hiding in grain or grooves
- Visibility: the clear body shows the slab edges while you roll
- Size pick: 10 inches suits most home craft tables and storage drawers
Wooden rolling pins leave two souvenirs in clay: grain marks and stuck residue in every groove. An acrylic roller is smooth, heavy enough to do the work for you, and rinses clean in seconds. The clear body also lets you see the slab’s edges while you roll, which is how even thickness quietly happens.
Also View: 23 Essential Air Dry Clay Tips Beginners Always Miss
Rolling Thickness Guides
Quick Tip:
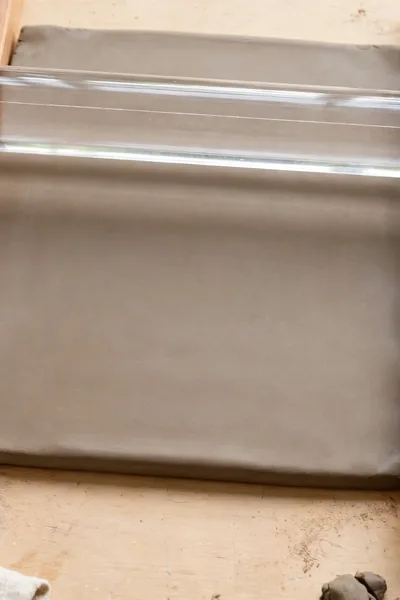
Start every slab at 5mm for ornaments and coasters, the thickness that dries flat and strong. Drop to 3mm only for delicate pieces like earrings and flowers, and never mix thicknesses in one piece, because uneven clay dries at uneven speeds and cracks at the join.
Thickness guides are strips, 3mm and 5mm, placed beside the clay so the roller rests on them and cannot press thinner. The result is one even thickness, which dries at one even speed. Cracked ornaments almost always trace back to a slab that was thick in the middle and thin at the edges.
Silicone Work Mat
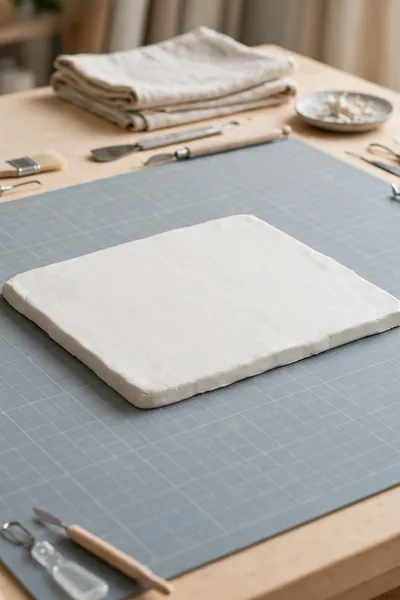
Common Mistake: Rolling clay straight onto the dining table or a sheet of baking paper. The clay sticks, the paper wrinkles into the slab, and pieces bend when you peel them up to move them.
The Fix: Work on a silicone mat from the first day. Clay releases from it cleanly, the mat wipes down in seconds, and finished pieces can be carried to the drying shelf still sitting on it.
A silicone mat does four jobs: clay does not stick to it, the table stays clean, pieces lift off without bending, and the measurement grid makes sizing honest. Choose one big enough for your largest piece plus working room, because a mat the size of a placemat cramps every project bigger than an ornament.
Slicing Blade and Clay Knife
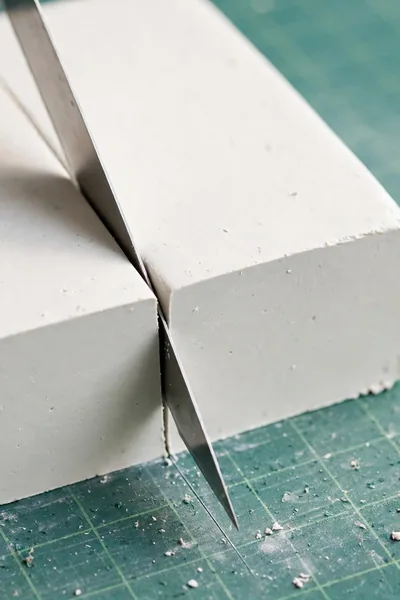
What You Need:
- One long, thin slicing blade for straight down cuts through blocks and slabs
- One clay knife with a shorter blade for trimming and detail cuts
- A safe storage sleeve or magnetic strip, because these edges stay sharp
- The habit of cutting away from your holding hand, every single time
- A wipe after each session, since dried clay dulls a blade fast
Cutting clay with a kitchen knife drags the edge and folds the bottom corner under. A thin slicing blade passes down through the block or slab, so edges stand up square and clean. The same blade lifts cut pieces off the mat without distorting them, a move that saves more pieces than any shaping skill.
Circle Cutter Set
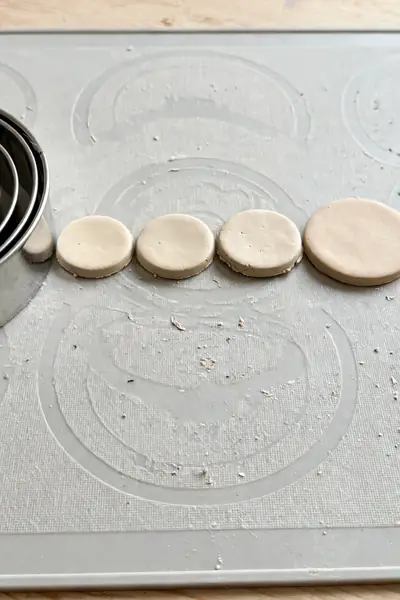
Before: Hand cut circles that lean, wobble, and refuse to match, so a set of four coasters looks like four separate accidents.
After: One press of the cutter gives a clean round every time, and four coasters come off the mat as a true set, same size, same edge, ready to stack.
Circles are the shape beginners need most and freehand worst. A nested cutter set turns out coasters, ornament rounds, bowl bases, and lids in sizes that match each other, which is what makes a set of handmade pieces look like a set. Metal cutters with a rolled top edge press cleanly without hurting your palm.
Shape Cutters and Plungers

Do This:
- Press straight down and give the plunger one firm push to emboss the detail
- Dip cutters in a little cornstarch if pieces start sticking inside
- Cut minis from a 3mm slab so they dry flat and fast
- Store the set nested in one small box, sorted by shape family
Avoid This:
- Wiggling the cutter sideways, which tears the shape’s edge
- Pulling stuck pieces out with fingernails and denting them
- Cutting shapes thicker than 5mm; they curl as they dry
- Buying single shapes one by one at triple the set’s price
Small shapes are where projects get their charm: stars on a garland, hearts on a magnet, flowers on a jewelry dish. Plunger cutters cut and emboss in one press, and the spring pushes pieces out without fingernail damage. A set of stars, hearts, flowers, and leaves covers most projects for a year.
Wooden Modeling Tools

Cost: Under $10 a set | Count: 5 to 6 double ended tools | Best For: Shaping, joining, smoothing | Lifespan: Years with a wipe clean habit
Wooden modeling tools are the hands you wish you had: one end smooths a seam, the other carves a curve, and the wood is gentle enough never to tear soft clay. A basic set of five or six double ended tools covers shaping, joining, and smoothing for nearly every project in this guide’s first year.
Detail Sculpting Tools

Detail tools take over where wooden tools are too big: the ball stylus that makes flower centers, the fine point that writes a name, the shovel that lifts a petal edge. Work at this scale is what separates a homemade piece from one people ask where you bought.
Buy the metal tipped set, not the plastic one. Plastic tips flex and snap in firm clay, and their seams leave lines you then have to sand away. A metal detail set costs a little more once and stays true for years, which is the pattern with most tools on this list.
Needle Tool

- Main job: hanging holes for ornaments, garlands, and bead pieces
- Bonus jobs: stitch lines, eye dots, whisker marks, and texture dots
- Timing: always pierce while the clay is soft, never after drying
- Size rule: holes shrink a little as clay dries, so pierce generously
- Care: wipe the needle clean so rust never marks white clay
Holes sound minor until an ornament has none and the string has nowhere to go. A needle tool makes clean holes in one press while the clay is soft, plus stitch lines, eye dots, and texture marks. Make holes bigger than looks right, because clay shrinks as it dries and paint narrows it later.
Precision Craft Knife
Quick Tip:
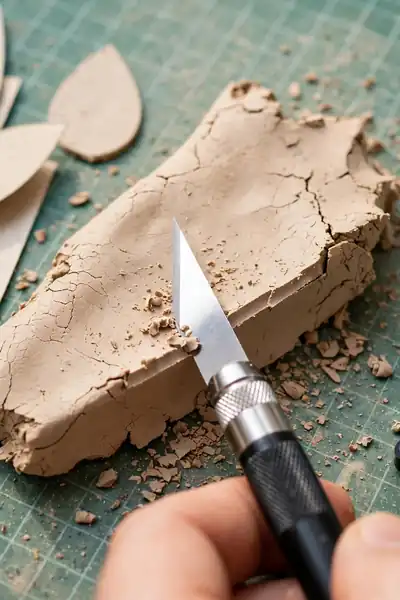
Keep the craft knife for paper templates and dry clay only, and let the slicing blade handle soft clay. Each blade keeps its edge far longer when it has one job, and you always know which tool in the drawer is truly sharp.
Templates, straight trims, and dry edge cleanup all call for a blade finer than the clay knife. A precision craft knife with a fresh blade cuts paper patterns, trims a dried rim, and slices thin clay sheets for layering. Change blades more often than feels necessary; a dull craft blade tears clay instead of cutting it, and blades are the cheapest sharpness there is.
Texture Stamps

Common Mistake: Rocking the stamp side to side to “make sure” it prints, which doubles the pattern at the edges and blurs the whole design.
The Fix: Press straight down with even palm pressure, hold two seconds, and lift straight up. One honest press prints cleaner than three rocking ones.
Flat clay is a canvas waiting for pattern. Texture stamps press lace, leaves, wood grain, or geometric designs into a slab in seconds, and the pattern survives drying and painting beautifully when pressed evenly. Press, do not rock: rocking doubles the image at the edges, the stamp mistake everyone makes exactly once.
Texture Rollers

What You Need:
- One roller with a pattern you will genuinely reuse, leaves or lace first
- A slab rolled slightly wider than the roller’s pattern band
- Thickness guides in place, so the pattern presses to an even depth
- A light dusting of cornstarch on the roller if clay starts lifting
- A test scrap to dial in pressure before the real piece
Where a stamp covers a coaster, a texture roller covers a tray. One slow pass prints a pattern across a slab: leaves down a serving board, lace across a jewelry tray, brick lines on a tiny house wall. Roll once, in one direction, with the pressure you would use as pastry, and lift the piece by the mat, not the clay.
Clay Extruder

Before: Hand rolled coils that swell and pinch along their length, so basket walls lean and rims wave where they should sit level.
After: The extruder delivers one even rope from the first inch to the last, coils stack true, and the basket looks woven on purpose instead of by luck.
Coils carry more projects than expected: basket walls, pot rims, handles, borders, and ropes on ornaments. Hand rolled coils come out thick and thin along their length, and the eye notices. An extruder pushes clay through discs and delivers one even rope from first inch to last, which is why extruded baskets look woven instead of lumpy.
Silicone Molds

Do This:
- Press clay in firmly from the center outward to fill fine detail
- Flex the mold gently to release, rather than digging pieces out
- Trim the back of each molded piece flat before attaching it
- Score and slip the join so molded pieces stay attached after drying
Avoid This:
- Overfilling the mold, which leaves a thick rim to trim away
- Removing pieces while the clay is still very soft and stretchy
- Mixing mold brands mid set; sizes differ just enough to notice
- Leaving clay sitting in molds for days, which warps the silicone
Molds are the shortcut behind every matching set of flowers, shells, and leaves you have admired. Press clay in, flex the silicone, and a shape drops out, ready to glue onto dishes, frames, and magnets. In my experience, one floral mold set appears in half the projects a maker finishes in a year.
Letter Stamps for Personalizing

Cost: Under $12 a set | Best For: Gift tags, ornaments, plant markers | Timing: Stamp while clay is soft | Result: Neat words, no wobbly handwriting
A name turns a clay gift from pretty to personal. Letter stamps press words into ornaments, tags, plant markers, and the bases of bowls while the clay is soft, in a font that stays neat where handwriting with a needle tool wanders. Line letters up against a ruler’s edge first; alignment is the difference between charming and crooked.
Turntable

Turning the work instead of your wrist sounds like a luxury until you shape your first round bowl without one. A turntable, the cake decorating kind works perfectly, lets you smooth, carve, and paint in a continuous line, checking every side without touching the soft clay with your fingers.
It also changes drying and painting habits: paint the piece in one sitting by rotating, instead of waiting for one side to dry before daring to turn it. Of all the tools in this guide, the turntable is the one makers often say they should have bought a year earlier.
Fine Grit Sandpaper

- Grit 400: removes rolling marks and shaping lines on dried clay
- Grit 600: refines the surface once the big marks are gone
- Grit 800: the final skin, silky before paint or sealant
- Always sand fully dry clay; damp clay clogs paper instantly
- Work over a tray and wear a mask for the fine dust
Sanding is the step that turns dried clay from chalky to ceramic smooth, and it all happens with fine grit paper in the 400 to 800 range. Work dry, in circles, over a tray that catches the dust. Start at 400 for shaping marks, move to 800 for the final skin, and keep a mask on, because clay dust is not a craft smell.
Also Explore: How to Seal Air Dry Clay for a Waterproof Pro Finish
Sanding Sponges

Quick Tip:
Rinse sanding sponges under the tap and let them dry between projects. A clogged sponge stops cutting and starts polishing one shiny patch into the piece, which then shows through paint as a pale spot that no second coat fully hides.
Flat paper cannot follow a curve, and most clay pieces are curves: bowl walls, bead rounds, animal bodies, vase necks. A sanding sponge bends with the shape, keeping contact so you never sand a flat spot into a round piece. Keep two, a medium and a fine, and rinse them; sponges last longer than paper.
Dusting Brushes

Common Mistake: Blowing dust off a sanded piece, or wiping it with a damp cloth. Blowing sends dust into your face and the room; the damp cloth turns dust into mud that settles into every texture line.
The Fix: Brush the piece with a wide, dry, soft brush over the sanding tray, working out of stamps and grooves last. The dust falls where it belongs, and the surface stays dry and ready.
Sanding leaves every piece coated in dust, and paint over dust freckles, lifts, and dries gritty. A brush, the makeup brush kind works, sweeps dust out of texture lines and stamp patterns before paint or sealant touches the piece. Brush outdoors or over the tray, and make it the last step before a finish goes on.
Spray Bottle and Slip Cup
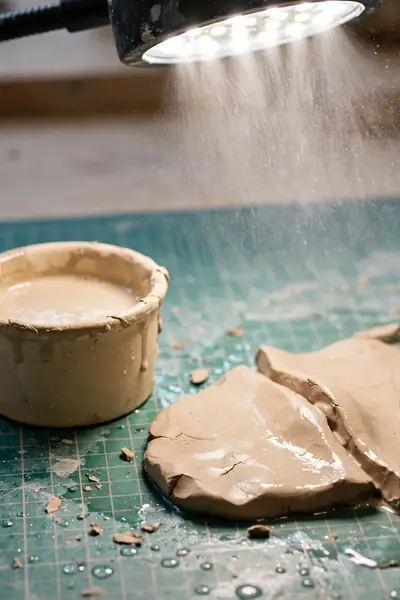
What You Need:
- A small spray bottle with an adjustable fine mist nozzle
- A lidded little pot for slip, so it keeps between sessions
- Slip made once: pea sized clay bits dissolved in water to a cream
- A soft brush dedicated to slip, kept in the pot
- The score, slip, press habit for every join you ever make
Water is a tool, and the spray bottle is how you dose it. A mist revives a drying edge, softens a seam for blending, and settles dust while sanding. The slip cup, a pot of clay and water paste, glues joins stronger than water alone: score, paint slip on, press, and smooth the seam.
Digital Kitchen Scale
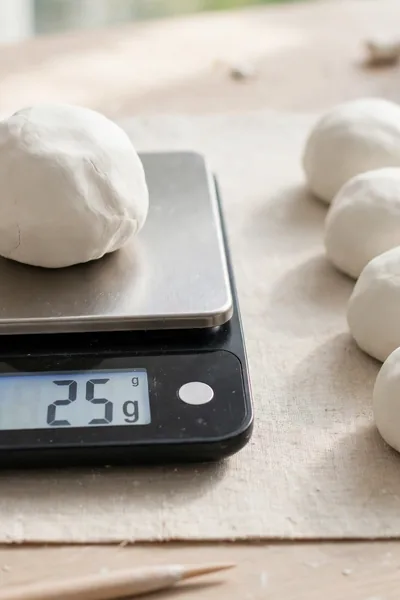
Before: Coasters in four thicknesses, beads in three sizes, and one piece per set always drying slower than its partners.
After: Every lump weighed to the same grams before shaping, so sets match in size and thickness and dry together like they were planned, because they were.
Matching sets expose guesswork: four coasters where one is visibly thicker, beads in three sizes from one necklace plan. A small digital scale ends it. Weigh the first piece, then portion every next lump to the same grams before shaping, and sets come out matched in size, thickness, and drying time without measuring a thing.
Airtight Storage Containers
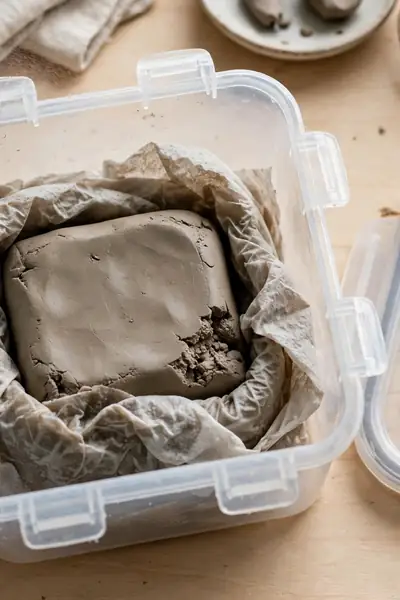
Do This:
- Wrap the opened block tightly before it goes into the container
- Add a damp, not wet, paper towel for stored stone or paper clays
- Squeeze the air out of zip bags used inside the box
- Label each container with the clay type and the opening date
Avoid This:
- Storing clay in its torn original wrapper and hoping for the best
- Leaving the container near a window or heater where it warms daily
- Mixing clay types in one box; scraps cross and textures clash
- Storing wet sponges in the box, which invites mold over time
Storage decides whether the clay habit stays cheap or gets expensive. A sealed container with a damp paper towel keeps an opened block workable for months, which means one block finishes ten projects instead of cracking in a drawer between two. Label the container with the clay type and opening date, because blocks all look alike.
Frequently Asked Questions
1. What are the first five tools a beginner should buy?
Start with an acrylic rolling pin, a silicone mat, a slicing blade, one wooden modeling tool set, and fine grit sandpaper. Those five handle rolling, cutting, shaping, and smoothing, which is 90 percent of beginner projects, for less than one big boxed kit costs.
2. Can I use kitchen tools instead of clay tools?
Some, with care. A smooth glass or marble rolling pin works, and a plain knife cuts in a pinch. But wooden spoons, textured boards, and anything that touches food should stay in the kitchen once clay has touched it, because craft materials and food should never share tools.
3. Do I need the extruder and turntable right away?
No. Both are second round tools. Buy the extruder when coil projects like baskets start calling you, and the turntable when round pieces like bowls become regular work. The core kit carries you happily until a real project asks for them.
4. How do I keep tools clean between projects?
Wipe blades and tools while the clay on them is still damp, and rinse mats and rollers in warm water. Dried clay needs soaking and scraping, which dulls blades. A two minute clean at the end keeps every tool ready and rust free.
5. Which tools are worth spending more on?
The roller, the slicing blade, and the detail tool set, because their quality shows in every single piece. Cutters, stamps, and storage boxes can stay budget forever without the work suffering, so spend where the edge and the smoothness live.
6. How many tools does a complete clay kit really have?
A working kit lands between 15 and 22 pieces including the small consumables like sandpaper. More than that is usually duplicates and novelty shapes. If every tool in the box has a project it served in the last few months, the kit is the right size.
Conclusion
Your clay kit does not need to be big. It needs to be right. Start with the core five, add tools as projects ask for them, and your air dry clay tools will quietly handle the rolling, cutting, shaping, and smoothing while you enjoy the making. I’ve seen how small changes like these can completely shift the quality of a whole craft table. Save this guide on Pinterest for your next craft store trip, try the core five on your very next project, and share it with a friend whose clay shelf is still a kitchen drawer. Your best pieces start with the right tools.