25 Brilliant Small Kitchen Organization Hacks That Work
Your kitchen is not too small. It is just carrying too many homeless things. I’ve noticed the tiniest kitchens cook beautifully once every item owns a place, and honest small kitchen organization is nothing more than giving twenty five categories a home they can keep.
Inside, you will find 25 hacks that need no renovation and mostly no tools: rails, risers, rods, carts, and corners rescued one by one. Each one costs little, installs fast, and suits renters as kindly as owners. Most use space your kitchen already has but never sees.
Why a Small Kitchen Feels Chaotic by Tuesday

Nothing in a small kitchen is actually extra. The chaos comes from homeless things: every item is used weekly, yet nothing has a fixed place, so counters become storage and cooking becomes a shuffle of piles before any food appears at all.
By Tuesday the week’s drift shows. Mail lands by the toaster, groceries wait in bags, and yesterday’s drying rack still holds this morning’s mugs. The kitchen did not shrink; its systems did. Every hack ahead simply gives one whole category of things a permanent, reachable, visible home.
Measure First: Five Zones, One Plan

Good small kitchen organization starts with zones, not shopping. Five zones hide inside every kitchen, however tiny: prep, cooking, cleaning, storage, and serving. When each job owns a small territory, items stop migrating across the whole room and landing wherever they fall.
- Measure each cabinet’s width, depth, and shelf heights, and write the numbers in one notebook.
- Assign every cabinet and drawer to one zone only; mixed storage is where chaos breeds.
- Place daily items between waist and eye level, and rarely used pieces high or low.
- List the gaps honestly: the dead corner, the deep drawer, the empty door backs.
Also View: 22 Hidden Under Sink Organizing Ideas That Double Space
A Wall Rail With Hooks for Daily Tools

Quick Tip: Hang only what you grab daily. A rail loaded with every tool you own becomes wall clutter with hooks. Six daily tools on the rail keep it useful, light, and easy to clean.
Renters can hang a rail on adhesive hooks rated for weight, or lean on a no drill tension setup between cabinets. Place the rail over the counter beside the stove, never above the burners, where steam and splashes coat everything. One rail frees an entire drawer for the tools that remain.
A Pull-Out Spice Rack in a Shallow Drawer
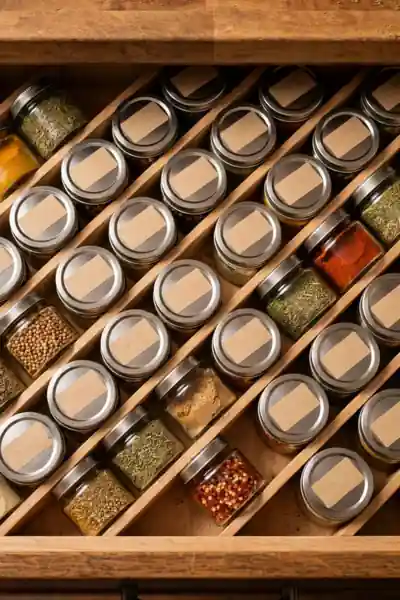
Common Mistake: Keeping spices in a deep cabinet above the stove. Jars hide behind jars, steam dulls the flavors, and you buy a third paprika while two sit open at the back.
The Fix: Move spices into one shallow drawer beside the stove, jars flat or angled in a pull-out rack, labels up. One glance covers the whole collection, and cooking stops pausing for searches.
No shallow drawer to spare? A narrow rack inside a cabinet door or a small tiered insert gives the same one layer view. The rule matters more than the product: spices stored two deep will always be bought twice and found late every single time.
Clear Fridge Bins Sorted by Food Type
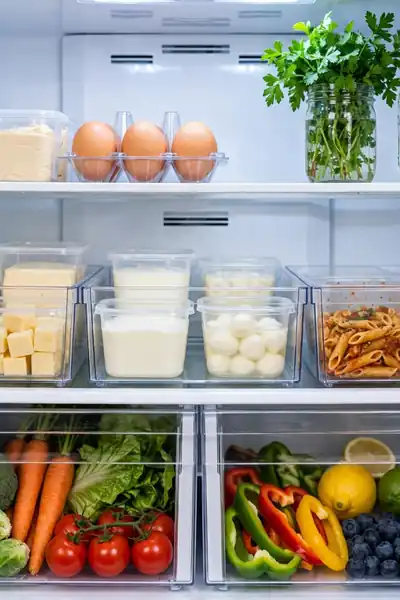
What You Need:
- Four to six clear bins: sized to your shelves, with handles or open fronts for pulling.
- One bin per food family: dairy, produce, cooked leftovers, condiments, and snacks.
- A washable liner or paper layer: catches drips before they glue bins to the shelf.
- Ten minutes weekly: a fast wipe and shuffle keeps the system honest.
Clear bins turn the fridge into drawers you can audit at a glance. Nothing ferments in the back because nothing can hide, and shopping lists write themselves from the empty spaces. I’ve noticed the fridge stays calmer when every bin has exactly one job to do.
Tiered Drawers Under the Sink
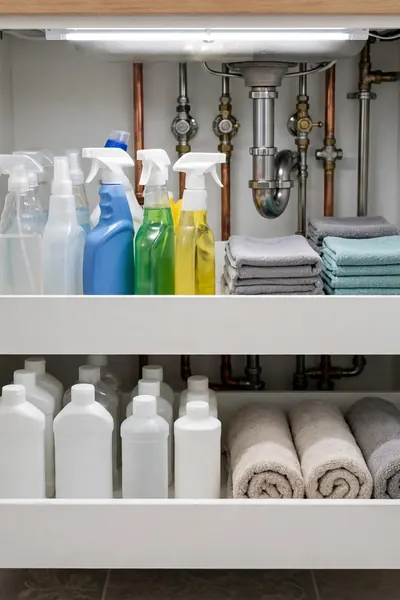
Before: Bottles kneel in a dark crowd around the pipes. The one you need lives at the back, behind three you never use, and every grab starts with kneeling and shuffling.
After: Two shallow drawers slide out at different heights, bottles standing in rows you can read. The pipes keep their space, the supplies keep theirs, and nothing hides behind anything.
Measure around your pipes before ordering; U shaped drawers exist for exactly this cabinet. Renters can choose freestanding tiered racks that lift out clean at moving time. Keep this kitchen zone separate from the bathroom version: cleaners here, nothing edible stored here, ever.
Pull-Out Trash and Recycling in One Cabinet
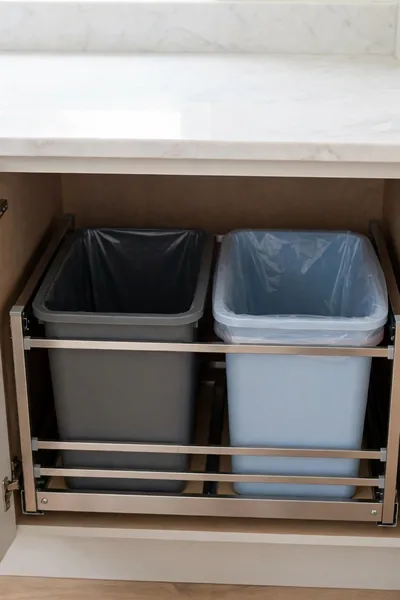
Do This:
- Give the combo the cabinet nearest the prep zone, where scraps are born.
- Choose soft close slides if you can; slammed bins teach people to avoid them.
- Line both bins and keep spare liners under the active one.
- Label the recycling side clearly for guests and kids.
Avoid This:
- Sizing bins by hope; measure the cabinet interior before ordering anything.
- Putting the combo far from the sink, which guarantees drips across the floor.
- Skipping the lid where pets roam; a closed bin ends midnight raids.
A floor bin steals walking space and announces itself to every nose. Hidden pull-outs return the floor, hide the smell, and sort recycling at the moment of throwing, not in a weekly rescue. Kitchens under twenty feet of counter feel this upgrade daily without exception.
A Slim Rolling Cart in the Fridge Gap

Cost: Low to medium | Width Needed: 5 to 7 inches | Time: 10 minutes | Best For: Oils, wraps, baking extras
That dead gap already exists in most kitchens, earning nothing. A cart turns it into a pantry shelf that rolls to you, then vanishes flush. Measure the gap at its narrowest point, skirting boards included, because carts forgive nothing and returns are a nuisance for everyone.
Undershelf Baskets That Double a Cabinet

Most cabinets waste the top half of every shelf. Plates sit in one low stack while clean air fills the space above them, air you already pay rent on. An undershelf basket claims that air in two minutes, with no screws and no tools at all.
Hang baskets where stacks are short: mugs above plates, bowls above serving dishes, packets above cans. Keep heavy items out; these baskets are for light, daily things. The cabinet suddenly reads as two shelves, and the morning mug stops hiding behind the gravy boat.
Pans Stored Sideways in a Vertical Organizer
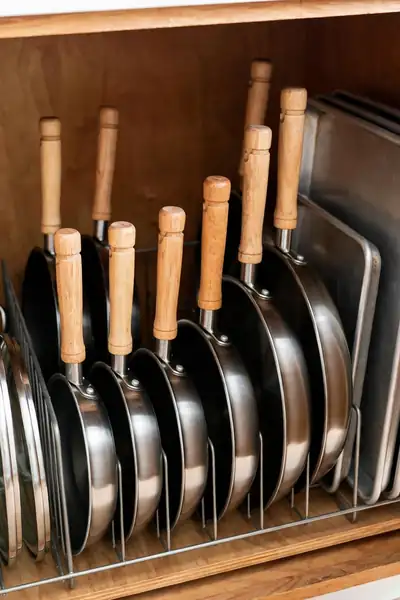
Stacked pans punish the cook at the bottom of the pile. Every dinner starts with lifting three pans to free one, while lids slide and clang. Filing pans upright, like books on a shelf, ends the excavation completely and protects their surfaces too.
- Measure the cabinet height and depth; the organizer must clear the door swing.
- Sort pans by how often they cook, daily pans at the front slots.
- Slide each pan in on its edge, heaviest at the back for stability.
- File lids in the end slots or a slim holder on the door.
A Magnetic Knife Strip Under a Shelf

Quick Tip: Mount the strip under a shelf or cabinet, not on open wall above the counter. Knives stay reachable for adults, invisible to small climbers, and off the work surface where they endanger wrists and vegetables alike.
Choose a strip long enough that blades never crowd; touching edges dull each other and slip. Renters can use strong adhesive backed strips on smooth tile or under cabinet wood. A knife block’s drawer or counter footprint returns to you the day the strip goes up.
A Pull-Out Coffee and Tea Station

Common Mistake: Letting coffee gear colonize the best counter permanently. The maker, grinder, pods, and mugs sprawl across prime prep space for a ritual that lasts twenty minutes a day.
The Fix: Gather the whole ritual onto one pull-out tray or shelf inside a cabinet near water and power. Slide it out for brewing, slide it home after, and the counter returns to cooking.
Tea drinkers can claim the same tray with a kettle, tins, and a honey jar. Guests find everything in one place without opening six cabinets, and mornings run calmer when the station has edges. Contained rituals are the secret of counters that stay clear all day.
Also Explore: 25 Cozy Coffee Bar Ideas for Slow Mornings at Home
Shelf Risers Inside Cabinets

What You Need:
- One riser per crowded shelf: bamboo, wire, or wood, sized a few inches narrower than the cabinet.
- Your shelf measurements: height between shelves decides whether a riser fits at all.
- Light items for the top level: cups, ramekins, and small bowls, never heavy stacks.
- Five minutes: placing a riser needs no tools, screws, or permission from a landlord.
Risers are the cheapest square footage in the kitchen, often under ten dollars each. I’ve seen this work well in many cases: two risers in the mug cabinet end the daily cup hunt completely. Buy one, live a week, then judge whether the next shelf deserves one.
A Tension Rod Under the Sink for Spray Bottles

Before: Spray bottles crowd the cabinet floor in a sticky herd. Finding the glass cleaner means moving four bottles, and leaks spread quietly underneath everything.
After: Bottles hang in one readable row by their triggers, labels forward. The floor below holds only a folded cloth stack, and leaks land where you can see them.
A tension rod costs a few dollars and installs with a twist, no holes, no tools, fully renter friendly. Size it snug and test with one bottle before loading the row. This tiny rod is the hardest working cheap hack in the whole under sink cabinet.
A Drawer Reserved for Daily Tools Only

Do This:
- Admit only tools used in the last seven days; count them, it is rarely more than ten.
- Give each tool a divided section so the drawer reads at a glance.
- Move the evicted tools to a box for one month before donating them.
- Defend the drawer weekly; newcomers earn entry only by daily use.
Avoid This:
- Keeping three of everything because washing feels inconvenient.
- Letting gadgets migrate back during one busy cooking weekend.
- Using this drawer as the junk drawer with better PR.
One honest drawer changes how cooking feels at 6 pm. Your hand lands on the right tool without looking, while the drawer most kitchens suffer stays shut. The evicted tools, boxed and dated, almost never get missed, which tells you they were never daily at all.
Stackable Containers With Uniform Labels

Cost: Medium, bought gradually | Time: One hour to decant | Skill Level: Beginner | Best For: Flour, rice, pasta, beans
Uniform containers stack like bricks, using the shelf’s full height instead of a skyline of half bags. Labels on the front and a date on the bottom end mystery ageing. Buy the set in two rounds, staples first, so the cost spreads and sizes match your real usage.
A Fold-Down Counter Extension

Some kitchens need more counter only sometimes: while chopping for a big meal, cooling trays of baking, or sorting a large shop. A hinged flap on a wall or cabinet end gives that surface on demand, then folds flat against the wall again.
Mount it at counter height beside the stove or sink, where extra space actually helps. Use strong folding brackets rated for weight, and treat the flap as staging, not seating. Renters without drilling rights can copy the idea with a sturdy folding table stored behind a door.
Lazy Susans in Deep Fridge Corners

Deep fridge corners are where sauces go to be forgotten. A turntable changes the geometry: one gentle spin brings the back row to the front, and every jar gets seen weekly instead of discovered, furry, twice a year during a purge.
- Measure the shelf depth and buy a turntable two inches narrower than it.
- Group by use: everyday sauces on one, baking and marinades on another if space allows.
- Place tall bottles at the center, short jars at the rim, for balance.
- Spin slowly; a crowded turntable that topples teaches nobody anything good.
Foils and Wraps in a Magazine Holder

Quick Tip: Stand wrap boxes with their cutting edges facing up and inward. A box grabbed blind with the serrated edge forward is a small injury waiting in an ordinary Tuesday drawer.
One holder swallows four or five long boxes that used to jam a drawer diagonally. Mount it inside a cabinet door near the prep zone, or stand it on a pantry shelf. The drawer you free is the one your daily tools drawer has been waiting for.
The Side of the Fridge as a Command Center

Common Mistake: Using the fridge front as the family noticeboard. School notes, coupons, photos, and lists bury the surface you touch most, and the kitchen feels loud before anyone cooks.
The Fix: Move the working papers to the fridge’s side panel, the face nobody photographs. A magnetic board, one list, the week’s menu, and a timer live there, in reach but out of the eyeline.
The front of the fridge goes quiet, and the kitchen’s whole mood drops a volume level. Shopping lists written at the side, where cooking happens, miss fewer items than lists kept in another room. Small surfaces carry big calm when each one has a single assignment.
Small Bins Inside Drawers

What You Need:
- Small bins in mixed sizes: dollar store sets work perfectly for this job.
- One category per bin: batteries, ties and clips, tape and string, spare bulbs.
- Your drawer measurements: bins should tile the drawer with no sliding gaps.
- A label or photo of the layout: so family members return things to the right bin.
Drawers fail at the small end first. Loose tiny things migrate, tangle, and turn a good drawer into a rummage. Fenced bins end the migration for a few dollars, and in my experience this is the hack guests notice when they hunt for a battery at your house.
Racks on the Inside of Cabinet Doors
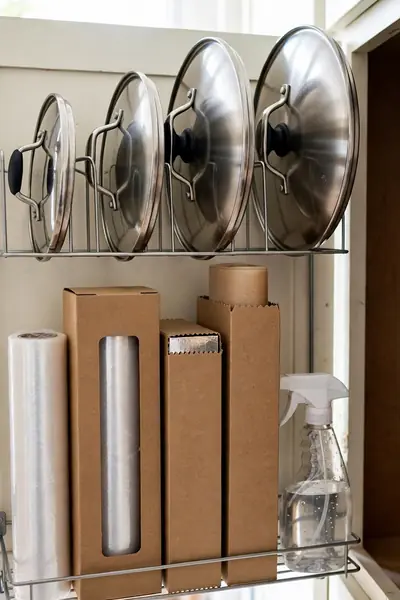
Before: Door backs hang empty in every cabinet while lids nest in a drawer avalanche and spray bottles crowd the sink cabinet floor below them.
After: Slim racks ride the doors themselves. Lids stand in a row you can read, wraps wait at hand height, and the door closes on space that finally earns its keep.
Check clearance first: racks and contents must pass the shelf edge as the door closes, with an inch to spare. Adhesive racks suit renters and smooth doors best. Start with the two doors you open daily; their backs usually hold a whole drawer’s worth of clutter.
A Roll-Up Drying Rack Over the Sink
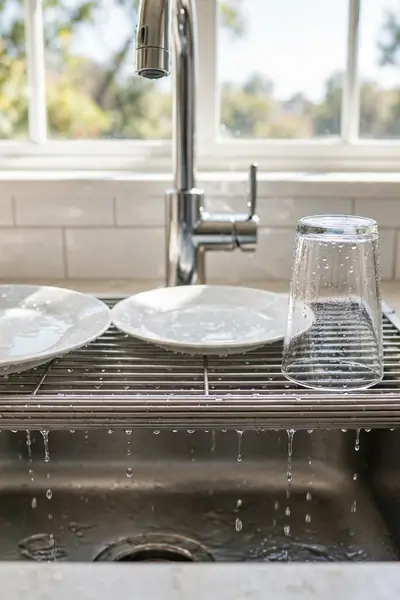
Do This:
- Unroll the rack only while dishes dry, then roll it into a drawer.
- Rest heavy pots on the rack’s center, lighter glasses toward the edges.
- Let the sink below catch every drip instead of a soaked counter mat.
- Keep one side free for rinsing while the other side dries.
Avoid This:
- Leaving the rack out permanently, which just moves the clutter higher.
- Stacking wet items two deep; air needs a path or drying stalls.
- Buying a rack wider than your sink; measure before ordering.
Counter drying racks are permanent tenants in kitchens that cannot afford rent. The roll-up version visits only when needed and pays nothing the rest of the day. For one or two person homes, this single swap returns the largest clear counter stretch of any hack here.
A Stepped Can Riser in the Pantry Cabinet

Cost: Low | Time: 5 minutes | Works In: Any deep shelf | Result: Every label visible at once
Flat shelves hide the second row, and the second row is where duplicate buying begins. Steps lift each row into view, turning a stock check into a glance. Group cans by meal, soups with soups, beans with beans, and the weekly shop gets shorter and cheaper.
Mug Hooks Under the Cabinet
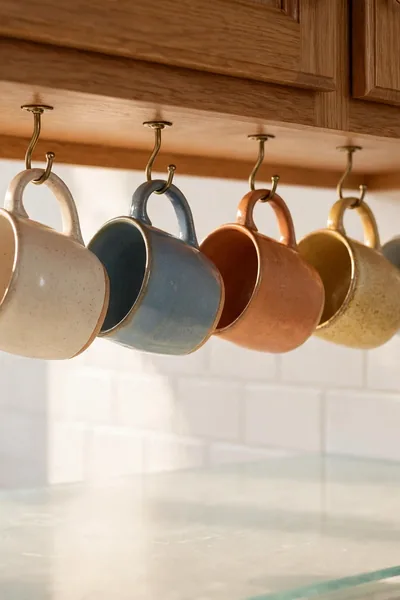
Mugs are shelf hogs with handles. A dozen mugs eat an entire cabinet shelf in most homes, stacked two deep, chipping each other’s rims, while the shelf does nothing else all year. Hanging them under the cabinet moves the whole collection into dead air.
Screw hooks into the cabinet’s underside, spaced a mug’s width apart, or use an adhesive rail if drilling is banned. Keep the row above the counter’s back edge, away from steam and splashes. The freed shelf usually swallows the contents of a whole crowded drawer with ease.
A Pull-Out for the Blind Corner Cabinet

Every L shaped kitchen hides a blind corner: a deep cave where pots go in and dignity comes out, usually on your knees. Pull-out corner units exist precisely for this cave, sliding the whole interior into the light in one motion.
- Measure the door opening and the cave’s depth; corner units are sized strictly.
- Empty the corner completely and clean it before anything new goes in.
- Load heavy pots on the lower shelf, lighter appliances above.
- Test the slide fully loaded before declaring the corner rescued.
The Fifteen Minute Weekly Reset

Quick Tip: Set the reset on a timer and stop at fifteen minutes, finished or not. A reset that can overrun becomes a deep clean you dread; a capped one stays a habit you keep.
Walk the five zones in order, returning strays, wiping the worst surface, and emptying the sink. Anything homeless gets a home decision on the spot, not a counter sentence. I’ve noticed kitchens stay organized not through big efforts, but through this small appointment nobody cancels.
Mistakes That Waste the Little Space You Have
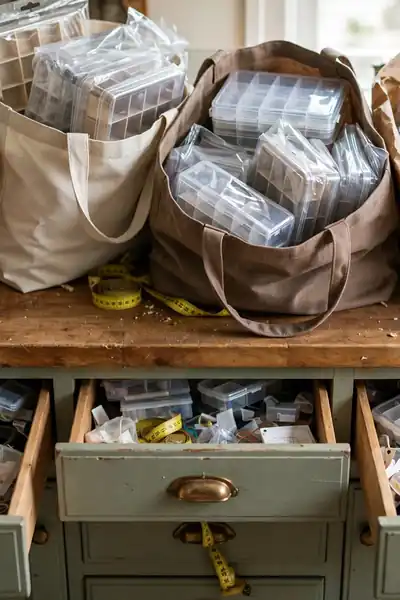
Common Mistake: Buying organizers first and measuring later, or never. Pretty bins that fit nothing come home to a kitchen that needed a plan, and the new clutter wears packaging.
The Fix: Measure every space, list the exact problem, then buy for that problem only. Keep receipts and packaging for a week; a hack that does not earn its space goes back, not into a drawer.
The other quiet killers: keeping gadgets for imaginary future cooking, storing rarely used appliances on prime counter, and organizing once without the weekly reset. Space in a small kitchen is a budget. Spend it only on what daily life actually uses, and audit it like money.
What All 25 Hacks Cost, From Free to Splurge
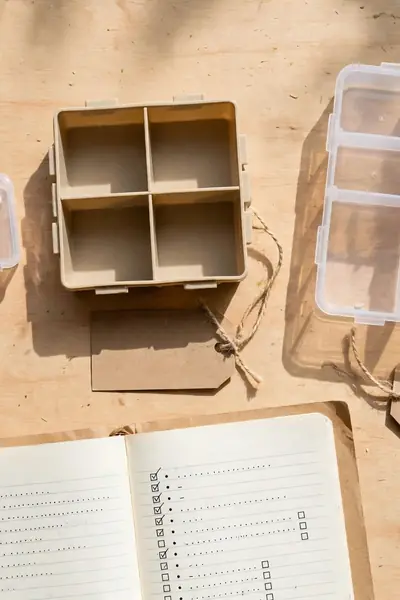
What You Need:
- Free first: the zone plan, the daily tools drawer edit, door racks you already own parts for, and the weekly reset.
- Under ten dollars each: tension rod, shelf risers, undershelf baskets, drawer bins, mug hooks, and the magazine holder.
- Ten to thirty dollars: the rolling cart, lazy susans, can risers, stackable containers, and the roll-up drying rack.
- The splurges: pull-out trash combos, corner units, and tiered drawer systems, bought last and measured twice.
Bought in that order, the whole system can grow for the price of one large grocery trip, spread over months. Start free, prove each zone works, then spend where daily friction lives. Money spent after proof is investment; money spent before it is pure decoration.
Frequently Asked Questions
1. My kitchen is tiny. Where do I even start?
Start with the zones section and one free hack: the daily tools drawer edit. A single calm drawer proves the system, and proof makes the next hack easier to choose and fund.
2. I rent. Which hacks are safe for my deposit?
The no drill list is long: tension rod, undershelf baskets, adhesive rails and racks, risers, bins, carts, and the roll-up rack. Everything lifts away at moving time without a mark.
3. Which hack gives the most space for the least money?
The tension rod and shelf risers usually win: a few dollars each, minutes to install, and both create storage where literally nothing existed before.
4. How do I organize deep cabinets?
Treat depth as a drawer problem: pull-out bins, turntables, and tiered inserts bring the back to you. Anything that must be reached by removing three other things will stop being used.
5. Do I need to buy matching containers?
Only for dry goods you decant weekly. Matching sizes stack safely and look calm, but mixed free containers beat no system at all. Upgrade gradually as jars empty.
6. How long does the whole kitchen take?
Zone by zone, most kitchens settle within three or four short sessions. The weekly fifteen minute reset then defends the result, which is where the real time gets saved.
Conclusion
A small kitchen does not need more room. It needs decisions: five zones, a home for every category, and hacks that use the air, doors, and corners already there. That is all small kitchen organization ever was, and now your kitchen has the full set.
I’ve seen how small changes like these can completely shift the way a space feels. Save this guide on Pinterest before your next free hour, start with the drawer that annoys you most, and share it with the friend whose counters disappear by Tuesday. Her kitchen is about to feel twice its size.