
21 Easy Macrame Patterns Beginners Can Finish Fast
Your first macrame project is still in a bag somewhere, half knotted, quietly judging you. It was never your skill. The project was simply too big for a first try. These macrame patterns for beginners fix that: every single one finishes in one sitting.
In my experience, beginners do not need more talent. They need a finished piece, fast, to prove their hands can do this. One completed keychain changes how the next project feels entirely.
Inside you will find three simple knots, then quick patterns that build on them one at a time: hangers, coasters, earrings, ornaments, even a phone pouch. Pick the smallest one, finish it today, and let that first success pull you into the next.
Why Quick Wins Matter for New Knot Beginners
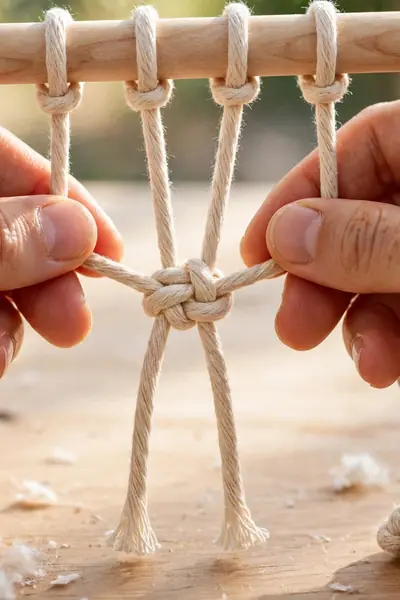
Most beginners quit macrame at the exact same moment: halfway through a giant wall hanging in week two, with forty cords tangling on the floor and no finished piece to show anyone. The project was never too hard. It was simply too long for a first try.
The smartest macrame patterns for beginners are the ones sized for one sitting. A finished keychain in forty minutes teaches the same knots as a huge hanging, but it also gives you proof your hands can do this. Every pattern ahead is chosen for that reason: small, quick, and genuinely finishable today.
What You Need Before Your First Pattern
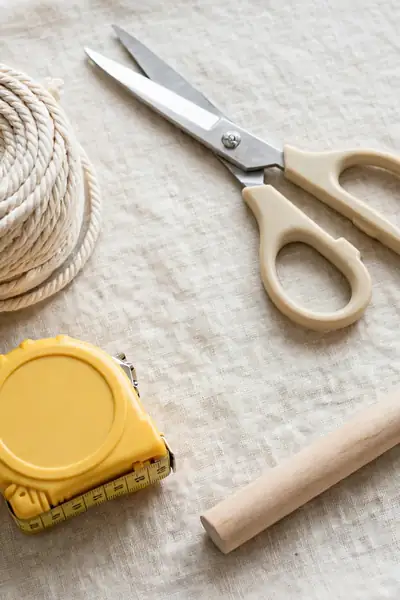
Macrame looks supply heavy in photos, but a beginner honestly needs very little. Everything on this short list costs under $25 total, most of it lives in a kitchen drawer already, and each item earns its place in almost every pattern in this guide.
- Cotton cord, 3 to 4mm: one 100-yard roll in a natural color; single twist cord unravels into soft fringe, braided cord holds crisper knots
- One wooden dowel or branch: 12 to 18 inches long, for wall hangings and practice rows
- Sharp fabric scissors: dull blades fray cord ends and make trimming fringe a fight
- Tape measure and painter’s tape: for measuring cord lengths and anchoring work to a table edge
- A comb or pet brush: for brushing out fringe and feather leaves
Resist the kits for now. Loose cord, one dowel, and scissors teach you more than a boxed set, because you choose the thickness and color yourself. Add a thrifted wooden ring later if the dream catcher calls to you. Start lean, and upgrade only after your first finished piece tells you what you enjoy making.
Also View: 21 Textured Macrame Basket Patterns for Cozy Storage
The Three Knots Behind Almost Every Pattern

Quick Tip: Learn the square knot with two different cord colors in your first practice row. The color change shows exactly which cord travels and which stays still, and the knot’s logic clicks in minutes instead of unraveling into guesswork.
These three knots are the whole alphabet. The lark’s head mounts cords on a dowel or ring. The square knot builds almost everything, from hangers to coasters. The half hitch spins spirals and shapes leaves. Practice each for ten minutes, and every pattern that follows becomes reading instead of guessing, where the fun starts.
Mini Plant Hanger in Under an Hour

Common Mistake: Cutting the cords too short. A hanger that looks small still eats cord fast: every square knot shortens the working length, and the net around the pot takes more than beginners expect. Short cords end with a hanger that fits a thimble.
The Fix: Cut eight cords at 6 feet for a 4 inch pot, longer than feels sensible. Extra length trims away at the end; missing length cannot be added, and this one measurement decides whether the project finishes at all.
Mount the eight cords on a ring or hook, knot 4 inches of square knots, leave a gap, then gather the cords into a net with alternating knots spaced wider apart. Set the pot in, adjust until it sits level, and knot a gathering wrap below it. First hanger: done, and honestly giftable.
Simple Keychain With a Wooden Bead
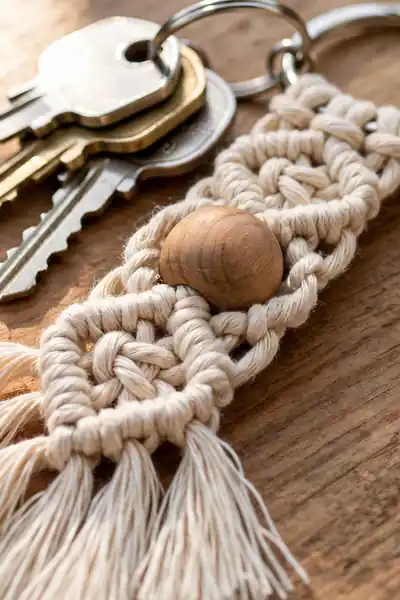
What You Need:
- Two cords at 30 inches each, the entire project’s cord in one short shopping list
- One wooden bead, 20mm, with a hole wide enough for two cords
- One key ring or swivel clasp to build the keychain on
- Scissors and a comb, for trimming and brushing the fringe at the end
Lark’s head both cords onto the ring, thread the bead onto the two center cords, then knot square knots below it until 3 inches are covered. Brush the remaining ends into fringe and trim them even. Forty minutes, start to finish, and the result rides on your keys daily, quietly advertising your new skill.
Tiny Wall Hanging on a Short Dowel
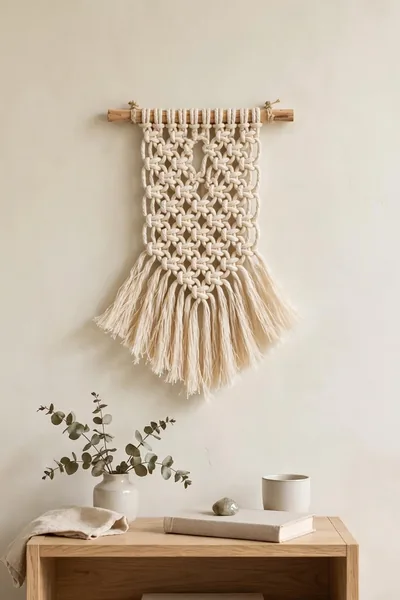
Before: A short stretch of bare wall above a nightstand, too small for a picture frame and too visible to ignore. It catches your eye every morning and offers nothing back.
After: The same wall holding a soft little hanging, 8 inches wide, its fringe brushed into a cloud. The corner suddenly looks chosen instead of forgotten, and guests ask about it.
Mount six cords on a short dowel, knot three rows of square knots, add one row of alternating knots, then cut the fringe long and brush it out fully before trimming the bottom into a gentle V. Small hangings reward neatness over size: keep every row level and the tiny piece reads as deliberate design.
Flat Knot Coasters for Your Coffee Table
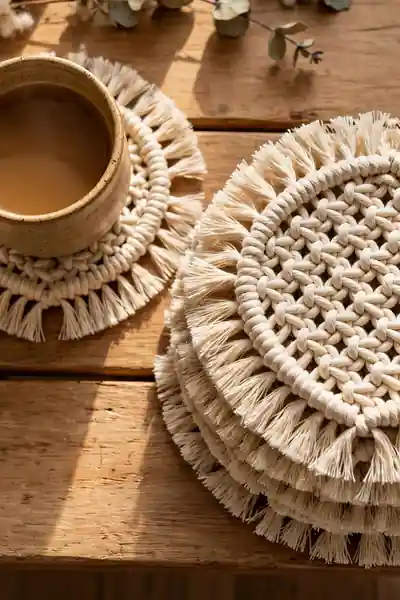
Do This:
- Knot on a flat table with the top edge taped down
- Keep every row snug against the one above it
- Count your knots per row out loud
Avoid This:
- Working in your lap, where rows quietly go crooked
- Mixing cord thicknesses inside one coaster
- Trimming the fringe before the final row is tied
Work the coaster flat and the rows stay honest almost by themselves. Six cords in tight square knot rows build the mat inch by inch. Add fringe on two ends or trim all four sides clean. A set of four takes one evening and protects every table you own.
Spiral Twist Bookmark

Time Needed: 25 minutes | Difficulty: Easy | Cord: about 3 feet of 2mm | Result: a twisted bookmark that lies flat
The spiral is only a half knot repeated: work the same first half of a square knot again and again and the column twists on its own, no turning required. Stop at 6 inches, add a bead or tassel, and trim the end. It is the most relaxing pattern in this guide.
Feather Leaves for a Soft Wall Accent
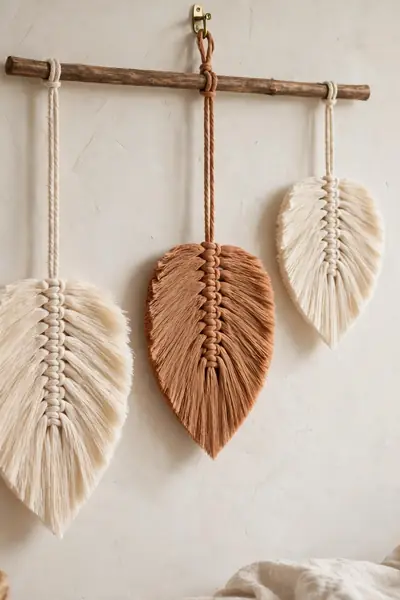
A feather leaf looks like the hardest thing on a craft fair table and is secretly one of the easiest: one cord folded, short pieces knotted along it, then a long, patient brushing. The shaping is done by scissors at the end, not by difficult knots.
Cut the side pieces generously, knot them snug along the center cord, then brush until the fibers separate into a soft plume. Trim slowly into a leaf shape, spray lightly with starch if it droops, and hang three at different lengths. The wall gets texture; you get compliments you almost feel guilty accepting.
Jar Wrap That Turns Glass Into a Vase
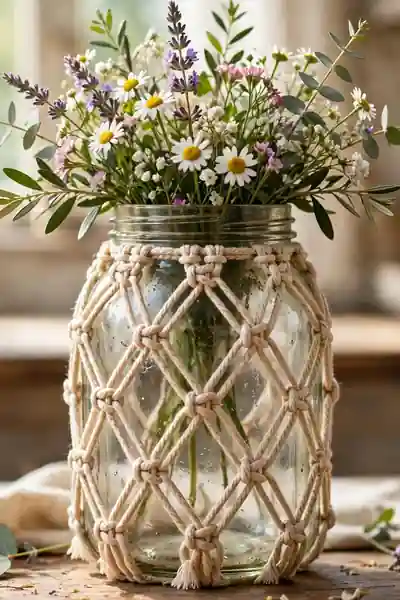
Every kitchen hides an empty jar that is too good to throw away. This wrap turns it into a vase or candle holder with one knot you already know, worked in a net that stretches to fit almost any jar you own.
- Mount 8 cords around the jar’s mouth with lark’s heads on a ring or a tight rubber band
- Knot 2 inches of straight square knots to form the collar that grips the neck
- Switch to alternating square knots spaced wider, building the diamond net down the jar’s body
- Gather all cords under the base, knot one tight wrap, and trim the fringe short
Slide the jar in before the final gathering knot, because the net sizes itself around the glass. Set it level, tighten the bottom wrap, and trim the fringe short. Flowers sit higher, candlelight glows through the diamonds, and a throwaway jar becomes the piece guests pick up and ask about.
Braided Wristlet for Keys and Bags
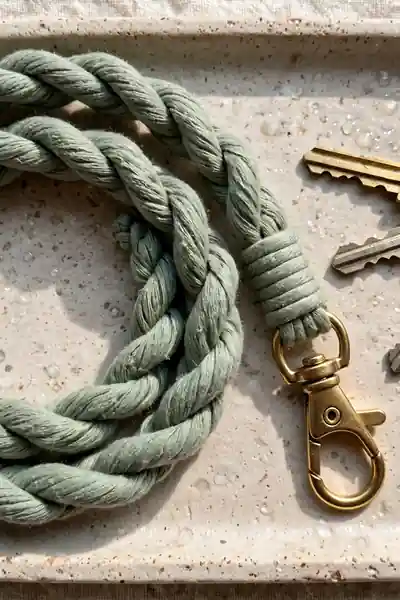
Quick Tip: Braid with the loop taped to the table and your body weight off it. A wristlet braided under tension stays even from end to end; one braided loosely in the air twists and fights the clasp later.
Three thick cords, one simple braid, and a wrapped finish where the ends meet the clasp: that is the entire pattern. Size it around your wrist with room for two fingers, because a wristlet that strangles gets left at home. It carries keys on walks, at markets, and through every door of your day.
Mini Garland for a Shelf or Mantel

Common Mistake: Making every flag a different size on purpose, thinking it looks playful. On a short garland, uneven flags mostly read as accidents, and the eye keeps stopping on the odd one.
The Fix: Knot all the flags the same width and length, then vary only the fringe trim at the bottom: points, curves, or straight cuts. The garland reads handmade and tidy at once.
String five to seven small flags on one long cord, with a finger’s width of bare cord between each. Hang it across a shelf, a mantel, or a nursery wall and the room gains a handmade line that photographs beautifully. It is also the fastest gift in this guide once the first is done.
Simple Dream Catcher on a Small Ring
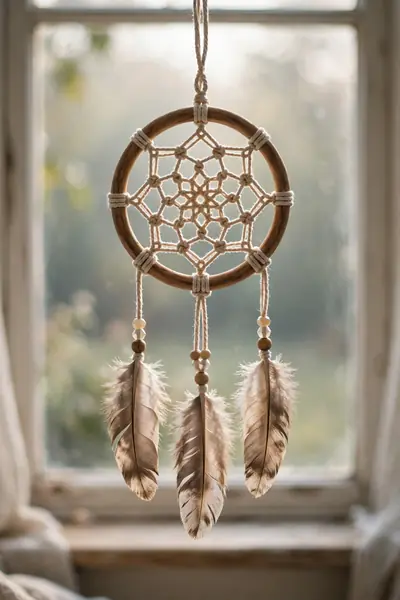
What You Need:
- One wooden or metal ring, 6 inches across, the dream catcher’s frame
- One long cord for the web, about 10 feet, thinner than your usual working cord
- Wooden beads and feathers, or leaf pieces from the feather section
- Three hanging cords for the drops below the ring
- Scissors, for trimming the web tail and the drops
The web is one half hitch repeated around the ring, looping into the row before it, shrinking toward the center. Keep the spacing even and the web stays honest; rush it and the center drifts. Finish with three hanging cords, leaves, and beads below. Hang it where morning light reaches it.
Curtain Tiebacks in Matching Pairs

Before: Curtains hang straight down all day, swallowing the window’s light and making the room feel half closed even at noon. The glass is there; the view never quite arrives.
After: The same curtains sweep open into soft curves, held by knotted bands that match the room’s textiles. Daylight reaches the corners, and the window finally looks dressed on purpose.
Knot a band of square knots long enough to circle your gathered curtain, add a bead at each end, and loop it over a small wall hook. Make the second one immediately, while your tension is fresh, so the pair truly matches. Matching tiebacks are a small thing that makes a room feel finished.
Macrame Earrings With Lightweight Cord
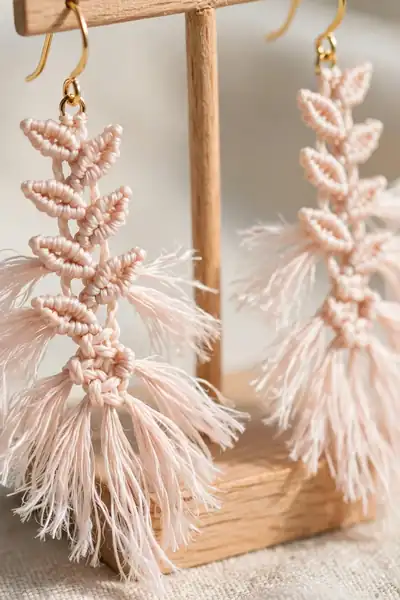
Do This:
- Use 2mm cord so the finished pair stays light on the ear
- Knot both earrings in the same sitting, one right after the other
- Copy your knot count from the first earring onto the second
Avoid This:
- Heavy beads that pull the hooks downward all day
- Trimming the fringe before both earrings are finished
- Starting with your best cord before practicing the size on scrap
Tiny macrame leaves and mini hangings both scale down into earrings beautifully. Work with short cords on a clipboard, keep your knots small and even, and finish with simple hooks. The pair weighs almost nothing, moves when you do, and draws the one compliment every maker loves: wait, you made those yourself, really?
Phone Pouch on a Short Strap
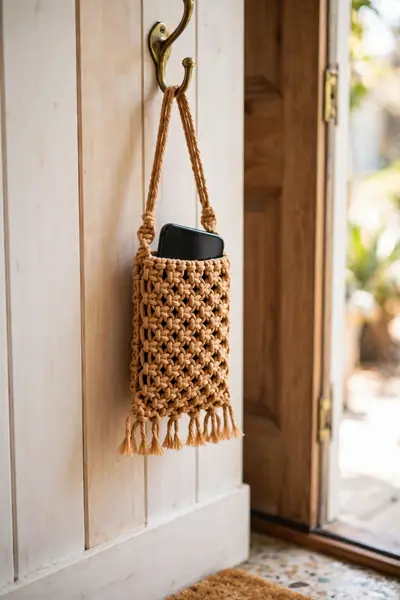
Time Needed: about 2 hours | Difficulty: Easy | Cord: eight cords at 7 feet | Result: a crossbody pouch that fits any phone
A pouch is just a wall hanging that gets folded: knot a flat panel of square knots, fold it, and knot the sides closed. Add a braided strap and the whole project is wearable. It holds your phone at markets and concerts, and it teaches shaping better than any practice swatch ever could.
Also Explore: DIY Macrame Tote Bag Tutorial for Market Day Style
Bottle Carrier for Markets and Walks
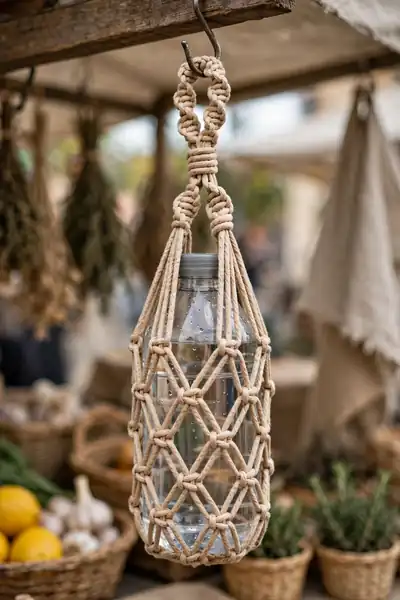
Farmers market bottles, gym water bottles, and picnic drinks all share one problem: hands are always full. A net carrier solves it with the oldest macrame trick there is, cords knotted into a net that hugs whatever bottle drops inside it.
The net stretches, which is the genius of it: one carrier fits the slim bottle and the wide one. Knot the mesh loose, gather it under the base, and finish with a wrist strap on top. It folds flat into a bag afterward, taking no space at all until the next bottle needs carrying.
Fruit Hammock for Counter Space
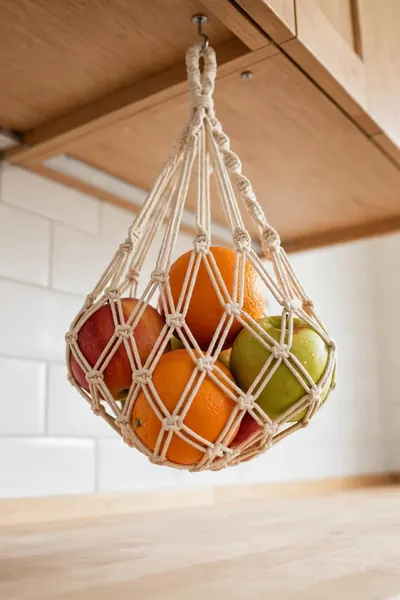
Counter space disappears one banana at a time in almost every kitchen. A fruit hammock moves the whole bowl into the air under a cabinet, where fruit actually ripens more evenly with air moving around it on every side instead of sitting in a pile.
- Screw two cup hooks under a cabinet, spaced about 14 inches apart
- Mount 10 cords on a short dowel or ring for the first end
- Knot an open net of alternating square knots, loose enough to cradle round fruit
- Gather the far end onto a second ring and hang both ends on the hooks
Hang it from two cup hooks under a cabinet or a high shelf, low enough to reach without a stool. Oranges, apples, and onions all rest happily in the net, visible at a glance so nothing rots forgotten in a bowl. Your counter gets its workspace back, and the kitchen gains a market stall charm.
Angel Ornament for Gifts and Trees

Quick Tip: Brush the skirt cords fully before you trim them. An angel’s whole charm is that soft flowing skirt; trimmed too early, the fibers never separate evenly and the skirt stays stubbornly stringy.
A wooden bead head, a small knotted body, and a brushed cord skirt: the angel assembles from three simple parts in half an hour. Add a hanging loop and she belongs on the tree, on a gift, or on a nursery wall. Make one and you will make ten; they are that kind of pattern.
Headband With a Spiral Center

Common Mistake: Knotting the whole band in spiral and skipping the flat ends. A full spiral twists against the head and will not sit still, however pretty it looks on the table.
The Fix: Work flat square knots for the parts behind the ears and save the spiral for the center front, where it shows. The band lies calm and the pretty part does the showing.
Measure around your own head and subtract an inch, because cord relaxes slightly with wear. Finish the ends with a simple knot or a small bead closure, and try it on before trimming anything. A headband you made in your exact size and color beats every shop version that almost fit.
Friendship Bracelets in Every Color

What You Need:
- Cord scraps in three or more colors, about 2 feet each, perfect for using leftovers
- One small bead per bracelet, for the finishing slide or end knot
- Scissors, for trimming the tails after the sliding knot
- A clipboard or tape, to anchor the band while you knot
- A friend, optional but recommended, for the wrist fitting and the company
Bracelets are where macrame began for most makers: one square knot band, tied on a friend’s wrist at a kitchen table. Use up the scrap basket, trade colors halfway for a two tone band, and finish with sliding knots so they come off at night. Twenty minutes each, and no two ever match perfectly.
Snowflake Ornament With a Star Center
Before: The tree and windows fill with shop bought plastic every winter, identical to every other house on the street. Pretty enough, but nothing on it says your hands were here.
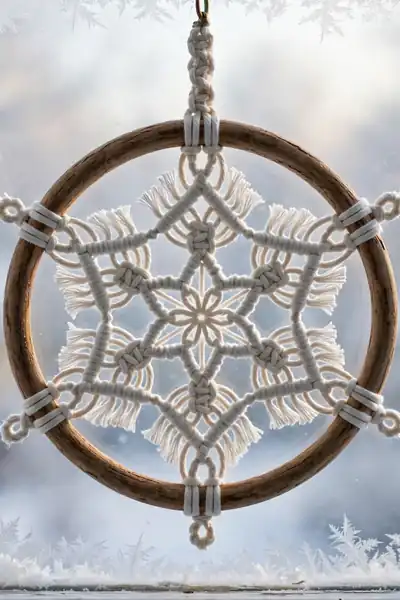
After: A white knotted snowflake hangs in the window, six points around a wooden ring with a star at its heart. It catches pale winter light and looks like lace that learned geometry.
Work six looped points around a small ring with the double half hitch, keeping each point the same length, then knot the star center with square knots. Stiffen it lightly if your cord is soft. It stores flat in an envelope between winters, which is more than any plastic ornament can honestly claim.
How to Read Any Pattern You Find Online
Do This:
- Count cords and rows before cutting anything
- Find the repeat and mark it with a pencil
- Knot one practice repeat on scrap cord first
Avoid This:
- Trusting the photo over the written counts
- Cutting every cord before reading to the end
- Skipping the materials list because it looks familiar
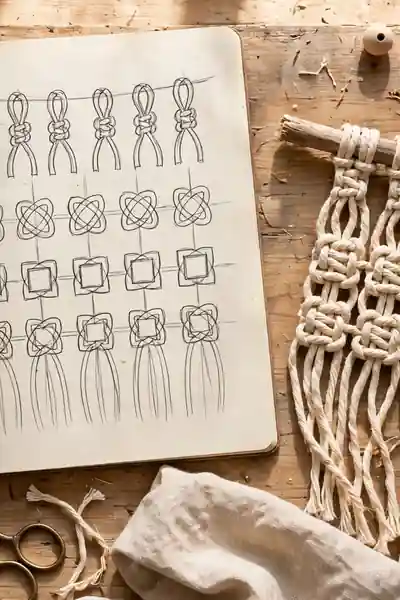
Every pattern speaks the same grammar: a materials list, a cord count, then rows built from named knots and repeats. Read it once like a story before touching cord, and the second read becomes a checklist. After two or three patterns read this way, new designs stop looking like code and start looking like recipes.
Mistakes That Make Beginners Want to Quit
Top Cause: wrong cord, fought daily | Fastest Fix: smaller projects, finished sooner | Cost of Quitting: one unfinished hanging, gathering dust | Result: finish small, then scale up calmly
Almost every quit traces back to three things: cord that fights back, a first project sized like a curtain, or rows knotted so tight the piece curls. All three are choices, not talent. Choose soft cotton, choose small, loosen your hands, and the craft turns kind. Nobody who finishes two small pieces ever really quits.
Frequently Asked Questions
1. How long does a first macrame piece usually take?
A keychain or bookmark takes 25 to 45 minutes, a mini plant hanger about an hour, and the biggest project in this guide, the phone pouch, around two hours. Every pattern here was chosen to finish in one sitting, most of them in a single relaxed evening session.
2. What is the best cord for a complete beginner?
Single twist cotton cord, 3 to 4mm, in a light natural color. It shows every knot clearly, unravels into soft fringe, and forgives mistakes because knots pull out cleanly. Save thin cords for earrings and bracelets, and stiffer braided cords for later, when your tension is steady.
3. Can I wash a finished macrame piece?
Most cotton pieces can be hand washed in cool water with a drop of mild soap, then laid flat to dry. Wall hangings usually need only a shake and a gentle brush. Avoid machine washing: the knots shift, fringe tangles, and wooden beads and rings can crack in the heat.
4. Can I sell the pieces I make from these patterns?
Yes. Basic knot patterns like these are traditional techniques, and the finished pieces you make with your own hands are yours to sell at markets or online. Credit the guide if you like, price for your time and materials, and photograph everything in bright natural light for listings.
5. What age can kids start macrame?
Around age 7 or 8, most kids can manage a friendship bracelet or bookmark with thicker cord and an adult nearby for the scissors work. Start with big knots and short projects, let them pick the colors, and finish in one sitting so the pride arrives the same day.
6. What if I do not own a dowel or a ring?
Use what the house already has: a wooden spoon handle, a sturdy branch from the garden, a coat hanger, or the back of a chair for hanging practice rows. Several patterns here, coasters, bracelets, and bookmarks, need no support at all, just tape on a table edge.
Conclusion
You now own the only macrame secret that matters: small finishes build real skill. Three knots, honest cord lengths, and projects sized for one sitting turn macrame patterns for beginners from a bag of abandoned cords into a shelf of finished pieces. I’ve seen how small changes like these can completely shift a beginner’s confidence. Save this guide on Pinterest for your next craft evening, start with the keychain or bookmark today, and share it with a friend whose half finished hanging is also waiting in a bag. Your first finished piece is one sitting away.



One Comment