DIY Air Dry Clay Monstera Dish for True Plant Lovers
Some dishes are just dishes. Then there is the leaf shaped one beside your monstera, holding your rings like it grew
there. If you love houseplants, this gentle project shows you how to make an air dry clay monstera dish at your own table.
I’ve noticed plant lovers finish this project more than any other craft they start, because the leaf forgives wobbly edges and uneven carving. You will trace or press the outline, carve the veins and splits, drape it into a gentle curve, then paint and seal it for proud daily use beside the plant that inspired it.
Why Plant Lovers Keep Making This Leaf Dish

Every plant lover I know has a soft spot for the monstera leaf shape, and this little dish puts it to work. It catches rings by the sink, keys by the door, and loose change on a dresser, all while looking like a tiny piece of the plant itself.
Making one is a gentle afternoon project with no kiln and no special skill. The leaf outline is forgiving, the carving is simple lines, and even a slightly uneven edge reads as natural. Your first air dry clay monstera dish will not be perfect, and it will still be charming.
Template or Real Leaf: The Shaping Choice

The outline decides everything, because a plain oval leaf will never read as monstera. You have two honest routes: trace a paper template for a clean repeatable shape, or lay a real leaf on the clay and let nature draw the outline for you.
- Choose the template route if you want matching sets or a gift that looks polished and even.
- Choose a real leaf if you love natural edges, and pick a leaf a little larger than the dish you want, since clay shrinks slightly as it dries.
- Keep the splits modest on your first dish, because deep cuts weaken thin clay.
- Whichever route you choose, keep the center vein line clear, since that single line sells the whole leaf.
Also View: How to Make an Air Dry Clay Soap Dish That Drains Well
Materials for the Monstera Dish

Quick Tip: Buy a little more clay than the project needs. A leaf dish takes roughly a quarter of a standard block, and the spare clay saves the day when a first leaf tears or rolls too thin.
Beyond the clay itself you need very little: card or thick paper for the template, a smooth bowl to shape the curve, acrylic paint in two greens, and a water based sealer. Everything else, the rolling and carving, is done with tools from the next section.
Tools for Shaping the Dish

Common Mistake: Most beginners reach for a serrated kitchen knife and a drinking glass as a roller. The serrated edge tears the leaf outline instead of cutting it, and a glass rolls unevenly, leaving one side of the slab thin and weak.
The Fix: Use a smooth wooden rolling pin and a plain craft knife or butter knife with a straight edge. Roll between two thin sticks or books of equal height and every part of the slab dries at the same thickness.
Add a blunt skewer or the back of a spoon for carving veins, plus a small cup of water for smoothing edges as you go. That short list, a roller, a straight knife, a carving point, and water, covers every tool this project asks for.
Clay and Paint Swaps for This Dish
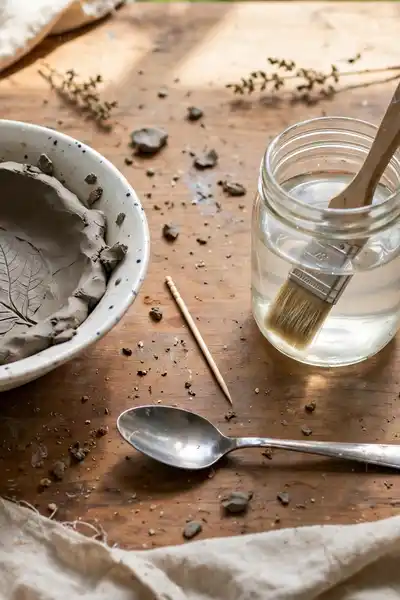
What You Need:
- A soup bowl or cereal bowl: any smooth bowl works as the draping mold, no special form needed.
- A toothpick or spoon handle: both carve clean vein lines in soft clay.
- Polymer clay, only if you accept baking: it works, but it changes the project from air dry to oven made.
- Clear brush on sealer instead of spray: two thin brushed coats protect as well as a spray coat.
- A smooth water bottle as a rolling pin: filled and heavy, it rolls a surprisingly even slab.
The one swap to skip is the clay itself if you want a food safe or waterproof dish, because no home sealer makes air dry clay either of those things. Keep this dish for dry treasures and it will serve for years of daily use.
Step by Step: Roll, Trace, and Cut the Leaf
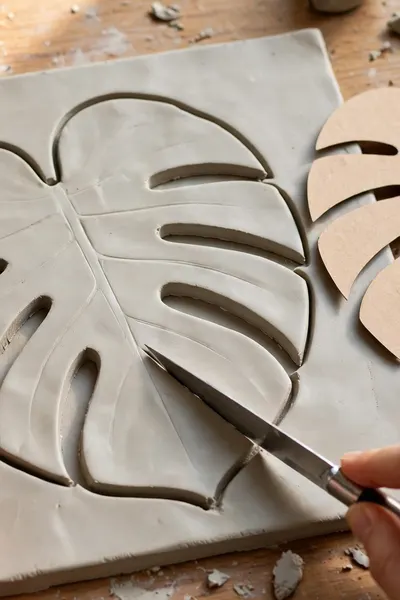
This is the shaping heart of the project, and it rewards slowness more than skill. Knead the clay until it feels like soft dough, roll it to the thickness of two stacked coins, then let the template do the drawing while you do the cutting.
- Knead a quarter block of clay for two minutes until smooth and free of air pockets.
- Roll the slab evenly, about five millimeters thick, turning it once so it does not stick.
- Lay the template, or the real leaf for tracing, on the slab and trace the outline lightly with a skewer.
- Cut along the line with a straight knife in long strokes, then lift the spare clay away.
- Smooth the cut edge with a wet fingertip so no rough lip survives drying.
Carving the Veins, Splits, and Holes
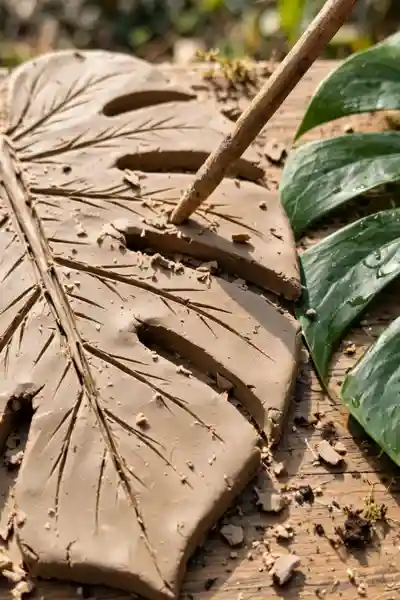
Do This:
- Carve the center vein first, one confident line from stem to tip.
- Angle the side veins upward toward the leaf tip, the way a real monstera grows.
- Cut splits in from the edge, stopping well short of the center vein.
- Pierce one or two small holes near the center line only on a thicker slab.
Avoid This:
- Carving so deep that the tool shows through the back of the slab.
- Making every split the same length, which looks stamped, not grown.
- Adding holes to a thin or already draped leaf, where they tear.
- Pressing hard enough to distort the outline you just cut.
Look at a real leaf before you carve, even a photo of one. Monstera splits follow a loose rhythm, longer near the middle of the leaf and shorter near the tip, and copying that uneven rhythm is what makes the clay version believable at a glance.
Draping and Drying for a Gentle Curve

Time Needed: 24 hours on the mold, 24 more off it | Difficulty: Easy | Pro Tip: Drape once, then leave it alone | Result: A gentle even curve
Line the bowl with plastic wrap first so nothing sticks, then settle the leaf into it clay side down and press only at the center. Drying in two stages, a day on the mold and a day off it on a rack, keeps the curve and stops the base from warping.
Sanding, Painting, and Sealing the Leaf

Before: Straight off the mold the leaf looks pale and chalky, with a rough cut edge and carving lines that hold dust. It reads as clay, not as a leaf, and the color gives it away instantly.
After: A light sanding, two greens blended while the paint is wet, and a satin sealer turn it glossy and deep. The veins shadow naturally, the edge feels smooth in the hand, and guests pick it up thinking it is ceramic.
Sand only when the leaf is fully dry, using fine paper and a light hand so the vein lines stay carved, not erased. Paint the darker green first, then the lighter green over the raised parts, and seal after the paint has dried completely overnight.
Tips From Making a Shelf of These

After a few of these leaves, small patterns start to show. The dishes that survive daily use are never the thinnest or the most deeply carved ones. They are the ones rolled evenly, carved gently, and dried without being rushed or handled.
- Check the thickness against a coin at three spots before you trace anything.
- Carve veins at half the depth you think they need, because paint will deepen their look.
- Save your best template, since a good outline is worth reusing for matching sets.
- Photograph each finished dish beside the real plant, since that pairing is what plant lovers save and share.
Mistakes That Flatten or Crack the Leaf

Quick Tip: Most ruined leaves die at the drying stage, not the shaping stage. If you remember one rule, make it this one: the thicker the carving, the slower the drying it needs.
Rolling too thin is the other classic failure, because a two millimeter leaf curls as it dries and snaps at the splits. Roll to five millimeters, keep splits away from the very edge of thin spots, and a cracked leaf becomes a rare event in your kitchen.
Troubleshooting: Warps, Tears, and Fading Paint
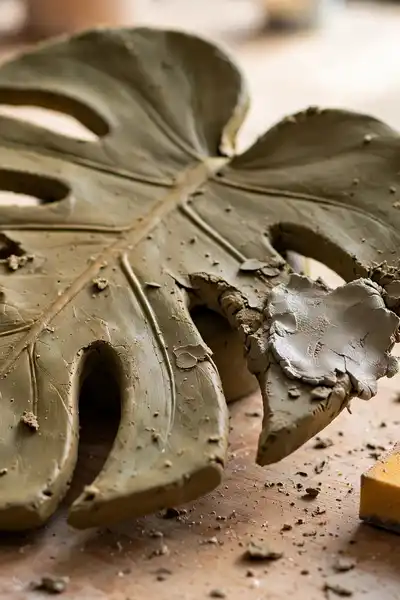
Common Mistake: When a dried leaf rocks on the table, most people sand the whole base flat. That usually thins one side, changes the curve, and the rocking quietly moves to a new spot instead of disappearing.
The Fix: Find the high point first by pressing each corner in turn, then sand only that spot in short passes, checking after every few strokes. A rocking dish is a one spot problem, and it deserves a one spot repair.
For a torn edge, press a pea sized piece of fresh clay into the gap, smooth it level, and let the patch dry a full day before sanding. Fading paint almost always means the sealer went on too thin, so add a second coat over it.
Variations: Sizes, Sets, Colors, and a Real Leaf Press

What You Need:
- Three leaf sizes traced from one template: a mini for rings, a medium for keys, a large for a plant shelf centerpiece.
- Two greens plus a touch of yellow paint: blends into the variegated look some real leaves carry.
- A real monstera leaf for pressing: vein side down into the slab, it stamps a texture no tool can copy.
- Gold paint for the edge only: a thin gilded rim turns the same dish into a gift piece.
- Matching smaller leaves without holes: simpler companions that make the main dish look more detailed.
A set of three sizes is the variation plant lovers actually use, because each size finds its own job around the home. Make the set from one template at three scales and the family resemblance does the styling work for you every single time.
Styling Your Dish and Gifting It to Plant Lovers
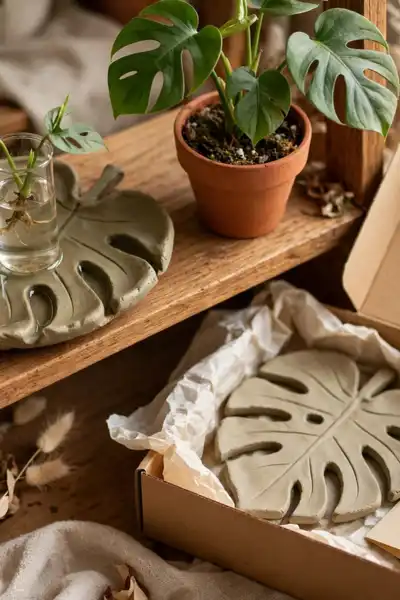
Before: A finished dish often lands in a drawer because it was made for the pleasure of making it, with no job waiting. Pretty and homeless, it gets buried under the next project and forgotten.
After: Given a job, the same dish works daily: rings by the bathroom sink, a cutting resting on it at the propagation station, keys at the door. Styled beside the real plant, it also becomes the corner’s quiet detail everyone notices.
For gifting, wrap the dish in tissue inside a small box with a handwritten note naming the plant it honors. I’ve given three of these now, and every single one ended up living beside the receiver’s own monstera within the week it arrived at its new home.
Also Explore: How to Grow Your Monstera Faster With Simple Tweaks
Caring for Your Dish and Storing It Safely

Do This:
- Dust the dish with a soft dry brush that reaches into the vein lines.
- Keep it for dry items only, and wipe any splash dry the same day.
- Refresh the sealer once a year if the dish lives by a sink.
- Store spare dishes stacked with cloth or tissue between each leaf.
Avoid This:
- Soaking the dish in water or putting it in a dishwasher.
- Using it as a soap dish with a wet bar resting on it.
- Leaving it in direct sun for months, which fades painted greens.
- Stacking dishes directly clay on clay, which chips the edges.
Treated gently, a sealed leaf dish lasts for years of daily use and keeps its color well. The paint and sealer do the protecting, and your only real job is keeping long soaks and hard knocks away from a material that was never fired in a kiln.
Frequently Asked Questions
1. Can I use a real monstera leaf as my guide?
Yes, and it gives the most natural outline of all. Lay it on the slab to trace, or press it vein side down for texture, then peel it away gently before draping the clay.
2. How long does the whole project take?
The shaping, carving, and draping take about an hour of hands on time. Drying takes two full days in two stages, and painting plus sealing fit into one more evening.
3. Is the finished dish waterproof?
No. A good sealer makes it splash resistant for sink side use, but air dry clay softens under long soaks, so keep it for dry items and wipe splashes dry.
4. Can I serve food on this dish?
No. Home sealers are not food safe, so keep the dish for rings, keys, and dry treasures. For wrapped candies, set them on a small paper liner first.
5. Can the dish live outdoors on a patio?
No. Rain and outdoor humidity soften air dry clay even under sealer, and sun fades the paint. This is an indoor dish, happiest near the plant that inspired it.
Conclusion
You now have every step in order: choose the outline, roll and cut, carve the veins and splits, drape and dry in two patient stages, then sand, paint, and seal. None of it needs a kiln or special skill, just one unhurried afternoon and two days of drying.
Save this guide for your next craft day, make your first air dry clay monstera dish this week, and share it with a fellow plant lover who keeps losing rings by the sink. I’ve seen how small changes like these can completely shift a plain shelf into a corner that feels grown, not decorated.